
Related Manuals for Ferno One Man 27-1


Summary of Contents for Ferno One Man 27-1
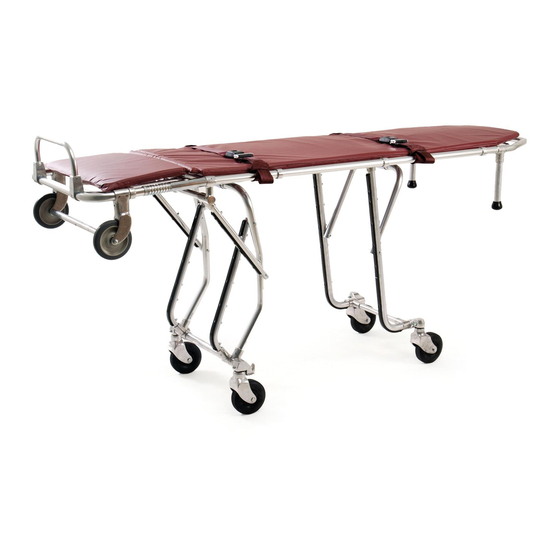
- Page 1 Users’ Manual ® Model 27-1 Multi-Level First-Call Cot July, 2001 Pub. No. 234-1862-03...
- Page 2 Additional free copies are available upon request from Customer Service. Proprietary Notice The information disclosed in this manual is the property of Ferno- Washington, Inc., Wilmington, Ohio, USA. Ferno-Washington, Inc. reserves all patent rights, proprietary design rights,...
-
Page 3: Table Of Contents
5 - Maintaining the Cot ..............13 6 - Repair Parts and Service ............16 7 - Setting Up the Cot ..............18 8 - Limited Warranty ..............19 9 - Ferno Customer Service............19 Illustrations Components ..................... 5 Height and Strength Considerations ............6 Figure 1 - Operating Fold-Down Frame Control Handle ...... -
Page 4: Safety Information
200 Constitution Ave., NW Washington, DC 20210 Improper parts and service can cause injury. Use only Ferno parts and Ferno- approved service on the cot. 2 - ABOUT THE COT Anodized tubing is used on the main frame to 2.1 Model 27-1 First-Call Cot... -
Page 5: Components
For detailed specifications, Height* contact Ferno Customer Service (page 19). Level 6 ..........34 in. Ferno reserves the right to change specifications Level 5 ..........29 in. without notice. Level 4 ..........25 in. Level 3 ..........21 in. -
Page 6: Operator Skills And Training
Note: Use additional help as needed to lift the weight of the cot and body (see Using Additional Supporting the weight of the cot can require Help, page 12). greater strength from a short person than from a tall person. © Ferno-Washington, Inc. 234-1862-03 July, 2001... -
Page 7: Using The Cot
An unrestrained body can fall off the LOWERING THE COT WITH cot. Use restraints to secure the body TWO OPERATORS on the cot. 1. Operators position themselves at opposite ends of the cot, facing each other. © Ferno-Washington, Inc. 234-1862-03 July, 2001... -
Page 8: Figure 2 - Changing Cot Height With Two Operators
1. Stand at loading end of cot and grasp main ends of the cot, facing each other and frame corners with an underhand grip grasping corners of main frame using an (Figure 3). underhand grip (Figure 2). © Ferno-Washington, Inc. 234-1862-03 July, 2001... -
Page 9: Figure 3 - One Operator Lowering Cot
1. Stand at operator end of cot and grasp main frame with an underhand grip. 2. Squeeze control handle, and raise operator end of cot until it nears desired height. Figure 5 - Operating Swivel Locks © Ferno-Washington, Inc. 234-1862-03 July, 2001... -
Page 10: Figure 6 - Fold-Down Frame In Lowered Position
4.8 Maneuvering Cot in Confined Areas Lower the fold-down frame for easier maneuvering in confined areas such as hallways and elevators (Figure 6). Figure 7 - Rolling Cot in Confined Areas © Ferno-Washington, Inc. 234-1862-03 July, 2001... -
Page 11: Figure 8 - Loading Cot
6. If cot must be repositioned, lift operator end of cot and move it. Do not drag cot posts on vehicle floor. 7. Secure cot in vehicle with Ferno-approved cot fastener. Loading Wheels Figure 9 - Unloading Cot 7. -
Page 12: Using Additional Help
Inspect the cot if the load Helpers can cause injury or be injured. limit has been exceeded Maintain control of the cot, operate the (see Inspecting the Cot, 400 lb controls, and direct any helpers. page 14). Load Limit © Ferno-Washington, Inc. 234-1862-03 July, 2001... -
Page 13: Maintaining The Cot
Do not use abrasive Contact Ferno Customer Service to order Ferno materials to clean the cot. disinfectants and cleaners (see page 19). Important... - Page 14 Do not immerse buckles. 5. Grasp buckles and repeatedly dip restraint webbing in clear water to rinse. Do not immerse buckles. 6. Hang restraints to air dry. © Ferno-Washington, Inc. 234-1862-03 July, 2001...
-
Page 15: Lubrication Diagram
12X - I-Beam Channel 6B - Loading Wheel Bearings (2) N/S - Sidearm Bearings (if equipped) 7B - Transport Wheel Bearings (4) 8B - Under Release Handle Sleeves (2) 9B - Undercarriage Frame Joints (6) © Ferno-Washington, Inc. 234-1862-03 July, 2001... -
Page 16: Repair Parts And Service
6.1 General Information To order parts or for professional cot repair, contact EMSAR ® EMSAR is the only agent authorized by Ferno to manage, service, and repair Ferno products. EMSAR factory-trained technicians use Ferno- approved parts and repair procedures. 800.73EMSAR (Phone) 937.383.1051 (Fax) -
Page 17: Parts Diagram
Model 27-1 First-Call Cot Users’ Manual 8.17 9, 18 9, 18 5,10 5,10 © Ferno-Washington, Inc. 234-1862-03 July, 2001... -
Page 18: Setting Up The Cot
5. Attach the other half of the restraint to the opposite side of the cot. 6. Fasten restraints by inserting tangs into receivers. 7. Pull tab to tighten restraints. Figure 12 - Attaching Mattress © Ferno-Washington, Inc. 234-1862-03 July, 2001... -
Page 19: Limited Warranty
Limited Warranty Obligation If a product or part is proven to be defective, Ferno will repair or replace it. At our option, we will refund the product’s purchase price. The purchaser accepts these terms in lieu of all damages.
Need help?
Do you have a question about the One Man 27-1 and is the answer not in the manual?
Questions and answers