
Related Manuals for Graco Compact Twin Flow


Summary of Contents for Graco Compact Twin Flow
- Page 1 Operation - Maintenance Compact Twin Flow 313549B Important Safety Instructions Read all warnings and instructions in this manual. Save these instructions. Machine shown may be different from your machine...
-
Page 2: Table Of Contents
Phasing the Pumps ........31 Phasing the Pumps ........32 Shut Down ............33 Material Ratio Adjustment ......34 Piston Replacement ........35 Piston Replacement Continued ....36 Periodic Maintenance........37 Troubleshooting ..........38 Graco Ohio Standard Warranty....40 Graco Ohio Information ........ 40... -
Page 3: Safety Precautions
Safety Precautions This manual provides installation, operation, and maintenance instructions. Read this manual before you install and operate your machine. Use your machine only as directed. Safety Terms within our manuals Cautions are given where failure to observe the instruction could result in damage to the equipment, associated equipment, and/or process. -
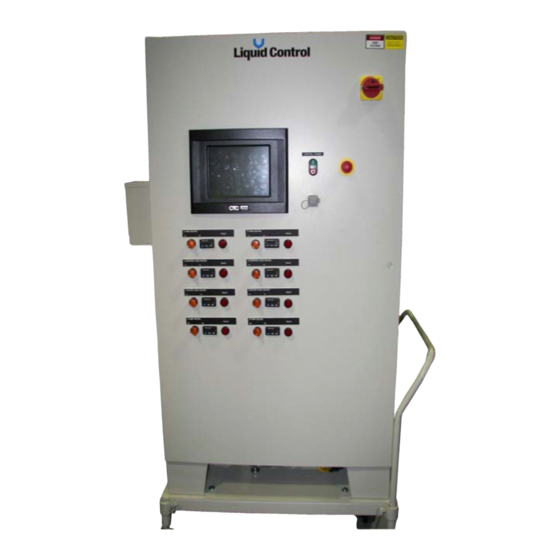
Page 4: Machine Features
Machine Features Posiload Machine: CONTROL POWER Switch Provides power for the electrical circuitry in the console. OFF: Electrical power is not applied to the electrical circuitry and the internal white lamp is dimmed. Electrical power is applied to the electrical circuitry and the internal white lamp is illuminated. -
Page 5: Main Touch Screen
Main Touch Screen Your SN number is displayed here TEMP PANEL button The TEMP PANEL button is selected to make the TEMPERATURE screen to appear. (See the TEMPERATURE screen section in this manual for more information.) PRESSURE PANEL button The PRESSURE PANEL button is selected to make the PRESSURE PANEL screen to appear. (See the PRESSURE PANEL screen section in this manual for more information.) SHOT FLOW button The SHOT FLOW button is selected to make the SHOT FLOW screen to appear. -
Page 6: Main Touch Screen Continued
Main Touch Screen continued SET UP RECIPES button The SET UP RECIPES button is selected to make the Recipe Preview screen to appear. (See the RECIPES screen section in this manual for more information.) The recipe screen is used for the following purposes: 1. -
Page 7: Calibrate Screen
CALIBRATE Screen NOTE: The WATLOW Temperature Controllers located on the front panel of the machine are as indicators only, no adjustment of these controllers are required. T/C WIND SET PT N7:60 button/indicator (Temperature Control Window Set Point) This button/indicator shows the range of the material temperature (this range is shown in ± C°). For example: If the material temperature was set to 90C°... -
Page 8: Calibrate Screen Continued
CALIBRATE Screen continued NOTE: The WATLOW Temperature Controllers located on the front panel of the machine are as indicators only, no adjustment of these controllers are required. TEMP SET PT N7:54 button/indicator (Mixed Material Temperature Set Point Control) This button/indicator shows the range of the mixed material temperature (this range is shown in ± C°). For example: If the mixed material temperature was set to 90C°... -
Page 9: Shot Flow Screen
SHOT FLOW screen PUMP MODE SHOT Button When the SHOT Button is selected, the machine pump will run one cycle when the foot switch or START CYCLE button is pressed. Depending on shot size, the machine may take more than one shot. OFF Button When this button is selected the power to the material pump servomotor will be disabled. -
Page 10: Shot Flow Screen Continued
SHOT FLOW screen continued For more information on the use of these buttons see the Daily Operation Section of this manual. START CYCLE button This button will activate the machine to run the pre-selected sequence defined in this screen. SHOT SIZE (cc’s) button/indicator This button/indicator shows the volume setting of the material of the SHOT SIZE volume in cubic centimeters (cc’s). -
Page 11: Pump Pressure Screen
PUMP PRESSURE screen Sections only shown if items are installed HIGH PRESSURE SET POINT indicator This indicator shows the current material pump high-pressure set point setting. This setting was previously preset in the PSI HIGH SET PT N7:40 in the CALIBRATION screen. For more information on the HIGH PRESSURE SETPOINT settings, see the CALIBRATION screen section of this manual. -
Page 12: Pump Pressure Screen Continued
PUMP PRESSURE screen continued SYSTEM HIGH PRESSURE ALARM indicator This indicator is illuminated when the material outlet hose and / or material mold pressure is at a high pressure shutdown condition, previously set with the PSI HIGH SET PT N7:40 button seen in the CALIBRATION screen section. -
Page 13: Servo Control Screen
SERVO CONTROL screen DRIVE ENABLE #3 This button when pressed will enable the servo drive. RUN SETUP PROGRAM button #4 When this button is selected a factory preinstalled setup program will upload into the CTC Parker Automation memory. Included in this setup program are various setup parameters that were previously installed by the factory or by the operator. -
Page 14: Temperature Screen
TEMPERATURE screen Sections only shown if recirculation is installed A TANK MATERIAL button/indicator This button/indicator shows the temperature setting of the material in the ”A” material tank temperature in C°. The A TANK MATERIAL indicator will show the current tank temperature setting. To change the ”A”... - Page 15 The new material temperature should appear in the A DISP. HOSE indicator. B TANK MATERIAL button/indicator This button/indicator shows the temperature setting of the material in the ”B” material tank in C°. The B TANK MATERIAL indicator will show the current oven temperature setting. To change the ”B”...
- Page 16 MATERIAL TEMPERATURE indicator This is the current mixed material temperature at the outlet of mixer shroud. Material temperature status indicator. This gives the status of the current mixed material temperature. TEMP NOT READY: The material is currently below specified temperature limits. MATERIAL TEMP OK: The current material temperature is at specified limits.
-
Page 17: Monitor Screen
MONITOR screen PUMP PRESSURE (psi) indicators ACTUAL This indicator gives the current pump outlet pressure in PSI (pounds per square inch). MATERIAL TEMP(C) indicators ACTUAL This indicator gives the current material temperature in C° (Celsius). SET POINT This indicator is for future development; it reads the same as the actual indicator. SHOT SIZE (cc’s) indicator ACTUAL This indicator gives the current shot size in cc’s (Cubic Centimeters). -
Page 18: Diagnostics Screen
Diagnostics screen This screen is used for advanced troubleshooting only. All settings on this screen can be changed using the other screen described in this manual. All indicators seen in this screen can be viewed using the other screens seen in this manual. -
Page 19: Recipe Preview Screen
Recipe Preview Screen The preview screen will display the current machine configuration or recipe. This recipe can be edited or changed as required, then saved, either as an existing recipe or a new recipe. This new recipe can now be uploaded to the controller where the machine can operate from memory. -
Page 20: Load Recipe Screen
LOAD RECIPE screen The purpose of this screen is to allow the reading of machine configurations as “Recipes” from memory. To load a recipe do the following: (If you are at the Recipe Preview screen press the LOAD RECIPE button to get to the screen shown above) 1. -
Page 21: Edit Recipe Screen
EDIT RECIPE screen The purpose of this screen is to allow changes of machine configurations or “Recipe” previously loaded and save the machine configuration to memory. To edit the values of a recipe in the EDIT RECIPE screen do the following: (If you are at the Recipe Preview screen press the EDIT RECIPE button to get to the screen shown above) 1. -
Page 22: Save Recipe Screen
SAVE RECIPE screen NOTE: Your screen keyboard may differ than what is shown on this illustration. To save the new recipe to an existing recipe disk do the following: 1. Select a recipe by touching the recipe loaded on the touch screen, the recipe that you touch will have a yellow rectangle around the recipe. -
Page 23: Delete Recipe Screen
DELETE RECIPE screen To delete a recipe do the following: 1. Select the recipe to be deleted by touching the recipe n the touch screen, the recipe that you touch will have a yellow rectangle around the recipe. This recipe will also appear in the RECIPE DELETE MESSAGE WINDOW. -
Page 24: Initial Startup
Initial Startup The machine is completely factory assembled and tested. However, due to packing convenience, some on-site reassembly may be required. Close all ball valves and close all other valves within feed systems unique to machine. NOTE: Steps 2-4 are only for machines with air. Place an in-line regulator and shutoff valve between the machine and the air supply. -
Page 25: Material Pump Servo Start Up Sequence
Material Pump Servo Start Up Sequence This is the sequence that will allow the material pump servo’s to operate. From the SHOT FLOW screen do the following: 1. Under SERVO POWER select the ON button. 2. Under SERVO ENABLE select the ON button. 3. -
Page 26: Adjusting The Limit Switches
Adjusting the Limit Switches The over travel limit switch are factory adjusted, when tripped, they will stop the servo motor from going into an extreme over travel condition. The home adjustment switch allows set the piston at the beginning of the dispense tube. Do not adjust the Retract or Extend limit switches. -
Page 27: Dry Run
Dry Run A Dry Run demonstrates the machine’s controls and dispensing steps. It also verifies that the machine is working correctly before loading material. From the MAIN Screen. Select the SHOT FLOW button. From the SHOT FLOW screen, do the Material Pump Servo Start Up Sequence (if required). -
Page 28: Priming The Hoses
Priming the Hoses Priming the Hoses ensures that air-free material is flowing through the material hoses and out the dispense valve outlet. Before proceeding, load the machine with materials. Priming is critical to keep the PosiRatio working properly. NOTE: To prime the hoses without the outlet pressure sensor installed, the high pressure and low pressure setpoints must be set to maximum (500 psi) value. -
Page 29: Ratio Check
Ratio Check The Ratio Check is a simple procedure where individual samples of material are collected, weighed, and compared to the manufacturer’s desired outputs. We recommend that you do a ratio check — by weight — at least once a day, and if the machine is used in production for more than one shift, then once a shift. -
Page 30: Daily Operations
The following steps illustrate the day-to-day operation of the PosiRatio. Before proceeding, perform all Daily Maintenance listed in the Periodic Maintenance section. Also complete all loading, priming, phasing, and ratio check procedures. Daily Operations WARNING In order for this machine to operate, this machine must have at least 1 recipe saved to memory on every start up. -
Page 31: Phasing The Pumps
Phasing the Pumps When the machine begins pumping material, both pistons must enter the metering tubes at precisely the same time so that both materials start flowing simultaneously. This will ensure proper mixing and a very repeatable metered ratio. Follow these instructions at initial start-up and after a pump repair. Before proceeding, if your model is equipped with ratio check ball valves, first close the material hose ball valves and then open the ratio check ball valves. -
Page 32: Phasing The Pumps
Phasing the Pumps Throughout this manual, references to the A pump and B pump are used. The A and B pumps correspond to the particular material originally specified for use in this machine and relate to the corresponding label on the material supply and to the hoses. -
Page 33: Shut Down
Shut Down From the SHOT FLOW screen, select the RETRACT button, select the OFF button, Press and release the EMERGENCY STOP button. Ensure everything is OFF. Inspect the pump shafts for a material buildup. Clean and lubricate. -
Page 34: Material Ratio Adjustment
Material Ratio Adjustment If the samples obtained in the Ratio Check section are very close to each other, but outside the manufacturer’s tolerances, then you need to adjust the ratio. Ratio Adjustment Beam Pointer Knob Pivot Bar 1. Turn From the SHOT FLOW screen do the Material Pump Servo Start Up Sequence (if Required), select the RETRACT button. -
Page 35: Piston Replacement
Piston Replacement Piston Replacement is advise when piston wears to the point that it will no longer seal against the metering tube, thus producing inaccurate output. Close all ball valves within feed systems unique to the machine. At the pump outlets close the material hose ball valves. Open the ratio check ball valves. -
Page 36: Piston Replacement Continued
Piston Replacement Continued Press the RETRACT button under PUMP MODE. Lubricate the new metering tube O-rings and reinstall the metering tube. Perform all Loading, Priming, Phasing, and Ratio Check procedures before resuming production. -
Page 37: Periodic Maintenance
Periodic Maintenance Daily (once a shift or as required) Water Trap Bowl Check air circuit water trap valve and release any water, as necessary, through the base outlet. Material Reservoirs Check material levels and refill as necessary. Ensure that the material reservoirs are vented properly. (Dry Air, Nitrogen, etc.) Air Dryer Check the condition of the desiccant air dryer. -
Page 38: Troubleshooting
Troubleshooting Pumping (after satisfactory startup) Problem Cause Solution Pump stalling and no material Blocked mixer. Turn off air supply and remove being pumped despite hoses from mixer. Check adequate input pressure. hoses for flow. Closed outlet ball valves. Open ball valves Blocked check valve. - Page 39 Pumping (after satisfactory startup) — Continued Problem Cause Solution Material continues to flow after Air in hose. Hose not primed Incline hose from check valve pumps stop dispense stroke, correctly. to outlet of hose. Avoid sags in or air bubble apparent at some hose.
-
Page 40: Graco Ohio Standard Warranty
With the exception of any special, extended, or limited warranty published by Graco, Graco will, for a period of twelve months from the date of sale, repair or replace any part of the equipment determined by Graco to be defective.
Need help?
Do you have a question about the Compact Twin Flow and is the answer not in the manual?
Questions and answers