
Subscribe to Our Youtube Channel
Related Manuals for Grundig GWN38430W


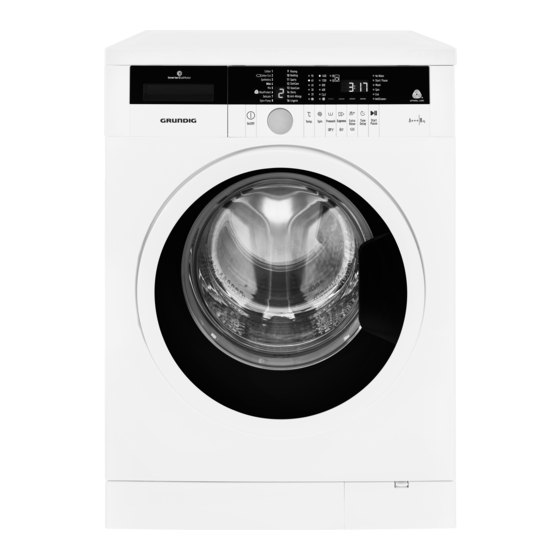
Summary of Contents for Grundig GWN38430W
-
Page 1: Washing Machine
WASHING MACHINE USER‘S MANUAL GWN38430W www.grundig.com Document Number 2820526049/ 12-06-17.(18:15) - Page 2 Please read this user manual first! Dear Customer, Thank you for preferring a Grundig product. We hope that you get the best results from your product which has been manufactured with high quality and state-of- the-art technology. Therefore, please read this entire user manual and all other accompanying documents carefully before using the product and keep it as a reference for future use.
-
Page 3: Table Of Contents
TABLE OF CONTENTS Important instructions for safety Functions/Programmes Selected by and environment Pressing the Function Buttons for 3 Seconds ..... .29 General safety . -
Page 4: Important Instructions For Safety And Environment
Important instructions for safety and environment This section contains safety instructions that will help protect from risk of personal injury or property damage. Failure to follow these instructions shall void any warranty. General safety • This product can be used by children at and above 8 years old and by persons whose physi- cal, sensory or mental capabilities are not fully developed or who lack experience and knowl-... -
Page 5: Product Safety
• Connect the product to a grounded outlet pro- tected by a 16 A fuse. Have the grounding instal- lation made by a qualified electrician. Our com- pany shall not be liable for any damages that will arise when the product is used without ground- ing in accordance with the local regulations. -
Page 6: Intended Use
• Do not force open the locked loading door. The loading door will be ready to open just a few min- utes after the washing cycle comes to an end. In case of forcing the loading door to open, the door and the lock mechanism may get damaged. -
Page 7: Children's Safety
Children's safety • Packaging materials are dangerous to children. Keep packaging materials in a safe place away from reach of the children. • Electrical products are dangerous to children. Keep children away from the product when it is in use. Do not let them to tamper with the prod- uct. -
Page 8: Compliance With The Weee Directive
Compliance with the WEEE Directive This product complies with EU WEEE Directive (2012/19/EU). This product bears a classification symbol for waste electrical and electronic equipment (WEEE). This product has been manufactured with high quality parts and materials which can be reused and are suitable for recycling. Do not dispose of the waste product with normal do- mestic and other wastes at the end of its service life. -
Page 9: Your Washing Machine
Your washing machine Overview 1- Power cable 2- Top panel 3- Control panel 4- Filter cap 5- Adjustable feet 6- Loading door 7- Detergent drawer 8- Drain hose... -
Page 10: Package Contents
Package Contents 1- Power cable 2- Drain hose 3- Transportation safety bolts * 4- Mains water inlet hose (One of the following filter types is used for the mains hose connection.) a- Electronic water shut-off b- Mechanical water shut-off c- Standard 5- Liquid detergent container** 6- User Manual 7- Blind plug***... -
Page 11: Technical Specifications
Technical specifications Complying Commission Delegated Regulation (EU) No 1061/2010 Supplier name or trademark GRUNDIG Model name GWN38430W Rated capacity (kg) Energy efficiency class / Scale from A+++ (Highest Efficiency) to D (Lowest Efficiency) A+++ Annual Energy Consumption (kWh) Energy consumption of the standard 60°C cotton programme at full load (kWh) 1.036... -
Page 12: Installation
Installation • Do not place heat sources such as Hobs, Irons, Ovens, etc. on the To make the product ready for use, washing machine and do not use review the information in the user them on the product. manual and make sure that the Removing packaging reinforcement electricity, tap water supply and water Tilt the machine backwards to remove... -
Page 13: Connecting Water Supply
• Remove transportation safety • Tighten all hose nuts by hand. bolts by turning them gently. Never use a tool when tightening the nuts. • Open the taps completely after • Attach the plastic covers supplied making the hose connection in the User Manual bag into the to check for water leaks at the holes on the rear panel. -
Page 14: Adjusting The Feet
Adjusting the feet • In case the hose is elevated after laying it on the floor level WARNING: In order to ensure or close to the ground (less than that the product operates more 40 cm above the ground), water silently and vibration-free, it must discharge becomes more difficult stand level and balanced on its... -
Page 15: Electrical Connection
Electrical connection Electrical requirements Before you insert the plug into the wall Connect the product to a grounded socket make sure that the voltage and outlet protected by a 16 A fuse. Our the frequency shown in the rating label company shall not be liable for any corresponds to your electricity supply. - Page 16 Important Transportation of the product • Unplug the product before Fitting a different plug transporting it. As the colours of the wires in the • Remove water drain and water mains lead of this appliance may supply connections. not correspond with the coloured •...
-
Page 17: Preparation
Preparation Sorting the laundry • Sort laundry according to type of fabric, colour, and degree of soiling and allowable water temperature. • Always obey the instructions given on the garment tags. LAUNDRY WASH SYMBOLS Machine Wash Symbols WASH Maximum Water Temperatures Symbol(s) Drying... -
Page 18: Preparing Laundry For Washing
Preparing laundry for washing Things to be done for energy saving • Laundry items with metal Following information will help you attachments such as, underwired use the product in an ecological and bras, belt buckles or metal energy-efficient manner. buttons will damage the machine. •... -
Page 19: Correct Load Capacity
Correct load capacity Using detergent and softener The maximum load capacity depends When using detergent, softener, on the type of laundry, the degree of starch, fabric dye, bleach or soiling and the washing programme limescale remover, read the desired. manufacturer's instructions on The machine automatically adjusts the package carefully and follow the suggested dosage values. - Page 20 Choosing the detergent type • If the liquid detergent has lost its fluidity, dilute it with water before The type of detergent to be used depends on the type and colour of the putting in the detergent cup. fabric. • Use different detergents for coloured and white laundry.
-
Page 21: Tips For Efficient Washing
Tips for efficient washing Using starch • Add liquid starch, powder starch Clothes or the fabric dye into the softener Light colours and whites compartment. • Do not use softener and starch (Recommended temperature range based on soiling level: 40- together in a washing cycle. - Page 22 Clothes Dark colours (Recommended temperature range based on soiling level: cold -40 °C) Liquid detergents suitable for Heavily colors and dark colors can be Soiled used at dosages recommended for heavily soiled clothes. Liquid detergents suitable for Normally colors and dark colors can be Soiled used at dosages recommended for normally soiled clothes.
-
Page 23: Operation
Operation Control panel Cotton Rinsing Bedding Cotton Eco 1400 No Water Synthetics Sports 1200 Start / Pause Mini DarkCare Wash StainCare Spin WoolProtect Shirts Anti-Allergy Delicate AntiCrease+ Spin+Pump Lingerie Temp. Spin Prewash Express Extra Time Start On/Off Rinse Delay Pause 1 - Programme selection display 8 - Auxiliary function button 3 2 - Cover lock LED indicator... -
Page 24: Programme And Consumption Table
Programme and consumption table Auxiliary functions Selectable Programme temperature range °C 2.55 1400 • • • • Cold-90 Cotton 1400 • • • • Cold-90 0.95 1400 • • • • Cold-90 60** 1.036 1400 Cold-60 Cotton Eco 60** 43.5 0.585 1400 Cold-60... -
Page 25: Programmes
Indicative values for Synthetics programmes (EN) Remaining Moisture Remaining Moisture Content (%) ** Content (%) ** ≤ 1000 rpm > 1000 rpm Synthetics 60 1.35 115/150 Synthetics 40 0.90 115/150 * You can see the washing time of the programme you have selected on the display of the machine. It is normal that small differences may occur between the time shown on the display and the real washing time. -
Page 26: Lingerie
• Shirts • Programme was tested by the “VDE” institute with the 20°C This programme is used to wash the temperature option selected and it shirts made from cotton, synthetic and was certified in terms of its efficacy in synthetic blended fabrics altogether. eliminating bacteria and mould. -
Page 27: Special Programmes
• Select the stain programme. CAUTION: Do not wash the items • Select the stain you want to clean apart from duvets such as carpets, by locating it in the groups above and rugs and etc. in the machine. selecting the related group with the Permanent damage occurs in the machine. -
Page 28: Auxiliary Function Selection
to drain the water without spinning An auxiliary function which is not your laundry. Programme resumes by compatible with the programme discharging the water and then it is cannot be selected. (See completed. „Programme and consumption table“) If you want to spin the laundry held in water, adjust the Spin Speed and press Some programmes have auxiliary functions that must be operated... -
Page 29: Functions/Programmes Selected By
Functions/Programmes Selected • Anti-Crease+ by Pressing the Function This function is selected when the 3rd Buttons for 3 Seconds auxiliary function is pressed and held for 3 seconds and the programme follow-up light for the relevant • Drum Cleaning step turns on. When the function is Press and hold the auxiliary function selected, the drum rotates for up to 8 button 1 for 3 seconds to select the... -
Page 30: Starting The Programme
Door lock Additional laundry may be loaded There is a locking system on the during the End Time countdown period. At the end of the countdown, loading door of the machine that End Time indicator turns off, prevents opening of the loading door washing cycle starts and the time in cases when the water level is of the selected programme appears... -
Page 31: Cancelling The Programme
Your machine is equipped with Adding and removing laundry • Press Start/Pause button a "Stand-by Mode". to pause the machine. The In case of not starting any programme programme follow-up light of the or waiting without making any other relevant step during which the operation while the machine is in the machine was switched into the selection step after it is turned on by... -
Page 32: Quick User Manual Preparing The Machine
Quick User Manual Cancelling the programme The programme is cancelled when the Preparing the machine machine is turned off and on again. • Check if the hoses are connected Press and hold On / Off button for 3 tightly. seconds. •... -
Page 33: Maintenance And Cleaning
Maintenance and cleaning Cleaning the loading door Service life of the product extends and frequently faced problems decrease if and the drum cleaned at regular intervals. For products with drum cleaning Cleaning the detergent drawer programme, please see Operating the product - Programmes. -
Page 34: Cleaning The Body And Control Panel
Cleaning the body and control panel Draining remaining water and cleaning the pump filter Wipe the body of the machine with soapy water or non-corrosive mild gel The filter system in your machine detergents as necessary, and dry with prevents solid items such as buttons, a soft cloth. -
Page 35: If The Product Has An Emergency Draining Hose, To Discharge The Water
If the product has an • Open the filter cap. • If the filter cap is composed of emergency draining hose, two pieces, press the tab on the to discharge the water: filter cap downwards and pull the piece out towards yourself. You can remove the filter cover by slightly pushing downwards with a •... -
Page 36: Troubleshooting
Troubleshooting Program does not start after closing the door. *Press the Start / Pause / Cancel • Start / Pause / Cancel button was not pressed. >>> button. Reduce the • It may be difficult to close the loading door in case of excessive loading. >>> amount of laundry and make sure that the loading door is closed properly. - Page 37 Loading door cannot be opened. Drain the water by • Door lock is activated because of the water level in the machine. >>> running the Pump or Spin programme. Wait until the • Machine is heating up the water or it is at the spinning cycle. >>> programme completes.
- Page 38 Washing performance is poor: Laundry turns grey. (**) Use the • Insufficient amount of detergent was used over a long period of time. >>> recommended amount of detergent appropriate for water hardness and the laundry. • Washing was made at low temperatures for a long time over a long period of time. >>> Select the proper temperature for the laundry to be washed.
- Page 39 Laundry became stiff after washing. (**) Using insufficient amount of detergent for • Insufficient amount of detergent is used. >>> the water hardness can cause the laundry to become stiff in time. Use appropriate amount of detergent according to the water hardness. If detergent is put in the prewash •...
- Page 40 Foam is overflowing from the detergent drawer. Mix 1 tablespoonful softener and ½ l water and pour into • Too much detergent is used. >>> the main wash compartment of the detergent drawer. • Put detergent into the machine suitable for the programmes and maximum loads indicated in the “Programme and consumption table”.
- Page 41 Repairs necessary as a direct or indirect result of: Accidental damage, misuse or abuse of a product. An attempted repair of a product by anyone other than a Grundig Approved Engineer (the “Engineer”). Installation or use of a product where such installation or use fails to meet the requirements contained in this guarantee or the User Instructions Booklet.
- Page 42 Optional extras, where available (i.e. extendable feet) are supplied on a chargeable basis only. Does Grundig offer replacements? This is a repair-only guarantee. On occasion, the Manufacturer may at its sole discretion, replace your product with a new product instead of carrying out a repair. Where a replacement is offered, this would normally be an identical model, but when this is not possible, a model of similar specification will be provided.
- Page 43 Will there be any charge for the repairs? It is your responsibility to provide evidence to the Engineer that your product is covered by this guarantee with a proof of purchase. The Manufacturer reserves the right to charge for the reasonable cost of any service call if: ...
- Page 44 Should you experience any difficulty in obtaining service contact the Grundig Customer Helpline on Tel: 0333 207 9920 or e-mail: customerservice@support.grundig.co.uk...
- Page 48 www.grundig.com...
Need help?
Do you have a question about the GWN38430W and is the answer not in the manual?
Questions and answers
How do I remove top of Grundig Washing Machine, model GWN39430W?