Table of Contents
Advertisement
Available languages
Available languages
Quick Links
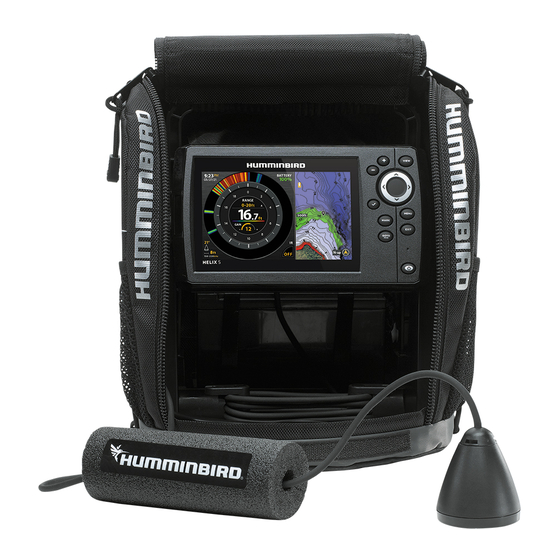
ICE FISHING TRANSDUCER Installation Guide
Use the instructions in this guide to install the ICE transducer.
Read the instructions in this transducer guide completely to understand the mounting guidelines
before starting the installation.
NOTE: The procedures and features described in this guide are subject to change without notice.
This guide was written in English and may have been translated to another language. Humminbird
is not responsible for incorrect translations or discrepancies between documents.
NOTE: The illustrations in this guide may not look the same as your product, but your unit will
function in the same way.
WARNING! Always make sure that conditions are safe before walking on the ice.
Install the control head before you start the transducer installation. See the control head
installation guide.
Visit our Web site at humminbird.com for additional information and resources. Also, visit youtube.
com/humminbirdtv for informational videos.
Installation Overview
1
| Test the Transducer Prior to Installation
WARNING! Always make sure that conditions are safe before walking on the ice.
NOTE: The control head ports are keyed to prevent reversed installation, so be careful not to force
the connectors into the wrong ports.
1. Connect the power cable to the control head and the battery terminal adapter. See your control
head installation guide for instructions.
2. Connect the transducer cable to the control head. See Connecting the Transducer Cable.
3. Lower the transducer into the ice hole.
4. Power On: Press the POWER key. While the Title screen is shown on the display, press the MENU
key. Select Normal mode, and press the RIGHT Cursor key to start Normal mode.
If you have an ICE™ Flasher Series control head, turn the Power/Range dial to A (Auto) or x1 to
power on the control head. If all connections are correct and power is available, the Humminbird
control head will enter Normal operation.
5. If the transducer is working properly, you will see the bottom on the sonar view.
6. Power Off: Press and hold the POWER key.
If you have an ICE Flasher Series control head, turn the Power/Range dial to Off.
7. Remove the transducer from the ice hole.
8. Disconnect Cables: Disconnect the transducer and power cable from the control head.
Disconnect the power cable terminals from the battery until installation is completed and
you're ready to fish.
2
| Assembling the Transducer and Float
Follow these instructions to assemble the transducer and float.
Installation Preparation
1
532506-3_A
Advertisement
Table of Contents

Related Manuals for Humminbird ICE Flasher Series


Summary of Contents for Humminbird ICE Flasher Series
-
Page 1: Installation Overview
If you have an ICE™ Flasher Series control head, turn the Power/Range dial to A (Auto) or x1 to power on the control head. If all connections are correct and power is available, the Humminbird control head will enter Normal operation. - Page 2 ICE FISHING TRANSDUCER Installation Guide 532506-3_A 1. Attach your transducer float to the transducer cable by sliding the cable through the slit in the float. Attaching the Float 2. Position the float so that the transducer will be submerged in the water, just below the ice. Positioning the Float float ice layer...
- Page 3 ICE FISHING TRANSDUCER Installation Guide 532506-3_A Connecting to the Portable Base jumper port OR... 2b. If your control head base does not include a jumper port, insert the transducer cable into the appropriate port on the rear of the control head.
- Page 4 3. If the transducer is working properly, you will see the bottom on the sonar view. If your Humminbird control head is NOT an ICE Series model (ICE Series, ICE HELIX CHIRP Series, etc.) or ICE Flasher Series model, use the following instructions to configure the control head for ice fishing.
-
Page 5: Storing The Transducer
OR... 1b. If you have an ICE Flasher Series control head, wipe the cable dry, then tuck the float under the control head, wrap the cable around the cable posts, and store the transducer in the transducer well in the front of the portable bag. You do not have to detach the transducer cable from the control head. -
Page 6: Préparation De L'installation
(Title) s'affiche, appuyez sur la touche MENU. Sélectionnez Normal, et appuyez sur la touche curseur DROITE. Si vous disposez d’une tête de commande ICE Flasher Series, réglez le cadran d’alimentation/ échelle sur A (Auto) ou sur x1 pour démarrer la tête de commande. Si tous les branchements et l’alimentation fonctionnent correctement, la tête de commande Humminbird passe en... - Page 7 TRANSDUCTEUR PÊCHE SOUS GLACE Guide d'Installation 532506-3_A | Assembler le transducteur et le flotteur Suivez ces instructions pour assembler le transducteur et le flotteur. Fixation du flotteur au câble 1. Fixez le transducteur flotteur pour le câble du transducteur en faisant glisser le câble à travers la fente dans le flotteur.
- Page 8 TRANSDUCTEUR PÊCHE SOUS GLACE Guide d'Installation 532506-3_A Connexion à la base portable port de cavalier OU... 2b. Si votre base de tête de commande ne comprend pas de port de cavalier, insérez le câble du transducteur dans la fente de borne appropriée sur la partie arrière de la tête de commande.
- Page 9 3. Si le transducteur fonctionne correctement, vous verrez le fond en mode d’affichage sonar. Si votre tête de commande Humminbird n'est PAS une modèle de la série ICE (série ICE, série ICE HELIX CHIRP, etc.) ou de la série ICE Flasher, suivez les directives suivantes pour commencer à...
-
Page 10: Entretien
OU... 1b. Si vous disposez d’une tête de commande ICE Flasher Series, essuyez le câble, puis rentrez le flotteur sous la tête de commande, enroulez le câble autour des bornes d’enroulement du câble, et rangez le transducteur dans son puits à l’avant du sac de transport. Il n’est pas nécessaire de détacher le câble du transducteur de la tête de commande.
Need help?
Do you have a question about the ICE Flasher Series and is the answer not in the manual?
Questions and answers