Table of Contents
Advertisement
Available languages
Available languages
Quick Links
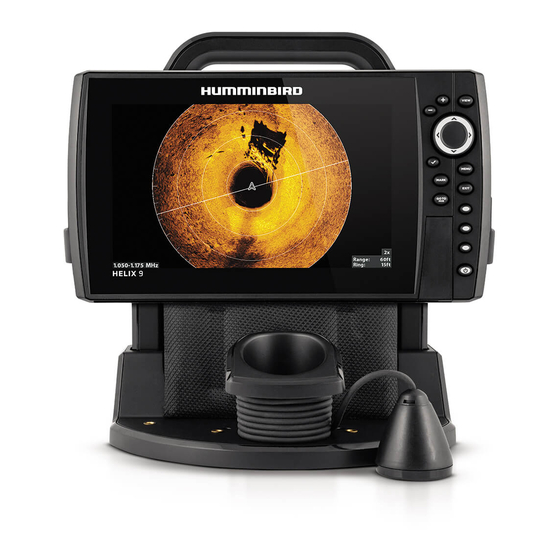
ICE HELIX® SERIES Installation Guide
Follow the instructions in this installation guide to install the ICE HELIX® shuttle and install the
control head and ICE transducer.
There may be some minor differences between the hardware described in this manual and the actual
hardware included, depending on the configuration you purchased. We encourage you to read this
guide completely so that you may understand the installation requirements.
Technical Support: If you find that any items are missing from your installation kit, visit our Web site
at humminbird.com or call Humminbird® Technical Support at 1-800-633-1468.
Supplies: In addition to the installation kit, you will need a Phillips screwdriver.
NOTE: The procedures and features described in this guide are subject to change without notice.
This guide was written in English and may have been translated to another language. Humminbird
is not responsible for incorrect translations or discrepancies between documents.
NOTE: The illustrations in this guide may not look the same as your product, but your unit will
function in the same way.
WARNING! Always make sure that conditions are safe before walking on the ice.
Installation Preparation
1
| Charging the Battery
The ICE HELIX fish finder comes with a NORSK lithium-ion battery and battery charger.
WARNING! Misusing the battery may cause a shortened life span or may present a risk of damage
to the device and/or bodily injury. Be sure to follow the safety rules listed below:
Δ Do not short circuit the positive (+) or negative (-) terminals with any metals.
Δ Do not reverse the positive (+) or negative (-) terminals.
Δ Do not heat, drop, disassemble, or crush.
Δ Do not expose to flame, spark or high temperature above 60C.
Δ Only use the included NORSK lithium-ion charger.
Δ Keep away from children.
WARNING! Power off all connected electronic devices when charging the battery.
NOTE: The ICE adapter kits do not include a battery or battery charger. Follow the manufacturer's
instructions for the battery you selected.
You should fully charge your battery before using it for the first time to ensure peak performance.
You should also check the charge on your battery at least once every 3 months. This is especially
important during periods of prolonged storage. This type of battery should not be stored in a
discharged state.
1. Remove the battery terminal covers.
2. Connect the red and black spade connectors on the charging cable onto the corresponding
battery terminals.
3. Connect the charging cable to the wall charger.
4. Plug in the wall charger to an outlet.
5. To see if the battery is fully charged, press the LED indicator on the battery once to display the
battery capacity, twice to display the voltage, and three times to turn off the LED indicator.
1
532821-2_A
Advertisement
Table of Contents

Related Manuals for Humminbird ICE HELIX Series


Summary of Contents for Humminbird ICE HELIX Series
- Page 1 NOTE: The procedures and features described in this guide are subject to change without notice. This guide was written in English and may have been translated to another language. Humminbird is not responsible for incorrect translations or discrepancies between documents.
-
Page 2: Testing The Transducer
Disconnect the power cable terminals from the battery until the installation is completed and you’re ready to fish. ICE HELIX Series Shuttle Assembly Perform the ICE HELIX shuttle assembly tasks in order, referring to the step-by-step procedures. When you are finished, the control head and the transducer will be part of the ICE shuttle assembly, and you will be ready to take your ICE HELIX out on the ice for final setup. - Page 3 ICE HELIX® SERIES Installation Guide 532821-2_A | Installing the Front Battery Cover and Gimbal Bracket Installing the Gimbal Bracket 1. Align the gimbal bracket standoffs to the front openings in the handle. The bracket tab should be facing down and toward the back of the shuttle. NOTE: Some models come with multiple gimbal brackets.
-
Page 4: Installing The Transducer
ICE HELIX® SERIES Installation Guide 532821-2_A | Installing the Transducer Installing the Transducer Cup 1. Line up the pin on the bottom of the transducer cup with one of the three positions on the shuttle base. 2. Secure the transducer cup with the included 1/4 - 20 x 5/8" screw. Hand-tighten only. 3. - Page 5 Use a Philips screwdriver to remove the screws from the bottom of the cable tray. Hold the cable tray together and turn it over, so the Humminbird logo is facing up. Lift the cover and set it aside.
- Page 6 9. With the Humminbird logo facing up, plug the cable tray into the back of the control head. The cable tray clasps should click into place. See the illustration Connecting the Cable Tray to the Control Head.
-
Page 7: Control Head Maintenance
Δ Chemicals, such as those found in bug spray and sunscreen, may cause permanent damage to the control head screen. Such damage is not covered by the warranty. Δ Never leave your Humminbird ICE unit in a closed car or trunk — the high temperatures generated in hot weather can damage the electronics. -
Page 8: Transducer Maintenance
(EEE), nor may it be required for EEE designed and intended as fixed or temporary installation in transportation vehicles such WARNING! Do NOT use the Humminbird charger with other as automobiles, aircraft, and boats. In some European Union member manufacturers’... -
Page 9: Préparation Avant L'installation
REMARQUE : Les procédures et les fonctionnalités décrites dans ce manuel sont susceptibles d'être modifiées à tout moment sans préavis. Ce manuel a été rédigé en anglais et a été traduit dans d'autres langues. Humminbird n'est pas responsable de la traduction inexacte ou des légères anomalies susceptibles d'être rencontrées dans les différents documents. - Page 10 SÉRIE ICE HELIX Guide d'Installation 532821-2_A | Tester le transducteur Testez le transducteur avant l'installation pour vous assurer qu'il n'a subi aucun dégât au cours de l'expédition. 1. Connectez le câble d’alimentation à la tête de commande et à l’adaptateur de borne de batterie (voir Connexion du câble d’alimentation et installation de la batterie).
- Page 11 SÉRIE ICE HELIX Guide d'Installation 532821-2_A | Installation du couvercle avant de la batterie et du support à cardan Installation du support à cardan 1. Alignez le couvercle avant de la batterie avec les rainures à l’avant du socle de la navette. 2.
- Page 12 SÉRIE ICE HELIX Guide d'Installation 532821-2_A | Installation du transducteur Installation de la coupelle du transducteur 1. Alignez la goupille sur le dessous de la coupelle du transducteur avec l’une des trois positions sur le socle de la navette. 2. Fixez la coupelle du transducteur avec la vis 1/4 - 20 x 5/8 po incluse. 3.
- Page 13 Utilisez un tournevis à tête cruciforme pour enlever les vis du dessous du plateau de câblage. Tout en maintenant le plateau de câblage, retournez-le de sorte que le logo Humminbird soit orienté vers le haut. Retirez le couvercle et mettez-le de côté.
- Page 14 Alignez les broches du plateau de câblage avec les trous de la tête de commande. 9. Avec le logo Humminbird orienté vers le haut, branchez le plateau de câblage à l’arrière de la tête de commande. Les attaches du plateau de câblage doivent s’insérer facilement jusqu’à...
-
Page 15: Entretien
Facultatif : Rechargez complètement la batterie après utilisation. Entretien Votre détecteur de poissons Humminbird ICE a été conçu pour fonctionner correctement pendant des années sans pratiquement aucun entretien. Suivez les procédures simples énumérées cidessous pour assurer un bon fonctionnement continu de votre appareil Humminbird ICE. -
Page 16: Caractéristiques
équipements électriques et électroniques (EEE), ou pour les AVERTISSEMENT ! NE PAS utiliser le chargeur Humminbird avec des équipements EEE conçus et destinés à des installations temporaires ou piles d'autres fabricants. Le chargeur Humminbird n'est compatible fixes sur les véhicules de transport tels que les automobiles, les aéronefs...
Need help?
Do you have a question about the ICE HELIX Series and is the answer not in the manual?
Questions and answers