Table of Contents
Advertisement
Quick Links
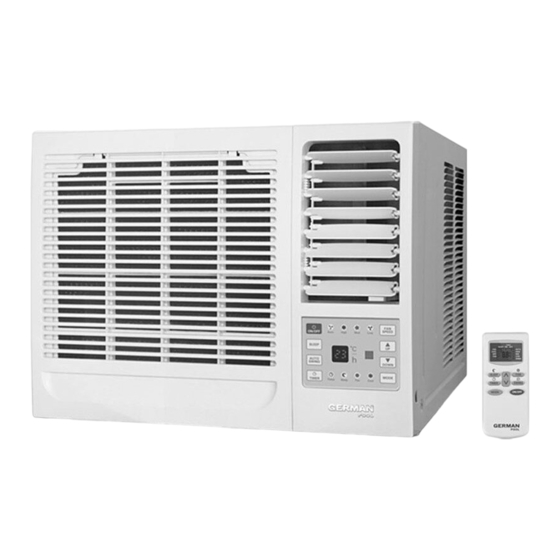
遙 控 窗 口 式 空 調
Window Type Air Conditioner
(W/Remote Control)
在 使 用 之 前 請 詳 細 閱 讀 「 使 用 說 明 書 」及「 保 用 條 款 」 , 並 妥 為 保 存 。
Please read these instructions and warranty information carefully
before use and keep them handy for future reference.
使 用 說 明 書
WAC-407R / WAC-409R
WAC-412R / WAC-418R
U S E R
M A N U A L
Advertisement
Chapters
Table of Contents

Related Manuals for German pool WAC-407R


Summary of Contents for German pool WAC-407R
- Page 1 遙 控 窗 口 式 空 調 WAC-407R / WAC-409R Window Type Air Conditioner WAC-412R / WAC-418R (W/Remote Control) 在 使 用 之 前 請 詳 細 閱 讀 「 使 用 說 明 書 」及「 保 用 條 款 」 , 並 妥 為 保 存 。...
-
Page 2: Table Of Contents
Table of Contents Introduction Operating Instructions Electrical Specifications Installation Instructions Care and Maintenance Troubleshooting Guide Warranty Terms & Conditions... -
Page 3: Introduction
Control Panel 自動 高速 中速 低速 開關 風速 風速 開關 壓縮機 自動 高速 中速 低速 睡眠模式 上 睡眠模式 上 自動旋轉 下 自動旋轉 下 計時 睡眠模式 風扇 製冷 器 計時器 計時器 睡眠模式 風扇 製冷 模式 計時器 模式 WAC-407R/WAC-409R/WAC-412R WAC-418R Remote Control... - Page 4 Operating Introduction For remote control model You can easily operate this air conditioner by pressing relevant button on the control panel as well as the remote control. 自動 高速 中速 低速 開關 風速 睡眠模式 自動旋轉 Remote Control 計時器 睡眠模式 風扇 製冷...
- Page 5 Operating Introduction Indication symbols of LED on control panel. Button Function 自動 高速 中速 低速 Timer Cooling Fan only(only Cooling Unit) Sleep Display set temp./Display set timer Low fan speed Mid fan speed 計時器 睡眠模式 風扇 製冷 High fan speed Auto fan speed *Above LED lights on when the relevant mode is in used.
-
Page 6: Operating Instructions
Operating Instructions Remote control The remote control transmits signals to the system. Button Function (TEMP UP) Increase the te mperature or time by 1 unit. (TEMP DOWN) Decrease the temperature o r time by 1 uni t. ON/OFF To switch the conditioner on and off. To select the fan speed of auto/low/mid/high. - Page 7 Operating Instructions “ SWING ” CONTROL OF THE AIR FLOW SWING The air outlet flow is uniformly dist- ributed in the room. It is possible to position the direction of the air in the optimal solution. FLAP , the air flow is The key activates the SWING...
- Page 8 Operating Instructions TIMER MODE----TIMER ON To set the automatic switching-on of TIMER ON the air conditioner To program the time start, the appliance should be off. Press TIMER , set the temperature with pressing the key or . Press TIMER again, set the time with pressing the key or , press the key more times till...
- Page 9 Operating Instructions FAN MODE The conditioner works in only ventilation. To set the FAN mode , Press MODE untill the pointer points to FAN . Whith pressing FAN button the speed changes in the following sequence: LOW/ MEDIUM/HIGH in FAN mode. The remote control also stores the speed that was set in the previous mode of operation.
- Page 10 Operating Instructions FEEL MODE FEEL Automatic mode. To activate the FEEL (automatic) mode of operation, press the MODE button on the remote control until the pointer points to FEEL. In the FEEL mode the fan speed and the temperature are set automatically according to the room tempera- ture (tested by the probe which is incorporated in the indoor unit)to ensure user comfort.
-
Page 11: Electrical Specifications
Electrical Specifications Electric Shock Hazard 1. All wiring must comply with local and national electrical codes and must be installed by a The air conditioner has a serial rating qualified electrician. If you have any questions volts. It must have its own fuse or regarding the following instructions, contact a circuit breaker, and no other device or unit should be operated on the fuse or... -
Page 12: Installation Instructions
Installation Instructions Remove all the shipping parts before installation. LOCATION S elect a location that can support the weight of the air conditioner and one that will not cause increased operation noise and vibration. Direct sunlight is unfavorable for efficient cooling. S elect a place where there is no obstacles near the air inlet and outlet. - Page 13 Installation Instructions CAUTION The installation parts must be strong against corrosion,especially in case the air conditioner will be installed near the sea or hot spring. Do not install air conditioner in the place where inflammable gas leaks are a possibility. he minimum clearance from the appliance to combustible surfaces is 100mm.
- Page 14 Installation Instructions 1) R emove the front panel. (F ig.5) R emove the air filter. (F ig.6) R emove screw at the botton of the front panel. (F ig.7) Open the panel cover. F ig.5 2) R emove the screws fix the chassis-fixing board and cabinet. Some models have two more screws on the back of the cabinet.
-
Page 15: Care And Maintenance
Care and Maintenance AIR FILTER The air filter should be washed at least once a month. lf the air filter remains full of dust, the air flow will decrease and the cooling capacity will be reduced. The filter is behind the cover and to be pulled out from right hand side. Wash the air filter with water an detergent. -
Page 16: Troubleshooting Guide
Troubleshooting Guide Never use hot water above 50 ,benzine,gasoline,acid,thinner or brush to wipe off dirt because they will damage the plastic surface and the coating. LONG OFF PERIOD MAINTENANCE Operate the fan alone ("LOW FAN"or"HIGH FAN") for half a day to dry out the inside of the unit. - Page 17 目錄 介紹 操作說明 電氣規格 安裝指南 清潔與保養 常見問題解決 保用條款 P.17...
- Page 18 圖1-1 控制面 自動 高速 中速 低速 開關 風速 風速 開關 壓縮機 自動 高速 中速 低速 睡眠模式 上 睡眠模式 上 自動旋轉 下 自動旋轉 下 計時 睡眠模式 風扇 製冷 器 計時器 計時器 睡眠模式 風扇 製冷 模式 計時器 模式 WAC-407R/WAC-409R/WAC-412R WAC-418R 遙控器 P.18...
-
Page 19: 操作說明
操作說明 遙控式機型 您可通過按遙控器/控制面板上相應的功能鍵控制空調。 自動 高速 中速 低速 開關 風速 睡眠模式 自動旋轉 計時器 睡眠模式 風扇 製冷 遙控器 計時器 模式 控制面板 序號 按鈕及指示燈 功能 用來控制吹風方向 自動 旋轉 -用來設置或取消計時操作。 -當空調開啟時,可以通過該按鈕設置定時關機,當空調處於關閉狀態下, 計時器 可以通過該按鈕設置定時開機。設置時間範圍是0-24小時。 -如果設置了定時關機,顯示幕上會顯示剩餘的時間,持續大約10秒鐘。之 後顯示幕會返回顯示設置溫度,如果在這10秒內按“計時器”按鈕,定時 關機將被取消。 -如果設置了定時開機,顯示幕上會顯示剩餘的時間。如需取消定時開機, 按“計時器”按鈕。 按此按鈕可開關空調。 開/關 按此按鈕時,空調的運行模式會按照“製冷-吹風-製冷”的順序轉換。 模式 按此按鈕時,風速會按照“自動-高速-中速-低速”的順序轉換。 風速 在製冷功能下設置溫度,或在計時情況下調整時間。如果同時按上下鍵超... - Page 20 操作說明 控制面板上的指示燈 序號 按鈕 功能 自動 高速 中速 低速 計時器 製冷 吹風 睡眠 顯示設置時間/溫度 低風速 中風速 高風速 計時器 睡眠模式 風扇 製冷 自動風速 *當某程式工作時,相應的LED燈會變亮。 遙控器 遙控器通過發送信號至系統,從而操作機器。 序號 按鈕 功能 增加鍵 升高溫度或增加時間 減少鍵 降低溫度或減少時間 開/關鍵 開/關空調 風扇 選擇風速:自動 高速 中速 低速 計時器 設置自動開/關機...
- Page 21 操作說明 吹風擺動模式 出風口將風均勻吹散在房間裏。 SWING 可根據需要將風向調整以達到最 佳效果。 按 啟動擺動功能,出風口即從左而右出風, SWING 保證出風均勻。 在製冷模式時,空調將葉片調整至水平位置。 可手動設置導流板的位置。出風口即從上而下 出風。 調整葉片時必須保持機器關閉狀態。 注意 - 某些特定的機型或不配備平行送風的功能。 - 切勿手動調整葉片,以免損毀啟動葉片的零件。 危險 切勿將手伸入出風口內,內有電機高速運轉。 製冷模式 製冷功能用以室內的製冷及抽濕。 COOL MODE 按 (模式)鍵選擇製冷功能,直到顯示幕上 鍵頭指向COOL(製冷)。 通過按 上、 下選擇鍵,啟動製冷功能。選擇的 溫度須比室溫低。 為了達到最佳的製冷效果,請根據指示鍵調節溫度, 風速及風向。 P.21...
- Page 22 操作說明 計時器模式--計時器開啟 TIMER ON 設置空調的自動開啟。 TIMER 在設置自動開啟時,空調必須關閉。按 (計時器)按鈕,通過 上、 下選擇鍵來設置時 TIMER 間,再次按 (計時器)按鈕,通過按 上、 下選擇鍵來設定開機時間,直到顯示幕上顯示 預計開機時間及程式。 重要 在運行自動開啟前,1)按 MODE (模式)(2)鍵 選擇工作程式。2)按 (風扇)(3)鍵選擇風 ON/OFF 速。3)通過按 (開/關)鍵關閉空調。 注意 TIMER - 若要取消設定的功能,請再次按 (計 時器)鍵。 - 若出現斷電,需要重新設定開機功能。 計時器模式--計時器關閉 TIMER OFF 設置空調的自動關閉 TIMER 當空調正在運行時,才能設置自動關機。按 (計時器)鍵,通過按...
- Page 23 操作說明 風扇模式 MODE 設定風扇模式,請按 (模式)鍵 直至顯示幕上鍵頭指向FAN(風扇)。 按 (風扇)鍵時,風速會按照低速/中速/高 速的順序調整。 遙控器同時也會自動儲存上次程式的風速。 處于“FEEL(自動感應)”模式時空調會自動選 擇風速以及程式。 抽濕模式 該功能用於乾燥室內濕氣。 MODE 設置抽濕模式時,按 (模式)鍵直到顯示 幕上鍵頭指向DRY(抽濕)。變頻製冷及吹風功能 將自動被啟動。 P.23...
- Page 24 操作說明 自動感應模式 FEEL 自動感應模式 MODE 啟動自動感應模式時,請按遙控上的 (模式)鍵選擇,直至顯示幕上鍵頭指向FEEL (自動感應)。 在該模式下,空調的風速和溫度根據室溫(在室 內機件安裝了溫度探測器)自動設置。 周圍溫度 操作模式 自動溫度 < 20℃ 23℃ 吹風(淨冷型) 18℃ 20℃~26℃ 乾燥 23℃ > 26℃ 製冷 為了使空調達到最佳工作狀態,請根據上表調整 溫度(整範圍最好為±2℃之間) (1) 、風速(2) 及風向(3)。 睡眠模式 SLEEP SLEEP 按遙控上的 (睡眠)鍵啟動睡眠模式,直 至顯示幕上鍵頭指向SLEEP。 在製冷狀態下進入睡眠模式,1小時後ST-1,再1小 時後ST-2,再過1小時後設定溫度為ST-3,保持2小 時不變,之後設定的溫度為ST-2,再1小時ST,此 後保持不變,10小時後不自動關機。 P.24...
-
Page 25: 電氣規格
電氣規格 1.所有的電線必須與當地和國家的電氣規範一 觸電警告 致,且必須由專業人員安裝。如果對以下操 作有不明白之處,請聯繫專業電工。 該空調有額定的功率,需配有特定的保 險絲及斷路器。禁止其他設備使用該保 險絲或斷路器。為了防止人身傷害,請 2.在安裝和使用之前請檢查電源是否可用,解 在安裝前斷掉電源。 決好電源線問題。 3.為了您的安全著想,空調的插頭已可靠接地。 插座與保險絲類型 若不確定壁式插頭是否接地,請咨詢專業的 插座與保險絲類型 250V 保險絲額定電壓 電工。 3.15 安培數 4.空調上的銘牌包含著電子及其他技術數值。 銘牌貼在空調的右邊。請確認電源與銘牌上 的一致。 5.空調的電路圖如下。 07K/09K/12K P.25... -
Page 26: 安裝指南
安裝指南 在安裝之前移除所有的運輸件。 位置 - 選一個可以承載空調重量的位置,可以最大程度避免噪音和震動。 - 避免陽光直射,以免影響製冷效果。 Less than 210 少於210mm - 選擇通風良好的位置。 少於210mm 少於210mm 多於55mm 挖鑿 如果牆身厚度大於210mm,請按照上圖所示挖鑿 牆身厚度少於210mm 牆壁。 少於210mm 大於400mm 大於400mm 大於500mm 將空調往後傾以便水滴順利排出。 P.26... - Page 27 安裝指南 注意 - 安裝部件須防銹,尤其是安裝在海邊或者潮濕的地方。 - 請勿把空調安裝在或會發生易燃氣體洩漏的地方。 - 空調允許靠近可燃物體的最小距離為100mm(只允許電力加熱)。 - 機外靜壓的範圍值為0-5帕。 操作 - 檢查電線及電源輸出的容量。電源輸出專門為空調設計所用,請勿用於其他設備。 - 須將空調可靠接地預防發生觸電事故。 - 將空調安全地接通電源。 - 如下所示使用保險絲。 注意 - 在安裝之前關閉開關,斷開電源。 - 該設備不適用於身體上,感官上或精神上有缺失的人士(包括兒童),或者缺乏知識、經驗的人 士。除非他們在正確的監督和指導下才能使用。兒童禁止玩耍該設備。 - 空調在組裝時須與主電源隔離,每一相均用隔離觸點實現在三類過壓條件下的完全切斷,在固定 接線中必須按接線規則加入此類措施。 - 本產品只供家居使用。 P.27...
- Page 28 安裝指南 1)移除前面的面板。(圖5) 移除隔塵網。(圖6) 移除前面面板底部的螺絲。(圖7) 揭開面板。 圖.5 2)將固定底盤和機身的螺絲移除。 某些型號或會在背板上多安裝2顆螺絲。(圖8) 3)握住底盤前面的把手,然後小心地將空調滑出櫃身。 4)把滴水導管安裝至空調後部的底盤上。(圖11)(如適用的話) 圖.6 為了滿足不同型號空調的需求,這裏有兩種處理凝結水的方法。 您可選擇後位排水或底部排水的方法。 底部排水方式: 滴水盤用四顆螺絲固定住,用寬底螺母擋住後位排水孔。 圖.7 (圖15) 後位排水方式: 用寬底螺母擋住底部排水孔,用導管連接至後部排水孔,請注意 需加高墊圈以防漏水。(圖16) 圖.8 5)用螺絲將空調控制機身安裝在安裝架(不包含)上。(圖10) 6)小心將空調滑進櫃身。(圖12) 7)重新安裝固定支架,前面板以及固定螺絲。(圖8,7,13) 圖.9 8)重新安裝過濾網。(圖14) 牆 櫃身 安裝架 螺絲 圖.10 圖.11 圖.12 圖.13 圖.15 圖.16 圖.14 寬底螺母 滴水盤 寬底螺母 墊圈...
-
Page 29: 清潔與保養
清潔與保養 隔塵網 - 隔塵網至少每一個月清潔一次。如果隔塵網積聚灰塵,會降低空調的製冷效率。 - 隔塵網安裝在面板後面,從右手邊拉出。 - 用清潔劑和水清洗隔塵網。 - 用乾淨的水沖洗,在重新安裝前請晾乾。 圖15 圖16 注意 - 請不要使用超過40℃的水清洗隔塵網。 - 在重新裝上隔塵網前請把隔塵網放在陰涼處乾燥。不要直接放置在太陽下。 - 移除隔塵網的時候請勿運作空調。 - T1條件下:室溫環境下18-43℃製冷。 - T3條件下:室溫條件下25-52℃製冷。 空氣凈化網: 空氣凈化網附在隔塵網上。清洗隔塵网時請清洗空氣凈化網。 前面板等配件: 面板容易積塵聚污。請用柔軟的乾毛巾擦拭面板。當面板特別髒 的時候,請先用軟布沾濕一點溫水或者溫和的肥皂水擦拭,再用 熱水 乾的軟布擦乾。 汽油,酸性物質等 P.29... -
Page 30: 常見問題解決
常見問題解決 禁止用超過50℃的水、汽油、酸類物質、天拿水或刷子等清洗污跡。因這些溶劑會破壞機器表面的特性。 長時間關機的保養: - 獨立運行吹風功能(低速或高速)半天時間,以便使機內乾燥。 - 關閉開關並將插頭拔出。 - 在長時間關機後如要使用重新使用空調,請用軟刷或吸塵器清潔製冷劑(後部)和蒸發器(前面)。 注意 在清潔期間小心損毀散熱片。 在請求幫助前 當需要售後服務時,請先檢查以下疑難解答方案。如果問題不能得到解決,請再聯繫售後維修。 故障 原因 1.電源關閉了嗎? 2.保險絲是否燒掉? 機器不運行 3.電壓是否過高或過低? 4.開關按鈕是否處於關閉狀態? 1.隔塵網是否積塵過多?是的話請查看第九頁的說明。 2.是否有陽光直射到機器上? 3.空調後部的空氣流通是否不暢? 空調後部是否與牆身有 500mm以上的距離? 製冷效果差 4.門窗是否處於開啟狀態?或室內有發熱源? 5.空調是否調至製冷功能? 6.通風擋板是否打開了? P.30... -
Page 31: Warranty Terms & Conditions
WAC-418R Warranty Terms & Conditions 保用條款 Under normal operations, the product will receive a 1-year 此保用提供德國寶產品之機件在正常使用下一年 full warranty provided by German Pool (effective starting 保用(自購買日起計算)。 from the date of purchase). 任何塑膠附件及輔助裝置。 Plastic parts and accessories Customer Service & Repair Centre 客戶服務及維修中心... - Page 32 傳真 Fax:+853 2875 2661 HONG KONG TOP BRAND TEN YEAR ACHIEVEMENT AWARD © 版權所有。未獲德國寶授權,不得翻印、複製或使用本說明書作任何商業用途,違者必究。 © All rights reserved. Copying, reproducing or using the contents of this manual is not allowed without prior authorization from German Pool, violators will be prosecuted. WAC-407R_409R_412R_418R_M_15(1)
Need help?
Do you have a question about the WAC-407R and is the answer not in the manual?
Questions and answers