Table of Contents
Advertisement
Advertisement
Table of Contents

Summary of Contents for SteppIR BigIR MK III
- Page 1 Yagi Dipole Vertical (Patented) 80m Coil Kit for the BigIR Instruction Manual SteppIR BigIR MK III Test Installation W/80m Coil SteppIR Antennas 2112 -116th Ave NE, Suite 2-5 , Bellevue, WA 98004 Tel: 425-453-1910 Fax: 425-462-4415 Tech Support: 425-891-6134 www.steppir.com...
-
Page 2: Table Of Contents
Parts List The SteppIR 80m Loading Coil Things to Know when Using Your 80m Loading Coil BigIR MK III Procedure to add 80m Coil Modifications Needed to Operate the BigIR MK II at 1500 watts Disassembling the Antenna Bypassing the SO-239 on the Element Control Unit BigIR MK I (original model) &... -
Page 3: Parts List
Hardware Kit for Shipping Coil Alone 1/2” Nylon Spacer 60-1004-01 10-32x1-1/2 SS Screws 60-0072-01 10-32x7/8” SS Screws 60-0061 10-32 Nylok Nuts 60-0019 Connector Protector 10-1029-01 Single Terminal Block 20-6020-01 Firmware Chip Chip Extractor Hardware Kit for Shipping Coil With BigIR MK III Connector Protector 10-1029-01... -
Page 4: The Steppir 80M Loading Coil
SteppIR controller. The SteppIR coil has 4 taps on the 80m band and one tap on the 60m band plus one position that switches the coil out of the circuit. The SteppIR controller automatically selects the proper tap and antenna length for the selected frequency to give the best performance. - Page 5 SteppIR Antennas - 80m Loading Coil Kit 2. Modeling shows that 3/4 wave can provide greater gain than a 1/4 wave vertical at all angles above about 27 deg. The increase is 3 db to 4 db from about 27 deg to 45 deg elevation.
-
Page 6: Bigir Mk Iii Procedure To Add 80M Coil
SteppIR Antennas - 80m Loading Coil Kit BigIR MK III Procedure to add 80m Coil: • If you have purchased the MK III and the coil together at the same time, skip the steps. • * Mount coil housing to the element unit using 4 (10-32x1-3/4) screws (Figure 9 &... -
Page 7: Modifications Needed To Operate The Bigir Mk Ii At 1500 Watts
SteppIR Antennas - 80m Loading Coil Kit The Following Modifications Need to be Made to the BigIR MK II to Op- erate the Coil at 1500 watts. • The coax connector must be bypassed internally on the element housing unit. -
Page 8: Bypassing The So-239 On The Element Control Unit
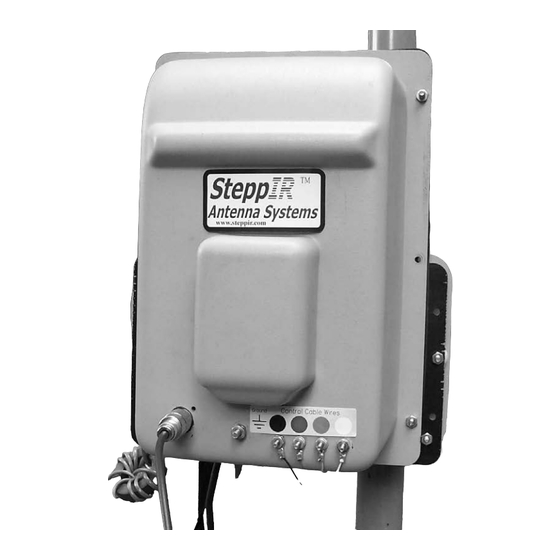
• Longer copper tape guide inside the fiberglass pole • It can safely run 1500 watts output using the SteppIR 80m coil The BigIR MK III - Internal and structural modifications • Moved the coax connector to a more convenient location •... - Page 9 SteppIR Antennas - 80m Loading Coil Kit • These two wires will be connected using the provided single wire terminal block. Be sure that the wires fit snug inside the block then tighten the screws firmly. If you decide to solder these wires together, be sure to insulate the joint adequately (such as heat shrink).
-
Page 10: Mounting The Coil Housing
(4) 1/2 in. standoffs with the terminals at the bottom (Figure 9 & Figure 11). Note: For the BigIR MK III it is recommended that you insert the (4) 10-32x1-1/4 in. screws from the coil side (opposite of Figure 9 & Figure 11) to allow clearance for the nuts. -
Page 11: Reassembling The Antenna
SteppIR Antennas - 80m Loading Coil Kit Figure 15 Figure 13 Remove this Screw Reassembling the Antenna: • Reinstall the second and third sections of 3/4” CPVC liner gluing them firmly in place (Figure 17). NOTE: If you need to take the antenna apart in the future you can cut the 3/4” diameter plastic pipe (after homing the copper) a minimum of 1 in. -
Page 12: Installing The New Firmware Chip (Retrofit Kit Only)
SteppIR Antennas - 80m Loading Coil Kit Installing the New Firmware Chip (retrofit kit only): • If you have purchased the BigIR MK III and the 80m coil together at the same time this installation has already been done at the factory. Figure 19 •... - Page 13 SteppIR Antennas - 80m Loading Coil Kit Chip Extractor Chip Extractor Figure 25 Figure 23 Picture 2 Picture 3 • Use a chip extractor (Figure 23 & 25) to carefully pull the chip out of its socket. The tiny “claws” on the extractor fit at the chip corners, and hook under the chip. Gently pull the chip upwards, rocking slightly as necessary until it is free.
- Page 14 SteppIR Antennas - 80m Loading Coil Kit Figure 29 Picture 5 Firmware chip in its socket • Center the chip in the socket and press the chip down vertically with your thumb (Figure 29). Press evenly until the chip is firmly seated on all sides.
-
Page 15: Powering Up And Enabling The Coil
SteppIR Antennas - 80m Loading Coil Kit Powering up and Enabling the Coil: • Plug in the controller power cord. • Turn on the controller and select the “General Frequency” mode. • Press and hold the select key until some of the band LED’s light up (more than one band LED will light) then release the select key. -
Page 16: Wiring Diagram
SteppIR Antennas - 80m Loading Coil Kit 1 2 3 4 5 6 7 8 ( t o Drawing 1... -
Page 17: Steppir Warranty
(2) years from date of sale. Do not modify this product or change physical construction without the written permission of SteppIR Antennas Inc. This limited warranty is automatically void if the following occurs: improper installation, unauthorized modifications, physical abuse or damage from severe weather, beyond the manufacturer's control. - Page 18 Yagi Dipole Vertical SteppIR Antenna Information Web Sites(as of 4/09/07) http://steppir.com/ http://groups.yahoo.com/group/steppir/...


Need help?
Do you have a question about the BigIR MK III and is the answer not in the manual?
Questions and answers