Table of Contents
Advertisement
Quick Links
User's Manual
1. Usage Notice
2. Introduction
3. Basic Operations
4. User Settings
5. LAN Control
6. Troubleshooting
7. Maintenance
8. Appendices
Read this manual carefully before you use this machine and keep
it handy for future reference. For safe and correct use, be sure to
read the Precautions in this manual before using the machine.
Advertisement
Table of Contents

Related Manuals for Ricoh PJ WU6590


Summary of Contents for Ricoh PJ WU6590
- Page 1 User’s Manual 1. Usage Notice 2. Introduction 3. Basic Operations 4. User Settings 5. LAN Control 6. Troubleshooting 7. Maintenance 8. Appendices Read this manual carefully before you use this machine and keep it handy for future reference. For safe and correct use, be sure to read the Precautions in this manual before using the machine.
-
Page 3: Table Of Contents
Control.the.projector.with.the.. Installing.the.Projection.Lens..33 projector.Management.Utility...73 Removing.the.Projection.Lens..33 Troubleshooting ......74 Using.the.Projector.in.Portrait.Mode............34 Maintenance ........ 79 Removing.and.Installing.the.. Replacing.the.Lamp......79 RICOH.PJ.Expansion.Board...35 Replacing.the.Filter......80 Connecting.the.Projector....36 Appendices ......... 80 Connect.to.Computer/Notebook/AV. equipment/other.devices....36 List.of.Compatible.Signals....81 Connect.to.HDBaseT.Module.(PJ. Configurations.of.Terminals....87 WU6590./.PJ.WU6480)....37 Terminal:.Computer.In.(Mini.. -
Page 4: Usage Notice
Usage Notice Usage Notice Precautions Follow all warnings, precautions and maintenance as recommended in this user’s guide to maximize the life of your unit. ■ ■ Warning- Indicates a potentially hazardous situation which, if instructions are not followed, could result in death or serious injury. - Page 5 Usage Notice ■ ■ Warning- The■supplied■power■cord■is■for■use■with■this■ machine■only.■Do■not■use■it■with■other■appliances.■ Doing■so■could■result■in■fire■or■electric■shock. ■ ■ Warning- It■is■dangerous■to■handle■the■power■cord■plug■with■ wet■hands.■Doing■so■could■result■in■electric■shock. ■ ■ Warning- Be■sure■to■disconnect■the■power■cord■from■the■ wall■outlet■at■least■once■a■year■and■check■for■the■ following: ■ ■ There■are■burn■marks■on■the■plug. ■ ■ The■prongs■on■the■plug■are■deformed. ■ ■ The■power■cord’s■inner■wires■are■exposed,■ broken,■etc. ■ ■ The■power■cord’s■coating■has■a■crack■or■dent. ■ ■ When■bending■the■power■cord,■the■power■turns■ off■and■on. ■ ■ Part■of■the■power■cord■becomes■hot. ■ ■ The■power■cord■is■damaged.
- Page 6 Usage Notice ■ ■ Warning- If■metal■objects,■or■water■or■other■fluids■fall■ inside■this■machine,■you■must■turn■off■its■power■ immediately.■After■turning■off■the■power,■be■sure■ to■disconnect■the■power■cord■plug■from■the■wall■ outlet.■Then■contact■your■service■representative■and■ report■the■problem.■Do■not■use■the■machine.■Doing■ so■could■result■in■fire■or■electric■shock. ■ ■ Warning- Never■operate■this■unit■on■AC■power■during■a■ thunderstorm.■If■you■see■lightning■or■hear■thunder,■ never■touch■the■unit,■cables■and/or■peripherals.■An■ electric■surge■caused■by■the■storm,■may■result■in■an■ electrical■shock■or■damage■to■the■unit. ■ ■ Warning- If■the■machine■topples,■or■if■a■cover■or■other■ part■gets■broken,■you■must■turn■off■its■power■ immediately.■After■turning■off■the■power,■be■sure■ to■disconnect■the■power■cord■plug■from■the■wall■ outlet.■Then■contact■your■service■representative■and■ report■the■problem.■Do■not■use■the■machine.■Doing■ so■could■result■in■fire■or■electric■shock. ■ ■ Warning- Do■not■use■lens■cap■when■projector■is■powered■on. ■ ■ Warning- Never■push■objects■of■any■kind■into■this■product■ through■openings■as■they■may■touch■dangerous■ voltage■points■or■short-out■parts■that■could■result■ in■a■fire■or■electric■shock.■Never■spill■liquid■of■any■...
- Page 7 Usage Notice ■ ■ Warning- Installing■the■Projector■on■a■Wall■or■Ceiling,■or■ using■the■Projector■in■Portrait■Mode: a)■Do■not■attempt■to■clean■or■replace■parts■for■a■ machine■that■is■installed■in■a■high■location■on■a■ wall■or■ceiling■or■in■portrait■mode.■Doing■so■may■ cause■it■to■fall■down,■resulting■in■an■injury. b)■Do■not■open■the■lamp■cover■of■a■machine■that■is■ installed■on■a■wall■or■ceiling■or■in■portrait■mode.■ Doing■so■may■cause■the■lamp■cover■to■fall■down.■ If■the■lamp■is■broken,■pieces■of■glass■may■fall■and■ cause■an■injury. c)■Contact■your■sales■or■service■representative■ to■clean■or■replace■parts■for■a■machine■that■is■ installed■on■a■wall■or■ceiling■or■in■portrait■mode. d)■If■a■machine■is■incorrectly■installed■on■a■wall■or■ ceiling■or■in■portrait■mode,■it■may■fall■down■and■ cause■an■injury.■Contact■your■sales■or■service■ representative■if■you■want■to■install■a■machine■on■ a■wall■or■ceiling■or■in■portrait■mode. e)■Do■not■obstruct■the■machine’s■vents.■Doing■ so■risks■fire■caused■by■overheated■internal■ components. f)■ For■users,■do■not■install■the■projector■by■yourself.■ Contact■your■sales■or■service■representative■if■you■ want■to■install■the■projector■on■a■wall■or■ceiling■or■ in■portrait■mode. g)■For■sales■or■service■representatives: ■ – Use■brackets■that■are■strong■enough■to■support■ the■projector.■The■projector■weighs■about■21■kg■ (46.3lb)■(Projector■weight■without■lens). ■ – The■projector■must■be■installed■in■a■location■that■ is■sturdy■enough■to■support■the■full■weight■of■the■...
- Page 8 Usage Notice ■ ■ Caution- Do■not■place■the■machine■or■use■it■in■an■ environment■where■it■might■get■wet■such■as■from■ snow,■rain,■or■being■near■water.■Doing■so■could■ result■in■fi■re■or■electric■shock. ■ ■ Caution- Do■not■put■your■face■or■hand■near■the■exhaust■ vents.■Doing■so■could■result■in■burns■or■an■accident■ due■to■hot■air■coming■from■the■exhaust■vents. ■ ■ Caution- Do■not■use■the■machine■on■soft■material■such■as■ paper■or■cloth■that■might■get■sucked■into■the■intake■ vents.■Doing■so■may■cause■heat■buildup■inside■the■ machine,■resulting■in■malfunction,■burns,■or■fire. ■ ■ Caution- Do■not■place■the■machine■in■a■location■where■air■fl■ ow■is■poor.■Doing■so■may■cause■fi■re■due■to■internal■ components■becoming■overheated. ■ ■ Caution- Do■not■place■or■store■the■machine■in■a■location■ where■direct■sunlight■or■heat■generation■might■ occur.■The■heat■may■deform■or■wear■out■the■exterior■ parts■or■negatively■affect■internal■parts.■Doing■so■ could■result■in■fire. ■ ■ Caution- Do■not■place■low■heat■resistant■material■near■the■ exhaust■vents.■Hot■air■may■come■from■the■exhaust■...
- Page 9 ■ ■ Caution- Do■not■tilt■the■machine■horizontally■more■than■±20■ degrees.■Doing■so■may■cause■the■entrance■of■foreign■ objects■in■the■housing■of■the■machine■which■could■ result■in■fire■or■electric■shock. ■ ■ Caution- If■the■machine’s■interior■is■not■cleaned■regularly,■ dust■will■accumulate.■Fire■and■breakdown■can■ result■from■heavy■accumulation■of■dust■inside■this■ machine. Contact■your■sales■or■service■representative■for■ details■about■and■charges■for■cleaning■the■machine’s■ interior. ■ ■ Caution- Unplug■the■power■cord■from■the■wall■outlet■before■ you■move■the■machine.■While■moving■the■machine,■ take■care■that■the■power■cord■is■not■damaged■under■ the■machine.■Failing■to■take■these■precautions■could■ result■in■fi■re■or■electric■shock. ■ ■ Caution- Do■not■use■attachments■not■recommended■by■ RICOH.■Use■of■an■incompatible■attachments■could■ cause■hazards■or■damage■to■the■product. ■ ■ Caution- Make■sure■to■install■the■projector■with■two■or■more■ people.■Otherwise,■it■is■likely■that■this■product■falls■ down■so■that■an■injury■may■result■while■the■product■ is■being■installed. English English...
- Page 10 Usage Notice ■ ■ Caution- Unplug■this■product■from■the■wall■outlet■and■take■ the■product■to■qualified■service■personnel■if■you■ encounter■any■of■the■following■conditions: a)■The■power■supply■cord■or■plug■is■damaged. b)■Liquid■has■been■spilled,■or■objects■have■fallen■ into■the■product. c)■The■product■has■been■exposed■to■rain■or■water. d)■The■product■does■not■operate■normally■when■ following■the■operating■instructions.■Adjust■only■ those■controls■that■are■covered■by■the■operating■ instructions. e)■The■product■has■been■dropped■or■damaged■in■ any■way.■(If■the■cabinet■should■break,■please■ handle■with■care■to■avoid■injury.) ■ ■ Caution- This■product■incorporates■glass■components,■ including■a■lens■and■a■lamp.■If■these■should■break,■ please■handle■with■care■to■avoid■injury■and■contact■ your■sales■representative■for■repair■service.■Avoid■ any■broken■pieces■of■glass■since■they■may■cause■ injury.■In■the■unlikely■event■that■the■lamp■ruptures,■ thoroughly■clean■the■area■around■the■projector■and■ discard■any■edible■items■placed■in■that■area■since■ they■may■be■contaminated. ■ ■ Caution- Do■not■place■anything■in■front■of■the■lens■while■the■ projector■is■operating.■Things■placed■in■front■of■the■ lens■may■overheat■and■burn■or■start■a■fire. ■ ■ Caution- Unauthorized■substitutions■may■result■in■fire,■...
- Page 11 Usage Notice ABOUT THE LAMP ■ ■ Warning- When■the■lamp■reaches■the■end■of■its■life,■it■will■burn■ out■and■may■make■a■loud■popping■sound.■If■this■ happens,■the■projector■will■not■turn■back■on■until■ the■lamp■module■has■been■replaced.■To■replace■the■ lamp,■follow■the■procedures■listed■under■“Replacing■ the■Lamp”. ■ ■ Warning- Before■replacing■the■lamp,■turn■off■the■power■and■ wait■at■least■one■hour■to■allow■the■machine■to■cool■ completely.■If■it■is■not■completely■cool,■you■may■ burn■or■injure■yourself■due■to■the■inside■of■the■ machine■and■lamp■unit■being■hot.■If■you■replace■the■ lamp■without■unplugging■the■power■cord■from■the■ power■outlet,■electric■shock■or■explosion■may■occur. ■ ■ Warning- Be■careful■when■handling■the■used■lamp■so■that■it■ does■not■break.■If■it■breaks,■it■may■cause■injury. ■ ■ Caution- This■projector■will■detect■the■life■of■the■lamp■itself.■ Be■sure■to■change■the■lamp■when■it■shows■warning■ messages. ■ ■ Caution- The■machine’s■light■uses■a■mercury■vapor■lamp■that■ becomes■high■pressure■when■it■is■turned■on.■The■ lamp■has■the■following■characteristics,■so■be■sure■to■...
- Page 12 Usage Notice ■ ■ If■the■lamp■explodes,■a■very■small■amount■of■ mercury■vapor■in■the■lamp■tube■and■broken■glass■ pieces■may■be■ejected■from■the■vents■or■other■ opening. What to do if a lamp has exploded If the lamp explodes, remove the power cord from the projector, leave the room while making sure it is thoroughly ventilated. If the lamp explodes and you think that you have gotten glass particles or mercury vapor in your eyes or have inhaled either, contact a doctor immediately.
- Page 13 Usage Notice REMOTE CONTROL BATTERY Warning •■ Never■throw■batteries■into■a■fire. Using■the■batteries■improperly■may■cause■them■to■explode■or■leak■ and■may■result■in■serious■injury.■If■battery-leaking■fluid■contacts■ skin,■wash■the■fluid■off■immediately■with■clean■water■and■consult■a■ doctor.■If■the■fluid■spills■on■an■instrument,■avoid■contact■and■wipe■ it■off■using■tissue■paper.■Then■dispose■of■the■used■tissue■paper■as■ flammable■garbage■after■moistening■the■tissue■with■water. •■ Keep■new■and■used■batteries■away■from■children. If■the■battery■compartment■does■not■close■securely,■stop■using■the■ product■and■keep■it■away■from■children.■If■you■think■batteries■might■ have■been■swallowed■or■placed■inside■any■part■of■the■body,■seek■ immediate■medical■attention. Notes •■ Be■sure■to■use■AA■size■batteries. •■ Dispose■of■batteries■in■a■designated■disposal■area. •■ Attention■should■be■drawn■to■the■environmental■aspects■of■battery■ disposal. •■ If■the■remote■control■does■not■operate■correctly,■or■if■the■operating■ range■becomes■reduced,■replace■the■batteries. •■ Avoid■contact■with■water■or■liquid. •■ Do■not■expose■the■remote■control■to■moisture■or■heat. •■ Do■not■drop■the■remote■control. •■ If■the■batteries■have■leaked■in■the■remote■control,■carefully■wipe■ the■case■clean■and■install■new■batteries. •■...
-
Page 14: Safety.labels.of.this.machine
Usage Notice Safety Labels of This Machine 1.■Do■not■look■into■the■lens■while■the■lamp■is■on.■The■strong■ light■from■the■lamp■may■cause■damage■to■your■eyesight. 2.■Do■not■place■anything■in■front■of■the■lens■while■the■ projector■is■operating.■Things■placed■in■front■of■the■lens■ may■overheat■and■burn■or■start■a■fire. 3.■■This■product■should■be■operated■only■from■the■type■of■ power■source■which■does■not■exceed■the■voltage■range■ specifi■ed■on■the■rating■label■and■the■power■cord. 4.■To■replace■the■lamp,■unplug■the■power■cord■and■then■wait■ for■60■minutes. English... -
Page 15: Regulation.&.Safety.notices
MODEL NAME: RICOH PJ WU6480 / RICOH PJ X6480 / RICOH PJ WU6590 / RICOH PJ X6590 TRADE NAME: PROJECTOR MODEL NAME: RICOH PJ WU6480 / RICOH PJ X6480 / RICOH PJ WU6590 / RICOH PJ X6590 Tested To Comply... - Page 16 Usage Notice RESPONSIBLE PARTY: Ricoh USA, Inc. 70 Valley Stream Parkway Malvern, Pennsylvania 19355 Phone: 610-296-8000 Notice: Shielded cables All■connections■to■other■computing■devices■must■be■made■ using■shielded■cables■to■maintain■compliance■with■FCC■ regulations. Caution Changes■or■modifi■cations■not■expressly■approved■by■the■ manufacturer■could■void■the■user’s■authority,■which■is■ granted■by■the■Federal■Communications■Commission,■to■ operate■this■projector. LAMP(S) INSIDE THIS PRODUCT CONTAIN MERCURY AND MUST BE RECYCLED OR DISPOSED OF ACCORDING TO LOCAL, STATE OR FEDERAL LAWS.
- Page 17 Usage Notice Declaration of Conformity for EU countries ■ ■ EMC■Directive■2014/30/EU■(including■amendments) ■ ■ Low■Voltage■Directive■2014/35/EU Notice: Users in EU countries CE Marking Traceability Information (For EU Countries Only) Manufacturer: Ricoh■Co.,■Ltd. 3-6■Nakamagome■1-chome,■Ohta-ku,■Tokyo.■143-8555,■ Japan Importer: Ricoh■Europe■PLC 20■Triton■Street,■London.■NW1■3BF,■United■Kingdom User Information on Electrical and Electronic Equipment Users■in■the■countries■where■this■symbol■shown■in■this■section■...
- Page 18 Usage Notice •■ The■lamp■contains■mercury. Please■dispose■of■this■product■or■used■lamps■in■accordance■ with■local■regulations. The■symbol■indicates■that■the■product■must■not■be■treated■ as■municipal■waste.■It■must■be■disposed■of■separately■via■ the■appropriate■return■and■collection■systems■available.■By■ following■these■instructions■you■ensure■that■this■product■is■ treated■correctly■and■help■to■reduce■potential■impacts■on■the■ environment■and■human■health,■which■could■otherwise■result■ from■inappropriate■handling. Recycling■of■products■helps■to■conserve■natural■resources■and■ protect■the■environment. For■more■detailed■information■on■collection■and■recycling■ systems■for■this■product,■please■contact■the■shop■where■ you■purchased■it,■your■local■dealer■or■sales/service■ representatives. Notice: Users in Turkey AEEE■Yönetmeliğine■Uygundur. Bu■sistem■sarf■malzemeleri■ve■yedek■parçaları■da■dahil■olmak■üzere■ AEEE■Yönetmeliğine■Uygundur. All Other Users If■you■wish■to■discard■this■product,■please■contact■your■local■ authorities,■the■shop■where■you■bought■this■product,■your■ local■dealer■or■sales/service■representatives. English...
- Page 19 Usage Notice Notice: Users in the EU Note for the Battery and/or Accumulator Symbol In■accordance■with■the■Battery■Directive■2006/66/EC■Article■ 20■Information■for■end-users■Annex■II,■the■above■symbol■is■ printed■on■batteries■and■accumulators.■This■symbol■means■ that■in■the■European■Union,■used■batteries■and■accumulators■ should■be■disposed■of■separately■from■your■household■waste.■ In■the■EU,■there■are■separate■collection■systems■for■not■only■ used■electrical■and■electronic■products■but■also■batteries■and■ accumulators.■Please■dispose■of■them■correctly■at■your■local■ community■waste■collection/recycling■centre. Notice: Users in Taiwan 廢電池請回收 請勿將電池當作一般垃圾丟棄。這個標 誌表示電池不應視為一般垃圾丟棄。僅 適用於台灣。 English English...
-
Page 20: Other.information
Usage Notice Other Information Copyrights to Images When■projecting■images■using■the■projector,■be■careful■not■to■ infringe■the■copyright■of■protected■materials. The■following■are■examples■that■may■infringe■the■copyright■of■ protected■materials. •■ Broadcasting■images■or■movies■for■commercial■purposes •■ Modifying■images■or■movies■using■functions■such■as■freeze,■ magnify,■or■zoom■to■broadcast■images■for■commercial■ purposes■or■public■viewing •■ Varying■the■aspect■ratio■of■images■or■movies■using■a■ function■that■changes■the■screen■size■to■broadcast■images■ for■commercial■purposes■or■public■viewing Note■to■Users■Viewing■3D■Images Pay■attention■to■the■following■points■when■viewing■images■ using■3D■glasses■with■projector: •■ How■3D■images■are■viewed■may■vary■according■to■the■ individual. •■ Do■not■use■3D■glasses■for■viewing■any■material■other■than■ 3D■images. •■ Before■viewing■3D■images,■make■sure■to■read■the■manuals■ provided■with■your■3D■glasses■and■3D■compatible■content. •■ Avoid■viewing■3D■images■for■a■long■period■of■time.■Take■a■ break■of■15■minutes■or■longer■after■every■hour■of■viewing. •■ If■you■feel■sick■while■viewing■3D■images,■stop■viewing■ them.■If■you■continue■to■feel■sick,■consult■a■doctor. •■ When■viewing■3D■image■in■a■room■where■on■LED■lighting■ system■or■fluorescent■lights■are■used,■you■may■feel■that■the■... -
Page 21: Introduction
Introduction Introduction Product Features Outstanding features include: ■ ■ PJ■X6590■/■PJ■X6480:■Native■1024■x■768■XGA■resolution■with■ Auto/4:3/16:9■aspect■ratio■supported ■ ■ PJ■WU6590■/■PJ■WU6480:■Native■1920■x■1200■WUXGA■ resolution■with■Auto/Full/4:3/16:9/Zoom■aspect■ratio■ supported ■ ■ 3D■function■with■Blu-Ray■3D■supported■for■projecting■3D■ content■using■DLP■Link■Technology ■ ■ High■brightness■and■contrast■ratio ■ ■ Various■picture■modes ■ ■ NTSC/PAL/SECAM■and■HDTV■(720p,■1080i,■1080p)■ compatibility■ ■ ■ Lower■power■consumption■and■economy■(ECO)■mode■for■ extending■lamp■life ■ ■ Auto■Dimming■mode■to■decrease■the■power■consumption■ of■the■lamp■by■up■to■70%■when■no■input■signal■is■detected■ for■5■minutes,■which■decreases■lamp■power■consumption■ and■further■extends■the■lamp■life ■... -
Page 22: Package.overview
Introduction Package Overview This projector comes with all the items shown below. Check to make sure your unit is complete. Contact your dealer immediately if anything is missing. (*)■Due■to■the■ difference■in■ applications■for■each■ country,■some■regions■ may■have■different■ accessories. Projector Remote■Control■■ (with■Batteries,■please■see■page■31) Power■Cord■(*) CD-ROM RGB■Cable Read■This■First■(*) ■Warranty■(*) -
Page 23: Product.overview
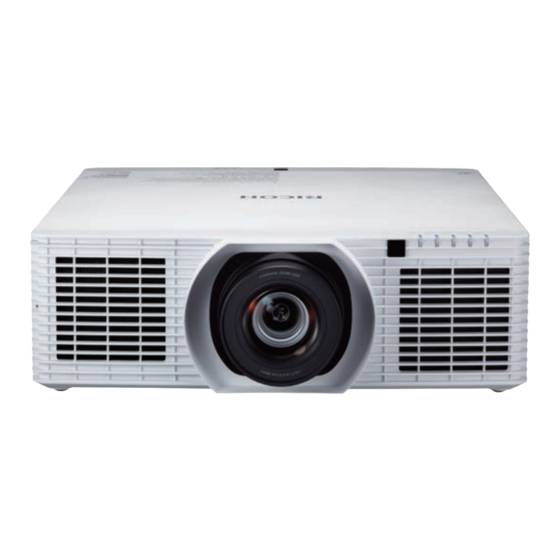
Introduction Product Overview 1. Security■bar 2. Projection■lens■(optional) 3. Remote■receiver 4. Indicator■LED 5. Connection■ports 6. Control■panel English English... -
Page 24: Connection.ports
Introduction Connection Ports 10 11 12 13 14 15 16 The■interface■is■ subject■to■model’s■ specifications. Wired■remote■control■In■terminal Wired■remote■control■Out■terminal Compatible■with■ PC-Contorl■(Out)■terminal MHL■version■2,■the■ charging■power■ RC-Control■(In)■terminal 5V@0.9A. S-Video■In■terminal HDBaseT■ Video■In■terminal terminal■is■available■ for■PJ■WU6590/PJ■ Computer2■In■terminal WU6480. Computer1■In■terminal Monitor■Out■terminal ■3G-SDI■terminal■ is■available■for■PJ■ HDMI■1/MHL■terminal WU6590. DVI-D■In■terminal Service■terminal USB-A■terminal LAN■terminal 3D■sync■terminal... -
Page 25: Control.panel
Introduction Control Panel Power Refer■to■the■“Powering■On/Off■the■ Projector”■on■page■38. Test■Pattern Display■the■test■pattern. Light Turn■on■or■off■the■back■light■of■the■ control■panel. Menu Press■“Menu”■to■launch■the■on■screen■ display■(OSD),■or■go■back■to■the■ previous■menu.■(See■page■49) Enter Select■or■confirm■settings. Four■ Use■ ,■ ,■ ,■or■ ■to■select■items■or■ Directional■ make■adjustments■to■your■selection. Select■Keys Input Press■“Input”■to■choose■your■desired■ input■source. Exit Cancel■the■selection,■or■go■back■to■ previous■page. Auto■Set Automatically■synchronize■the■ projector■to■the■input source. English English... - Page 26 Introduction 10 Lens■Shift Press■“Lens■Shift”■and■the■indicator■ below■lights■up.■Use■ ,■ ,■ ,■or■ ■ to■shift■the■projection■lens. 11 Focus Press■“Focus”■and■the■indicator■below■ lights■up.■Use■ ,■ ,■ ,■or■ ■to■ adjust■the■focus■setting. 12 Zoom Press■“Zoom”■and■the■indicator■below■ ,■ ,■ ,■or■ lights■up.■Use■ to■adjust■the■zoom■setting. 13 Indicator■light■ The■indicator■lights■up■when■“Lens■ for■“Lens■Shift” Shift”■is■pressed. 14 Indicator■light■ The■indicator■lights■up■when■“Focus”■ for■“Focus” is■pressed. 15 Indicator■light■ The■indicator■lights■up■when■“Zoom”■ for■“Zoom”...
-
Page 27: Remote.control
Introduction Remote Control 13 28 Power■On Refer■to■the■“Powering■On/Off■the■ Projector”■on■page■38. Light Turn■on■or■off■the■back■light■of■the■remote■ control. Standby Refer■to■the■“Powering■On/Off■the■ Projector”■on■page■38. Comp.1 Press■“Comp.1”■to■choose■Computer1■In■ terminal. English English... - Page 28 Introduction Comp.2 Press■“Comp.2”■to■choose■Computer2■In■ terminal. HDMI Press■“HDMI”■to■choose■between■ HDMI1/MHL■In■and■HDMI2■In■terminal. Video Press■“Video”■to■choose■between■Video■In■ and■S-Video■In■terminal. DVI-D Press■“DVI-D”■to■choose■DVI-D■In■ terminal. Opt. Press■“Opt.”■to■choose■optional■board■ terminal. 10 Lens■Shift Press■“Lens■Shift”■and■the■indicator■ below■lights■up.■Use■ ,■ ,■ ,■or■ ■to■ shift■the■projection■lens. 11 Focus Press■“Focus”■and■the■indicator■below■ lights■up.■Use■ ■or■ ■to■adjust■the■ focus■setting. 12 Zoom Press■“Zoom”■and■the■indicator■below■ lights■up.■Use■ ■or■ ■to■adjust■the■ zoom■setting. 13 Indicator■ The■indicator■lights■up■when■“Lens■Shift”■...
- Page 29 Introduction 19 Exit Cancel■the■selection,■or■go■back■to■ previous■page. 20 Four■ Use■ ,■ ,■ ,■or■ ■to■select■items■or■ Directional■ make■adjustments■to■your■selection. Select■Keys 21 Auto■Set Automatically■synchronize■the■projector■ to■the■input■source. 22 Picture Select■the■preset■picture■mode. 23 MHL Press■“MHL”■to■control■your MHL■device. 24 Mute Momentarily■turn■off/on■the■audio■and■ video. 25 Freeze Pause■the■screen■image.■Press■again■to■ resume■the■screen■image. 26 Aspect Use■this■function■to■choose■your■desired■ aspect■ratio. 27 Status Display■the■projector■status.
- Page 30 Introduction 33 Set Set■the■code■for■this■remote■control.■Press■ and■hold■“Set”■until■the■backlight■on■the■ remote■control■blinks■and■then■press■a■ number■(01,■02,■03...99)■to■designate■an ID.■You■can■control■projector■with■the■ matching■ID■set■in■the■“Options”■>■ “Control”■>“Projector■ID”■OSD. Press■and■hold■“All”■and■“Set”■until■the■ remote■control■blinks■a■single■instance■to■ reset■the■ID■to■“0”. English...
-
Page 31: Remote.control.battery.installation
Introduction Remote Control Battery Installation ■■ P ush■the■clip■to■release■ ■■ I nstall■new■batteries■ ■■ C lose■the■battery■cover■ the■battery■cover. (AA/R6/LR6).■Ensure■ and■press■it■down■until■ that■you■have■the■ it■clicks■into■place.■Do■ batteries’■polarity■(+/–)■ not■mix■different■types■ aligned■correctly. of■batteries■or■new■and■ old■batteries. ■To■ensure■safe■operation,■please■observe■the■following■precautions■: ■ ■ Use■AA/R6/LR6■type■battery. ■ ■ Avoid■contact■with■water■or■liquid. ■ ■ Do■not■expose■the■remote■control■to■moisture■or■heat. ■ ■ Do■not■drop■the■remote■control. ■ ■ If■the■battery■has■leaked■in■the■remote■control,■carefully■wipe■the■case■clean■and■ install■new■battery. -
Page 32: Remote.control.operating.range
Introduction Remote Control Operating Range Point■the■remote■control■toward■the■projector■(Remote■Receiver)■ when■pressing■any■button. Maximum■operating■range■for■the■remote■control■is■about■23.0’■(7m)■ and■±30°■(horizontally),■±20°■(vertically)■in■front■of■the■projector. 23.0’ (7m) ±30° (horizontally), ±20° (vertically) 23.0’ (7m) ±30° (horizontally), ±20° (vertically) ■ English... -
Page 33: Basic Operations
Basic Operations Basic Operations Installing the Projection Lens 1.■Remove■the■front■lens■cap■and■rear■lens■cap■from■the■ Use■RICOH■PJ■ optional■lens. Replacement■Lens■ 2.■Remove■the■dust■cap■and■upper■lens■cover■from■the■ Type■C1/C2/C3/ projector. C4/C5/C6. 3.■Insert■the■projection■lens.■ 4.■Turn■the■lever■counterclockwise■until■you■feel■it■click■into■ place■to■lock■the■lens■in■position.■ 5.■Install■the■upper■lens■cover■back.■ Removing the Projection Lens 1.■Remove■the■upper■lens■cover.■ 2.■Turn■the■lever■clockwise■to■release■the■lens.■ 3.■Pull■out■the■projection■lens.■ 4.■Replace■the■upper■lens■cover■and■the■dust■cap. English English... -
Page 34: Using.the.projector.in.portrait.mode
Basic Operations Using the Projector in Portrait Mode Portrait■projection■is■possile■by■installation■with■the■terminal■side■ facing■up.■In■that■case,■the■projector■can■be■tilted■up■to■+/-■45■ When■the■projector■ degrees.■ enters■portrait■mode,■ 360■degree■projection■ is■not■supported. When■the■projector■ enters■portrait■mode,■ Picture■Mode■will■ be■changed■to■sRGB.■ Some■Picture■Modes■ may■not■be■available. The■projector■automatically■enters■portrait■mode■by■detecting■the■ installation■angle.■When■entering■portrait■mode,■the■following■ message■will■be■displayed.■It■is■also■displayed■at■power■on■in■portrait■ mode. This■message■can■be■disabled■when■“Options■>■Status■Display”■is■set■ to■“Off”. Notify Projector is now in portrait mode. 360 degree projection is not supported. English... -
Page 35: Removing.and.installing.the.. Ricoh.pj.expansion.board
Basic Operations Removing and Installing the RICOH PJ Expansion Board There■are■2■optional■slots■for■you■to■install■the■expansion■board■you■ want.■Before■removing■or■installing■the■expansion■board,■be■sure■to■ turn■off■the■projector,■wait■until■the■cooling■fans■stop,■and■unplug■the■ Do■not■install■2■ power■cord. Expansion■Board■ 1.■Loosen■the■screws■of■the■expansion■board■on■the■optional■ for■Blending■ slot■by■turning■them■counterclockwise.■ simultaneously.■The■ projector■can■only■ 2.■Pull■out■the■expansion■board. recognize■one 3.■Insert■the■expansion■board■into■the■projector. when■that■happens. 4.■Tighten■the■screws■on■the■board■by■turning■them■clockwise. The■Expansion■ Board■can■be■set■to■ both■optional■slot. Do■not■leave■the■ optional■expansion■ board■uncovered during■operation. English English... -
Page 36: Connecting.the.projector
Basic Operations Connecting the Projector Make■sure■that■ Connect to Computer/Notebook/AV the■power■plug■is■ equipment/other devices fully■inserted■into■ both■the■projector■ AC■inlet■and■the■ wall■outlet. The■AC■outlet■ Wired must■be■near■this■ remote glasses control equipment■and■ must■be■easily■ 3D emitter accessible. Due■to■the■ difference■in■ 3G-SDI applications■for■ module each■country,■ some■regions■may■ have■different■ accessories. To■ensure■the■ ... -
Page 37: Connect To Hdbaset Module (Pj Wu6590 / Pj Wu6480)
Basic Operations Connect to HDBaseT Module (PJ WU6590 / PJ WU6480) HDBaseT■is■a■connectivity■standard■for■whole-house■and■commercial■ distribution■of■uncompressed■HD■multimedia■content.■After■ installing■the■HDBaseT■module■to■the■projector■and■using■the■ HDBaseT■switching■matrix■(commercially■available),■you■may■ connect■multiple■sources■to■your■projector■with■HDBaseT■connection. IR TX VGA IN YPbPr RJ45 HDMI RS232 RJ45 The■illustration■is■ HD Connect IR RX for■reference■only,■ Use■a■shielded■LAN■cable■up■to■100■meters■in■length■rated■at■ ■ actual■layout ™ may■vary. CAT5e■or■better. The■maximum■transmission■distance■is■100■m.However,■it■ ■... -
Page 38: Powering.on/Off.the.projector
Basic Operations Powering On/Off the Projector If■you■connect■ Powering On the Projector multiple■sources■ 1.■Ensure■that■the■power■cord■and■signal■cable■are■securely■ at■the■same■time,■ connected.■The■Power■indicator■will■turn■red. press■“Input”■on■ the■control■■panel■ 2.■Remove■the■lens■cap.■ or■the■desired■ 3.■Turn■on■the■lamp■by■pressing■the■ ■button■on■the■control■ source■button■on■the■ panel■or■ on■the■remote■control.■■The■Power■indicator■ remote■control■to■ will■flash■blue. switch■inputs. The■startup■screen■will■display■and■the■Power■indicator■will■ turn■blue. 4.■Turn■on■your■source■(computer,■notebook,■video■player,■ etc.)■The■projector■will■detect■your■source■automatically. Turn■on■the■ Make■sure■that■the■“Auto■Source”■has■been■set■to■“On”. projector■first■and■ then■the■signal■ CAUTION: sources. •. Do.not.look.into.the.lens.while.the.lamp.is.on..The.strong.light. from.the.lamp.may.cause.damage.to.your.eyesight. -
Page 39: Powering.off.the.projector
Basic Operations Powering Off the Projector 1.■Press■the■ ■button■and■you■will■see■a■message■on■the■on- screen■display. 2.■Press■the■ ■button■again■to■turn■off■the■projector■lamp. 3.■The■cooling■fan■continues■to■operate■for■about■30■seconds■ for■cooling■cycle■and■the■Power■indicator■will■flash■red.■ After■cooling■down,■the■light■stops■flashing,■and■then■the■ projector■will■enter■the■standby■mode. If■you■wish■to■turn■the■projector■back■on,■you■must■wait■ until■the■projector■has■completed■the■cooling■cycle■and■ has■entered■standby■mode■(when■“Turn■Off■Mode”■is■ “Standard“).■Once■in■standby■mode,■simply■press■the■ ■ button■on■the■control■panel■or■ ■button■on■the■remote■ control■to■restart■the■projector. 4.■Disconnect■the■power■cord■from■the■electrical■outlet■and■the■ projector. English English... -
Page 40: Warning.indicator
Basic Operations Warning Indicator When■the■“Temp”■indicator■lights■red,■it■indicates■the■ ■ ™ projector■has■overheated.■The■projector■will■automatically■ shut■itself■down. Error Projector Overheated. Lamp will automatically turn off soon. When■the■“Lamp■1”,■“Lamp■2“■indicator■or■both■light■ ■ ™ red,■the■projector■has■detected■that■the■lamp■failed■or■is■ approaching■its■end■of■life.■Please■change■the■lamp■as■soon■ as■possible■or■contact■your■local■dealer■or■our■service■center. Error Lamp 1 failed. The projector has entered “lamp 2“ mode. Notify Lamp 1 and Lamp 2 are approaching the end of its useful life. Replacement suggusted! When■the■“Temp”■indicator■flashes■red■(0.5■sec■on,■0.5■sec■... -
Page 41: Adjusting.the.projected.image
Basic Operations Adjusting the Projected Image Adjusting the Position of Projector Image The projector is equipped with adjustable feet to raise and lower the image to fill the screen. 1.■Locate■the■adjustable■foot■you■wish■to■modify■on■the■ underside■of■the■projector. 2.■Rotate■the■adjustable■ring■clockwise■to■raise■the■projector■ or■counter■clockwise■to■lower■it.■Repeat■with■the■remaining■ feet■as■necessary. You■can■incline■ the■projector■up■to■ 7°■±0.5°■by■rotating■ Front Adjustable feet Maximum Length: 20mm the■adjustable■feet. -
Page 42: Adjusting.projection.image.size
Screen (W) Projection Distance (D) Screen (H) Screen Width Side View Offset (Hd) Projection Distance (D) *Only for PJ WU6590/PJ WU6480 with Type C3/C4/C5/C6 lens 0.1W 0.1W 0.1W 0.1W [A]■differs■when■different■lens■is■installed. Lens installed for PJ WU6590/ Lens installed for PJ X6590/... - Page 43 Basic Operations PJ WU6590/PJ WU6480 with PJ Replacement Lens Type C3 Diagonal Screen Size W x H Projection Distance (D) Offset (Hd) length (inch) (feet) (feet) (inch) size of 16:10 Width Height Width Height Wide Tele Wide Tele Min. Max.
- Page 44 Basic Operations PJ WU6590/PJ WU6480 with PJ Replacement Lens Type C2 Diagonal Screen Size W x H Projection Distance (D) Offset (Hd) length (inch) (feet) (feet) (inch) size of 16:10 Width Height Width Height Wide Tele Wide Tele Min. Max.
- Page 45 Basic Operations PJ WU6590/PJ WU6480 with PJ Replacement Lens Type C5 Diagonal Screen Size W x H Projection Distance (D) Offset (Hd) length (inch) (feet) (feet) (inch) size of 16:10 Width Height Width Height Wide Tele Wide Tele Min. Max.
- Page 46 Basic Operations PJ X6590/PJ X6480 with PJ Replacement Lens Type C3 Diagonal Screen Size W x H Projection Distance (D) Offset (Hd) length (inch) (feet) (feet) (inch) size of 16:10 Width Height Width Height Wide Tele Wide Tele Min. Max. Min.
- Page 47 Basic Operations PJ X6590/PJ X6480 with PJ Replacement Lens Type C2 Diagonal Screen Size W x H Projection Distance (D) Offset (Hd) length (inch) (feet) (feet) (inch) size of 16:10 Width Height Width Height Wide Tele Wide Tele Min. Max. Min.
- Page 48 Basic Operations PJ X6590/PJ X6480 with PJ Replacement Lens Type C5 Diagonal Screen Size W x H Projection Distance (D) Offset (Hd) length (inch) (feet) (feet) (inch) size of 16:10 Width Height Width Height Wide Tele Wide Tele Min. Max. Min.
-
Page 49: User Settings
User Settings User Settings Using the On Screen Display (OSD) The Projector has a multilingual On Screen Display that allows you to make image adjustments and change a variety of settings. How to operate 1.■To■open■the■OSD,■press■“Menu”■on■the■Control■Panel■or■ Remote■Control. 2.■When■OSD■is■displayed,■use■ ■keys■to■select■any■item■ in■the■main■menu.■While■making■a■selection■on■a■particular■ page,■press■ or■“Enter”■key■to■enter■sub■menu. -
Page 50: Image.adjustment
User Settings Image Adjustment Picture Mode Presentation Brightness Contrast Saturation Tint Sharpness Gamma Standard(2.2) Color Temperature Advanced Select Enter Exit Image Adjustment Picture■Mode There■are■factory■presets■optimized■for■various■types■of■ images.■The■available■options: Picture Mode Bright Presentation Standard Vivid sRGB DICOM SIM. Bright:■Mode■for■emphasizing■brightness. ■ ` Presentation:■Mode■for■making■presentations. ■ ` Standard:■Mode■for■optimizing■the■balance■between■... - Page 51 User Settings Press■the■ ■key■to■decrease■the■contrast. ■ ` Press■the■ ■key■to■increase■the■contrast. ■ ` Saturation Adjust■the■color■saturation■of■the■image. Press■the■ ■key■to■decrease■the■amount■of■color■in■the■ ■ ` image. Press■the■ ■key■to■increase■the■amount■of■color■in■the■ ■ ` image. Tint Adjust■the■color■balance■of■the■image. Press■the■ ■key■to■adjust■the■image■color■greenish. ■ ` Press■the■ ■key■to■adjust■the■image■color■reddish. ■ ` Sharpness Adjust■the■sharpness■of■the■image. Press■the■ ■key■to■decrease■the■sharpness. ■ ` Press■the■ ■key■to■increase■the■sharpness. ■...
- Page 52 User Settings On:■Enable■NCE. ■ ` Off:■Disable■NCE. ■ ` Advanced Wall■Color ■ ` Use■this■function■to■obtain■an■optimized■screen■image■ according■to■the■wall■color.■The■available■options:■White/■ Light■Yellow/■Light■Blue/■Pink■/■Dark■Green. Wall Color White Light Yellow Light Blue Pink Dark Green NCE■Settings ■ ` NCE Settings Color Saturation Gain Reset Select Adjust Exit ■ – Color:■Use■ ■key■to■select■a■color■that■you■wish■to■...
-
Page 53: Display.settings
User Settings Display Settings Aspect Ratio Auto Phase Frequency H. Position V. Position Keystone Lens Normal Projection Advanced Select Enter Exit Display Settings Aspect■Ratio Use■this■function■to■choose■your■desired■aspect■ratio. Aspect Ratio Auto 16:9 16:10 Zoom Auto:■Automatically■selects■the■appropriate■display■format.■ ■ ` When■input■is■4:3,■the■image■is■displayed■as■4:3.■When■input■ is■16:9,■the■image■is■displayed■as■16:9. 4:3:■Displays■4:3■aspect■ratio. ■ ` 16:9:■Displays■16:9■aspect■ratio. ■... - Page 54 User Settings H.■Position■(Horizontal■Position) Shift■the■projected■image■position■horizontally. “H.■Position”■and■ “V.■Position”■functions■ Press■the■ ■key■to■move■the■image■left. ■ ` are■only■supported■ under■Computer■Signal■ Press■the■ ■key■to■move■the■image■right. ■ ` source. V.■Position■(Vertical■Position) Shift■the■projected■image■position■vertically. Press■the■ ■key■to■move■the■image■down. ■ ` Press■the■ ■key■to■move■the■image■up. ■ ` Keystone Adjust■image■distortion■caused■by■tilting■the■projector. Keystone V. Keystone H. Keystone Four Corners Reset Select Enter Exit V.■Keystone:■Adjust■the■vertical■keystone.
- Page 55 User Settings Lens Lens■Settings ■ ` Lens Settings Load Settings Save Settings Clear Settings Select Enter Exit ■ – Load■Settings:■Applys■the■settings■that■you■previously■ saved. ■ – Save■Settings:■After■making■lens■shift,■zoom■and■focus■ adjustments,■you■can■choose■a■set■of■setting■to■memorize■ current■lens■settings. ■ – Clear■Settings:■Clears■the■selected■lens■setting. Lens■Centering ■ ` Returns■the■lens■to■the■centered■position. Lens Settings Enter Exit Projection Use■this■function■to■select■the■projector■mode,■depending■ upon■how■the■projector■is■mounted. Projection Standard Ceiling...
- Page 56 User Settings ■ – Auto:■Automatically■detect■RGB■range. ■ – Limited■Range:■Process■the■input■image■as■standard■ range■data. ■ – Full■Range:■Select■this■mode■when■computer■signal■or■ full■range■signal■from■AV■equipment■is■input. Overscan ■ ` Use■this■function■to■conceal■the■poor■picture■quality■in■the■ four■edges. Startup■Screen ■ ` Use■this■function■to■select■an■image■to■be■displayed■during■ the■projector■start■up■procedure.■The■available■options:■Logo/■ User(Logo)/■Off. Background■on■No■Signal ■ ` Use■this■function■to■select■an■background■image■to■be■ displayed■when■no■signal■is■detected.■The■available■options:■ User(Logo)/■Blue/■Black. Screen■Capture ■ ` Use■this■function■to■customize■the■startup■screen. a.■Project■the■image■you■want■you■capture. b.■Select■“Screen■Capture“■and■press■ c.■A■dialog■box■appears■to■confirm■the■action.■Choose■“Yes”■ to■use■the■current■image■as■your■customized■startup■ screen.■(Choose■“No”■to■cancel■the■screen■capture■and■ exist■the■Onscreen■Display). d.■A■message■appears■stating■that■the■screen■capture■is■in■...
- Page 57 User Settings “Background■on■No■Signal“. Test■Pattern ■ ` Use■this■function■to■display■different■test■patterns■to■help■you■ adjust■the■size,■focus■and■colors■and■check■that■the■projected■ image■is■free■from■distortion.■The■available■options:■Off/■Grid■ /■White/■Color■Bar. Closed■Caption ■ ` Use■this■function■to■select■a■preferred■closed■captioning■mode. Caption■is■an■on-screen■display■of■the■dialogue,■narration,■ and■sound■effects■of■TV■programs■and■videos■that■are■closed■ captioned■(usually■marked■as■“CC”■in■TV■listings).■The■ available■options:■Off/■CC-1■/■CC-2/■CC-3■/■CC-4.■CC-1■ displays■captions■in■the■primary■language■in■your■area Auto■Dim:■Choose■“On”■to■dim■the■lamp■power,■depending■ ■ ` on■the■brightness■level■of■images,■and■significantly■reduce■ the■lamp■power■consumption.■The■lamp■life■will■be■ extended. English English...
-
Page 58: Default.settings
User Settings Default Settings Language Auto Source Input Source Computer1 Auto Power Off (Min) Standby Settings Network Security Reset Enter Exit Select Default Settings Language Choose■the■Language.■Press■“Enter”■to■open■the■sub■menu■ and■then■use■the■ ,■ ,■ ,■or■ ■key■to■select■your■preferred■ language.■Press■“Enter”■to■finalize■the■selection. Language Select Enter Exit Auto■Source When■this■function■is■turned■“On”,■the■projector■will■search■ for■other■signals■if■the■current■input■signal■is■lost.■When■ this■function■is■turned■“Off”,■it■will■only■search■a■specified■ connection■port. - Page 59 User Settings Input Source Select Enter Exit Auto■Power■Off■(Min) Sets■the■countdown■timer■interval.■The■countdown■timer■will■ start,■when■there■is■no■signal■being■sent■to■the■projector.■The■ Default■value■of■ projector■will■automatically■power■off■when■the■countdown■ “Auto■Power■Off■(Min)”■ is■20■min. has■finished■(in■minutes).■When■countdown■timer■is■selected■ to■“0”,■auto■power■off■is■disabled. Standby■Settings Monitor■Out ■ ` Enable/Disable■the■Monitor■output■function. ■ – On:■Enable■the■Monitor■Out■function■at■projector■standby■ status. ■ – Off:■Disable■the■Monitor■Out■function■at■projector■ standby■status. Network■ ■ ` Enable/Disable■the■network■function. ■ – On:■Enable■the■network■function■at■projector■standby■ status. ■ – Off:■Disable■the■network■function■at■projector■standby■ status.
- Page 60 User Settings Network Status DHCP IP Address Subnet Mask Apply MAC Address Select Enter Exit Status:■Display■the■network■connection■status. ■ ` DHCP:■Select■On■to■allow■the■projector■to■obtain■an■ ■ ` IP■address■automatically■from■your■network.■Select■ “Off”■to■manually■assign■IP,■Subnet■Mask■and■Gateway■ configuration. IP■Address:■Set■an■IP■address■or■display■IP■address■ ■ ` provided■from■DHCP■server■when■DHCP■is■set■to■“On”. Subnet■Mask:■Set■subnet■mask■number■or■display■subnet■ ■ ` mask■number■provided■from■DHCP■server■when■DHCP■is■ set■to■“On”. Apply:■Select■“Yes”■to■apply■the■changes■made■in■network■ ■ ` configuration■settings. Apply Enter Exit MAC■Address:■Display■MAC■address.
- Page 61 User Settings menus■except■Language■and■Lamp■Hours■Used■to■the■factory■ default■settings. Reset Enter Exit English English...
-
Page 62: Options
User Settings Options Lamp Settings Filter Settings High Altitude Status Display Power Settings Control Information Enter Exit Select Options Lamp■Settings Use■this■option■to■view■the■lamp■life■status■and■configure■the■ lamp■settings.■Press■the■►■key■to■enter■the■sub■menu■and■ configure■the■desired■settings. Lamp Settings Lamp Mode Dual Lamp Power Mode Normal Lamp 1 Hours Used Lamp 2 Hours Used Lamp Switch On Failure Only Lamp Life Reminder... - Page 63 User Settings Lamp■Switch:■Control■when■the■projector■switches■lamps.■ ■ ` The■options■include:■■“On■Failure■Only”,■“At■Power-Up”■or■ after■“24H“■/■“50H“■/■“100H“■(hours). Lamp Switch On Failure Only At Power-Up 100H Lamp■Life■Reminder:■Choose■this■function■to■show■or■ ■ ` to■hide■the■warning■message■when■the■changing■lamp■ message■is■displayed.■The■message■will■appear■30■hours■ before■suggested■replacement■of■lamp. Reset■Lamp■1■Timer:■Reset■the■lamp■used■hours■counter■for■ ■ ` Lamp■1■to■zero.■Do■this■after■changing■the■lamp. Reset■Lamp■2■Timer:■Reset■the■lamp■used■hours■counter■for■ ■ ` Lamp■2■to■zero.■Do■this■after■changing■the■lamp. Filter■Settings Filter Settings Filter Hours Used Filter Reminder Reset Select Enter Exit Filter■Hours■Used:■Display■the■filter■usage■time.
- Page 64 User Settings ■ – Standard:■The■projector■will■enter■fan■cooling■process■ after■being■turned■off. ■ – Instant■Resume:■The■projector■allows■you■to■restart■it■ within■2■minutes■after■being■turned■off. Control Control HDMI CEC Projector ID Trigger Out Control Channel PC Control Select Enter Exit HDMI■CEC:■Use■this■function■for■synchronized■power■ON/ ■ ` OFF■operation■between■the■projector■and■a■CEC-compatible■ device■connected■to■the■HDMI/MHL■port■of■the■projector. Projector■ID:■Set■the■remote■control■ID■for■this■projector.■ ■ ` When■multiple■adjacent■projectors■are■in■operation■at■the■ same■time,■switching■the■remote■control■codes■can■prevent■ interference■from■other■remote■controls.■After■the■Projector■ ID■is■set,■switch■to■the■same■ID■for■the■remote■control■to■ control■this■projector. Trigger■Out:■Set■the■port■to■provide■trigger■out■function.■■ ■ ` The■available■options:■Off■/■DC■Out■1■/■DC■Out■2■/■1■&■2.
- Page 65 User Settings input■source. Picture■Mode:■Display■current■Picture■Mode. ■ ` Lamp■Mode:■Display■current■Lamp■Mode. ■ ` Total■Time:■Display■the■lamp■hours. ■ ` Lamp■1■Time:■Display■the■Lamp■1■hours. ■ ` Lamp■2■Time:■Display■the■Lamp■2■hours. ■ ` Lamp■Power:■Display■current■Lamp■Power. ■ ` Filter■Hours■Used:■Display■the■filter■hours. ■ ` Inlet■Temp:■Display■the■temperature■taken■in■the■inlet. ■ ` Serial■Number:■Display■the■serial■number■for■this■projector. ■ ` FW■Version:■Display■the■firmware■version. ■ ` English English...
- Page 66 User Settings 3D Sync DLP-Link 3D Format Auto 3D Sync Invert Enter Exit Select 3D■Sync Use■this■option■to■select■the■appropriate■3D■function. Compatible■3D■ DLP-Link:■Choose■“DLP-Link”■to■use■DLP■Link■3D■Glasses. ■ ` source,■3D■content■ External:■Choose■“External”■to■use■VESA■3D■emitter■and■3D■ ■ ` and■Optical■3D■ Glasses. glasses■are■required■ for■3D■viewing. 3D■Format ■■ ■ “3D■Sync■Invert”■is■ Use■this■option■to■select■the■appropriate■3D■format■content. only■available■when■ 3D Format 3D■is■enabled. Auto Side by Side This■setting■may■...
- Page 67 User Settings On:■Choose■“On”■to■invert■left■and■right■frame■contents. ■ ` English English...
-
Page 68: Lan Control
LAN Control LAN Control Controlling this Device with Web Browser You■can■control■this■device■from■a■PC■by■using■a■web■browser. Connecting to the device 1.■Confirmation of the IP address of the device Select■the■“Setting”■→■“Network”■in■the■menu■of■this■ device,■and■verify■the■IP■address.■(See■“Network”■on■page■ 59). Network Status DHCP IP Address Subnet Mask Apply MAC Address Select Enter Exit 2.■Connection Enter■the■IP■address■that■was■verified■by■opening■the■web■... -
Page 69: Crestron.tools
LAN Control •■ Computer •■ HDMI1/MHL •■ S-Video •■ HDMI2 •■ Video Other■buttons■work■in■the■same■manner■as■Projector■ ■ ` Control. Crestron Tools You■can■perform■settings■of■the■projector■network■and■Crestron■ Room■View. After■setting■the■ user■password,■you■ will■be■able■to■access■ Crestron’s■page■by■ entering■the■password. ■■ ■ After■enabling■the■ Admin■password,■you■ will■be■able■to■access■ the■page■of■Crestron■ tool■only■upon■entering■ the■Admin■password. Crestron Info You■can■display■information■about■the■firmware■version■of■the■ projector■and■status■of■the■lamp. Crestron■offers■the■ following■two■types■of■... -
Page 70: Control The Projector Via The Projector Management Utility
LAN Control Control the Projector via the Projector Management Utility Projector■Management■Utility■conforms■to■the■PJLink■class■1■ standards,■and■is■compatible■with■all■class■1■commands. A■maximum■of■100■projectors■connected■to■the■network■can■be■ This■software managed■using■one■computer. is■to■control■and monitor■projectors Projector■Management■Utility■operating■environment■is■ manufactured■by described■below. our■company.■The software■may■not •■ Supported■operating■system work■properly •■ Windows■Vista■(32-bit/64bit■version) when■used■to •■ Windows■7■(32-bit/64bit■version) control■other •■ Windows■8■(32-bit/64bit■version) projectors. •■ Windows■8.1■(32-bit/64bit■version) •■ Windows■10■(32-bit/64bit■version) •■ Windows■Server■2008■SP2■(32-bit/64bit■version) •■... -
Page 71: Register.projectors
LAN Control 7.■When■the■installation■is■complete,■exit■the■installer. A■shortcut■icon■is■created■on■the■desktop. Register projectors 1. Registers the projectors with Auto search. ■ – Click■[Register Projector]■button. ■ – Click■[Auto Search]■button. ■ – List■of■projectors■which■support■PJLink■are■displayed■ in■the■window.■Projector■name■is■displayed■as■ “********”■until■authorization■if■password■is■enable. English English... - Page 72 LAN Control ■ – Select■the■desired■projector■and■click■[Register]■ button.■Password■authorization■is■required■ if■password■of■the■projector■is■set■to■enable. ■ – Click■[OK]■button■to■return■to■the■original■screen. 2. Directly specifies the IP address and registers the projector. ■ – Enter■IP■address■of■the■desired■projector■and■click■■ [Confirm]■button■then■the■projector■name■will■be■ displayed.■After■confirming■the■projector■name,■click■ [Register]■button. English...
-
Page 73: Projector.management.utility
LAN Control Control the projector with the projector Management Utility Click■[Remote Control]■tab■and■select■the■desired■projector■ in■the■list.■You■can■control■the■selected■projector■by■clicking■ control■buttons■in■the■bottom■of■the■window.■ [Power] button Turn■“On/Off”■the■power■of■the■projectors■or■groups■selected■ from■the■Projector■(/Group)■List. [Input] button Switches■the■input■source■of■the■projectors■or■groups■selected■ from■the■Projector■(/Group)■List. Input■source■will■not■be■changed■if■the■projector■doesn’t■ support■the■selected■input■source. A■Table■of■input■source■name■in■the■projector■and■the■ projector■management■utility. The■projector The■projector■Management■Utility Computer■1 RGB■1 Computer■2 RGB■2 Video Video■1 S-Video Video■2 HDBaseT NETWORK■1 3G-SDI Video■3 HDMI1/MHL Digital■1 DVI-D... -
Page 74: Troubleshooting
Troubleshooting Troubleshooting If you experience trouble with the projector, refer to the following information. If the problem persists, please contact your local dealer or service center. Problem: No image appears on screen Ensure■all■the■cables■and■power■connections■are■correctly■ ■ ` and■securely■connected■as■described■in■the■“Connecting■the■ Projector”■section. Ensure■the■pins■of■terminals■are■not■crooked■or■broken. ■ ` Check■if■the■projection■lamp■has■been■securely■installed.■... - Page 75 Troubleshooting Problem: The screen of the Notebook computer is not displaying a presentation If■you■are■using■a■Notebook■PC: ■ ` Some■Notebook■PCs■may■deactivate■their■own■screens■ when■a■second■display■device■is■in■use.■Each■has■a■ different■way■to■be■reactivated.■Refer■to■your■computer’s■ documentation■for■detailed■information. Problem: Image is unstable or flickering Adjust■the■“Phase”■or■“Clock”■to■correct■it.■■ ■ ` Refer■to■the■“H.■Position■(Horizontal■Position)”■or■“V.■Position■ (Vertical■Position)”■section■for■more■information. Check■and■reconfigure■the■display■mode■of■your■graphic■ ■ ` card■to■make■it■compatible■with■the■product. Problem: Image is out of focus Adjust■the■Focus.■(refer■to■page■41) ■...
- Page 76 Troubleshooting Problem: Image is reversed Select■“Display■Settings”■>■“Projection”■from■the■OSD■ ■ ` menu■to■adjust■the■image. Problem: Lamp burns out or makes a popping sound When■the■lamp■reaches■its■end■of■life,■it■will■burn■out■and■ ■ ` may■make■a■loud■popping■sound.■If■this■happens,■the■ projector■will■not■turn■on■until■the■lamp■module■has■been■ replaced.■To■replace■the■lamp,■follow■the■procedures■in■the■ “Maintenance”. Problem: Indicator lighting message POWER■■ TEMP■ LAMP■1■ LAMP■2■ Filter■ indicator indicator indicator indicator indicator Status Steady■light■=>■...
- Page 77 Troubleshooting POWER■■ TEMP■ LAMP■1■ LAMP■2■ Filter■ indicator indicator indicator indicator indicator Status (Blue) (Red) (Red) (Red) (Red) (Red) Liquid■pump■ warning Problem: Message Reminders Temperature■Error■-■the■projector■is■overheat■inside.■Check■ ■ ` the■environmental■condition. Error Projector Overheated. Lamp will automatically turn off soon. Error Projector Overheated. Please clean the filter or change the filter if necessary. Replacing■the■lamp■-■the■lamp■is■about■to■reach■its■...
- Page 78 Troubleshooting Replacing■the■filter■-■the■filter■is■about■to■reach■its■maximum■ ■ ` usage■time.■Clean■or■replace■the■filter■soon. Notify The filter timer reaches to the predetermined time. Please check the filter. Wrong■direction■in■portrait■mode■-■if■the■projector■ ■ ` is■installed■in■the■wrong■direction,■the■projector■will■ automatically■shut■down. Error Wrong direction for portrait mode. Please change to correct direction. English...
-
Page 79: Maintenance
Warning:■Do■not■drop■ the■lamp■module■or■ touch■the■glass■parts.■ The■glass■parts■may■ Lamp Replacing Procedure: shatter■and■cause■ 1.■ Switch■off■the■power■to■the■projector■by■pressing■the■ ■ injury■if■it■is■dropped. button.■ 2.■ Allow■the■projector■to■cool■down■at■least■60■minutes. Warning:■For■ 3.■ Disconnect■the■power■cord. continued■safety■ 4.■ Use■a■screwdriver■to■remove■the■screw(s)■from■the■ replace■with■RICOH■ PJ■Replacement■Lamp■ cover. Type■29. 5.■ Open■the■cover. 6.■ Remove■the■screws■from■the■fan. Caution:■If■the■ 7.■ Pull■out■the■fan. lamp■should■break,■ 8.■ Remove■the■screw■on■the■lamp■module. handle■with■care■to■... -
Page 80: Replacing.the.filter
Maintenance Used Lamps This■projector’s■lamp■contains■trace■amounts■of■environmentally■ harmful■inorganic■mercury.■Be■careful■not■to■break■used■lamps,■and■ dispose■of■them■in■accordance■with■local■regulations■or■contact■your■ sales■representative. Replacing the Filter Replace■the■air■filter■when■it’s■damaged■or■too■soiled.■When■the■ warning■message■suggesting■replacement■displays■or■you■see■the■ filter■indicator■lights■up,■replace■the■filter■as■soon■as■possible. Warning:■For■ continued■safety■ replace■with■RICOH■PJ■ Replacement■Air■Filter■ Type■7. Filter Replacing Procedure: 1.■ Switch■off■the■power■to■the■projector■by■pressing■the■ ■ button.■ 2.■ Allow■the■projector■to■cool■down■at■least■60■minutes. 3.■ Disconnect■the■power■cord. 4.■ Use■a■screwdriver■to■remove■the■screw■from■the■cover. 5.■ Remove■the■cover. 6.■ Replace■the■filter.■ 7.■ Install■the■cover.■... -
Page 81: List.of.compatible.signals
Appendices List of Compatible Signals A. VGA Analog (1)■VGA■Analog■-■PC■Signal H.Frequency■ Modes Resolution V.Frequency■(Hz) (kHz) 31.47 37.86 37.5 640■x■480 43.27 61.91 35.2 37.88 48.08 SVGA 800■x■600 46.88 53.67 77.43 48.36 56.48 1024■x■768 60.02 68.68 98.96 63.85 1152■x■864 67.5 77.1 SXGA 63.98 76.97 1280■x■1024 79.98... - Page 82 Appendices 640■x■480 31.5 640■x■480 66.6■(67) 800■x■600 37.88 PowerBook■G4 1024■x■768 48.36 1024■x■768 60.241 1152■x■870 68.681 1280■x■768 47.78 WXGA 1280■x■768 60.29 1280■x■768 68.63 HD■720 1280■x■720 1280■x■800 49.7 WXGA 1280■x■800■-■RB 101.6 1440■x■900 55.94 WSXGA+ 1680■x■1050 65.29 Ricoh_16:9 1366■x■768 47.71 1920■x■1080-RB 66.6 HD■1080 1920■x■1080-EIA 67.5 WSVGA 1024■x■600...
- Page 83 Appendices B. HDMI (1)■HDMI■-■PC■Signal H.Frequency■ Modes Resolution V.Frequency■(Hz) (kHz) VGA_60 59.94 31.469 VGA_72 72.809 37.861 VGA_75 640■x■480 37.5 VGA_85 85.008 43.269 VGA_120 119.518 61.91 SVGA_56 56.25 35.156 SVGA_60 60.317 37.879 SVGA_72 72.188 48.077 800■x■600 SVGA_75 46.875 SVGA_85 85.061 53.674 SVGA_120 119.854 77.425 XGA_60...
- Page 84 Appendices WXGA_60 59.87 47.776 WXGA_75 1280■x■768 74.893 60.289 WXGA_85 84.837 68.633 WXGA_60 1280■x■720 WXGA_60 1280■x■800 59.81 49.702 WXGA_120-RB 1280■x■800 119.909 101.563 WXGA+_60 1440■x■900 59.887 55.935 1680x1050_60 1680■x■1050 59.954 65.29 Ricoh_16:9 1366■x■768 59.79 47.712 1920■x■1080_RB 1920■x1080 66.587 1920■x■1080_EIA 1920■x1080 67.5 Ricoh_timing 1024■x■600 37.5 1920■x■1200-RB...
- Page 85 Appendices 720■x■480■(1440■ 480i 15.73 x■480) 480p 720■x■480 31.47 720■x■576■(1440■ 576i 15.63 x■576) 576p 720■x■576 31.25 720p 1280■x■720 720p 1280■x■720 37.5 1080i 1920■x■1080 33.75 1080i 1920■x■1080 28.13 1080p 1920■x■1080 1080p 1920■x■1080 23.98 26.97 1080p 1920■x■1080 33.75 D. YPbPr H.Frequency■ Modes Resolution V.Frequency■(Hz) (kHz) 480i...
- Page 86 Appendices F. 3D Timming Input■timing 1280■X■720P■@■50Hz Top■-■and■-■Bottom 1280■X■720P■@■60Hz Top■-■and■-■Bottom HDMI■ 1280■X■720P■@■50Hz Frame■packing 3D■Input■ 1280■X■720P■@■60Hz Frame■packing (with■3D■ Info■Frame■ 1920■X■1080i■@■50■Hz Side-■by-Side■(Half) information) 1920■X■1080i■@■60■Hz Side-■by-Side■(Half) 1920■X■1080P■@■24■Hz Top■-■and■–■Bottom 1920■X■1080P■@■24■Hz Frame■packing 1920■x■1080i■@■50Hz Side-by- SBS■ 1920■x1080i■@■60Hz Side mode■is■ 1280■x■720P■@■50Hz (Half) Input■ HDMI■ 1280■x■720P■@■60Hz Resolutions 3D■Input■ (without■3D■ 1920■x■1080i■@■50Hz Info■Frame■...
-
Page 87: Configurations.of.terminals
Appendices Configurations of Terminals Terminal: Computer In (Mini D-sub 15 pin) [Monitor Out] Red (R/Cr) Input [R Output] DDC 5V [NC*] Green (G/Y) Input [G Output] Ground (Ver. sync.) Blue (B/Cb) Input [B Output] DDC Data [NC*] Ground (Horiz.sync.) Horiz. sync. Input [Output] (Composite H/V sync. -
Page 88: Terminal:.3D.sync
Appendices Terminal: 3D Sync Contact■your■dealer■ for■control■cable■and■ commands. +5VDC Stereo Sync ■ TTL Signal Parameter high” state >= 2.4 V for left-eye image >=2.4v low” state<=0.8 V for right-eye image; <=0.8v Duty cycle Terminal: 12V Trigger Out Contact■your■dealer■ for■control■cable. Terminal: Wired Remote In/Out IR Receivers Contact■your■dealer■... -
Page 89: Specifications
Appendices Specifications ■■List of general specifications Item RICOH PJ X6480 RICOH PJ X6590 RICOH PJ WU6480 RICOH PJ WU6590 DLP■chip 0.7”■DMD■XGA 0.67”■DMD■WUXGA Lamp■Type UHP■365W■x■2 •■ Type■C3:■■ •■ Type■C4:■■ F■=■1.6■–■2.0,■f■=■24.1■mm■–■35.8■mm,■ F■=■1.8■–■2.23,■f■=■35.2■mm■–■53.5■mm,■ 1:1.5■powered■zoom■and■powered■ 1:1.52■powered■zoom■and■powered■ focus focus •■ Type■C1:■■ •■ Type■C5:■■ Projection■Lens■ F■=■1.84■–■2.32,■f■=■11.3■mm■–■14.1■... - Page 90 Appendices Item RICOH PJ X6480 RICOH PJ X6590 RICOH PJ WU6480 RICOH PJ WU6590 •■ Operational■Temperatures:■32°■to■104°F■(0°■to■40°C);■up■to■90%■humidity■(non- condensing) Environment •■ Storage■Temperatures:■-14°■to■149°F■(-10°■to■65°C);■up■to■90%■humidity■(non- condensing) •■ Eco■Mode:■ •■ Eco■Mode:■ •■ Eco■Mode:■ •■ Eco■Mode:■■ 740W■@■110Vac,■ 740W■@■110Vac,■ 740W■@■110Vac,■ 740W■@■110Vac,■ Power■ 700W■@■220Vac 700W■@■220Vac 700W■@■220Vac 700W■@■220Vac Consumption •■ Standard■Mode:■...
-
Page 91: Cabinet.dimensions
Appendices Cabinet Dimensions Unit:■mm Holes for ceiling mount Screw type: M6 [B]■and■[C]■differ■when■different■lens■is■installed. Lens■installed Type■C3 Type■C1 Type■C2 Type■C4 Type■C5 Type■C6 English English... -
Page 92: Trademarks
Appendices Trademarks •■ DLP■is■trademarks■or■registered■trademark■of■Texas■ Instruments. •■ Microsoft,■Windows,■Windows■Vista,■Internet■Explorer■and■ PowerPoint■are■either■a■registered■trademark■or■trademark■ of■Microsoft■Corporation■in■the■United■States■and/or■other■ countries. •■ HDMI,■the■HDMI■Logo■and■High-Defi■nition■Multimedia■ Interface■are■trademarks■or■registered■trademarks■of■HDMI■ Licensing■LLC. •■ MHL,■Mobile■High-Defi■nition■Link,■and■MHL■Logo■are■ trademarks■or■registered■trademarks■of■MHL,■LLC. •■ Kensington■is■a■trademark■or■registered■trademark■of■ ACCO■Brands. •■ Blu-ray■is■a■trademark■of■Blu-ray■Association. •■ HDBaseT™■and■the■HDBaseT■Alliance■logo■are■trademarks■ of■the■HDBaseT■Alliance. •■ Other■product■and■company■names■mentioned■in■this■user’s■ manual■may■be■the■trademarks■or■registered■trademarks■of■ their■respective■holders. English...
Need help?
Do you have a question about the PJ WU6590 and is the answer not in the manual?
Questions and answers