Table of Contents
Advertisement
User´s Manual version 04.2018
GARUDAN GPS/G-1507, GARUDAN GPS/G-2010
GARUDAN GPS/G-3020, GARUDAN GPS/G-3525
GARUDAN GPS/G-4032, GARUDAN GPS/G-6032
GARUDAN GPS/G-6040, GARUDAN GPS/G-10060
GARUDAN GPS/H-1510, GARUDAN GPS/H-2010
ANITA B s.r.o.
Průmyslová 2453/7
680 01 Boskovice
Czech Republic
tel: +420 516 454 774
+420 516 453 496
fax: +420 516 452 751
e-mail:
info@anita.cz
MP00006EN_181206
Advertisement
Table of Contents

Subscribe to Our Youtube Channel
Related Manuals for Garudan GPS/G-1507


Summary of Contents for Garudan GPS/G-1507
- Page 1 User´s Manual version 04.2018 GARUDAN GPS/G-1507, GARUDAN GPS/G-2010 GARUDAN GPS/G-3020, GARUDAN GPS/G-3525 GARUDAN GPS/G-4032, GARUDAN GPS/G-6032 GARUDAN GPS/G-6040, GARUDAN GPS/G-10060 GARUDAN GPS/H-1510, GARUDAN GPS/H-2010 ANITA B s.r.o. Průmyslová 2453/7 680 01 Boskovice Czech Republic tel: +420 516 454 774 +420 516 453 496...
- Page 2 ANITA © VERSION CREATED ON APPROVED BY MP00006EN_181206 06. 12. 2018 Jakub Lžičař All rights reserved. Property of Anita B s.r.o. and protected by copyright. The use of this content without written consent of Anita B s.r.o. is prohibited. Copyright © Anita B s.r.o. (2018) MP00006EN_181206...
-
Page 3: Table Of Contents
ANITA © Content 1. Description of Machine ....................5 2. Turning ON and turning OFF the Machine ..............6 3. Opening of Existing Sewing Pattern ................7 Opening of sewing pattern in style characters: ............7 Opening of sewing pattern in style numbers: ............. 9 4. - Page 4 ANITA © 10.2 Insertion (deletion) of trimming function: ............. 37 10.3 Insertion (deletion) of command for setting of presser foot height (for series GPS/G): ..........................37 10.4 Insertion (deletion of command for setting of presser foot height (for series GPS/H): ..........................38 10.5 Creating pattern in routing mode: .................
-
Page 5: Description Of Machine
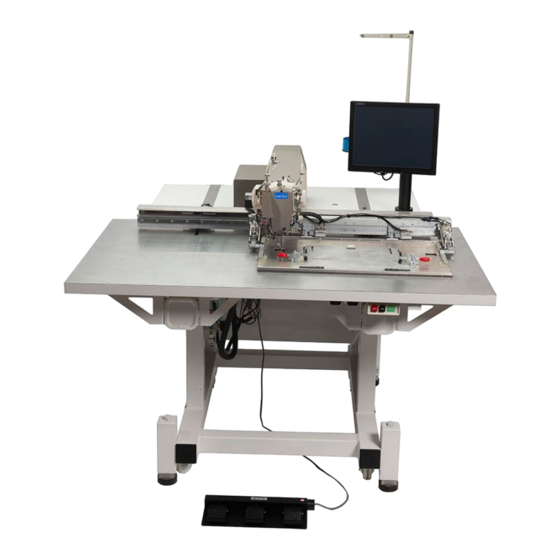
ANITA © 1. DESCRIPTION OF MACHINE Picture 1 Control switch Key „ON“ – turning on the machine Key „OFF“ – turning off the machine Key „STOP“ – emergency stop Hand wheel LCD touch screen MP00006EN_181206... -
Page 6: Turning On And Turning Off The Machine
ANITA © 2. TURNING ON AND TURNING OFF THE MACHINE After connection of the machine into electrical power network (230V/50Hz) press control switch A (picture 1). By pressing key B (picture 1) turn on the machine. Wait for starting of software. During turning off the machine, proceed according to following instructions: press key C (picture 1). -
Page 7: Opening Of Existing Sewing Pattern
ANITA © 3. OPENING OF EXISTING SEWING PATTERN After machine is turned on and computer running, sewing machine screen will ask operator to select the sewing pattern. It is possible switch between two window styles by parameter 58 Style of pattern open. - Page 8 ANITA © All possible patterns are in list E. Table may contain patterns with details (picture 2) or only list of patterns. It is possible to switch between the styles by buttons C. Table E contains list of folders and patterns.
-
Page 9: Opening Of Sewing Pattern In Style Numbers
ANITA © 3.2 Opening of sewing pattern in style numbers: Picture 3: Screen after turning on the machine in style Numbers There are 3 possible ways how to select the pattern. First possibility how to choose the pattern is setting combination of 3 consecutive numbers on the numeric keyboard (see pic.2). Second possibility is to select one of the 3 recently opened patterns via section D (see pic.2). -
Page 10: Description Of Lcd Screen For Sewing The Pattern
ANITA © 4. DESCRIPTION OF LCD SCREEN FOR SEWING THE PATTERN Picture 4: Sewing interface Zoom the pattern Layout of the pattern Winding the bobbin Change of sewing speed Control of feed plates (up/down) Control of presser foot Information about the pattern ... -
Page 11: Pattern Chaining
ANITA © 4.1 Pattern chaining: Function of pattern chaining automatically changes sewing patterns in accordance with previously set sequence. It is mostly used when customer requires performing more sewing operations with one sewn material but, at the same time, these operations cannot be performed within one sewing pattern. - Page 12 ANITA © Picture 6: Window for add pattern to chain A – Switch for selection of patterns list between machine and USB pen drive B – Name of current folder (“\..” is root folder) C – Switch between showing name of patterns and name of patterns with details in list E –...
-
Page 13: Pattern Chaining In Style Numbers
ANITA © 4.3 Pattern chaining in style numbers: Pattern chaining is set by pressing the button F on picture 3 during selection of existing pattern (picture 3). It is necessary to define a list of patterns to be chained in the chart A by keyboard B on picture 7. -
Page 14: Setting Of Continuous Mode
ANITA © 4.4 Setting of continuous mode: This mode can only be used for firmware version 0.25 and higher. Continuous mode is characterized by automatic start of sewing of the same pattern after previous sewing of this pattern has been finished, without necessity of pushing either the pedal or SEWING START button. -
Page 15: Stepping In The Pattern
ANITA © 5.4 Stepping in the pattern: Stepping in the pattern enables start of sewing from other than starting point of the sewing operation. This function is mostly used if the pattern consists of more sewing sections and operator needs to sew only one of these sections or in case it is necessary to repair (sew repeatedly) only part of the pattern. -
Page 16: Monitoring Of Lower Bobbin
ANITA © 5. MONITORING OF LOWER BOBBIN For this function we have two ways: 1. we don´t know the number of patterns which we need to sew at full bobbin and 2. we know the number of patterns which we need to sew at full bobbin. We don´t know the number of patterns insert full bobbin in the bobbin case of the hook press key Start –... -
Page 17: Main Icons
ANITA © 6. MAIN ICONS These icons are used for basic commands. These icons allow changeover between individual modes of machine (sewing, editing, testing…). The machine is always in general mode after start up of machine and it only allows opening and sewing created patterns and showing information about machine. -
Page 18: Description Of Main Icons
ANITA © 6.1 Description of main icons: Button Indication Description Switch over to mode of sewing Information about machine (type, serial No.,…) Switch over to mode of creating pattern (possible to use only in service mode) Settings of machine (possible to use only in service mode) Test of machine (possible to use only in service mode) Information about firmware with possibility of update Log in to service mode... -
Page 19: Description Of Screen For Creating Patterns And Buttons
ANITA © 7. DESCRIPTION OF SCREEN FOR CREATING PATTERNS AND BUTTONS Picture 12 Pattern programming interface Main programming screen consists of following icons: A - Main icons – these are for basic operations with files B - Icons of curves – by these you can select required type (shape) of inserted data (line, curve …) C - Sewing icons –... -
Page 20: Icons Of Curves
ANITA © 7.1 Icons of curves: By these icons you select required type (shape) of inserted data (line, curve …). Button Indication Description LINE CURVE ARC – arc is made by inserting 3 points CIRCLE – circle is made by inserting 3 points (each circle is separate object) SINGLE –... -
Page 21: Sewing Icons
ANITA © 7.2 Sewing icons Button Indication Description NORMAL stitch ZIG-ZAG stitch REVERSE stitch JUMP – part of object without sewing. this you can make only in part which is marked as LINE MP00006EN_181206... -
Page 22: Tool Icons
ANITA © 7.3 Tool icons: Button Indication Description Simulation of sewing the pattern Save the pattern – you can´t change the name of pattern Save as – you can change the name of pattern Recalculate stitches Clear stitches Mirror – add symmetric data to pattern based on axis X or Y or last point Resize the pattern –... - Page 23 ANITA © Settings of editor and parameters of pattern – chapter 8 Edit the pattern - you can edit finished part of pattern, down arrow is for choice of object, sub object, point or stitch modification – chapter 7.6. to 7.9 By this key you switch over to inserting points by the help of coordinates By this key you switch over to inserting points by the help of touch...
-
Page 24: Special Icons
ANITA © 7.4 Special icons: Button Indication Description Trim – add command for trim Clamp – add command for rotation of rotary frame Overlap Back Tack Back-Tack PP device – the command for change the height of presser foot Pause – by this key you can stop the machine at selected point Order delete –... -
Page 25: Other Icons
ANITA © 7.5 Other icons: Button Indication Description This function is for moving with screen. Ruler – this function is for definition of distances Creating patterns by the help of some model – movement with motors, there is current position (X and Y), distance between current position and last added point (dX and dY) and distance between current position and first point of object (dX0 and dY0) on information bar. -
Page 26: Icons For Editing The Object
ANITA © 7.6 Icons for editing the object: It is necessary to click on arrow button on left side of button D12 and choose line Object. Button Indication Description By this function you can move with selected object. Turning OFF this function is done by pressing again on this key. - Page 27 ANITA © Button Indication Description Add copy of selected object with offset copy Switch the selection to the previous object (by sewing sequence) Switch the selection to the next object (by sewing sequence) MP00006EN_181206...
-
Page 28: Icons For Editing The Subobject
ANITA © 7.7 Icons for editing the subobject: It is necessary click on arrow button on left side of button D12 and chooses line Subobject. Button Indication Description Divide subobject to two parts - make new Move with subobject based on start point. Turning OFF of this function is done by pressing again on this key. -
Page 29: Icons For Editing The Point
ANITA © 7.8 Icons for editing the point: is necessary click on arrow button on left side of button D12 and chooses line Point. Button Indication Description Move with selected point. Turning OFF this function is done by pressing again on this key. Move with selected point by arrows. -
Page 30: Icons For Editing The Stitch
ANITA © 7.9 Icons for editing the stitch: It is necessary click on arrow button on left side of button D12 and chooses line Stitch. Button Indication Description Add stitches behind the selected point. Turning OFF of this function is done by pressing again on this key. -
Page 31: Settings
ANITA © 8. SETTINGS Settings are showed by pressing icon D11 (picture 13). This setting is also shown at creating the new pattern. Picture 13 Pattern programming interface settings Automatic trim before jump – If it is checked, editor will add trim before every JUMP. Automatic jump between objects –... -
Page 32: Operations With Patterns
ANITA © 9. OPERATIONS WITH PATTERNS Operation with pattern is possible only in service mode – chapter 9.1 Creating the new patter: While at picture 14 press icon A3 for opening window with patterns for programming. Write name of pattern which you want to create into array Pattern number and confirm by pressing icon OK. Window Editor setting is opened and we can set parameters (chapter 9 picture 13). -
Page 33: Opening Of Saved Pattern For Further Editing (Software From Version 2.00)
ANITA © 9.3 Opening of saved pattern for further editing (software from version 2.00): Parameter 58 Style of pattern open is set to 0 Numbers. Press icon of Programming A3 and then appears screen for selection of pattern from list of patterns as shown in picture 15. Select pattern or directory from table B and press Open file F to open the pattern or to open (change) directory. - Page 34 ANITA © If parameter 58 Style of pattern open is set to 1 Characters, you will see picture 16 to open the pattern. All possible patterns and folders with patterns are in table E on picture 16. Buttons F are to scroll through patterns and folders.
-
Page 35: Saving Pattern
ANITA © 9.4 Saving pattern: Modified pattern can be saved by pressing icon D2 (pattern will be overwritten by new data). If you want to change the name press icon D3 and enter new number (3 characters). 9.5 Deleting pattern: Any pattern can be deleted by following sequence of operations. - Page 36 ANITA © Obr. 17: Obrazovka kopírování vzorů A – Button for copying from machine to USB pen drive B – Button for copying from USB pen drive to machine C – Window with list of files saved in machine D – Window with list of files in respective folders saved on USB flash disc E –...
-
Page 37: Creating Pattern
ANITA © 10. CREATING PATTERN 10.1 Insertion of curves and data: You can create the pattern by the help of lines (icon B1), curves (B2), arcs (B3), circles (B4) and stitches (B5). Into these you can insert straight stitch (icon C1) or zigzag stitch (C2). At first select type of curve by pressing icon B1, B2, B3, B4 or B5. -
Page 38: Insertion (Deletion Of Command For Setting Of Presser Foot Height (For Series Gps/H)
ANITA © 10.4 Insertion (deletion of command for setting of presser foot height (for series GPS/H): Command for setting of presser foot height can be used on all models of series GPS/H. Presser foot mechanism controlled by step motor enables machine to change height of its presser foot in defined position. -
Page 39: Creating Pattern In Routing Mode
ANITA © 10.5 Creating pattern in routing mode: This mode is mostly used for patterns where we have template and know in advance exact sewing route. By the help of arrows we create a shape of sewing, gradually saving points of the pattern. Firstly, we choose type of sewing section by buttons B1 to B5 (line, curve, etc.), type of stitch by C1 to C4 (straight, zigzag etc.). -
Page 40: Editing Of Points In Routing Mode
ANITA © 10.6 Editing of points in routing mode: Editing of points in routing mode can be done by pushing down arrow of the button D12 and selecting the item Point. Next step is to click on routing mode (button F3) and screen for editing of points will appear –... -
Page 41: Editing Of Stitches In Routing Mode
ANITA © 10.7 Editing of stitches in routing mode: For editing of stitches in routing mode it is necessary to click on the down arrow of button D12 and select the item Stitch. Next step is to click on routing mode (button F3) and screen for editing of stitch will appear –... -
Page 42: Background Picture
ANITA © 10.8 Background picture: Button D15 enables to display required picture (or photo) on the background of pattern editing process and create pattern by routing the sewing line of the picture. It is recommended to use this function with mouse and keyboard connected to the machine. Picture 21: Window of setting background picture A –... -
Page 43: Simulation Of Pattern
ANITA © 11. SIMULATION OF PATTERN After creating new pattern it is recommended to check the whole route of the sewing without the needle to be sure that there will be no clash between needle, presser foot and feed plate. Simulation is activated by button D1, which can be found either on the screen for sewing or on the screen for creating pattern. -
Page 44: Parameters Of Machine
ANITA © 12. PARAMETERS OF MACHINE Parameters of machine you can set in Parameters mode. This mode you can activate only if the service interface is active (chapter 6). By pressing key A4 – Parameters you switch over to this mode. The window of this mode is made by three parts. -
Page 45: Parameter List
Cancel 0 Disable Machine moves to the start point after pressing key Cancel. (this setting of parameter is default for models GPS/G-1507, GPS/G-2010, GPS/G-3020, GPS/G-3525, GPS/H-1510 and GPS/H-2010) 1 Enable After pressing key Cancel machine moves to the centre of the frame (point 0,0) and then to the start point. - Page 46 0 Simple feed plate One feed plate (default setting for model GPS/G-3020) 1 Two feed plates Two feed plates – left and right (default setting for models GPS/G-1507, GPS/G-2010, GPS/H-1510 and GPS/H-2010) 2 Upper and bottom Two feed plates – upper and bottom (default setting for model – GPS/G-...
- Page 47 2 Left feed plate By pressing the pedal you can take control of left or upper feed plate (default setting for models GPS/G-1507, GPS/G-2010, GPS/H-1510 and GPS/H-2010). 3 Right feed plate By pressing the pedal you can take control of right or bottom feed plate.
- Page 48 ANITA © 14 Number of broken detection 1 to 1020 Number of stitches of thread break detection (default value is 2) 15 Trim 0 Disable 1 Mechanical trim Mechanical trim (magnetic or pneumatic) (default) 2 Heat trim Heat trim – thread is trimmed by heat 3 Pneumatic trim Direct pneumatic trim mechanism.
- Page 49 ANITA © 23 Trim delay (ms) 52 to 1020 Trim delay (default value is 52) 24 Blocking after trim (ms) 0 to 1024 Time of blocking the motor of needle after sewing/trimming (default value is 100) 25 Reverse angle (°) 0 to 90 Reverse angle of the motor of needle after sewing/trimming (default value is 26 Up stop position (°)
- Page 50 ANITA © 30 Low pressure detect Low pressure detector 0 Disable OFF – the detector is not installed (default) 1 Enable 31 Needle cooling 0 Disable OFF – needle cooling is not installed (default) 1 Enable Needle cooling is installed but it is necessary to activate this function in sewing interface.
- Page 51 ANITA © 34 Programmable presser foot 0 Disable OFF – programmable presser foot is not installed (default). 1 Enable ON – programmable presser foot is installed. 35 Reverse angle before wiper (°) Angle of reverse motor movement before thread wiping 0 to 30 Angle by which needle motor moves back before thread wiping.
- Page 52 ANITA © 39 Barcode position Y (0,1 mm) Position of barcode Y -½ to ½ sewing range Coordinates for position X, where barcode is situated. This parameter is only used for machines equipped with barcode reader and for barcode mode 2 or 3.
- Page 53 ANITA © 45 Pattern copy in operator mode 0 Disable Operator cannot copy patterns to machine and from machine to USB pen drive. Transfer of patterns is only possible in service mode. 1 Enable Operator can copy patterns to machine and from machine to USB pen drive. Transfer of patterns is possible in both modes.
- Page 54 ANITA © 53 Label device close time (ms) 0 to 1020 Parameter is active when parameter 06 Feed plate type is set to value 3 Label device. This parameter is time delay necessary for moving label device in horizontal direction (from left to right and from right to left). (default value 300) 54 Label device up time (ms) 0 to 1020...
- Page 55 ANITA © 60 Inputs 0 SC Sewing Light curtain – If light curtain area is corrupted, only sewing process will be stopped. (default) 1 SC Level 1 Light curtain – If light curtain area is corrupted, sewing process, feed plates motion or pattern opening will be stopped.
-
Page 56: List Of Parameters For Exchange Of Needles
ANITA © 12.2 List of parameters for exchange of needles: PN01 Needle changer 0 Disable Machine is not equipped with device for exchange of needles. (default) 1 Enable Machine is equipped with device for exchange of needles – change of thread color in sewing is possible. -
Page 57: List Of Parameters For Pocket Device
ANITA © 12.3 List of parameters for pocket device: PA06 Feed plate up time (ms) 50 to 500 Time delay necessary for movement feed plates to upper position. PA07 Size change time (ms) 50 to 500 Time delay necessary for change size of inner feed plate. PA09 FF fast size change 0 Disable... -
Page 58: Example Of Pedal Settings
ANITA © 12.4 Example of pedal settings: Machine GPS/H-1510 – two feed plates controlled by two pedals Machine GPS/G-3525 – two feed plates controlled by two pedals Machine GPS/G-3525 – upper and bottom feed plate controlled by two pedals Machine GPS/G-6032 – upper and bottom feed plate controlled by two pedals Parameter Value 06 Feed plate type... -
Page 59: Tests Of Machine
ANITA © 13. TESTS OF MACHINE Picture 25: Testing interface Testing interface is used for identification of errors in machine connection, especially during assembly or service interventions. Testing interface displays statuses of all inputs, enables control of all outputs and testing of motor movements. After switching to testing mode machine will automatically move to sensors of zero position. - Page 60 ANITA © Table 1: Inputs of control board B Input Note Thread break detector, red – connected, green – machine is not connected to detector Stop button, red – button is pressed, green – button is not pressed Air pressure detector, red– air pressure is correct, green – air pressure has low level PC board, red –...
- Page 61 ANITA © Table 3: Inputs of additional board B Input Note Thread break detector needle number 2, red– connected, green – machine is not connected to detector … Sensor of needle number 2 (distant needle, needle on right side) Sensor of needle number 1 (nearer needle, needle on left side) Tab.
-
Page 62: Error List
ANITA © 14. ERROR LIST Number Error Description PLC module has been stopped during sewing. For repairing E0001 PLC collision error. (E0001) you have to turn OFF and then turn ON PC software again. PLC module fell into undefined status. For repairing you E0002 PLC state error. - Page 63 ANITA © One of motors of axis doesn´t communicate with bus X-Axis or Y-Axis motor E0015 system CAN. You have to check the connection of both communication error (E0015) motors. Motor of axis Y doesn´t communicate with bus system Y-Axis motor communication E0016 CAN.
- Page 64 ANITA © Needle laser is connected on needle position and someone start sewing mode on machine. Needle laser cannot be Laser is connected in sewing connected in needle bar if machine start sewing mode. E0049 mode (E0049) Disconnect needle laser from needle bar and power supply before start sewing mode of machine.
-
Page 65: Basic Interface Of Machine
ANITA © 15. BASIC INTERFACE OF MACHINE Picture 26: Screen of machine introductory software After closing of sewing interface basic screen of introductory software will appear (see pic. 22). This interface offers following options to operator: opening of sewing interface again, opening of machine setting interface or switching off the machine. -
Page 66: Machine Setting
ANITA © 15.1 Machine setting: After pushing the button Settings (pic. 26) operator is asked to enter code for opening window for machine setting. It is the same code which is used for entering the machine (number 110585). It is possible to make following settings: Change interface language –... -
Page 67: Setting Of Touch Screen
ANITA © 15.3 Setting of touch screen: Picture 29: Initial screen for setting of touch screen It is possible to change user language by choosing required language from menu A (picture 29). If there is problem with calibration of monitor, that is, if pressed point on the monitor is not identical with position of cursor, it is necessary to perform calibration by pushing button B (4 point calibration) and follow instructions on the monitor. -
Page 68: Maximum Allowed Sewing Speeds
ANITA © 16. MAXIMUM ALLOWED SEWING SPEEDS Table 6: Maximum allowed sewing speed for normal stitches Stroj GPS/G- GPS/G- GPS/G- GPS/G- GPS/G- GPS/G- GPS/G- GPS/H- 1507 3020 3525 3525RH 2527J 4032RH 10060RH 1510 2010 4032 6032RH 2010 Délka 6032 6040 stehu 6040RH 2,5 mm...
Need help?
Do you have a question about the GPS/G-1507 and is the answer not in the manual?
Questions and answers