
Subscribe to Our Youtube Channel
Related Manuals for Garudan GZ-5527-443


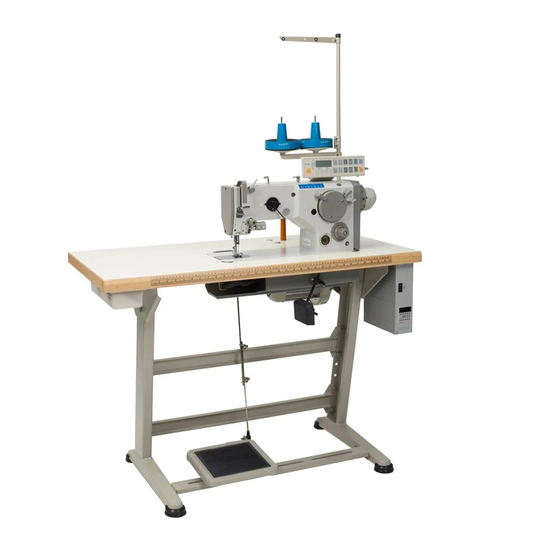
Summary of Contents for Garudan GZ-5527-443
- Page 1 User’s Manual GZ-5527-443 GZ-5527-447 ANITA B s.r.o. Průmyslová 2453/7 680 01 Boskovice Czech Republic tel: +420 516 454 774 +420 516 453 496 fax: +420 516 452 751 e-mail: info@anita.cz MP02800EN_180319...
- Page 2 © ANITA All rights reserved. Property of Anita B s.r.o. and protected by copyright. The use of this content without written consent of Anita B s.r.o. is prohibited. Copyright © Anita B s.r.o. (2018) MP02800EN_180319...
-
Page 3: Table Of Contents
© ANITA Obsah 1 SAFETY ........................4 2 SPECIAL FEATURES AND APPLICATIONS ..............4 3 SPECIFICATIONS ....................... 5 4 MACHINE OPARATION ..................... 5 4.1 NEEDLE THREADING ..................5 4.2 HOOK THREAD WINDING ................6 4.3 BOBBIN FIXING AND HOOK THREADING ............7 4.4 THREAD TENSION ADJUSTMENT .............. -
Page 4: Safety
© ANITA 1 SAFETY • This machine may only be operated by adequately trained operators and only after having completely read and understood the Instruction Manual! • This machine may only be used for the purpose for which it is intended and may not be operated without its safety devices. -
Page 5: Specifications
© ANITA 3 SPECIFICATIONS A flatbed single-needle machine. It sews a double-thread zig-zag lockstitch. It has a bi- directional drop feed. The machine is equipped with a horizontal hook.Wick lubrication. There is an automatic bobbin winder on the machine arm. ... -
Page 6: Hook Thread Winding
© ANITA 4.2 HOOK THREAD WINDING Fix the bobbin (1) on the winder. do the threading according to picture (A), wind 5 times round the bobbin. Push the lever (2) in the arrow direction (3). Start the machine up. After the bobbin winding, release the lever (2), remove the bobin and fix another bobbin immediately and prepare its winding during the sewing. -
Page 7: Bobbin Fixing And Hook Threading
© ANITA 4.3 BOBBIN FIXING AND HOOK THREADING Tilt the flap (1), grip it and pull the bobbin case (2) out of the hook Put the bobbin (3) in the bobbin case with the thread end (4) oriented according to the picture (2). -
Page 8: Thread Tension Adjustment
© ANITA 4.4 THREAD TENSION ADJUSTMENT A. Needle thread tension adjustment Secondary tensioner adjustment (1) Adjust the secondary tensioner (1) so that it has as small tension as possible, but high enough so as the thread cannot be pulled out from the tensioner (1) at the material removing after previous trimming (when the tensioner (2) is opened - switched off). -
Page 9: Hook Thread Tension Adjustment
© ANITA Correct interlacing of threads in the center of the material Increase of the needle thread tension (or reduce the hook needle tension) Reduce the needle thread tension (or increase the hook thread tension) B. Hook thread tension adjustment The hook thread tension depends on the adjustment of springs (1) and (2). -
Page 10: Needle Replacement
© ANITA 4.5 NEEDLE REPLACEMENT 4.5.1 Machine 523i, 524i, 525i – needle system 134 Loosen the screw (1) and remove the needle (2). Fix a new needle and turn it so that the needle scarf (3) is oriented according to detail (D). Tighten the screw (1). 4.5.2 Machine 527i –... - Page 11 © ANITA Loosen screw (1) according to picture (A), and adjust the needle bar so that in position 0 according to picture (B) the tip of the hook is 0.5 mm above the needle eye. MP02800EN_180319...
-
Page 12: Foot Lifting
© ANITA 4.6 FOOT LIFTING Foot lifting with a hand lever Lift the foot by pressing the lever (1) to a stop (foot remains lifted). Lower the foot by returning the lever (1) to initial position or by pressing the knee lever (2) /if there is any/ and by its subsequent releasing or by the automatic foot lifting by means of the pedal and subsequent pedal releasing. -
Page 13: Foot Pressure Setting
© ANITA 4.7 FOOT PRESSURE SETTING Regulate the foot pressure by means of a screw driver (1) which is supplied with the machine accessories.The pressure increases by turning in the arrow direction and vice versa. The foot pressure should be as small as possible, but strong enough so that the feeding is reliable even at a high sewing speed. -
Page 14: Backtacking (Reverse Feed; Closing Up)
© ANITA 4.9 BACKTACKING (REVERSE FEED; CLOSING UP) Backtacking with a hand lever (applies to manually controlled subclasses) Press the lever (1) downwards. The machine will feed in the reverse direction until you release the lever. Backtacking with a microswitch (applies to automatically controlled subclasses) Press the microswitch (2). -
Page 15: Setting Of Zig-Zag Stitch Width (Throw) And Position
© ANITA 4.10 SETTING OF ZIG-ZAG STITCH WIDTH (THROW) AND POSITION Setting of zig-zag stitch width Press the lever (1) in the arrow direction (A) until it strikes the lever (2) - the lever arrest is released (2). Grip both levers at the same time and set the zig-zag stitch width by turning the lever (2) against the selected number indicating the stitch width. -
Page 16: Control Of Machine Equipped With Positioning Motor And Solenoid Automatic Control
© ANITA 4.11 CONTROL OF MACHINE EQUIPPED WITH POSITIONING MOTOR AND SOLENOID AUTOMATIC CONTROL 4.11.1 CONTROL PANEL The pedal position is scanned with a proximity switch which distinguishes 16 levels. The meaning is in the table: Pedal position Pedal motion Meaning Heel fully backwards Command for thread trimming (seam finish) -
Page 17: Key Control Panel
© ANITA 4.11.2 KEY CONTROL PANEL Function 1 Hand backtacking When the key is pressed at sewing, the sewn material is fed backwards. 2 Needle positioning in upper or bottom position By the parameter the key function can be defined: 1 = needle up/down 2 = needle up 3 = one stitch (factory setting is 1) -
Page 18: Thread Trimming
© ANITA 4.12 THREAD TRIMMING 4.12.1 TRIMMING PRESSURE BETWEEN KNIVES The fixed knife should have some pressure on the moving knife. Till the machine, loosen the screw (1), and remove the bolt (2). Turn of screw (3) clockwise to increase pressure of the knife or turn of screw (3) counter clockwise to decrease pressure of the knife. -
Page 19: Maintenace
© ANITA 5 MAINTENACE 5.1 CLEANING AND CHECKING Maintenance operation Maintenance interval Throat plate (1) disassembly. Cleaning of throat plate, hook (2), feed dog (3) and their surroundings.It is possible to clean with compressed air. Re-lubrication of hook path with oil and washing of dirt out of the 1 week path. -
Page 20: Lubrication
© ANITA 5.2 LUBRICATION Oil lubrication Keep the oil level at Min mark (1) Add oil into tank (3) through the hole (4) at least once two weeks until the oil starts flowing from the terminal(5). Add several drops of oil in holes (6) and (7) once a month. Grease lubrication Add grease in grease cups (8) and (9) by means of a lubrication press once a year.
Need help?
Do you have a question about the GZ-5527-443 and is the answer not in the manual?
Questions and answers