Table of Contents
Advertisement
Available languages
Available languages
Advertisement
Chapters
Table of Contents

Subscribe to Our Youtube Channel
Related Manuals for Cooke & Lewis CLMFBI


Summary of Contents for Cooke & Lewis CLMFBI
- Page 1 CLMFBI CLMFMI CLMFST 3663602842835 3663602842842 3663602842859 V10517...
- Page 2 ÖNEMLI - [C] x1 [B] x1 [D] x1 [E] x1 [A] x1 [F] x2...
- Page 3 Preparation Préparation Przygotowanie Vorbereitung Preparación Preparação Hazırlık Installation Installation Installation Установка Instalare Utilisation Benutzung Utilizare Kullanım Entretien et maintenance inere ș Cuidados y Mantenimiento Bakım ve Onarım...
- Page 4 Installation Installation Installation Установка Instalare This appliance must be installed correctly by a qualified person, strictly following the manufacturer’s instructions. Warning: Danger of electric shock! The power supply must be cut off before the appliance is installed completely. Only a qualified person in compliance with the instructions provided can install the appliance. The manufacturer declines all responsibility for improper installation, which may harm persons and animals and cause damage.
- Page 5 Ten produkt zawiera szkło; podczas montażu i obsługi zachować ostrożność, aby uniknąć obrażeń ciała lub uszkodzeń mienia. Na tym urządzeniu znajduje się tabliczka znamionowa. Tabliczka przedstawia wszystkie informacje dotyczące specyfikacji potrzebne do zamówienia części zamiennych. W przypadku sprzedaży urządzenia lub przeprowadzki należy oddać tabliczkę lub pozostawić ją na swoim miejscu.
- Page 6 Numai o persoană calificată în conformitate cu instrucţiunile furnizate poate instala aparatul. Producătorul nu îşi asumă răspunderea pentru instalarea necorespunzătoare, care poate vătăma persoane sau animale şi poate produce daune. Verificaţi ambalajul şi asiguraţi-vă că aveţi toate piesele specificate. Stabiliţi o locaţie corespunzătoare a produsului. This Acest produs conţine sticlă, aveţi grijă...
- Page 7 Uyarı: Elektrik çarpabilir! Cihaz tamamen monte edilene kadar güç kaynağı kapalı olmalıdır. Yalnızca uzman bir kişi, belirtilen talimatlara uygun olarak cihazı monte edebilir. Üretici, insanlara ve hayvanlara zarar verebilecek ve hasara neden olabilecek hatalı montaj konusunda hiçbir sorumluluk kabul etmez. Ambalaj içeriğini kontrol edin ve listelenen parçaların hepsinin elinizde bulunduğundan emin olun.
- Page 8 Installation Installation Installation Установка Instalare Installation of Built-in Ovens For correct installation, this product can be fitted under the work surface in a built under housing unit or in a tall oven housing unit. Caution! The panels of the adjacent cabinets must be made of heat-resistant material. In particular the adhesive that bonds the plastic laminate to the furniture must be able to withstand temperatures of not less than 120 °C to avoid delamination.
- Page 9 Uwaga! Płyty sąsiednich szafek muszą być wykonane z materiału odpornego na wysokie temperatury. W szczególności klej mocujący laminat z tworzywa sztucznego do mebla musi wytrzymywać temperaturę do 120°C w celu uniknięcia delaminacji. Urządzenie musi być umieszczone w szafce odpornej na wysokie temperatury. Installation von Einbauöfen Die korrekte Installation dieses Produkts erfolgt unter der Arbeitsplatte in einen Unterschrank oder in ein spezielles Gehäuse für höher bauende Öfen.
- Page 10 Upper vent ≥25mm at rear The diagram above shows the air circulation requirements including a slot that should be cut into the plinth if fitted. It is essential when installing your oven there is adequate air circulation around the appliance to ensure the correct operation of the appliance.
- Page 11 Die Abbildung oben zeigt die Anforderungen an die Luftzirkulation einschließlich eines Schlitzes, der in den Sockel, falls vorhanden, geschnitten werden sollte. Bei der Installation Ihres Ofens muss eine ausreichende Luftzirkulation um das Gerät herum sichergestellt sein, damit das Gerät ordnungsgemäß betrieben werden kann. Eine unzureichende Luftzirkulation beeinträchtigt die Leistung des Geräts erheblich und kann sich aufgrund des Temperaturanstiegs nachteilig auf die in angrenzenden Schränken eingebauten Geräte auswirken.
- Page 12 Cihazın düzgün şekilde çalışmasını sağlamak için fırınınızı monte ederken cihazın çevresinde yeterli hava dolaşımı olması önemlidir. Yetersiz hava dolaşımı cihazın performansını olumsuz yönde etkileyecektir ve sıcaklık artışı nedeniyle yanındaki dolapları etkileyebilir. Fırının yanındaki mutfak ünitesi panelleri ısıya dayanıklı malzemeden yapılmış olmalıdır. Kaplamalı ahşaptan yapılan ünitelerin yapıştırıcılarının en az 120ºC sıcaklığa dayanabildiğinden emin olun.
- Page 13 Important: Do not lift the oven by the door handle to avoid potential damage to the glass and hinges. Caution! If the supply cord is damaged, it must be replaced by the manufacturer, its service agent or similarly qualified persons in order to avoid a hazard. Important : ne pas soulever le four par la poignée de la porte afin d’éviter des dommages potentiels au verre et aux charnières.
- Page 14 Important: Nu ridicaţi cuptorul de mânerul uşii pentru a evita deteriorarea sticlei şi a balamalelor. Atenţie! În cazul în care cablul de alimentare este deteriorat, acesta trebuie să fie înlocuit de producător, de agentul său de service sau de o persoană calificată, pentru evitarea pericolelor. Importante: No levante el horno por el tirador de la puerta, para evitar que se dañen el cristal y las bisagras.
- Page 15 [F] x2 Once the oven has been lifted into place inside the housing unit, use the 2 holes located within the sides of the metal casing of the oven to secure it. Secure with the 2 screws [F]. Important: Finger tight only, do not use tools to avoid damage to the screws! Une fois que le four est placé...
- Page 16 Assim que o forno tiver sido colocado no devido lugar na unidade de cozinha, utilize os 2 orifícios nas laterais do revestimento metálico do forno para o fixar. Fixe com 2 parafusos [F]. Importante: Aperte apenas com os dedos, não utilize ferramentas para evitar danificar os parafusos! Fırın, yerleştirme ünitesinin içine koymak üzere kaldırıldığında, fırını...
- Page 17 Adjusting the shelf position Caution! To minimize the risk of burns when handling hot pans, grills or oven dishes, always ensure you place the shelves and grill pan correctly between the side rails. Réglage de la position de la grille Attention ! Pour réduire le risque de brûlure lors de la manipulation de casseroles chaudes, de grilles ou de plats à...
- Page 18 Posición de la rejilla Precaución: Para reducir el riesgo de quemaduras al manipular moldes, parrillas o fuentes de horno calientes, asegúrese de colocar siempre las rejillas y bandejas correctamente entre las guías laterales. Ajustar a posição da prateleira Cuidado! Para minimizar o risco de queimadura ao manusear panelas, grelhadores ou tabuleiros de forno quentes, certifique-se de que coloca sempre as prateleiras do forno e a grelha corretamente entre as calhas laterais.
- Page 19 Installation All installation must be carried out by a competent person or qualified electrician. Before connecting the mains supply ensure that the mains voltage corresponds to the voltage on the rating plate. Direct Connection The appliance must be connected directly to the mains using an omnipolar circuit breaker with a minimum opening of 3mm between the contacts.
- Page 20 Connection of the oven...
- Page 21 Installation Toute l’installation doit être effectuée par une personne compétente ou un électricien qualifié. Avant de raccorder le câble d’alimentation, s’assurer que la tension de secteur correspond à la tension indiquée sur la plaque signalétique. Raccordement direct L’appareil doit être raccordé directement au secteur à l’aide d’un disjoncteur omnipolaire avec une ouverture minimale de 3 mm entre les contacts.
- Page 22 Branchement du four...
- Page 23 Montaż Montaż musi zostać wykonany przez osobę kompetentną lub wykwalifikowanego elektryka. Przed podłączeniem do sieci upewnić się, czy parametry zasilania odpowiadają napięciu podanym na tabliczce znamionowej. Bezpośrednie podłączenie Urządzenie należy bezpośrednio podłączyć do zasilania, korzystając z wyłącznika wielobiegunowego z minimalnym rozwarciem między stykami wynoszącym 3 mm. Monter musi upewnić...
- Page 24 Podłączenie piekarnika...
- Page 25 Installation Die gesamte Installation muss von einer fachkundigen Person oder einem ausgebildeten Elektriker durchgeführt werden. Stellen Sie vor dem Anschließen an die Stromversorgung sicher, dass die Netzspannung zur Spannungsangabe auf dem Typenschild passt. Direkter Anschluss Das Gerät muss mithilfe eines mehrpoligen Leistungsschalters mit einem Mindestabstand zwischen den Kontakten von 3 mm direkt an das Netz angeschlossen werden.
- Page 26 Anschluss des Ofens...
- Page 27 Уcтановка Установка должна выполняться компетентным лицом или квалифицированным электриком. Перед подключением прибора к сети удостоверьтесь, что напряжение сети соответствует напряжению, указанному в паспортной табличке прибора. Прямое подключение Прибор должен быть подключен напрямую к сети через многополюсный автоматический выключатель с минимальным расстоянием между контактами 3 мм. Правильность...
- Page 28 Подключение духового шкафа...
- Page 29 Instalarea Instalarea trebuie să fie realizată în totalitate de o persoană competentă sau un electrician calificat. Înainte de conectarea la reţeaua electrică, asiguraţi-vă că tensiunea reţelei corespunde tensiunii specificate pe plăcuţa de identificare. Legătură directă The appliance Aparatul trebuie conectat direct la reţea cu ajutorul unui disjunctor omnipolar cu o deschidere minimă...
- Page 30 Conectarea cuptorului...
- Page 31 Instalación Toda la instalación deberá ser realizada por una persona competente o un electricista cualificado. Antes de conectar la corriente eléctrica asegúrese de que la tensión de la red se corresponde con la indicada en la placa de características técnicas. Conexión directa El aparato debe conectarse directamente a la red eléctrica mediante un disyuntor omnipolar con una apertura mínima de tres mm entre los contactos.
- Page 32 Conexión del horno...
- Page 33 Instalação A instalação tem de ser efetuada por uma pessoa competente ou por um eletricista qualificado. Antes de ligar a rede elétrica, certifique-se de que a tensão da rede corresponde à tensão na placa de classificação. Ligação direta The O aparelho tem de ser ligado diretamente à rede elétrica utilizando um disjuntor omnipolar com uma abertura mínima de 3 mm entre os contactos.
- Page 34 Ligação do forno...
- Page 35 Montaj Montajın tamamı, yetkili bir kişi veya uzman bir elektrik tesisatçısı tarafından yapılmalıdır. Ana güç kaynağını bağlamadan önce ana voltajın, anma değeri plakasındaki voltajla uyumlu olduğundan emin olun. Doğrudan Bağlantı The appliance Cihaz, omnipolar devre kesici kullanılarak kontaklar arasında minimum 3 milimetrelik bir açıklıkla doğrudan ana güç...
- Page 36 Fırın bağlantısı...
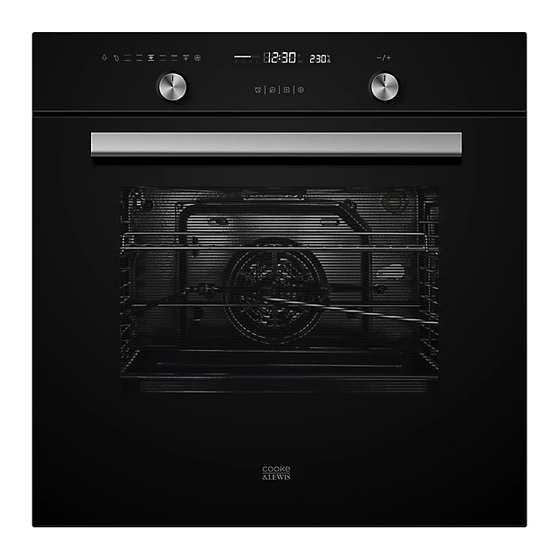
- Page 37 Utilisation Benutzung Utilizare Kullanım Before you start WARnInG: Read the instructions before using the appliance. Function & Settings Control panel Door Control panel Door Fixing holes (x2) Handle Fixing holes (x2) Handle Oven lamp Mains cable Oven lamp Mains cable Shelf level markings Side rails Shelf level markings...
-
Page 38: Functions And Settings
Model with button control: CLMFBI Display Timer Display Timer - /+ selector F2 Alarm - / + selector F2 Alarm Function selector F1 Start button Function selector F1 Start button Stop button Stop button Models with touch controls: CLMFMI & CLMFST... - Page 39 5. Press “ ” to confirm. 6. The clock is now set. note! To use the timer function, please set the clock first. If the power is disconnected from the appliance, the clock will need to be reset. Use the F1 control to select one of the available operating modes. The corresponding icon illuminates.
-
Page 40: Practical Cooking Advice
Icon Function Description The top and bottom work together to provide conventional cooking. Conventional The temperature can be set within the range of 50-250°C in 5°C cooking increments. The default temperature is 220°C. Combination of the fan and both heating elements provides more even heat penetration,saving up to 30-40% of energy. -
Page 41: Conventional Cooking
COnVenTIOnAL COOKInG Recommended Temperature Cooking time Food shelf position from setting (ºC) in minutes the bottom Small cakes 175 - 185 16 - 19 Sponge cake 180 - 185 20 - 25 Pizza 205 - 210 18 - 23 Apple yeast cake 185 - 195 25 - 50 COnVeCTIOn... -
Page 42: Grill Function
How to cook 1. Rotate the F1 control clockwise or anti-clockwise to select the desired cooking function. The corresponding icon illuminates. 2. Rotate the F2 control to adjust temperature. Then press “ ” to start. 3. The default cooking time is nine hours and the default temperature appears in the display. 4. - Page 43 Programming an automatic start time This function is used to set the automatic start time of the oven. Before using this function, ensure that: • The food is placed in the oven. • The clock is set. note: This function can only be used when the oven is in standby. 1.
-
Page 44: Energy Saving Function
energy saving function In standby and delay mode, press and hold “ ” for 3 seconds and the display goes off. Or, if no function is selected within ten minutes the oven enters energy saving mode automatically. To exit energy saving mode Use F2, pause or play to show the clock. -
Page 45: Removing The Side Rails
Entretien et maintenance inere ș Cuidados y Mantenimiento Bakım ve Onarım Cleaning Please clean the oven regularly to ensure safe use and reliability. Before any maintenance and cleaning, disconnect the power. Set all controls in the OFF position. It is recommended to clean the oven when it is still slightly warm; do not clean when hot. Clean the surface of the unit with a damp cloth, soft brush or fine sponge and then wipe dry. -
Page 46: Cleaning The Oven Door
Cleaning the oven cavity 1. Open the door. 2. Clean all oven accessories with warm water or washing up liquid and polish dry with a soft clean cloth. 3. Clean the oven interior with a soft clean cloth. 4. Wipe the front of the appliance with a damp cloth. 5. - Page 47 4. To remove the inner glass, place the door face down on a table. Use a soft cloth to avoid scratching the outer glass. 5. Lift out the inner pane of glass. 6. Lift out the middle pane of glass. 7.
- Page 48 Lamp replacement Warning! Ensure the glass is completely cool before removal’ Always disconnect the appliance from the electricity supply before performing maintenance work. During use the appliance becomes hot. Care should be taken to avoid touching heating elements inside the oven. Wait until all parts have cooled down. Important! The bulb in the oven lamp is a special bulb and has high temperature resistance.
- Page 49 Shelf replacement warning To ensure the oven shelves operate safely, correct placement of the shelves between the side rail is imperative. Shelves and the pan only can be used between the first and fifth layers. Ventilation openings When cooking is finished, the cooling fan will operate for a short while until the oven has cooled below 75ºC.
- Page 50 Utilisation Benutzung Utilizare Kullanım Avant de commencer AVeRTISSeMenT : lire les instructions avant d’utiliser l’appareil. Fonctionnement et réglages Control panel Door Panneau de contrôle Porte Fixing holes (x2) Handle Orifices de fixation (2 trous) Manche Oven lamp Mains cable Lampe du four Câble secteur Shelf level markings Side rails...
-
Page 51: Table Of Contents
Modèle avec boutons de commande : CLMFBI Affichage Minuterie Display Timer Sélecteur F2 « -/ + » Alarme - / + selector F2 Alarm Function selector F1 Start button Bouton de démarrage Sélecteur de fonction F1 Stop button Bouton d’arrêt Modèles avec commandes tactiles : CLMFMI &... -
Page 52: Appuyer Sur " " Pour Confirmer. Les Chiffres Des Minutes Se Mettent À Clignoter
5. Appuyer sur « » pour confirmer. Les chiffres des minutes se mettent à clignoter. 6. L’horloge est réglée. Remarque ! Pour utiliser la fonction de minuterie, régler l’horloge en premier. Si l’alimentation de l’appareil est débranchée, l’horloge doit être réinitialisée. Utiliser la commande F1 pour sélectionner l’un des modes de fonctionnement disponibles. - Page 53 Icône Fonction Description Un élément non visible sur le bas du four fournit une chaleur plus concentrée à la base des aliments, sans les colorer. Il est idéal pour la cuisson lente de plats tels que des plats mijotés, des ragoûts, Chaleur des pâtisseries et des pizzas, lorsque l’on souhaite obtenir une provenant...
- Page 54 Icône Fonction Description Un élément de chauffage situé autour du ventilateur de convection fournit une source de chaleur supplémentaire pour une cuisson à convection. En mode de convection, le ventilateur s’allume automatiquement pour améliorer la circulation de l’air à l’intérieur du four et procure une chaleur uniforme pour la cuisson.
- Page 55 COnVeCTIOn Gâteau aux pommes et à la levure 170 - 175 60 - 70 (un seul étage) 2 (plaque profonde) Petits gâteaux 165 - 170 20 - 23 (double étages) (plaque peu profonde) 2 (plaque profonde) Gâteau aux pommes et à...
- Page 56 Plage de temps Paliers de temp 0 - 30 minutes. 1 minute. 30 minutes. - 9 heures 5 minutes. 5. Tourner la commande F2 pour régler la température de cuisson une fois que la cuisson commence. Appuyer sur « » pour confirmer, un signal sonore est émis. Si la touche « » n’est pas activée dans les trois secondes, le four continue la cuisson à...
- Page 57 1. Appuyer sur « » pour entrer en mode de démarrage différé. Les chiffres des heures se mettent à clignoter. 2. Tourner la commande F2 pour sélectionner les chiffres des heures (0 à 23). 3. Appuyer sur « » pour confirmer. Les chiffres des minutes se mettent à clignoter. 4.
- Page 58 Fonction d’économie d’énergie En mode veille et en mode différé, appuyer sur « » et maintenir le doigt pendant 3 secondes, l’affichage s’éteint. Ou, si aucune fonction n’est sélectionnée dans les dix minutes, le four passe automatiquement en mode économie d’énergie. Pour quitter le mode d’économie d’énergie Utiliser F2, Pause ou Marche pour afficher l’horloge.
- Page 59 Entretien et maintenance inere ș Cuidados y Mantenimiento Bakım ve Onarım nettoyage Nettoyer régulièrement le four pour garantir la fiabilité et une utilisation en toute sécurité. Avant toute opération d’entretien et de nettoyage, débrancher l’alimentation. Positionner toutes les commandes en position ARRÊT. Il est recommandé...
- Page 60 nettoyage de l’intérieur du four 1. Ouvrir la porte. 2. Nettoyer tous les accessoires du four avec de l’eau chaude ou du liquide vaisselle et les polir à l’aide d’un chiffon propre. 3. Nettoyer l’intérieur du four avec un chiffon doux et propre. 4.
- Page 61 30° 4. Pour retirer la vitre intérieure, placer la face avant de la porte sur une table. Utiliser un chiffon doux pour éviter de rayer la vitre extérieure. 5. Soulever le panneau de verre intérieur.
-
Page 62: Remplacement De La Lampe
6. Soulever le panneau de verre du milieu. 7. Après le nettoyage, remonter la porte dans l’ordre inverse et la remonter sur le four. AVeRTISSeMenT : ne pas forcer lors du démontage la porte pour éviter de briser la vitre ou de causer des dommages. La porte ne doit être portée que par les côtés, ne pas utiliser la poignée.. - Page 63 1. Débrancher l’alimentation du réseau électrique ou éteindre le disjoncteur de la prise secteur de l’appareil. 2. Dévisser le cache en verre de la lampe en le tournant dans le sens inverse des aiguilles d’une montre (remarque : il peut être rigide) et remplacer l’ampoule par une nouvelle ampoule du même type.
- Page 64 Utilisation Benutzung Utilizare Kullanım Przed rozpoczęciem użytkowania OSTRZEŻENIE: Przed rozpoczęciem korzystania z urządzenia należy zapoznać się z instrukcją obsługi.. Funkcje i ustawienia Control panel Door Panel sterowania Drzwiczki Fixing holes (x2) Handle Otwory mocujące (x2) Uchwyt Oven lamp Mains cable Lampka piekarnika Przewód zasilania sieciowego Shelf level markings...
-
Page 65: Display 15 15 Timer
Model z obsługą za pomocą przycisków: CLMFBI Wyświetlacz Regulator czasowy Display Timer Pokrętło wyboru „-/+” F2 Alarm - / + selector F2 Alarm Function selector F1 Start button Przycisk uruchamiania Pokrętło wyboru funkcji F1 Stop button Przycisk zatrzymania Modele z obsługą dotykową CLMFMI i CLMFST Wyświetlacz... - Page 66 5. Nacisnąć przycisk „ ”, aby potwierdzić. 6. Zegar został ustawiony. Uwaga! To Aby móc korzystać z funkcji wyłącznika czasowego, należy najpierw ustawić zegar. W przypadku odłączenia zasilania od urządzenia niezbędne będzie ponowne nastawienie zegara. Za pomocą pokrętła F1 wybrać jeden z dostępnych trybów pracy. Zaświeci się odpowiednia ikona. elementy Pokrętło F1 Pokrętło F2...
- Page 67 Ikona Funkcja Opis Ukryty element grzejny w dolnej części piekarnika skupia ciepło od spodu potrawy bez jej przyrumienienia. Jest to idealne rozwiązanie do powolnego przyrządzania takich potraw, jak zapiekanki, gulasze, ciasta i Grzanie od pizze, gdyż zapewnia uzyskanie chrupkiego spodu. dołu Temperaturę...
- Page 68 Praktyczna porada kulinarna Piekarnik oferuje różne sposoby przygotowywania potraw. Z biegiem czasu użytkownik powinien wypracować najlepsze praktyki korzystania z tego urządzenia, a poniższe wskazówki powinien traktować jedynie jako poglądowe, możliwe do zmiany stosownie do własnego doświadczenia. Temperatury i czasy przygotowywania potraw podano na ich opakowaniach. Po zapoznaniu się z działaniem urządzenia można modyfikować...
- Page 69 GRILL PODWÓJnY Z WenTYLATOReM 55 - 65 Kurczak (obrócić po: 35 min) 75 - 88 Gęś (obrócić po: 35 min) Schab pieczony 135 - 150 Przygotowywanie potraw 1. Obrócić pokrętło F1 w prawo lub w lewo, aby wybrać odpowiednią funkcję. Zaświeci się odpowiednia ikona.
- Page 70 Ustawianie alarmu Wyłącznik czasowy można ustawić w zakresie od 1 minuty do 9 godzin 59 minut. Uwaga: tej funkcji można używać tylko wówczas, gdy piekarnik działa w trybie gotowości. 1. Nacisnąć przycisk „ ”, aby wejść w tryb alarmu. Zostanie wyświetlona ikona zegara i zaczną migać...
- Page 71 Uwaga! • Tej funkcji nie można używać do rozmrażania potraw. • Przy korzystaniu z funkcji opóźnionego startu nie można używać funkcji alarmu. • W celu sprawdzenia statusu należy jednokrotnie nacisnąć przycisk pauzy „ ”; w celu anulowania — nacisnąć go dwukrotnie, a w celu kontynuowania — nacisnąć przycisk rozpoczęcia „ ”. Sprawdzanie pozostałego czasu Tryb Opis...
- Page 72 Entretien et maintenance inere ș Cuidados y Mantenimiento Bakım ve Onarım Czyszczenie Piekarnik należy czyścić regularnie w celu zapewnienia bezpieczeństwa użytkowania i niezawodności urządzenia. Przed wykonaniem jakichkolwiek czynności konserwacyjnych lub czyszczenia należy odłączyć zasilanie. Wszystkie pokrętła i przyciski ustawić w pozycji wyłączenia. Zaleca się...
- Page 73 Czyszczenie komory piekarnika 1. Otworzyć drzwiczki. 2. Oczyścić wszystkie akcesoria piekarnika ciepłą wodą lub płynem do mycia naczyń i wytrzeć do sucha czystą, miękką ściereczką. 3. Przetrzeć wnętrze piekarnika czystą, miękką ściereczką. 4. Przetrzeć przód urządzenia wilgotną ściereczką. 5. Pozostawić piekarnik i wszystkie akcesoria do dokładnego wyschnięcia. Ostrzeżenie! Uwaga: Nie można zdemontować...
- Page 74 30° 4. Aby wymontować szybę wewnętrzną, położyć drzwiczki na stole powierzchnią czołową w dół. Użyć miękkiej tkaniny, aby uniknąć zarysowania szyby zewnętrznej. 5. Wyjąć szybę wewnętrzną. 6. Wyjąć szybę środkową.
- Page 75 7. Po czyszczeniu złożyć drzwiczki, wykonując powyższe czynności w odwrotnej kolejności, po czym przymocować je do piekarnika. OSTRZEŻENIE: Przy zdejmowaniu drzwiczek nie używać siły, aby nie spowodować uszkodzenia elementów lub obrażeń ciała. Przy przenoszeniu drzwiczek trzymać je za brzegi, a nie za uchwyt. Wymiana oświetlenia Ostrzeżenie! Przed wyjęciem należy upewnić...
- Page 76 Przy wymianie należy wykonać następujące czynności: 1. Wyjąć wtyczkę z gniazda zasilania lub przełączyć bezpiecznik do pozycji wyłączenia. 2. Odkręcić szklany klosz lampki, obracając w lewo (może ciężko się obracać) i wymienić żarówkę na nową tego samego typu. Trzymać nową żarówkę przez tkaninę, aby uniknąć jej uszkodzenia. 3.
- Page 77 Utilisation Benutzung Utilizare Kullanım Vor dem Start WARnUnG: Lesen Sie die Anleitung, bevor Sie das Gerät verwenden. Funktion und Einstellung Control panel Door Bedienfeld Tür Fixing holes (x2) Handle Befestigungsbohrungen (x2) Griff Oven lamp Mains cable Ofenleuchte Netzkabel Shelf level markings Side rails Markierungen für Einschubebenen Seitliche Schienen...
- Page 78 Modell mit Tasten: CLMFBI Auslage Timer Display Timer „-/+“-Bedienelement F2 Alarm - / + selector F2 Alarm Function selector F1 Start button Starttaste Bedienelement zur Funktionswahl F1 Stop button Stopptaste Modelle mit Touch-Tasten: CLMFMI & CLMFST Auslage Timer Display Timer „-/+“-Bedienelement F2...
- Page 79 5. Drücken Sie zum Bestätigen „ “. 6. Die Uhrzeit ist jetzt eingestellt. Hinweis! Um die Timer-Funktion nutzen zu können, muss die Uhrzeit eingestellt worden sein. Wenn das Gerät von der Stromversorgung getrennt wurde, muss die Uhrzeit neu eingestellt werden. Verwenden Sie das Bedienelement F1, um einen der verfügbaren Betriebsmodi zu wählen.
- Page 80 Symbol Funktion Beschreibung Ein verborgenes Element im unteren Teil des Ofens ermöglicht eine stärker konzentrierte Erhitzung der Nahrung von unten, ohne das Nahrungsmittel zu bräunen. Diese Methode eignet sich ideal für das langsame Garen von Gerichten wie Aufläufe, Eintöpfe Erhitzen und Pasteten, und welchen, bei denen ein knuspriger Boden von unten gewünscht ist wie Pizza.
- Page 81 Symbol Funktion Beschreibung Ein um das Heizelement herum angeordnetes Umluftgebläse bietet eine zusätzliche Wärmequelle für konventionelles Garen. Im Umluftmodus schaltet sich das Gebläse automatisch ein, um die Luftzirkulation innerhalb des Ofens zu verbessern und eine gleichmäßige Wärmeverteilung für das Garen sicherzustellen. Umluft Dieser Modus eignet sich für Kuchen und Gebäck und zum Rösten von Braten, wenn Sie möchten, dass diese außen...
- Page 82 2 (tiefes Blech) Kleine Kuchen 165 - 170 20 - 23 (doppelter Einschub) 4 (flaches Blech) 2 (tiefes Blech) Blechkuchen 170 - 175 65 - 75 (doppelter Einschub) 4 (flaches Blech) GRILLen MIT STRAHLUnGSWÄRMe Toast 4 - 5 Rindersteak 15 + DOPPeLGRILL Rindersteak 6 - 8...
- Page 83 5. Drehen Sie das Bedienelement F2, um die Gartemperatur anzupassen, sobald das Garen beginnt. Drücken Sie zum Bestätigen „ “ – ein Signalton wird ausgegeben. Wenn Sie „ “ nicht innerhalb von drei Sekunden drücken, gart der Ofen mit der zuletzt eingestellten Gartemperatur weiter.
- Page 84 4. Drehen Sie das Bedienelement F2, um die Minutenziffern (0–59) einzustellen. 5. Drehen Sie das Bedienelement F1, um die Garfunktion zu wählen: Eine Sanduhr wird auf dem Display angezeigt und die Standardtemperatur wird ausgewählt. 6. Drücken Sie „ “, um die Garzeit/Temperatur einzustellen. Der Standardwert 9 Stunden wird angezeigt.
- Page 85 Kindersicherung So aktivieren Sie die Kindersicherung: Halten Sie im Standby-Modus „ “ und „ “ drei Sekunden lang gedrückt. Das Gerät gibt einen Signalton aus und kommuniziert auf diese Weise, dass die Kindersicherung aktiviert ist. Das Kindersicherungssymbol „ “ wird auf dem Display angezeigt. So deaktivieren Sie die Kindersicherung: Halten Sie bei aktivierter Kindersicherung „...
- Page 86 Entretien et maintenance inere ș Cuidados y Mantenimiento Bakım ve Onarım Reinigung Reinigen Sie den Ofen bitte regelmäßig, um eine sichere und zuverlässige Verwendung sicherzustellen. Trennen Sie das Gerät vor jeglichen Wartungs- und Reinigungsarbeiten von der Stromversorgung. Stellen alle Bedienelemente in die Stellung AUS. Es wird empfohlen, den Ofen zu reinigen, solange er noch etwas warm –...
- Page 87 Reinigen des Garraums 1. Öffnen Sie die Tür. 2. Reinigen Sie alle Zubehörteile mit warmem Wasser, das sie ggf. mit Spülmittel versetzen, und trocknen Sie alle Teile mit einem weichen und sauberen Tuch. 3. Reinigen Sie den Innenraum des Ofens mit einem weichen und sauberen Tuch. 4.
- Page 88 30° 4. Setzen Sie die Tür zum Entfernen der inneren Glasscheibe kopfüber auf einen Tisch. Verwenden Sie ein weiches Tuch, damit die äußere Scheibe nicht zerkratzt wird. 5. Heben Sie die innere Glasscheibe heraus. 6. Heben Sie die mittlere Glasscheibe heraus.
- Page 89 7. Setzen Sie die Tür nach der Reinigung in umgekehrter Reihenfolge wieder zusammen und bringen Sie sie wieder am Ofen an. WARnUnG: Wenden Sie während des Ausbaus keine Gewalt an, damit es nicht zum Bruch oder zu Verletzungen kommt. Tragen Sie die Tür nur an den Kanten und nicht am Griff.
- Page 90 Gehen Sie beim Ersetzen wie folgt vor: 1. Ziehen Sie den Netzstecker aus der Steckdose oder schalten Sie das Gerät über den Hauptschalter am Netzausgang des Geräts aus. 2. Schrauben Sie die Glasabdeckung der Leuchte durch Drehen gegen den Uhrzeigersinn ab, (beachten Sie, dass sie schwergängig sein kann) und ersetzen Sie das Leuchtmittel durch ein neues des gleichen Typs.
- Page 91 Utilisation Benutzung Utilizare Kullanım Перед началом эксплуатации ПРЕДУПРЕЖДЕНИЕ. Перед использованием прибора ознакомьтесь с инструкцией. Функции и настройки Control panel Door Панель управления Дверь Fixing holes (x2) Handle Отверстия для фиксации (2) Рукоятка Oven lamp Mains cable Лампа духового шкафа Кабель питания Shelf level markings Side rails Маркировка...
- Page 92 Модель с кнопочным управлением: CLMFBI Дисплей Таймер Display Timer Ручка выбора “-/+” F2 Оповещение - / + selector F2 Alarm Function selector F1 Start button Кнопка запуска Ручка выбора функций F1 Stop button Кнопка остановки Модели с сенсорным управлением: CLMFMI & CLMFST Дисплей...
- Page 93 4. Поверните ручку F2 для выбора нужного значения минут (0-59). 5. Нажмите “ “ для подтверждения. 6. Часы настроены. Примечание. ToЧтобы использовать функцию таймера, нужно сначала установить часы. В случае отключения питания необходимо будет затем заново настроить часы. Используйте ручку F1 для выбора одного из доступных режимов работы. Загорится...
- Page 94 Значок Функция Описание Скрытый нижний нагревательный элемент обеспечивает более интенсивный нагрев блюда снизу без подрумянивания. Эта функция идеально подходит блюд длительного приготовления, таких как запеканка, рагу, мучные и кондитерские изделия и Нижний нагрев пицца с корочкой. Температуру можно установить в диапазоне от 60 до 120°C с шагом...
- Page 95 Значок Функция Описание Нагревательный элемент, расположенный вокруг конвекционного вентилятора, обеспечивает дополнительный источник нагрева при использовании режима конвекции. В режиме конвекции вентилятор включается автоматически для обеспечения более эффективной циркуляции воздуха в духовом шкафу и более равномерного распределения тепла. Конвекция Этот режим подходит для приготовления пирогов, мучных и кондитерских...
- Page 96 Пицца 170 - 175 19 - 25 Яблочный пирог из дрожжевого 170 - 175 60 - 70 теста (одноярусный) 2 (глубокая форма) Небольшой пирог 165 - 170 20 - 23 (двухярусный) 4 (неглубокая форма) Яблочный пирог из 2 (глубокая форма) дрожжевого...
- Page 97 Интервал времени Шаг по времени 0 - 30 Минуты. 1 Минута. 30 Минуты. - 9 Часы 5 Минуты. 5. Поверните ручку F2 для регулировки температуры после начала приготовления. Нажмите “ “ для подтверждения — прозвучит звуковой сигнал. Если кнопка “ ” не будет нажата в течение...
- Page 98 Программирование времени автоматического запуска Данная функция предназначена для установки времени автоматического запуска духовки. Перед использованием данной функции убедитесь в следующем: • Блюдо помещено в духовой шкаф. • Часы настроены. Примечание. Эту функцию можно использовать только пока духовка находится в режиме ожидания. 1.
- Page 99 Функция экономии энергии В режимах ожидания и отложенного запуска нажмите и удерживайте кнопку “ ” в течение 3 секунд для отключения дисплея. Или, если никакие функции не используются в течение десяти минут, духовой шкаф автоматически переходит в энергосберегающий режим. Для выхода из энергосберегающего режима Используйте...
- Page 100 Entretien et maintenance ș inere Cuidados y Mantenimiento Bakım ve Onarım Очистка Выполняйте регулярную очистку духового шкафа для обеспечения его безопасной и надежной работы. Отключайте прибор от источника питания перед выполнением любых действий по очистке и техническому обслуживанию. Установите все элементы управления в положение выключения. Рекомендуется...
- Page 101 Очистка внутренних поверхностей духового шкафа 1. Откройте дверцу. 2. Очистите все детали духового шкафа с использованием теплой воды или моющей жидкости и насухо протрите мягкой чистой тканью. 3. Очистите внутренние поверхности духового шкафа с помощью мягкой чистой ткани. 4. Протрите лицевую поверхность прибора влажной тканью. 5.
- Page 102 30° 4. Чтобы снять внутреннее стекло, положите дверцу на стол лицевой стороной вниз. Используйте мягкую ткань, чтобы избежать появления царапин на внешнем стекле. 5. Поднимите внутреннее стекло. 6. Поднимите среднее стекло.
- Page 103 7. После очистки соберите дверцу, выполнив все действия в обратном порядке, и установите ее на духовой шкаф. ПРЕДУПРЕЖДЕНИЕ. Не используйте силу при снятии дверцы, чтобы избежать получения травм или поломки дверцы. Переносите дверцу, держась за ее края, не используйте ручку.. Замена...
- Page 104 2. Открутите стеклянную защитную крышку лампы, повернув ее против часовой стрелки (примечание: может быть закручена очень плотно) и замените старую лампочку новой того же типа. Держите лампочку с помощью ткани, чтобы исключить риск преждевременного повреждения. 3. Закрутите стеклянную защитную крышку лампы на место. ПРИМЕЧАНИЕ.
- Page 105 Utilisation Benutzung Utilizare Kullanım Înainte de a începe AVeRTISMenT: Citiţi instrucţiunile înainte de utilizarea aparatului. Funcţionare şi setări Control panel Door Panou de control Uşă Fixing holes (x2) Handle Găuri de fixare (x2) Mâner Oven lamp Mains cable Lampă cuptor Cablu de alimentare Shelf level markings Side rails...
-
Page 106: Stop Button
Model cu buton de comandă: CLMFBI Afişaj Temporizator Display Timer Selector F2 „-/+” Alarmă - / + selector F2 Alarm Function selector F1 Start button Buton de pornire Selector de funcţie F1 Stop button Buton de oprire Modele cu comandă tactilă: CLMFMI & CLMFST Afişaj... -
Page 107: Selector F2
5. Apăsaţi „ ” pentru a confirma. 6. Ceasul este setat. Notă! Pentru utilizarea temporizatorului, setaţi mai întâi ceasul. Dacă aparatul este deconectat de la alimentarea electrică, ceasul trebuie resetat. Folosiţi butonul de comandă F1 pentru a selecta unul dintre modurile de funcţionare disponibile. Pictograma corespunzătoare se aprinde. - Page 108 Pictogramă Funcţie Descriere Un element încastrat în partea inferioară a cuptorului asigură o căldură mai concentrată către baza alimentelor, fără a le arde. Acest lucru este ideal pentru gătirea la foc încet a preparatelor precum Încălzirea cele în caserole, tocăniţe, produse de patiserie şi pizza, la care se părţii doreşte o bază...
- Page 109 Recomandări practice de preparare Cuptorul oferă o gamă largă de alternative care permite prepararea oricărui tip de aliment, în cel mai bun mod posibil. Cu timpul, veţi învăţa să profitaţi de acest aparat de gătit versatil, următoarele îndrumări fiind doar informative şi pot fi modificate în funcţie de experienţa personală. Citiţi informaţiile de pe ambalajul alimentelor pentru a afla temperatura şi durata de preparare.
- Page 110 GRĂTAR DUBLU Friptură 6 - 8 ARIPI DUBLE CU GRĂTAR 55 - 65 (Se întoarce după: 35 min) 75 - 88 Gâscă (Se întoarce după: 35 min) Friptură de porc 135 - 150 Modalitate de preparare 1. Rotiţi butonul de comandă F1 în sens orar sau antiorar pentru a selecta funcţia dorită de preparare.
-
Page 111: Rotiţi Butonul De Comandă F2 Pentru A Selecta Cifrele Orei
Setarea unei alarme Se poate seta o alarmă între 1 minut şi 9 ore şi 59 de minute. Notă: Această funcţie se poate folosi când cuptorul este în modul inactiv. 1. Apăsaţi „ ” pentru a accesa modul de setare a alarmei. Se afişează o pictogramă sub formă de ceas şi cifrele orei luminează... - Page 112 Verificarea timpului rămas Descriere Dacă ceasul este deja setat, apăsaţi „ ” pentru a verifica ora curentă.. Dacă alarma este deja setată, apăsaţi „ ” pentru a verifica ora alarmei, afişajul de funcţionare comută la ceas, apoi se afişează din nou timpul de preparare după 3 secunde. Dacă...
- Page 113 Entretien et maintenance inere ș Cuidados y Mantenimiento Bakım ve Onarım Curăţarea Curăţaţi periodic cuptorul pentru utilizare sigură şi fiabilitate. Înainte de orice operaţiune de întreţinere sau curăţare, deconectaţi alimentarea electrică. Setaţi toate comenzile în modul OFF. Se recomandă curăţarea cuptorului atunci când încă este puţin cald; nu curăţaţi cuptorul când este fierbinte.
- Page 114 Curăţarea interiorului cuptorului 1. Deschideţi uşa. 2. Curăţaţi toate accesoriile cuptorului cu apă caldă sau detergent lichid şi ştergeţi cu o lavetă moale şi curată până la uscare. 3. Curăţaţi interiorul cuptorului cu o lavetă moale şi curată. 4. Ştergeţi partea frontală a aparatului cu o lavetă umedă. 5.
- Page 115 4. Pentru îndepărtarea sticlei interioare, aşezaţi uşa cu faţa în jos pe o masă. Folosiţi o lavetă moale pentru a evita zgârierea sticlei exterioare. 5. Scoateţi panoul interior de sticlă. 6. Scoateţi panoul median de sticlă. 7. După curăţare, asamblaţi la loc uşa în ordinea inversă a operaţiunilor şi montaţi-o înapoi pe cuptor.
- Page 116 Înlocuirea becului Avertisment! Asiguraţi-vă că sticla este complet rece înainte de îndepărtare. Deconectaţi întotdeauna alimentarea electrică a aparatului înainte de a efectua lucrări de întreţinere. În timpul utilizării, aparatul poate deveni fierbinte. Procedaţi cu grijă pentru a evita atingerea elementelor de încălzire din interiorul cuptorului. Aşteptaţi până la răcirea tuturor pieselor. Important! Becul din cuptor este unul special şi are este rezistent la temperaturi ridicate.
- Page 117 Avertisment privind înlocuirea grilajelor Pentru a asigura faptul că grilajele funcţionează corespunzător, este imperativă amplasarea corectă a grilajelor între şinele laterale. Grilajele vaselor pot fi folosite între primul şi al cincilea nivel. Orificii de ventilare După finalizarea preparării, ventilatorul va mai funcţiona pentru scurt timp, până când cuptorul se răceşte la 75ºC.
- Page 118 Utilisation Benutzung Utilizare Kullanım Antes de empezar ADVeRTenCIA: Lea las instrucciones antes de utilizar el aparato. Funcionamiento y ajustes Fixing holes (x2) Handle Panel de control Uşă Oven lamp Mains cable Orificios de fijación (2) Mâner Lámpara del horno Cablu de alimentare Shelf level markings Side rails Marcas de nivel de las rejillas...
-
Page 119: Timer
Modelo con botones de control: CLMFBI Exposición Temporizador Display Timer Selector F2 “-/+” Alarma - / + selector F2 Alarm Function selector F1 Start button Botón de inicio Selector de función F1 Stop button Botón de parada Modelos con controles táctiles: CLMFMI & CLMFST Exposición... - Page 120 4. Gire el botón F2 para seleccionar los dígitos de los minutos (0-59). 5. Pulse “ ” para confirmar. 6. El reloj queda ajustado. nota: Para utilizar la función de temporizador, primero debe ajustar el reloj. Si se interrumpe la alimentación del aparato, es necesario volver a ajustar el reloj. Utilice el selector F1 para seleccionar uno de los modos de funcionamiento disponibles.
- Page 121 Icono Función Descripción Las partes superior e inferior funcionan conjuntamente para proporcionar cocción convencional. Cocción convencional La temperatura se puede ajustar de 50 a 250 °C, en incrementos de 5 °C. La temperatura predeterminada es de 220 °C. El uso conjunto del ventilador y los dos elementos de calor proporciona una penetración del calor más homogénea y puede ahorrar hasta el 30-40 % de energía.
- Page 122 Consejos de cocción prácticos El horno ofrece muchas opciones que le permiten cocinar cualquier tipo de alimento de forma óptima. Con el tiempo, aprenderá a hacer el mejor uso de este completo aparato de cocina y las indicaciones siguientes son solo instrucciones generales que se pueden cambiar en función de su propia experiencia personal.
- Page 123 GRILL DOBLe Bistec 6 - 8 VenTILADOR DOBLe COn GRILL 55 - 65 Pollo (Darle la vuelta a los 35 min) 75 - 88 (Darle la vuelta a los 35 min) Pieza de cerdo asada 135 - 150 Funciones de cocción 1.
- Page 124 Ajuste de una alarma El temporizador se puede ajustar de 1 minuto a 9 horas y 59 minutos. Nota: Esta función solo puede utilizarse cuando el horno está en modo de espera. 1. Pulse “ ” para ir al modo de alarma. Aparece el icono de reloj y los dígitos de las horas parpadean en la pantalla.
- Page 125 Comprobación del tiempo que queda Modo Descripción Si el reloj ya está ajustado, pulse “ “ para comprobar la hora. Modo de Si la alarma ya está ajustada, pulse “ “ para comprobar la hora de la alarma. funcionamiento La pantalla pasa a ser un reloj y vuelve al tiempo de cocción transcurridos 3 segundos.
- Page 126 Entretien et maintenance inere ș Cuidados y Mantenimiento Bakım ve Onarım Limpieza Limpie el horno periódicamente para garantizar un uso seguro y satisfactorio. Antes de realizar cualquier tarea de mantenimiento y limpieza, desconecte el cable de alimentación. Ponga todos los controles en la posición de apagado, OFF. Se recomienda limpiar el horno cuando todavía esté...
- Page 127 Limpieza del interior del horno 1. Abra la puerta. 2. Limpie todos los accesorios del horno con agua tibia o detergente y séquelos con un paño limpio. 3. Limpie el interior del horno con un paño suave limpio. 4. Limpie la parte frontal del aparato con un paño húmedo. 5.
- Page 128 4. Para quitar el cristal interior, ponga la puerta boca abajo sobre una mesa. Utilice un paño suave para no rayar el cristal exterior. 5. Saque el panel de cristal interior. 6. Saque el panel de cristal intermedio. 7. Después de la limpieza, vuelva a montar la puerta en el orden inverso y a ponerla en el horno. ADVeRTenCIA: No fuerce la puerta durante la extracción para que no se rompa y evitar lesiones.
- Page 129 Sustitución de bombillas ¡Advertencia! Asegúrese de que el cristal que cubre la bombilla está completamente frío antes de quitarlo. Desconecte siempre el aparato de la alimentación eléctrica antes de efectuar tareas de mantenimiento. Cuando está en uso, el aparato se calienta. Debe tenerse cuidado para no tocar los elementos de calor del interior del horno.
- Page 130 Advertencia de sustitución de las rejillas Para garantizar que las rejillas del horno se pueden usar correctamente, es esencial colocarlas correctamente en las guías laterales. Las rejillas y la bandeja solo se pueden usar entre los niveles primero y quinto. Aberturas de ventilación Cuando termina la cocción, el ventilador sigue funcionando durante un breve tiempo, hasta que el horno se ha enfriado por debajo de 75 °C.
- Page 131 Utilisation Benutzung Utilizare Kullanım Antes de começar AVISO: Leia as instruções antes de utilizar o aparelho. Função e configurações Control panel Door Painel de controlo Porta Fixing holes (x2) Handle Orifícios de fixação (x2) Cabo Oven lamp Mains cable Lâmpada do forno Cabo de alimentação Shelf level markings Side rails...
- Page 132 Modelo sem controlo de botão: CLMFBI Apresentação Temporizador Display Timer Seletor F2 “-/+” Alarme - / + selector F2 Alarm Function selector F1 Start button Botão de iniciar Seletor de função F1 Stop button Botão de parar Modelos com controlos tácteis: CLMFMI & CLMFST Apresentação...
- Page 133 4. Rode o controlo F2 para selecionar os dígitos dos minutos (0-59). 5. Prima “ ” para confirmar. 6. O relógio está agora configurado. nota! Para utilizar a função de temporizar, tem de configurar o relógio primeiro. Se o aparelho for desligado da alimentação elétrica será necessário configurar novamente o relógio. Utilize o controlo F1 para selecionar um dos modos de funcionamento disponíveis.
- Page 134 Icone Função Descrição Um elemento oculto na base do forno proporciona um calor mais concentrado na parte de baixo dos alimentos, sem queimar. Isto é ideal para pratos de confeção lenta tais como chanfanas, assados, bolos e Aquecimento pizas em que se pretende conseguir uma base crocante. inferior A temperatura pode ser definida num intervalo entre 60-120 °C em intervalos de 5 °C.
- Page 135 Conselhos práticos para cozinhar O forno disponibiliza uma vasta gama de alternativas que lhe permitem cozinhar qualquer tipo de comida da melhor forma possível. Com o tempo aprenderá a tirar o máximo partido deste versátil aparelho de cozinha e as seguintes indicações são apenas orientações que poderá adaptar de acordo com a sua experiência pessoal.
- Page 136 GReLHA DUPLA Bife 6 - 8 VenTOInHA DUPLA COM GReLHA 55 - 65 Frango (Virar após: 35 minutos) 75 - 88 Pato (Virar após: 35 minutos) Lombo de 135 - 150 porco assado Como cozinhar 1. Rode o controlo F1 para a direita ou para a esquerda para selecionar a função de cozedura pretendida.
- Page 137 Configurar um alarme Pode configurar um temporizador entre 1 minuto e 9 horas e 59 minutos. Nota: apenas é possível utilizar esta função quando o forno está em modo de espera. 1. Prima “ ” para entrar no modo de alarme. É apresentado o ícone de relógio e os dígitos das horas piscam no visor.
- Page 138 Checking the remaining time Modo Descrição Se o relógio já estiver configurado, prima “ ” para verificar a hora atual. Modo de Se o lembrete de alarme já estiver configurado, prima “ “ para verificar a hora funcionamento do lembrete de alarme, o visor muda para um relógio e após 3 segundos retoma o tempo de cozedura.
- Page 139 Entretien et maintenance inere ș Cuidados y Mantenimiento Bakım ve Onarım Limpeza Limpe o forno com regularidade para garantir um funcionamento seguro e fiável. Antes da manutenção e limpeza, desligue da alimentação elétrica. Coloque todos os controlos na posição OFF. Recomenda-se que limpe o forno quando este ainda está...
- Page 140 Limpar o interior do forno 1. Abra a porta. 2. Limpe todos os acessórios do forno com água ou líquido de lavagem mornos e seque com um pano limpo macio. 3. Limpe o interior do forno com um pano limpo macio. 4.
- Page 141 3. Coloque a porta num ângulo de 30°, levante-a e afaste-a do forno. 30° 4. Para remover o vidro interior, coloque a porta voltada para baixo numa mesa. Utilize um pano macio para evitar riscar o vidro exterior.
- Page 142 5. Remova o painel de vidro interior. 6. Remova o painel de vidro intermédio. 7. Após a limpeza, volte a montar a porta pela ordem inversa e volte a colocá-la no forno. AVISO: Durante a remoção não force a porta para evitar partir ou provocar ferimentos. Transporte sempre a porta segurando pelas extremidades, nunca utilize o puxador.
- Page 143 Aviso! Antes de remover o vidro certifique-se de que este está completamente frio. Desligue sempre o aparelho da alimentação elétrica antes de realizar a manutenção. Durante a utilização o aparelho aquece. Tenha cuidado para não tocar nos elementos quentes no interior do forno.
- Page 144 Utilisation Benutzung Utilizare Kullanım Çalıştırmadan önce UYARI: Cihazı kullanmadan önce talimatları okuyun. Fonksiyon ve Ayarlar Control panel Door Kontrol paneli Kapı Fixing holes (x2) Handle Tespit delikleri (2 adet) Oven lamp Mains cable Fırın lambası Ana güç kablosu Shelf level markings Side rails Raf seviyesi işaretleri Yan raylar...
- Page 145 Düğme kontrollü model: CIMBIZ Vitrin Zamanlayıcı Display Timer “-/+” seçici F2 Alarm - / + selector F2 Alarm Function selector F1 Start button Başlatma düğmesi Fonksiyon seçici F1 Stop button Durdurma düğmesi Dokunmatik kontrollü modeller: CAMIMI ve CMT Vitrin Zamanlayıcı Display Timer “-/+”...
- Page 146 5. Onaylamak için “ ” düğmesine basın. 6. Saat şimdi ayarlandı. Dikkat edin! Zamanlayıcı fonksiyonunu kullanmak için lütfen öncelikle saati ayarlayın. Cihazdan güç bağlantısı kesildiğinde saatin yeniden ayarlanması gerekecektir. Mevcut çalıştırma modlarından birini seçmek için F1 kontrol düğmesini kullanın. İlgili simgenin ışığı...
- Page 147 Simge Fonksiyon Açıklama Fırının altındaki gizli eleman, karartmadan yiyeceğin tabanına daha yoğun bir ısı sağlar. Bu, çıtır taban istenen güveçler, yahniler, hamur işleri ve pizzalar gibi yavaş pişirme kapları için uygundur. Taban ısısı Sıcaklık, 5°C artışlarla 60-120°C aralığında ayarlanabilir. Varsayılan sıcaklık 60°C’dir.
- Page 148 Pratik pişirme tavsiyesi Fırın, her türlü yiyeceği mümkün olan en iyi şekilde pişirmenizi sağlayan çok çeşitli alternatifler sunar. Bu çok yönlü pişirme cihazını en iyi şekilde kullanmayı zamanla öğreneceksiniz ve aşağıdaki talimatlar yalnızca, sizin kendi kişisel deneyiminize göre değişiklik gösterebilen bir kılavuzdur. Pişirme sıcaklıkları...
- Page 149 IZGARALI ÇİFT FAN 55 - 65 Tavuk (Arkasını çevirme: 35 dk.) 75 - 88 (Arkasını çevirme: 35 dk.) Kızarmış Büyük Parça 135 - 150 domuz eti Nasıl pişirilir? 1. İstenen pişirme fonksiyonunu seçmek için F1 kontrol düğmesini saat yönünde veya saat yönünün tersine çevirin.
- Page 150 Alarm kurma 1 dakikadan 9 saat 59 dakikaya kadar bir zamanlayıcı ayarlayabilirsiniz. Not: bu fonksiyon yalnızca fırın bekleme durumundayken kullanılabilir. 1. Alarm moduna girmek için “ ” düğmesine basın. Bir saat simgesi görüntülenir ve saat haneleri ekranda yanıp söner. 2. Saat hanelerini (0-9) seçmek için F2 kontrol düğmesini çevirin. 3.
- Page 151 Kalan süreyi kontrol etme Açıklama “ düğmesine basın. Saat halihazırda ayarlıysa geçerli saati kontrol etmek için “ Alarm hatırlatıcı halihazırda ayarlıysa alarm hatırlatıcının süresini kontrol etmek Çalışma modu için “ “ düğmesine basın, ekran saate geçer ve ardından 3 saniye sonra pişirme süresine geri döner.
- Page 152 Entretien et maintenance inere ș Cuidados y Mantenimiento Bakım ve Onarım Temizlik Güvenli kullanımı ve emniyeti sağlamak için lütfen fırını düzenli olarak temizleyin. Herhangi bir bakım ve temizlik yapmadan önce güç bağlantısını kesin. Tüm kontrol düğmelerini KAPALI duruma getirin. Fırın hala ılıkken temizlenmesi önerilir; sıcakken temizlemeyin. Ünitenin yüzeyini nemli bir bezle, yumuşak fırçayla veya ince süngerle temizleyin ve ardından silerek kurulayın.
- Page 153 Fırın boşluklarını temizleme 1. Kapağı açın. 2. Tüm fırın aksesuarlarını ılık suyla veya bulaşık deterjanıyla temizleyin ve yumuşak, temiz bir bezle kurulayarak parlatın. 3. Fırının iç kısmını yumuşak, temiz bir bezle temizleyin. 4. Cihazın ön kısmını nemli bir bezle silin. 5.
- Page 154 3. Kapağı 30° aralık olacak şekilde kapatın ve yukarı kaldırarak fırından çıkarın. 30° 4. T İç camı çıkarmak için kapağı ters bir şekilde bir masanın üzerine koyun. Dış camın çizilmesini engellemek için yumuşak bir bez kullanın. 5. Camın iç bölmesini çekip çıkarın.
- Page 155 6. Camın orta bölmesini çekip çıkarın. 7. Temizledikten sonra kapağın sökülen parçalarını ters sırada yerine takın ve tekrar fırına takın. UYARI: Kırılmayı veya zarar görmeyi engellemek için kapağı çıkarırken zorlamayın. Kapağı yalnızca kenarlarından taşıyın, kulpu kullanmayın.. Lamba değiştirme...
- Page 156 Uyarı! Çıkarmadan önce camın tamamen soğuk olduğundan emin olun. Bir bakım işi gerçekleştirmeden önce her zaman cihazdan güç kaynağı bağlantısını kesin. Kullanım sırasında cihaz ısınır. Fırının iç kısmındaki ısıtma elemanlarına dokunmamaya dikkat edilmelidir. Tüm parçalar tamamen soğuyana kadar bekleyin. Önemli! Fırın lambasındaki ampul özel bir ampuldür ve yüksek sıcaklık direncine sahiptir. Yalnızca aynı...
- Page 157 Distribuidor: Kingfisher International Products Limited, 3 Sheldon Square, London, W2 6PX, Euro Depot España, S.A.U. c/ La Selva, United Kingdom 10 - Edificio Inblau A 1a Planta 08820-El Distributor: Prat de Llobregat www.bricodepot.es B&Q plc, Chandlers Ford, Hants, Distribuidor: SO53 3LE United Kingdom www.diy.com Brico Depot Portugal SA Rua Castilho, SFD Limited, Trade House, Mead Avenue, 5 - 1 esquerdo, sala 13 1250-066 Lisboa...
- Page 160 PN:16171100A21790...
Need help?
Do you have a question about the CLMFBI and is the answer not in the manual?
Questions and answers
The knob for temp has broken