
Related Manuals for Cooke & Lewis CLELDO105


Summary of Contents for Cooke & Lewis CLELDO105
- Page 1 5059340094090 CLELDO105 V21020 BX220IM 5059340094090-C&L-A4-IM-Easy-V06.indd 1 5059340094090-C&L-A4-IM-Easy-V06.indd 1 29/10/2020 3:18 PM 29/10/2020 3:18 PM...
- Page 2 Contents Installation Care and Maintenance 5059340094090-C&L-A4-IM-Easy-V06.indd 2 5059340094090-C&L-A4-IM-Easy-V06.indd 2 29/10/2020 3:18 PM 29/10/2020 3:18 PM...
- Page 3 IMPORTANT - Please read carefully the separate safety guide before use. [02] x 3 [03] x 1 [01] x 1 [04] x 1 [07] x 2 [05] x 1 [06] x 2 [08] x 2 5059340094090-C&L-A4-IM-Easy-V06.indd 3 5059340094090-C&L-A4-IM-Easy-V06.indd 3 29/10/2020 3:18 PM 29/10/2020 3:18 PM...
- Page 4 Installation EN Before you start • This appliance must be installed correctly by a qualified person, strictly following the manufacturer’s instructions. WARNING: Danger of electric shock! The power supply must be cut off before the appliance is installed completely. • Only a qualified person in compliance with the instructions provided can install the appliance. The manufacturer declines all responsibility for improper installation, which may harm persons and animals and cause damage.
- Page 5 Installation 550 mm 870 mm ≥885 mm 885 mm ≥550 mm [01] x 1 548 mm 563 mm 594 mm 564 mm Installation of Built-in Ovens • For correct installation, this appliance must be fitted in a tall oven housing unit. • Caution! The panels of the adjacent cabinets must be made of heat-resistant material. In particular, the adhesive that bonds the plastic laminate to the furniture must be able to withstand temperatures of not less than 120°C to avoid delamination.
- Page 6 Installation ≥35 mm It is essential when installing your oven there is adequate air circulation around the appliance to ensure the correct operation of the appliance. Inadequate air circulation will greatly impair the performance of the appliance and can affect adjacent cabinets due to the rise in temperature.
- Page 7 Installation Important: Do not lift the appliance by the door handle to avoid potential damage to the glass and hinges. Caution! If the supply cord is damaged, it must be replaced by the manufacturer, its service agent or similarly qualified persons in order to avoid safety hazards. 5059340094090-C&L-A4-IM-Easy-V06.indd 7 5059340094090-C&L-A4-IM-Easy-V06.indd 7 29/10/2020 3:18 PM...
- Page 8 Installation [08] [06] [07] [06] x 2 [07] x 2 [08] x 2 Once the oven has been lifted into place inside the appliance housing, locate the two holes in the casing of the oven and fix it into place using [06], [07] and [08]. Caution: Do not over-tighten the screws [06] to avoid damage to the oven or appliance housing –...
- Page 9 Installation Electrical Installation All installation must be carried out by a competent person or qualified electrician. Before connecting the mains supply ensure that the mains voltage corresponds to the voltage on the rating plate. Direct Connection The appliance must be connected directly to the mains using an omnipolar circuit breaker with a minimum opening of 3 mm between the contacts.
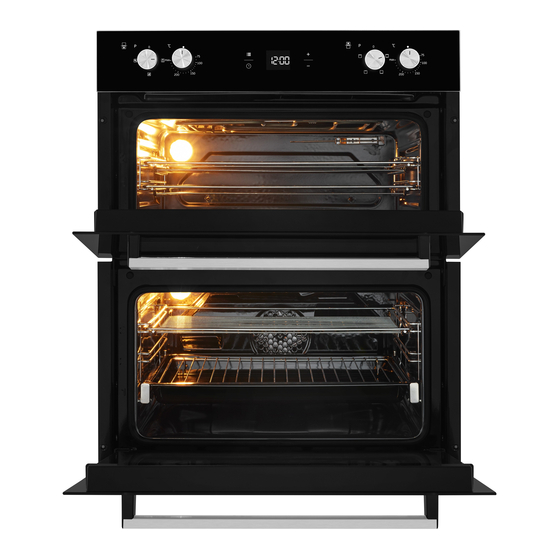
- Page 10 EN Before you start WARNING: Read the instructions before using the appliance. CAUTION: Accessible parts may be hot when the grill is used – keep young children away. CAUTION: Always use oven gloves when removing cookware from the oven. Oven layout Control panel Mains cable (at rear, not shown) Fixing holes (x2)
- Page 11 Oven controls Function control knob of Top oven Temperature control knob of Top oven Control panel Function control knob of Main oven Temperature control knob of Main oven Temperature indicator of Top oven Temperature indicator of Main oven Operational modes Top oven Icon Function / Feature...
- Page 12 Convection oven Use for traditional convection cooking when roasting or baking. Bottom element only Use for crisping the bases of pizza and cake at the end of cooking. Fan assisted oven Use for fan assisted cooking and even temperature distribution. Control panel Turn on the power supply at the main consumer unit, and your oven is ready for its initial set up.
- Page 13 Setting the Cooking duration and End times - Main oven only These functions can be used to program the cooking times in the Main oven so that cooking finishes as required and the oven switches off the power automatically. Cooking duration can be set for a finite length of time. Additionally, the End time can be set so that the Cooking duration then finishes at the time you need.
- Page 14 Lock function • Press and hold the Lock button for three seconds to freeze the Control Panel. Press and hold the button again for three seconds to unfreeze the panel. • Once the Control panel is locked, the oven will beep if any button is pressed. IMPORTANT: the rotary controls will still operate in Locked mode.
- Page 15 Using the Fan assisted oven - Main oven 1. Select Fan assisted oven on the right rotary control. 2. Select the temperature required on the right rotary control and the Indicator light will come on to allow pre-heating to start. This can take up to fifteen minutes before the correct temperature is reached. 3.
- Page 16 [04] [05] [04] x 1 [05] x 1 [03] [03] x 1 [05] [05] x 1 [02] [02] x 3 5059340094090-C&L-A4-IM-Easy-V06.indd 16 5059340094090-C&L-A4-IM-Easy-V06.indd 16 29/10/2020 3:18 PM 29/10/2020 3:18 PM...
- Page 17 Care and Maintenance EN General • It is important to clean the product regularly as excessive fat and grease can affect performance and cause a fire hazard. • Always switch off your appliance and allow it to cool down before cleaning. •...
- Page 18 Care and Maintenance Cleaning the side rails and covers 1. Remove all the accessories from the inside of the oven. 2. Carefully remove the side rails from the covers as shown. 3. Remove the side covers from the inside of the oven. 4.
- Page 19 Care and Maintenance Removing oven parts for cleaning • To remove the door, open the door to the maximum angle. Then pull the buckle at the door hinge backward. • Close the door to an angle approximately 30°. Hold the door with one hand on each side. Lift up and slowly pull the door out from the oven.
- Page 20 Care and Maintenance Bulb replacement - cold oven only 1. Switch off the power at the main circuit breaker. 2. Carefully unscrew the cover by turning it counter-clockwise. 3. Replace the bulb and screw the cover back in place. NOTE: Only use 25-40 W / 220 V-240 V, T300°C G9 halogen lamps. Handle with a soft cloth to avoid premature failure.
- Page 21 Addresses Manufacturer: UK Manufacturer: Kingfisher International Products Limited, 3 Sheldon Square, London, W2 6PX, United Kingdom EU Manufacturer: Kingfisher International Products B. V . Rapenburgerstraat 175E 1011 VM Amsterdam The Netherlands www.kingfisher.com/products www.diy.com www.screwfix.com www.screwfix.ie To view instruction manuals online, visit www.kingfisher.com/products Customer Helpline (Freephone) UK 0800 324 7818 uk@kingfisherservice.com...
Need help?
Do you have a question about the CLELDO105 and is the answer not in the manual?
Questions and answers