
Related Manuals for Avaya Ethernet Routing Switch 3600 Series


Summary of Contents for Avaya Ethernet Routing Switch 3600 Series
- Page 1 Installing Avaya Ethernet Routing Switch 3600 Series Release 6.0 NN47213-304 Issue 01.01 January 2017...
- Page 2 RESERVES THE RIGHT TO TAKE LEGAL ACTION AGAINST YOU the express behalf of Avaya. End User agrees to indemnify and hold AND ANYONE ELSE USING OR SELLING THE SOFTWARE harmless Avaya, Avaya's agents, servants and employees against all WITHOUT A LICENSE.
- Page 3 LICENSED TO PROVIDE AVC VIDEO. NO LICENSE IS GRANTED written consent of Avaya can be a criminal, as well as a civil offense OR SHALL BE IMPLIED FOR ANY OTHER USE. ADDITIONAL under the applicable law.
-
Page 4: Table Of Contents
Chapter 2: New in this document.................... 7 Chapter 3: Preinstallation checklist.................. 8 Chapter 4: Installation preparation.................. 10 ........................ 10 Switch models ....... 11 Universal Serial Bus ports on the Ethernet Routing Switch 3600 Series ................ 11 Electrostatic discharge prevention ...................... 12 Technical specifications ...................... 14 Power specifications .................... - Page 5 Contents .................... 43 Subscribing to e-notifications January 2017 Installing Avaya Ethernet Routing Switch 3600 Series Comments on this document? infodev@avaya.com...
-
Page 6: Chapter 1: Introduction
Chapter 1: Introduction Purpose This document provides conceptual information and installation procedures for the switch hardware. January 2017 Installing Avaya Ethernet Routing Switch 3600 Series Comments on this document? infodev@avaya.com... -
Page 7: Chapter 2: New In This Document
Chapter 2: New in this document Installing Avaya Ethernet Routing Switch 3600 Series, NN47213–304 is a new document. January 2017 Installing Avaya Ethernet Routing Switch 3600 Series Comments on this document? infodev@avaya.com... -
Page 8: Chapter 3: Preinstallation Checklist
Chapter 3: Preinstallation checklist Before you install the Avaya Ethernet Routing Switch 3600 Series, make sure that you complete the tasks in the preinstallation checklist. Task Description Review the technical specification for For the physical, electrical, and the switch. Make sure that the area... - Page 9 1 Ohm of resistance from the rack to the grounding electrode. Installing ERS 3600 in an equipment rack on page 19. January 2017 Installing Avaya Ethernet Routing Switch 3600 Series Comments on this document? infodev@avaya.com...
-
Page 10: Chapter 4: Installation Preparation
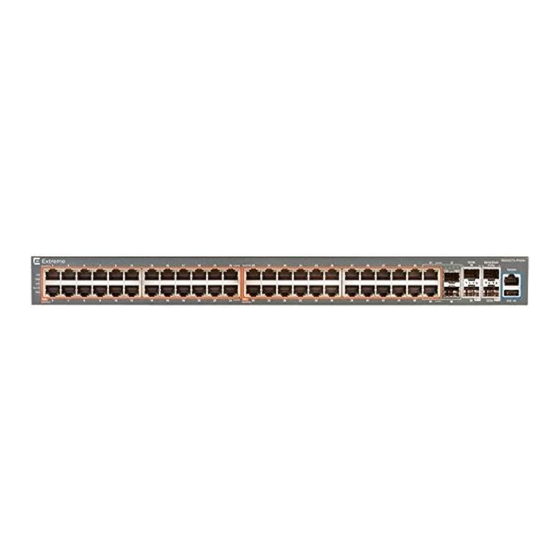
Chapter 4: Installation preparation Switch models The following table describes the Avaya Ethernet Routing Switch 3600 Series models. All switch models support autopolarity. Model Key features Part number ERS3626GTS • 24 10/100/1000 ports AL3600?05-E6 • Two shared SFP ports • Two 1/10 Gigabit SFP+ ports operating in dual mode as uplink ports •... -
Page 11: Universal Serial Bus Ports On The Ethernet Routing Switch 3600 Series
Universal Serial Bus ports on the Ethernet Routing Switch 3600 Series The Ethernet Routing Switch 3600 Series includes a USB Type A port on the front panel adjacent to the console port. The USB Type A port enables switch administrators to perform tasks that were previously completed through TFTP with a commonly available USB Mass Storage Device (also know as a flash drive or thumb drive). -
Page 12: Technical Specifications
Figure 1: ESD cable Technical specifications The following table provides the technical specifications for the individual switches in the Avaya Ethernet Routing Switch 3600 Series. Ensure that the area where you install the switch and where it operates meets these requirements. Warning: To avoid bodily injury from hazardous electrical shock and current, never remove the top of the device. - Page 13 Operating Temperature 32° and 122° F (0° and 50° C) Storage Temperature -40C to 70C Operating Humidity 95% RH non-condensing Storage Humidity 95% RH non-condensing Table continues… January 2017 Installing Avaya Ethernet Routing Switch 3600 Series Comments on this document? infodev@avaya.com...
-
Page 14: Power Specifications
• No nearby sources of severe electromagnetic noise • No nearby heat sources such as hot air vents or direct sunlight Power specifications This section provides the following specifications for Avaya Ethernet Routing Switch 3600 Series. Table 4: AC power specifications Model Power supply... - Page 15 Port (Watts) output Sum of all ports (Watts) ERS3626GTS 100V-240VAC ERS3626GTS-PWR+ 914.1W 100V-240VAC 24 Ports at 720W ERS3650GTS 100V-240VAC ERS3650GTS-PWR+ 914.1W 100V-240VAC 48 Ports at 720W January 2017 Installing Avaya Ethernet Routing Switch 3600 Series Comments on this document? infodev@avaya.com...
-
Page 16: Ac Power Cord Specifications
AS3112-1981 male plug 50 Hz Single phase Supported power cords Avaya Ethernet Routing Switch 3600 Series supports power cords with Power Cords with C13 Power Supply Side Connector. January 2017 Installing Avaya Ethernet Routing Switch 3600 Series Comments on this document? infodev@avaya.com... -
Page 17: Verifying The Package Contents
Verify the package contents with the item list to ensure you have received all components. If components are missing, contact the vendor where you purchased the switch. Figure 2: ERS 3600 Series package contents 1. Avaya Ethernet Routing Switch 3600 Series 2. Rack-mounting hardware that includes: • Rack-mount brackets (2) •... -
Page 18: Connecting Ac Power
The only way to turn off the switch is to disconnect the power. Always connect the AC power cord in a location that can be reached quickly and safely in case of an emergency. January 2017 Installing Avaya Ethernet Routing Switch 3600 Series Comments on this document? infodev@avaya.com... -
Page 19: Chapter 5: Installing Ers 3600 In An Equipment Rack
1 Ohm of resistance from the rack to the grounding electrode. Note: Avaya does not supply the bolts used to secure the switch to the rack. Ensure you obtain the appropriate bolts to secure the switch to your specific rack before you begin. Procedure 1. -
Page 20: Single And Multiple Switch Arrangements
You can connect up to eight switch devices that are in one Rack Unit (RU) height in a stack to provide uninterrupted connectivity for up to 224 ports for ERS3626 switches and up to 416 ports for January 2017 Installing Avaya Ethernet Routing Switch 3600 Series Comments on this document? infodev@avaya.com... -
Page 21: Standalone Arrangement
The Unit Select switch is used to designate a switch in the stack as a base or non-base unit. Sliding the switch down designates that switch as the base unit. Only one switch in a stack can have the January 2017 Installing Avaya Ethernet Routing Switch 3600 Series Comments on this document? infodev@avaya.com... -
Page 22: Cascade Down
Cascade Down connector of the base unit terminates in the Cascade Up connector on the next unit in the stack which is physically located below the base unit. This next unit January 2017 Installing Avaya Ethernet Routing Switch 3600 Series Comments on this document? infodev@avaya.com... - Page 23 Important: Because many network management software packages assume a cascade down (stack down) configuration, Avaya recommends the usage of this configuration. January 2017 Installing Avaya Ethernet Routing Switch 3600 Series Comments on this document? infodev@avaya.com...
-
Page 24: Redundant Cascade Stacking
The 3600 Series switches allow a stack of up to eight units in a 3600 Series stack. If any single unit fails or if a cable is accidently disconnected, other units in the stack remain operational without interruption. January 2017 Installing Avaya Ethernet Routing Switch 3600 Series Comments on this document? infodev@avaya.com... -
Page 25: Identifying Cables To Use With The Ethernet Routing Switch
The following table lists the required cables for a switch and cable specifications. Required cable Description 10/100/1GBase-T Ports The interconnect cabling must conform to the Cat5e, Cat6, or Cat6e specification of the Commercial Building Telecommunications Cabling Table continues… January 2017 Installing Avaya Ethernet Routing Switch 3600 Series Comments on this document? infodev@avaya.com... -
Page 26: Connecting A Transceiver To The Switch Or Switch Stack
Connecting a transceiver to the switch or switch stack The following sections describe small form factor pluggable (SFP) transceivers in the Ethernet Routing Switch 3600 Series. For installation and removal procedures, see Installing Transceivers and Optical Components on Avaya Ethernet Routing Switch 3600 Series. Installing transceivers Procedure 1. -
Page 27: Supported Optical Devices
Important: Avaya recommends that you use Avaya branded SFP and SFP+ transceivers as they undergo extensive qualification and testing. Avaya is not responsible for any problems that arise from using non-Avaya branded SFP and SFP+ transceivers. - Page 28 Small form-factor pluggable plus (SFP+) transceivers SFP+ transceivers are hot-swappable input and output enhancement components that allow 10 gigabit connections. All Avaya SFP+ transceivers use Lucent connectors (LC) to provide precision keying and low interface losses. For more information about SFP and SFP+ transceivers, including technical specifications and installation instructions, see Installing Transceivers and Optical Components on Avaya Ethernet Routing Switch 3600 Series.
-
Page 29: Locating End Of Sale Notices
You must consider the minimum attenuation requirement based on the specifications of third-party equipment. For more information about minimum insertion losses for Avaya optical products, see Installing Transceivers and Optical Components on Avaya Ethernet Routing Switch 3600 Series. - Page 30 Green (Solid) Normal operation. Status System cannot work properly (like temperature is too high). Amber (Solid) The system failed self-test. Green (Solid) Normal operation. Table continues… January 2017 Installing Avaya Ethernet Routing Switch 3600 Series Comments on this document? infodev@avaya.com...
- Page 31 Table 11: SFP+ transceiver Port LED state indicators Label Color/Status Description No link established. Solid Green SFP+ detected and link established. Green / blinking SFP+ link established and transmit activity detected. Table continues… January 2017 Installing Avaya Ethernet Routing Switch 3600 Series Comments on this document? infodev@avaya.com...
-
Page 32: Ip Address Information Configuration
1. Connect one end of serial cable to the DB—9 connector on the terminal. 2. Connect the other end of the serial cable to the RJ–45 connector on the switch. 3. Turn the terminal on. January 2017 Installing Avaya Ethernet Routing Switch 3600 Series Comments on this document? infodev@avaya.com... -
Page 33: Accessing The Console Menu
3. Connect to the switch using the terminal or terminal emulation application. 4. After the Avaya banner is displayed, press CTRL + Y to display the main menu. The version of the main menu displayed is dependent on whether the switch is part of a standalone or stacked switch configuration. -
Page 34: Assigning Ip Parameters Using Enterprise Device Manager
7. In the Default Gateway dialog box, type an IP address. 8. Click Apply. Note: For more information about switch configuration, see Quick Start Configuration for Avaya Ethernet Routing Switch 3600 Series, NN47213-301. Verifying assigned IP address is reachable Before you begin •... -
Page 35: Chapter 6: Installation Reference
Optional (can be swapped or linked with pin DTR (data terminal ready) Optional TXD (transmit data) Mandatory DCD (carrier detect) Optional GND (ground) Mandatory Table continues… January 2017 Installing Avaya Ethernet Routing Switch 3600 Series Comments on this document? infodev@avaya.com... -
Page 36: Usb Port
USB port The USB port is a Standard Type-A female USB 2.1 port. The switch provides USB host functionality and can support USB flash drives. January 2017 Installing Avaya Ethernet Routing Switch 3600 Series Comments on this document? infodev@avaya.com... -
Page 37: Chapter 7: Safety Messages
Se il dispositivo viene installato in un rack, non impilare le unità direttamente una sull’altra. Ogni unità deve essere fissata al rack con le staffe di montaggio appropriate. Le staffe di montaggio non sono state progettate per supportare più unità. January 2017 Installing Avaya Ethernet Routing Switch 3600 Series Comments on this document? infodev@avaya.com... - Page 38 Attenzione: Se nello slot non vengono installati moduli, assicurarsi di mantenere la piastra di copertura metallica in sede sopra lo slot. La rimozione della piastra impedisce la ventilazione e il corretto raffreddamento dell’unità. January 2017 Installing Avaya Ethernet Routing Switch 3600 Series Comments on this document? infodev@avaya.com...
- Page 39 électrique en touchant le commutateur. Par ailleurs, l’absence de trajet de mise à la terre peut générer des émissions excessives. January 2017 Installing Avaya Ethernet Routing Switch 3600 Series Comments on this document? infodev@avaya.com...
- Page 40 Senza un’adeguata messa a terra, chiunque tocchi lo switch corre il rischio di ricevere una scossa elettrica. L’assenza di un percorso per la messa a terra verso lo switch può comportare un eccesso di emissioni. January 2017 Installing Avaya Ethernet Routing Switch 3600 Series Comments on this document? infodev@avaya.com...
-
Page 41: Chapter 8: Related Resources
Documentation See Documentation Reference for Avaya Ethernet Routing Switch 3600 Series, NN47213-101 for a list of the documentation for this product. For more information about new features of the switch and important information about the latest release, see Release Notes for Avaya Ethernet Routing Switch 3600 Series, NN47213-400. -
Page 42: Searching A Documentation Collection
Avaya Mentor videos provide technical content on how to install, configure, and troubleshoot Avaya products. About this task Videos are available on the Avaya Support website, listed under the video document type, and on the Avaya-run channel on YouTube. Procedure •... -
Page 43: Subscribing To E-Notifications
Application & Technical Notes for Ethernet Routing Switch 5000 Series. Procedure 1. In an Internet browser, go to https://support.avaya.com. 2. Type your username and password, and then click Login. 3. Under My Information, select SSO login Profile. - Page 44 8. Scroll through the list, and then select the product name. 9. Select a release version. 10. Select the check box next to the required documentation types. January 2017 Installing Avaya Ethernet Routing Switch 3600 Series Comments on this document? infodev@avaya.com...
- Page 45 Subscribing to e-notifications 11. Click Submit. January 2017 Installing Avaya Ethernet Routing Switch 3600 Series Comments on this document? infodev@avaya.com...
- Page 46 Index support .................41 videos .................. January 2017 Installing Avaya Ethernet Routing Switch 3600 Series Comments on this document? infodev@avaya.com...
Need help?
Do you have a question about the Ethernet Routing Switch 3600 Series and is the answer not in the manual?
Questions and answers