Avaya ERS 3500 Series Regulatory Information

Avaya ERS 3500 Series Regulatory Information

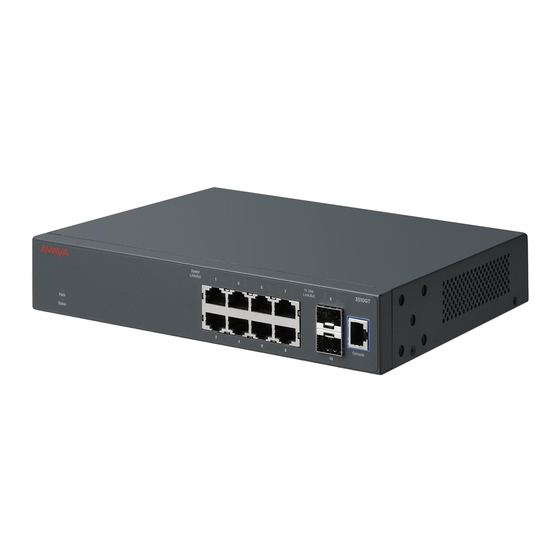
Ethernet routing switch
Hide thumbs Also See for ERS 3500 Series:
Table of Contents

Advertisement

Avaya Ethernet Routing Switch 3500
Series Regulatory Information
5.0
NN47203-100
01.01 (700503193 Rev.0.1)
February 2012

Advertisement

Table of Contents
loading

Summary of Contents for Avaya ERS 3500 Series

  • Page 1 Avaya Ethernet Routing Switch 3500 Series Regulatory Information NN47203-100 01.01 (700503193 Rev.0.1) February 2012...
  • Page 2 Avaya or the applicable third party. Avaya does not guarantee that these links will work all the time and has no control over the availability of the linked pages.
  • Page 3: Table Of Contents

    Contents Chapter 1: Purpose of this document................Chapter 2: New in this release................... Chapter 3: Applicable products..................Chapter 4: Regulatory information and safety precautions..........Chapter 5: English......................How to get help............................21 Notices and alerts............................. 21 Safety messages............................22 Installation preparation..........................23 Before you begin..........................
  • Page 4 Messages de sécurité..........................64 Préparation en vue de l'installation......................65 Avant de commencer........................65 Installation du commutateur ERS 3510GT ou ERS 3510GT-PWR+ sur une table ou une étagère. 66 Installation de deux commutateurs ERS 3510GT ou ERS 3510GT-PWR+ dans un boîtier..... 68 Installation du commutateur ERS 3524GT, ERS 3524GT-PWR+, ERS 3526T, ou ERS 3526T-PWR + dans un boîtier..........................
  • Page 5: Chapter 1: Purpose Of This Document

    Chapter 1: Purpose of this document This document provides regulatory information and precautionary messages Regulatory Information 5.0 February 2012...
  • Page 6 Purpose of this document Regulatory Information 5.0 February 2012 Comments? infodev@avaya.com...
  • Page 7: Chapter 2: New In This Release

    The Avaya ERS 3500 Series is new and supports the following hardware and software features: ERS 3500 hardware The following table lists and describes the supported hardware for ERS 3500 Series 5.0. Question marks (?) in the table signify power cord types; substitute the following regional variants: •...
  • Page 8 19 inch rack. ERS 3500 software features The following software features are supported on the ERS 3500 Series Release 5.0: • BootP or Default IP • RADIUS password fallback • Downloading agent & diags without reset •...
  • Page 9 • 802.1Q tagging • 802.1p traffic class support / remarking • Advanced QoS (traffic classification, filtering, mark/remarking, metering, shaping) • Avaya Automatic-QoS • Single 802.1d Spanning Tree Protocol (STP) on all ports • Spanning Tree port mode • Spanning Tree 802.1d compliance mode •...
  • Page 10 • RADIUS Server reachability • DA Filtering • Port Naming • CANA • SSHv2 • SSH enhancement to support RSA • Secure FTP (SFTP) • Auto Detection And Configuration (ADAC) with 802.1AB interaction Regulatory Information 5.0 February 2012 Comments? infodev@avaya.com...
  • Page 11 • 802.1AB MED (Cisco IP Phones) • 802.1AB Location TLV • 802.1AB and ADAC interoperability • 802.1AB Integration features • 802.1AB Customization features • Identify Units (Blink LEDs) • Cumulative system uptime (hidden command) • Virtual LACP • Static Routing with default route •...
  • Page 12 New in this release Regulatory Information 5.0 February 2012 Comments? infodev@avaya.com...
  • Page 13: Chapter 3: Applicable Products

    Chapter 3: Applicable products The information presented in this document applies to the following products: • Avaya Ethernet Routing Switch 3500 Series Regulatory Information 5.0 February 2012...
  • Page 14 Applicable products Regulatory Information 5.0 February 2012 Comments? infodev@avaya.com...
  • Page 15: Chapter 4: Regulatory Information And Safety Precautions

    Read the information in this section to learn about regulatory conformities and compliance. International Regulatory Statement of Conformity This is to certify that the Avaya Ethernet Routing Switch 3500 Series equipment was evaluated to the international regulatory standards for electromagnetic compliance (EMC) and safety and were found to have met the requirements for the following international standards: •...
  • Page 16 EN 55024 (CISPR 24). EN 300386 statement The ERS 3500 Series complies with the requirements of EN 300386 V1.3.3 for emissions and for immunity for a Class A device intended for use in either Telecommunications center or locations other than telecommunications centers given the performance criteria as specified by the manufacturer.
  • Page 17 National Safety Statements of Compliance EN 60950 statement This is to certify that the ERS 3500 Series equipment is in compliance with the requirements of EN 60950 in accordance with the Low Voltage Directive. Additional national differences for all European Union countries have been evaluated for compliance.
  • Page 18 La información siguiente se proporciona en el dispositivo o en los dispositivos descritos en este documento, en cumplimiento con los requisitos de la Norma Oficial Méxicana (NOM): Exportador Avaya Inc., 4655 Great America Parkway, Santa Clara, CA 95054 USA Importador Avaya Communication de México S.A. de C.V.
  • Page 19 PCB's), Cadmium, Mercury, Hexavalent Chromium, and Bromine. Avaya declares compliance with the European Union (EU) RoHS Directive (2002/95/EC) in that Lead, which is a restricted hazardous substance, is used only in accordance to the exemption(s) to Articile 4(1), item 7 granted by the European Union (EU) RoHS DIrective (2002/95/EC) in the Annex—”lead in solders...
  • Page 20 Regulatory information and safety precautions Regulatory Information 5.0 February 2012 Comments? infodev@avaya.com...
  • Page 21: Chapter 5: English

    • technical documentation • product training • technical support If you purchased a service contract for your Avaya product from a distributor or authorized reseller and you need assistance, contact the technical support staff for that distributor or reseller. Notices and alerts Notice paragraphs alert you about issues that require your attention.
  • Page 22: Safety Messages

    English Warning: Warning notices provide information about how to avoid personal injury when working with Avaya products. Voltage: Danger—High Voltage notices provide information about how to avoid a situation or condition that can cause serious personal injury or death from high voltage or electric shock.
  • Page 23: Installation Preparation

    Installation preparation Warning: Disconnecting the power cord is the only way to turn off power to this device. Always connect the power cord in a location that can be reached quickly and safely in case of an emergency. Warning: Fiber optic equipment can emit laser or infrared light that can injure your eyes. Never look into an optical fiber or connector port.
  • Page 24: Installing The Ers 3510Gt Or Ers 3510Gt-Pwr+ Switch On A Table Or Shelf

    Allow at least 2 inches (5.1 cm) on each side of the switch for proper ventilation and at least 5 inches (12.7 cm) at the back of the switch for power cord clearance. Procedure 1. Attach the rubber feet at the marked locations. Regulatory Information 5.0 February 2012 Comments? infodev@avaya.com...
  • Page 25 Installation preparation 2. Set the switch on a table or shelf. Regulatory Information 5.0 February 2012...
  • Page 26: Installing Two Ers 3510Gt Or Ers 3510Gt-Pwr+ Switches In An Equipment Rack

    - 5. Rear bracket for mating 3510GT and 3510GT-PWR+ switches — Quantity: 1 - #10–32 rack mounting screws (not shown) — Quantity: 4 - #12–24 rack mounting screws (not shown) — Quantity: 4 - M6 rack mounting screws (not shown) — Quantity: 4 Regulatory Information 5.0 February 2012 Comments? infodev@avaya.com...
  • Page 27 Perform the following procedure to install your switch in an equipment rack. Note: The Avaya ERS 3500 Series hardware can vary in size and shape. Your switch might appear different than the following example figures. Regulatory Information 5.0...
  • Page 28 90° and attaching it to each ERS 3510GT switch with three M4 flat head screws (included), as shown below. 3. Attach the standard rack mount bracket ears to the outer end of each switch as shown below. Regulatory Information 5.0 February 2012 Comments? infodev@avaya.com...
  • Page 29 Installation preparation 4. Once the switches are joined together, fold the hinged bracket inward. 5. Perform one of the following • To connect two ERS 3510GT or two 3510GT-PWR+ switches together use the rear bracket as shown below, with four M4 pan head screws to secure the switches at the rear.
  • Page 30: Installing The Ers 3524Gt, Ers 3524Gt-Pwr+, Ers 3526T, Or Ers 3526T-Pwr+ Switch In An Equipment Rack

    Perform the following procedure to install your switch in an equipment rack. Note: The Avaya ERS 3500 Series hardware can vary in size and shape. Your switch might appear different than the following example figures. Regulatory Information 5.0 February 2012 Comments? infodev@avaya.com...
  • Page 31 3. Slide the switch into the rack. Insert and tighten the rack mount screws. Note: The ERS 3500 Series mounting hardware is specific for each switch model. Do not mix screws or brackets between different ERS 3500 Series switches. 4. Verify that the switch is securely fastened to the rack.
  • Page 32: Connecting Ac Power

    • CSA-certified (CSA label secured to the cord) United Kingdom 240 VAC 50 Hz • BS1363 male plug with Single phase fuse • Harmonized cord Australia 240 VAC AS3112-1981 male plug 50 Hz Single phase Regulatory Information 5.0 February 2012 Comments? infodev@avaya.com...
  • Page 33: Ac Power Specifications

    AC power specifications The Ethernet Routing Switch 3500 series does not have a power switch. When you connect the AC power cord to a suitable AC power outlet, the switch powers up immediately. Connect the AC power cord to the back of the switch, and then connect the cord to a power outlet.
  • Page 34 (rms) consumption rating 3526T Maximum 0.28 A 100–240 VAC Maximum 28.5 W 65 Btu/h at 50–60 Hz maximum 3526T-PWR+ Maximum 5.0 A 100–240 VAC Maximum 500 W 350 Btu/h at 50–60 Hz maximum Regulatory Information 5.0 February 2012 Comments? infodev@avaya.com...
  • Page 35: Chapter 6: Deutsch

    • Schulungen zu Produkten • Technischer Support Wenn Sie einen Servicevertrag für Ihr Produkt von Avaya bei Ihrem Händler oder autorisierten Fachhändler erworben haben und Hilfe benötigen, setzen Sie sich mit dem Technischen Support, Ihrem Händler oder Fachhändler in Verbindung.
  • Page 36: Sicherheitshinweise

    Deutsch Warning: Warnungen beinhalten Informationen zur Vermeidung von Verletzungen bei der Arbeit mit Produkten von Avaya. Voltage: Gefahrenhinweise zu Hochspannung verweisen auf Informationen zur Vermeidung von Situationen oder Bedingungen, in denen es durch Hochspannung oder Stromschlag zu schweren Personenschäden kommen kann oder in denen sogar Lebensgefahr besteht.
  • Page 37: Vorbereitung Der Installation

    Vorbereitung der Installation Caution: Wird das Gerät in ein Gerätegestell montiert, montieren Sie keine weiteren Geräte darüber. Alle Geräte müssen im Gerätegestell mit den entsprechenden Montagehalterungen befestigt werden. Montagehalterungen sind nicht geeignet, mehrere Geräte gleichzeitig zu sichern. Voltage: Verwenden Sie nur Netzkabel, die über Erdungsbahnen verfügen. Ohne eine entsprechende Erdung kann eine Person, die mit der Anlage in Berührung kommt, einen Stromschlag erleiden.
  • Page 38: Installation Einer Anlage Des Modells Ers 3510Gt Oder Ers 3510Gt-Pwr+ Auf Einem Tisch Oder In Einem Regal

    Lassen Sie mindestens 5,1 cm Belüftungsabstand auf jeder Seite der Anlage sowie mindestens 12,7 cm Abstand für das Netzkabel auf der Rückseite der Anlage frei. Procedure 1. Bringen Sie die Gummifüße an den markierten Stellen an. Regulatory Information 5.0 February 2012 Comments? infodev@avaya.com...
  • Page 39 Vorbereitung der Installation 2. Stellen Sie die Anlage auf einen Tisch oder in ein Regal. Regulatory Information 5.0 February 2012...
  • Page 40: Montage Von Zwei Anlagen Des Modells Ers 3510Gt Oder Ers 3510Gt-Pwr+ In Einem Gerätegestell

    - 5. Rückseitige Halterung zur gegenseitigen Befestigung von Anlagen der Modelle 3510GT und 3510GT-PWR+ – Menge: 1 - Montageschrauben Nr. 10–32 (nicht gezeigt) – Menge: 4 - Montageschrauben Nr. 12–24 (nicht gezeigt) – Menge: 4 - Montageschrauben M6 (nicht gezeigt) – Menge: 4 Regulatory Information 5.0 February 2012 Comments? infodev@avaya.com...
  • Page 41 Vorbereitung der Installation Anforderungen des Gerätegestells • Eine Gerätegestellabmessung vertikaler Abstand für jede Anlage in einem 48,2-cm- Gerätegestell nach E1A- oder 1EC-Standard und einem T1A-Gerätegestell (58,5 cm). • Angemessener Raum im Gerätegestell für die Höhe der 1U-Anlage (44 mm). • Das Gerätegestell muss am Fußboden verschraubt und, soweit erforderlich, versteift sein.
  • Page 42 Deutsch Note: Hardware für die Serie 3500 des Avaya ERS kann in Größe und Form variieren. Ihre Anlage sieht möglicherweise anders aus als in den folgenden Beispielabbildungen. Procedure 1. Stellen Sie sicher, dass die Anlage nicht an die Stromversorgung angeschlossen ist.
  • Page 43 Vorbereitung der Installation 4. Schließen Sie das Scharnier der Halterung, nachdem die beiden Anlagen aneinander befestigt wurden. 5. Führen Sie einen der folgenden Schritte aus: • Montage von zwei Anlagen des Modells ERS 3510GT oder 3510GT-PWR +: Befestigen Sie die Anlagen mithilfe der rückseitigen Halterung für identische Anlagen und vier M4-Flachkopfschrauben auf der Rückseite aneinander.
  • Page 44: Montage Einer Anlage Des Modells Ers 3524Gt, Ers 3524Gt-Pwr+, Ers 3526T Oder Ers 3526T-Pwr+ In Einem Gerätegestell

    Stromdienstleistern verwendet wird. Vom Gerätegestell zur Erdungselektrode darf die Erdungsbahn nicht unterbrochen sein und darf einen Widerstand von 1 Ohm nicht überschreiten. Gehen Sie folgendermaßen bei der Montage Ihrer Anlage in einem Gerätegestell vor. Regulatory Information 5.0 February 2012 Comments? infodev@avaya.com...
  • Page 45 Vorbereitung der Installation Note: Hardware für die Serie 3500 des Avaya ERS kann in Größe und Form variieren. Ihre Anlage sieht möglicherweise anders aus als in den folgenden Beispielabbildungen. Procedure 1. Stellen Sie sicher, dass die Anlage nicht an die Stromversorgung angeschlossen ist.
  • Page 46: Wechselstromanschluss

    100 oder 120 VAC 50–60 Hz • NEMA5-15P-Stecker Einphasig • UL-Anerkennung (UL- Zeichen an Kabelummantelung) • CSA-zertifiziert (CSA- Zeichen an Leitung befestigt) Vereinigtes Königreich 240 VAC 50 Hz • BS1363-Stecker mit Einphasig Sicherung • Abgestimmte Leitung Regulatory Information 5.0 February 2012 Comments? infodev@avaya.com...
  • Page 47: Spezifikation Der Wechselstromversorgung

    Spezifikation der Wechselstromversorgung Beschreibung der Stecker Spezifikationen Typischer Stecker in den einzelnen Ländern Australien 240 VAC AS3112-1981-Stecker 50 Hz Einphasig Die Anlagen der Serie 3500 des Ethernet Routing Switch sind nicht mit einem Netzschalter ausgestattet. Beim Anschließen des Wechselstromnetzkabels an eine geeignete Wechselstromsteckdose wird die Anlage sofort eingeschaltet.
  • Page 48 50–60 Hz 357 BTU/h 3526T maximal 0,28 A 100–240 VAC, maximal 28,5 W maximal 50–60 Hz 65 BTU/h 3526T-PWR+ maximal 5,0 A 100–240 VAC, maximal 500 W maximal 50–60 Hz 350 BTU/h Regulatory Information 5.0 February 2012 Comments? infodev@avaya.com...
  • Page 49: Chapter 7: Español

    Chapter 7: Español Cómo obtener ayuda Para acceder a toda la variedad de servicios y al soporte técnico que Avaya proporciona, visite www.avaya.com. También puede visitar www.avaya.com/support para acceder a las siguientes páginas: • documentación técnica • capacitación en productos •...
  • Page 50: Mensajes De Seguridad

    Español Warning: Los avisos de advertencia proporcionan información acerca de cómo evitar lesiones personales durante el trabajo con productos Avaya. Voltage: Los avisos de peligro-alto voltaje proporcionan información acerca de cómo evitar una situación o condición que puede provocar lesiones personales graves o la muerte a causa de alto voltaje o descarga eléctrica.
  • Page 51: Preparación Para La Instalación

    Preparación para la instalación Voltage: Utilice únicamente cables de alimentación que posean puesta a tierra. Sin una conexión correcta a tierra, cualquier persona que toque el conmutador corre el riesgo de recibir una descarga eléctrica. La ausencia de una puesta a tierra al conmutador puede provocar emisiones excesivas.
  • Page 52: Instalación Del Conmutador Ers 3510Gt O Ers 3510Gt-Pwr+ En Una Mesa O Estante

    Deje al menos 2 pulgadas (5,1 cm) a cada lado del conmutador para una ventilación adecuada y al menos 5 pulgadas (12,7 cm) en la parte trasera del conmutador para el espacio del cable de alimentación. Procedure 1. Coloque las patas de goma en las ubicaciones marcadas. Regulatory Information 5.0 February 2012 Comments? infodev@avaya.com...
  • Page 53 Preparación para la instalación 2. Ubique el conmutador sobre una mesa o estante. Regulatory Information 5.0 February 2012...
  • Page 54: Instalación De Dos Conmutadores Ers 3510Gt O Ers 3510Gt-Pwr+ En Un Bastidor Para Equipos

    - Tornillos de montaje para bastidor #10–32 (no se muestran); cantidad: 4 - Tornillos de montaje para bastidor #12–24 (no se muestran); cantidad: 4 - Tornillos de montaje para bastidor M6 (no se muestran); cantidad: 4 Regulatory Information 5.0 February 2012 Comments? infodev@avaya.com...
  • Page 55 Preparación para la instalación Requisitos del bastidor • proporcione el espacio equivalente a un bastidor en posición vertical para cada conmutador en un bastidor para equipos E1A o 1EC estándar de 19 pulgadas (48,2 cm) y un bastidor para equipos T1A de 23 pulgadas (58,5 cm). •...
  • Page 56 Español Note: El hardware de Avaya ERS 3500 Series puede variar en tamaño y forma. Es posible que su conmutador luzca diferente a las siguientes figuras de ejemplo. Procedure 1. Asegúrese de que el conmutador no esté recibiendo alimentación eléctrica.
  • Page 57 Preparación para la instalación 4. Una vez que los conmutadores están unidos, doble el soporte articulado hacia adentro. 5. Realice uno de los siguientes procedimientos • Para conectar dos conmutadores ERS 3510GT o dos conmutadores 3510GT-PWR+ juntos utilice el soporte trasero como se muestra a continuación, con cuatro tornillos de cabeza troncocónica M4 para asegurar los conmutadores en la parte trasera.
  • Page 58: Instalación De Los Conmutadores Ers 3524Gt, Ers 3524Gt-Pwr+, Ers 3526T, O Ers 3526T-Pwr+ En Un Bastidor Para Equipos

    área. El grupo a tierra debe ser permanente y no debe superar 1 Ohmio de resistencia desde el bastidor hasta el electrodo de puesta a tierra. Realice el siguiente procedimiento para instalar el conmutador en un bastidor para equipos. Regulatory Information 5.0 February 2012 Comments? infodev@avaya.com...
  • Page 59 Preparación para la instalación Note: El hardware de Avaya ERS 3500 Series puede variar en tamaño y forma. Es posible que su conmutador luzca diferente a las siguientes figuras de ejemplo. Procedure 1. Asegúrese de que el conmutador no esté recibiendo alimentación eléctrica.
  • Page 60: Conexión De La Alimentación De Ca

    UL en la funda del cable) • Certificado por CSA (etiqueta de CSA en el cable) Reino Unido 240 VCA 50 Hz • Enchufe macho BS1363 Monofásico con fusible • Cable armonizado Regulatory Information 5.0 February 2012 Comments? infodev@avaya.com...
  • Page 61: Especificaciones De Alimentación De Ca

    Especificaciones de alimentación de CA País y descripción de Especificaciones Enchufe típico enchufes Australia 240 VCA Enchufe macho 50 Hz AS3112-1981 Monofásico Los conmutadores Ethernet Routing Switch 3500 series no necesitan un interruptor de alimentación. Cuando conecta el cable de alimentación de CA a un tomacorriente de CA, el conmutador se enciende de inmediato.
  • Page 62 50–60 Hz máximo 3526T Máximo 0,28 A 100–240 VAC a Máximo 28,5 W 65 Btu/h 50–60 Hz máximo 3526T-PWR+ Máximo 5,0 A 100–240 VAC a Máximo 500 W 350 Btu/h 50–60 Hz máximo Regulatory Information 5.0 February 2012 Comments? infodev@avaya.com...
  • Page 63: Chapter 8: Français

    Chapter 8: Français Comment obtenir de l'aide Pour accéder à la gamme complète de services et de support proposés par Avaya, rendez- vous surwww.avaya.com. Vous pouvez également consulter www.avaya.com/support pour accéder aux pages suivantes : • documentation technique • formation sur les produits •...
  • Page 64: Messages De Sécurité

    Français Warning: Les avertissements indiquent comment éviter les blessures corporelles lors de l'utilisation des produits Avaya. Voltage: Les avis Danger - Haute tension indiquent comment éviter une situation ou une condition qui pourrait entraîner des blessures corporelles graves, voire mortelles en raison d'une tension élevée ou d'un choc électrique.
  • Page 65: Préparation En Vue De L'installation

    Préparation en vue de l'installation Voltage: Utilisez uniquement les câbles d'alimentation dotés d'une prise de mise à la terre. Sans prise de mise à la terre correcte, les personnes qui actionnent l'interrupteur risquent de recevoir un choc électrique. En l'absence d'une prise de mise à la terre liée à l'interrupteur, des surtensions peuvent survenir.
  • Page 66: Installation Du Commutateur Ers 3510Gt Ou Ers 3510Gt-Pwr+ Sur Une Table Ou Une Étagère

    Laissez au moins 5,1 cm (2 pouces) de chaque côté du commutateur pour obtenir une bonne ventilation et au moins 12,7 cm (5 pouces) au dos du commutateur pour le cordon d'alimentation. Procedure 1. Fixez le pied en caoutchouc aux emplacements indiqués. Regulatory Information 5.0 February 2012 Comments? infodev@avaya.com...
  • Page 67 Préparation en vue de l'installation 2. Installez le commutateur sur une table ou une étagère. Regulatory Information 5.0 February 2012...
  • Page 68: Installation De Deux Commutateurs Ers 3510Gt Ou Ers 3510Gt-Pwr+ Dans Un Boîtier

    - Vis de montage sur boîtier n°10–32 (non illustré) — Quantité : 4 - Vis de montage sur boîtier n°12–24 (non illustré) — Quantité : 4 - Vis de montage sur boîtier M6 (non illustré) — Quantité : 4 Regulatory Information 5.0 February 2012 Comments? infodev@avaya.com...
  • Page 69 Préparation en vue de l'installation Configuration requise au niveau du boîtier • fournir l'équivalent d'un boîtier en termes d'espace vertical pour chaque commutateur installé dans un boîtier standard E1A ou 1EC de 48,2 cm (19 pouces) et un boîtier T1A de 58,5 cm (23 pouces).
  • Page 70 Français Note: La taille et la forme des modèles de la gamme ERS 3500 Avaya peut varier. L'apparence de votre commutateur peut différer de celle des commutateurs illustrés dans les exemples suivants. Procedure 1. Assurez-vous que le commutateur est mis hors tension.
  • Page 71 Préparation en vue de l'installation 4. Une fois que les commutateurs sont réunis, repliez le support à charnière vers l'intérieur. 5. Effectuez l'une des actions suivantes : • Pour connecter deux commutateurs ERS 3510GT ou deux commutateurs 3510GT-PWR+ ensemble utilisez le support arrière comme illustré ci- dessous, avec quatre vis à...
  • Page 72: Installation Du Commutateur Ers 3524Gt, Ers 3524Gt-Pwr+, Ers 3526T, Ou Ers 3526T-Pwr+ Dans Un Boîtier

    électrique de la zone. La mise à la terre doit être permanente et ne doit pas dépasser 1 ohm de résistance entre le boîtier et l'électrode de mise à la terre. Pour installer votre commutateur dans un boîtier, procédez comme suit. Regulatory Information 5.0 February 2012 Comments? infodev@avaya.com...
  • Page 73 Préparation en vue de l'installation Note: La taille et la forme des modèles de la gamme ERS 3500 Avaya peut varier. L'apparence de votre commutateur peut différer de celle des commutateurs illustrés dans les exemples suivants. Procedure 1. Assurez-vous que le commutateur est mis hors tension.
  • Page 74: Branchement De L'alimentation Ca

    • Reconnu UL (marquage UL sur la gaine du câble) • Certifié CSA (étiquette CSA fixée au câble) Royaume-Uni 240 V CA 50 Hz • Prise mâle BS1363 avec Monophase fusible • Câble harmonisé Regulatory Information 5.0 February 2012 Comments? infodev@avaya.com...
  • Page 75: Spécifications Relatives À L'alimentation Ca

    Spécifications relatives à l'alimentation CA Description pays/prise Spécifications Prise classique Australie 240 V CA Prise mâle AS3112-1981 50 Hz Monophase La gamme de commutateur-routeur Ethernet Routing Switch 3500 ne possède pas de bouton Marche/Arrêt. Lorsque vous branchez un câble d'alimentation CA à une prise de courant CA appropriée, le commutateur se met sous tension immédiatement.
  • Page 76 3526T Maximum 0,28 A 100–240 V CA Maximum 28,5 W 65 Btu/h à 50–60 Hz maximum 3526T-PWR+ Maximum 5,0 A 100–240 V CA Maximum 500 W 350 Btu/h à 50–60 Hz maximum Regulatory Information 5.0 February 2012 Comments? infodev@avaya.com...
  • Page 77: Chapter 9: Português Do Brasil

    • treinamento de produtos • suporte técnico Se você tiver adquirido um contrato de serviço para o seu produto da Avaya junto a um distribuidor ou revendedor autorizado, entre em contato com a equipe de suporte técnico desse distribuidor ou revendedor para obter ajuda.
  • Page 78: Mensajes De Seguridad

    Português do Brasil Warning: Os avisos de atenção fornecem informações sobre como evitar ferimentos ao operar produtos Avaya. Voltage: Os avisos de Perigo—Alta tensão fornecem informações sobre como evitar situações ou condições que possam causar ferimentos graves ou até morte devido à alta tensão ou a choques elétricos.
  • Page 79: Preparação Para Instalação

    Preparação para instalação Voltage: Utilice únicamente cables de alimentación que posean puesta a tierra. Sin una conexión correcta a tierra, cualquier persona que toque el conmutador corre el riesgo de recibir una descarga eléctrica. La ausencia de una puesta a tierra al conmutador puede provocar emisiones excesivas.
  • Page 80: Como Instalar A Central Ers 3510Gt Ou A Ers 3510Gt-Pwr+ Em Uma Mesa Ou Compartimento

    Permita pelo menos 5,1 cm (2 polegadas) em cada lado da central para uma ventilação adequada e pelo menos 12,7 cm (5 polegadas) na parte traseira da central para a passagem do cabo de alimentação. Procedure 1. Coloque os pés de borracha nos locais indicados. Regulatory Information 5.0 February 2012 Comments? infodev@avaya.com...
  • Page 81 Preparação para instalação 2. Coloque a central em uma mesa ou compartimento. Regulatory Information 5.0 February 2012...
  • Page 82: Como Instalar Duas Centrais Ers 3510Gt Ou Ers 3510Gt-Pwr+ Em Um Rack Para Equipamentos

    - Parafusos de montagem de rack nº 10–32 (não mostrados) — Quantidade: 4 - Parafusos de montagem de rack nº 12–24 (não mostrados) — Quantidade: 4 - Parafusos M6 de montagem de rack (não mostrados) — Quantidade: 4 Regulatory Information 5.0 February 2012 Comments? infodev@avaya.com...
  • Page 83 Preparação para instalação Requisitos do rack • fornecer o equivalente a um rack de espaço vertical para cada central em um rack de equipamento padrão E1A ou 1EC de 48,2 cm (19 pol.) e um equipamento de rack T1A de 58,5 cm (23 pol.). •...
  • Page 84 Português do Brasil Note: O hardware Avaya ERS série 3500 pode variar em tamanho e forma. Sua central pode parecer diferente das figuras nos exemplos a seguir. Procedure 1. Verifique se a energia está desconectada da central. 2. Conecte as duas centrais ERS 3510GT juntas abrindo o suporte articulado em 90°...
  • Page 85 Preparação para instalação 4. Uma vez unidas as centrais, dobre o suporte articulado para dentro. 5. Execute uma das seguintes etapas • Para conectar duas centrais ERS 3510GT ou duas centrais 3510GT-PWR + juntas use o suporte traseiro conforme mostrado abaixo com quatro parafusos M4 de cabeça panorâmica para fixar as centrais na parte traseira.
  • Page 86: Como Instalar A Central Ers 3524Gt, Ers 3524Gt-Pwr+, Ers 3526T Ou Ers 3526T-Pwr+ Em Um Rack Para Equipamentos

    O aterramento deve ser permanente e não exceder 1 Ohm de resistência entre o rack e o eletrodo de aterramento. Realize o procedimento a seguir para instalar sua central em um rack para equipamentos. Regulatory Information 5.0 February 2012 Comments? infodev@avaya.com...
  • Page 87 Preparação para instalação Note: O hardware Avaya ERS série 3500 pode variar em tamanho e forma. Sua central pode parecer diferente das figuras nos exemplos a seguir. Procedure 1. Verifique se a energia está desconectada da central. 2. Prenda um suporte de cada lado da central usando as chaves incluídas.
  • Page 88: Como Conectar A Alimentação De Ca

    • Reconhecido por UL (UL indicado no encapamento do fio) • Certificado por CSA (rótulo do CSA marcado no fio) Reino Unido 240 VAC 50 Hz • Plugue macho BS1363 Monofásico com fusível • Cabo harmonizado Regulatory Information 5.0 February 2012 Comments? infodev@avaya.com...
  • Page 89: Especificações De Alimentação De Ca

    Especificações de alimentação de CA País e descrição da Especificações Plugue típico conexão Austrália 240 VAC Plugue macho AS3112-1981 50 Hz Monofásico O Ethernet Routing Switch série 3500 não possui uma central de alimentação. Ao conectar o cabo de alimentação de CA à tomada de CA apropriada, a central é imediatamente ligada. Certifique-se de conectar o cabo de alimentação de CA à...
  • Page 90 Máximo de 0,28 A De 100–240 Máximo de 28,5 W 65 Btu/h VAC a 50–60 máximo 3526T-PWR+ Máximo de 5,0 A De 100–240 Máximo de 500 W 350 Btu/h VAC a 50–60 máximo Regulatory Information 5.0 February 2012 Comments? infodev@avaya.com...

Table of Contents