Table of Contents
Advertisement
Ga om deze handleiding in andere talen te downloaden naar onze website:
NL
Um diese Anleitung in anderen Sprachen herunterzuladen, besuchen Sie bitte unsere
DE
Website:
Pour télécharger ce manuel dans d'autres langues, consultez notre site Web :
FR
Para descargar este manual en otros idiomas, visite nuestro sitio web:
ES
Per scaricare questo manuale in altre lingue, visitare la pagina del prodotto sul nostro sito
IT
Web:
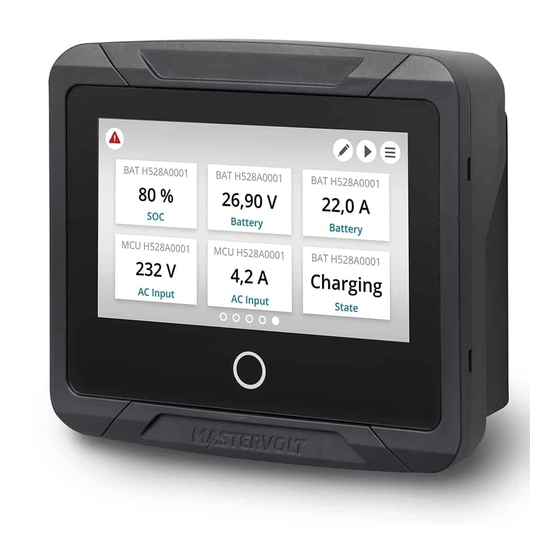
EasyView 5
MONITORING AND CONTROL PANEL
FOR THE MASTERBUS NETWORK
www.mastervolt.com
10000011559/11
Advertisement
Table of Contents

Subscribe to Our Youtube Channel
Related Manuals for Mastervolt EasyView 5


Summary of Contents for Mastervolt EasyView 5
- Page 1 EasyView 5 MONITORING AND CONTROL PANEL FOR THE MASTERBUS NETWORK Ga om deze handleiding in andere talen te downloaden naar onze website: Um diese Anleitung in anderen Sprachen herunterzuladen, besuchen Sie bitte unsere Website: Pour télécharger ce manuel dans d'autres langues, consultez notre site Web :...
-
Page 2: Table Of Contents
EasyView 5 - User and Installation Manual Table of contents Product description ····························· 3 Dashboard and navigation ············· 13 Parts ·········································· 3 Maintenance ······························· 13 Connections ································· 4 Monitoring and configuration ··············· 14 Accessories ································· 5 Favorite pages ···························· 14 Safety ··············································... -
Page 3: Product Description
Wall box Bottom cover * Always use the front cover when the EasyView 5 display needs to be protected from damage or sunlight. ** Always use the seal when the EasyView 5 display needs to be protected from water, moist and... -
Page 4: Connections
EasyView 5 - User and Installation Manual Connections Connections MasterBus port 1 MasterBus port 2 USB device port Power input 12/24 V... -
Page 5: Accessories
EasyView 5 - User and Installation Manual Accessories Accessories Mastervolt EasyView 5 MasterBus cable (6 meter / 20ft) MasterBus terminator 12/24 V connector Mounting screw (4 pcs) 4x30mm PH2 Mounting screw (4 pcs) 4x14mm PH2... -
Page 6: Safety
• Use that is inconsistent with the purpose of the product. Warranty Mastervolt assures a two-year warranty on the EasyView 5 after purchase, on the condition that the product is installed and used according to the instructions in this manual. -
Page 7: Masterbus
Every device that is compatible with MasterBus is equipped with two data ports. The devices are simply chained together, forming a local data network. Monitoring panels such as the EasyView 5 can be used for monitoring and control of all connected MasterBus equipment. -
Page 8: How To Set Up A Masterbus Network
EasyView 5 - User and Installation Manual How to set up a MasterBus network Connections between the devices are made MasterBus needs a terminating device on both by standard straight MasterBus cables. ends of the network. Mastervolt can supply these cables. -
Page 9: Installation Instructions
EasyView 5 - User and Installation Manual Installation instructions The EasyView 5 offers three mounting options: Panel mounting onto the wall box - see section 4.1 • Flush mounting in an 82 x 113 mm hole - see separate instruction sheet with saw template •... -
Page 10: Clamp Mounting
Clamp mounting In case the mounting screws of the EasyView 5 have no grip, for instance when the EasyView 5 is installed as a refit and the dimensions of the mounting hole are too big, the wall box can also be used as a mounting clamp. -
Page 11: Aux Power Supply
If there is no MasterBus powering device or the available power is not sufficient, the EasyView 5 must be connected to a 12/24V battery via the supplied connector (see section 1.3). -
Page 12: Operation
3 seconds) the Home button. 5.2.3 Home Tapping the button when the EasyView 5 is switched on, returns you to the Home screen. The Home screen is the first favorite page on the Dashboard. -
Page 13: Dashboard And Navigation
EasyView 5 - User and Installation Manual Dashboard and navigation The dashboard consists of one or more favorite pages, showing an overview of user picked settings and values of connected devices on the MasterBus network. See section 6.1 for more details. -
Page 14: Monitoring And Configuration
Select device in the System page. When no other devices are connected to the EasyView 5, only the EasyView 5 is shown in the System page. The Device page of the EasyView 5 is shown as example in the following screenshots. - Page 15 EasyView 5 - User and Installation Manual The Device page shows which items can be added on the favorite page. Select item(s) and tap the confirm button ( ) in the top right corner to confirm the selection. Up to 6 items can be selected per favorite page.
-
Page 16: Widget Order / Move A Widget
EasyView 5 - User and Installation Manual 6.1.2 Widget order / move a widget The order in which the widgets are selected, is also the order in which they appear on the favorite page. To change the order: From the required favorites page, tap the edit button . -
Page 17: Renaming A Widget
EasyView 5 - User and Installation Manual 6.1.4 Renaming a widget Tap the Edit button to go to the Edit page. This button may be hidden. See section 6.6. Tap the widget name to open the Custom name page. Make the required change and tap the confirm button. -
Page 18: System Page
EasyView 5 - User and Installation Manual System page Tap the system browsing button to navigate to the System page. The System screen displays a list of all connected devices in alphabetical order. Select a device to navigate to its Device page. Devices from the list with an active alarm are accompanied by an alarm symbol. -
Page 19: Alarms
EasyView 5 - User and Installation Manual Alarms An Alarm popup is displayed when a connected device generates an alarm. Tap ‘Log’ to navigate directly to the device page or ‘Snooze’ to snooze the alarm. If the alarm persists, the popup is shown every 9 minutes. -
Page 20: Easyview 5 Monitoring Settings
EasyView 5 - User and Installation Manual EasyView 5 monitoring settings If you select the EasyView 5 from the System screen you will find the settings listed below. The settings are stored in the internal memory of the selected device. Therefore, switching off the EasyView 5 will not influence the settings. -
Page 21: Easyview 5 Configuration Settings
Tap the settings button. Tap Configuration, enter Pin code 1991 and tap the confirm button in the top right corner. Go to the configuration tab. The EasyView 5 configuration menu is used for read out and adjustment of settings. Item Meaning... -
Page 22: Easyview 5 Events
MasterBus. An example of an event where the EasyView 5 is the event source can be that a light can be switched Off when the EasyView 5 is switched On, the event source is then State. -
Page 23: Event Data
Event Data Configuring other devices Monitoring and configuring other devices is possible by selecting a device in the EasyView 5 device list, see section 6.2. Refer to the user manual of the connected device for an overview of all available settings. Settings are stored in the memory of the selected device. This means that switching off or disconnecting of the EasyView 5 will not affect the settings of the connected devices. -
Page 24: Digital Switches
Tap the device that can initiate the alarm. Go to the configuration tab and scroll to Events. How to setup the event depends on the device but the target should be the EasyView 5 and the command should be the customized message. -
Page 25: Updates
MasterAdjust software (see chapter 8). To upload firmware to the EasyView 5 by USB, insert a USB flash drive in the USB port at the back of the device. After inserting the USB flash drive, restart the display (see 5.2.1). The USB flash drive is now detected, and a USB flash drive button appears on the dashboard. -
Page 26: Masteradjust Software
Masterbus – USB interface Trouble shooting Contact your local Mastervolt Service Centre if you cannot correct a problem with the aid of the trouble shoot table below. See www.mastervolt.com for an extended list of Mastervolt Service Centers. - Page 27 EasyView 5 - User and Installation Manual Failure Possible cause What to do Backlight suddenly An alarm situation triggers Check the alarm source shown on the changes color from the backlight to turn red. See display and press LOG to stop the white to red.
- Page 28 EasyView 5 - User and Installation Manual Failure Possible cause What to do The display is in “Selection” Change the setting to “All devices”. mode with another device selected. Error in the wiring. Check the MasterBus cables. Device not suitable for...
-
Page 29: 10 Specifications
EasyView 5 - User and Installation Manual 10 Specifications Technical specifications 10.1 EasyView 5 Product code 77010310 Weight 0.36kg 0.79lbs Dimensions 113 x 127 x 43 mm 4.4 x 5.0 x 1.7 inch Display size 109 mm 4.3 inch Display languages... - Page 30 EasyView 5 - User and Installation Manual Ø 3 (4x) Front, mounting holes Front Back, without wall box...
- Page 31 EasyView 5 - User and Installation Manual Case partly removed to show mounting hole details. Side, with wall box Side, without wall box...
- Page 32 Customer Service Customer Service Customer Service T: +31 (0) 20 34 22 100 T: +1 800 307 6702, Option 1 T: +64 9 415 7261 Option 1 E: info@mastervolt.com E: orderentry@marinco.com E: enquiries@bepmarine.com Technical Support Technical Support Technical Support T: +31 (0) 20 34 22 100...
Need help?
Do you have a question about the EasyView 5 and is the answer not in the manual?
Questions and answers
can my easyview 5 monitor my serevice battery bank and my separate starter batteries at the same time ? i can see it does the service batteries but not sure whats going on with the engine batteries . do i need to set up separate widgets tomonitor them
Yes, the Mastervolt EasyView 5 can monitor both a service battery bank and separate starter batteries simultaneously, showing state of charge, current usage, and voltage for each.
This answer is automatically generated