Sign In
Upload
Download
Table of Contents
Contents
Add to my manuals
Delete from my manuals
Share
URL of this page:
HTML Link:
Bookmark this page
Add
Manual will be automatically added to "My Manuals"
Print this page
×
Bookmark added
×
Added to my manuals
Manuals
Brands
emmeti Manuals
Fan
ETI Series
Installation and use manual
emmeti ETI Series Installation And Use Manual
Fan coil silence thin with smart touch controls
Hide thumbs
1
2
3
4
5
6
7
8
9
10
11
12
13
14
15
16
17
18
19
20
21
22
23
24
25
26
27
28
29
30
31
32
33
34
35
Table Of Contents
36
page
of
36
Go
/
36
Contents
Table of Contents
Troubleshooting
Bookmarks
Table of Contents
Index
General Information
Safety Rules
Product Range
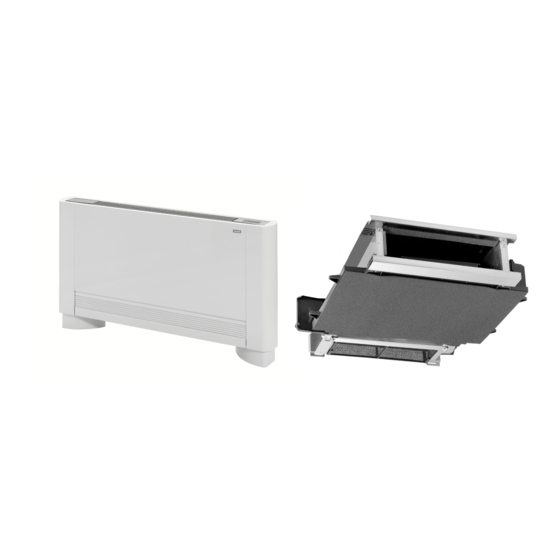
Etm
Eti
Eti
Etm
2-Pipe Thin Overall Dimensions
Table of Contents
2-Pipe Thin Version Technical Specifications
Installation
Positioning the Unit
Minimum Distances for Installation
Opening the Sides
Wall or Vertical Floor Installation
Eti
Horizontal or Ceiling Mounted Installation
Hydraulic Connections
Piping Diameter
Condensate Drain
Connections
Fitting the Condensate Drain Device in the Horizontal Version
Fitting the Condensate Drain Device in the Vertical Version
Disassembling the Panelling
Rotating the Connections
Panel Disassembly of Command
Disassembling the Heat Exchangers
Fitting the Front Grid Safety Support
Evacuation of the Air During the Filling of the System
External Cleaning
Maintenance
System Fitting
Air Intake Filter Cleaning
Cleaning Filter Media
Tips to Save Energy
Illustrations
Troubleshooting
Fitting Components
Hydraulic Kit
Adjusting the Retainer
3-Way Valve with Diverter
ETM, ETI Version with 3-Way Diverter Valve
Fitting the Thermostatic Head
Valve Thermoelectric Head Kit
Assembly and Connections of the Electrical Box Panel
Assembling the Air Temperature Probe
Electrical Box Connections
Water Probe Management of the Electrical Box
Assembly and Fan Control Connections for THIN-TBK Remote Adjustment
THIN-TBK Connections Diagram with 3-Speed Thermostats
LED Signals
Water Probe Management with Three-Speed Thermostat
General Switch-On
Key Function
LED Indications
THIN-4-V Electric Box Control Panel
Heating / Cooling Operating Mode Setting
Speed Adjustment
Stand by
Temperature Selection
Error Signals
Key Lock
Reducing Brightness
Technical Data
Diagram
Product View and Parts Identification
Advertisement
Quick Links
1
Etm
2
Eti
3
Etm
4
Table of Contents
Download this manual
Fan Coil
SILENCE THIN
Etm
- ETI
with Smart Touch controls
Installation
AND USE MANUAL
GB
Table of
Contents
Previous
Page
Next
Page
1
2
3
4
5
Advertisement
Table of Contents
Need help?
Do you have a question about the ETI Series and is the answer not in the manual?
Ask a question
Questions and answers
Related Manuals for emmeti ETI Series
Fan emmeti ETM Series Installation And Use Manual
Fan coil silence thin with smart touch controls (36 pages)
Fan emmeti ETM 240 Installation And Use Manual
Fan coil silence thin with smart touch controls (36 pages)
Fan emmeti ETM 260 Installation And Use Manual
Fan coil silence thin with smart touch controls (36 pages)
Fan emmeti ETM 280 Installation And Use Manual
Fan coil silence thin with smart touch controls (36 pages)
Fan emmeti RECUPERA ONE-40-S Installation Manual And Using Instructions
(29 pages)
Fan emmeti Recupera DRY 500 Installation And Use Manual
Controlled mechanical ventilation unit (64 pages)
Fan emmeti MED A-141 Manual
Heat recovery ventilation unit (52 pages)
Fan emmeti Silence Installation And Use Manual
Fan coil (76 pages)
Fan emmeti RECUPERA SLIM-A110 Installation Manual And Using Instructions
Heat recovery ventilation unit (48 pages)
Fan emmeti Recupera FAN-31 Use And Installation Manual
Cmv unit (28 pages)
Fan emmeti RECUPERA ONE-15 Installation Manual
(29 pages)
Fan emmeti RECUPERA SLIM B-110 Installation Manual And Using Instructions
(40 pages)
Fan emmeti Bat 15 Installation And Use Manual
(2 pages)
Fan emmeti RECUPERA MED B-140 Installation And Use Manual
(36 pages)
Fan emmeti 0NE-100 Installation Manual And Using Instructions
Heat recovery ventilation unit (36 pages)
This manual is also suitable for:
Etm series
Etm 220
Etm 240
Etm 260
Etm 280
Etm 2100
...
Show all
Eti 220
Eti 240
Eti 280
Eti 260
Eti 2100
Table of Contents
Print
Rename the bookmark
Delete bookmark?
Delete from my manuals?
Login
Sign In
OR
Sign in with Facebook
Sign in with Google
Upload manual
Upload from disk
Upload from URL


Need help?
Do you have a question about the ETI Series and is the answer not in the manual?
Questions and answers