Table of Contents
Advertisement
Advertisement
Table of Contents
Troubleshooting

Related Manuals for Phoenix Contact THERMOMARK ROLL 2.0


Summary of Contents for Phoenix Contact THERMOMARK ROLL 2.0
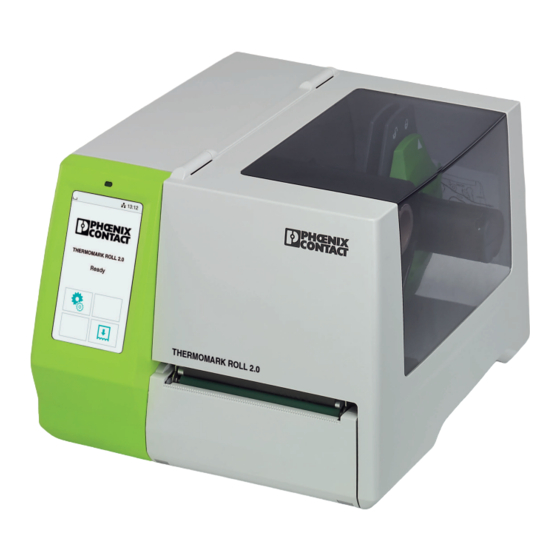
- Page 1 Operating the THERMOMARK ROLL 2.0 thermal transfer printer User manual...
-
Page 2: User Manual
Operating the THERMOMARK ROLL 2.0 thermal transfer printer UM EN THERMOMARK ROLL 2.0, Revision 01 2019-02-15 This user manual is valid for: Designation Revision Order No. THERMOMARK ROLL 2.0 1085260 PHOENIX CONTACT GmbH & Co. KG • Flachsmarktstraße 8 • 32825 Blomberg • Germany phoenixcontact.com... -
Page 3: Table Of Contents
FTP login ....................28 3.4.2 Sending print data via FTP ..............28 3.4.3 FTP access to storage media ...............29 3.4.4 FTP firmware update ................29 Mounting accessories ......................30 Cutter or perforator ....................30 Mounting the external media hub.................34 3 / 52 108716_en_01 PHOENIX CONTACT... - Page 4 THERMOMARK ROLL 2.0 Maintenance and troubleshooting ....................35 Cleaning the device .....................35 Cleaning the printhead..................36 Cleaning and replacing the pressure roller ............37 Troubleshooting....................38 Error messages ....................39 Repairs ........................40 Storage and disposal...................40 Appendix ..........................41 Ordering data.......................41 Technical data .....................44 Approvals and declarations .................46 Declaration of conformity ..................47...
-
Page 5: For Your Safety
Here you will find additional information or detailed sources of information. Qualification of users This user manual is addressed to persons, who are familiar with the relevant safety con- cepts for handling electrical machines. The persons must be able to recognize dangers. 5 / 52 108716_en_01 PHOENIX CONTACT... -
Page 6: Field Of Application Of The Product
THERMOMARK ROLL 2.0 Field of application of the product The THERMOMARK ROLL 2.0 is a thermal transfer printer and thermal direct printer for the industrial sector. With this printer, you can print continuous material such as labels and shrink sleeves. - Page 7 This can damage the printhead. The ink ribbon must be at least 5 mm wider than the material. Direct contact between the printhead and the material can lead to increased wear on the printhead. 7 / 52 108716_en_01 PHOENIX CONTACT...
-
Page 8: Starting Up The Printer
THERMOMARK ROLL 2.0 Starting up the printer Unpacking and setup Scope of supply – Printer – Mains cable – USB cable – Empty film core (possibly already mounted on the take-up hub) – Label roll EML (20X8)R/TL – THERMOMARK-RIBBON 110/50 ink ribbon –... -
Page 9: Overview Of The Device
Supply hub, for supplying the ink ribbon Margin stop, for securing the material roll Photoelectric barrier, for label detection Pressure roller Tear-off plate Lever, for locking the printhead Rotary dial, for setting the material guide margin stop 9 / 52 108716_en_01 PHOENIX CONTACT... -
Page 10: Connecting The Device
2.3.1 Connecting the mains cable The THERMOMARK ROLL 2.0 is equipped with a wide range power supply unit for AC volt- ages between 100 V and 240 V. • Insert the mains cable into the socket of the device. -
Page 11: Connecting The Printer Via Usb
Connect the computer to the device using the supplied USB cable. • Download and install the driver software. Following successful installation, an icon for the THERMOMARK ROLL 2.0 appears in the Windows “Devices and Printers” system folder. • Open the marking software. -
Page 12: Connecting A Printer Via Wlan
THERMOMARK ROLL 2.0 2.3.3 Connecting a printer via WLAN Installing a WLAN stick • Insert a WLAN stick into the USB interface to the left of the display. Setting up the WLAN connection • Activate the WLAN interface via the menu (see “Setting up WLAN”... -
Page 13: Inserting The Material And Printing
Push the material below the guide roller (2) towards the printing unit. Guide the material through below the label sensor (5). • Move the guides close to the edges of the material. The material must not become jammed. • To close the printhead, turn the green lever clockwise. 13 / 52 108716_en_01 PHOENIX CONTACT... -
Page 14: Inserting Leporello Labels
THERMOMARK ROLL 2.0 2.4.2 Inserting Leporello labels Figure 2-4 Material feed path with Leporello labels Inserting Leporello labels • Open the cover. • Release the margin stop (1). To do this, turn the green adjustable ring counterclockwise until the arrow points to the symbol. -
Page 15: Inserting The Ink Ribbon
Push the ink ribbon roll onto the supply hub (1) so that the color coating of the film faces downwards during unwinding. • The Phoenix Contact ink ribbon rolls for this printer have the color coating on the out- side of the winding. Observe the unwinding direction shown in Figure 2-5. -
Page 16: Printing
The marking software can be used to create markings on the computer that are adapted to the Phoenix Contact marking material. Select the THERMOMARK ROLL 2.0 as the output device there. You will be provided with a list of materials that are suitable for this device. -
Page 17: Operating The Printer
The language is set when the printer is started up. To select a different language later, pro- ceed as follows: • Touch this icon. • Touch this icon. • Touch this icon. • Touch this icon. • Touch the desired language. 17 / 52 108716_en_01 PHOENIX CONTACT... -
Page 18: Start Page
THERMOMARK ROLL 2.0 3.1.3 Start page Not always are all icons visible. An icon is hidden if it is not used in the current printer status. Call the menu Pause print job Continue print job Repeat last page printed Delete all print jobs... -
Page 19: Operation Via The Menu
Specify storage medium to be accessed via the interfaces and FTP management. For other functions, all storage media can be selected but the default storage me- USB mem- dium is suggested first. ory device External storage media – USB memory device – SD cards 19 / 52 108716_en_01 PHOENIX CONTACT... - Page 20 CLIP PROJECT: at “File, Print setup...” – PROJECT complete: at “File, Printer Configurations” You will find the “Printer parameters” under THERMOMARK ROLL 2.0. Only change the settings in the printer after this has been done. This will result in an additional increase or reduction.
- Page 21 Label detection Changing the procedure for detecting the label sensor Gap sen- If you are printing with Phoenix Contact material, adjustment is not required. Con- tinuous material is automatically detected. Extrapolating the labels This function prevents the first labels from remaining unprinted. In the default set- ting, this function is on.
- Page 22 THERMOMARK ROLL 2.0 Table 3-1 Menu structure Menu Setting option [...] Default Setting up interfaces Setting up Ethernet Entering the host name Unique designation for the printer in the network DHCP, method for assigning the IP address Dynamic assignment of the IP address by the DHCP server...
- Page 23 “Setting the country” param- eter. Adjusting the display Adjusting the brightness of the display Time without activity before the printer is set to energy-saving mode 5 min Test print Test print on EML(20x8)R – 23 / 52 108716_en_01 PHOENIX CONTACT...
- Page 24 THERMOMARK ROLL 2.0 Table 3-1 Menu structure Menu Setting option [...] Default Security Activating PIN protection, password for protection of print parameter changes via the display (default: 0000) Password for printing via FTP (see “Printing via FTP” page print FTP login as ftpprint...
- Page 25 Only after you have acknowledged the “Clean printhead!” message, the error mes- sage for the error that occurred in the material flow is displayed. Licenses and software libraries for third-party components used in the firmware – 25 / 52 108716_en_01 PHOENIX CONTACT...
- Page 26 THERMOMARK ROLL 2.0 Table 3-1 Menu structure Menu Setting option [...] Default Watching help videos Video on how to insert the ink ribbon – Video on how to insert the material – Video on how to install the cutter –...
-
Page 27: Configuration Via The Website
Setting configuration parameters which are also accessible via the display in the “Set- tings” menu (see page – Setting passwords – Viewing lists of hardware and optional components – Viewing overview of available fonts – Opening auxiliary functions 27 / 52 108716_en_01 PHOENIX CONTACT... -
Page 28: Printing Via Ftp
THERMOMARK ROLL 2.0 Printing via FTP With the File Transfer Protocol (FTP), you can manage and transfer files in the network via the Ethernet or WLAN interface. For printer management, you require an FTP program (FTP client) which supports the “binary” transfer mode. The printer acts as an FTP server. -
Page 29: Ftp Access To Storage Media
While the firmware is being copied, a progress indicator appears on the display. Once the file is successfully copied, the printer restarts automatically. • End the FTP connection. In the status display, you can check whether the firmware update was successful. 29 / 52 108716_en_01 PHOENIX CONTACT... -
Page 30: Mounting Accessories
THERMOMARK ROLL 2.0 Mounting accessories Cutter or perforator A cutter which automatically cuts off labels is available as an accessory (THERMOMARK ROLL-CUTTER, 5146422). A perforator is available for shrink sleeves (THERMOMARK ROLL-CUTTER/P, 5146435). WARNING: Danger of cutting due to unintentional blade movement Disconnect the printer from the power supply before installing, removing, or cleaning the cutter blade. - Page 31 Activate the cutter or perforator in the marking software. – CLIP PROJECT: at “File, Print setup...” – PROJECT complete: at “File, Printer Configurations” – You will find the “Printer parameters” with the “Accessory mode” under THERMOMARK ROLL 2.0. 31 / 52 108716_en_01 PHOENIX CONTACT...
- Page 32 THERMOMARK ROLL 2.0 Cleaning the cutter or perforator Figure 4-3 Removing the cutter blades WARNING: Danger of cutting due to unintentional blade movement Disconnect the printer from the power supply before installing, removing, or cleaning the cutter blade. WARNING: Danger of cutting The cutter blades are sharp.
- Page 33 To insert the upper blade, push the lower blade onto the panel. Place the upper blade in the guide. Push it upwards until the gear racks engage with the gear wheels. • Rotate the shaft using the Torx screwdriver until the blade reaches the upper stop. 33 / 52 108716_en_01 PHOENIX CONTACT...
-
Page 34: Mounting The External Media Hub
THERMOMARK ROLL 2.0 Mounting the external media hub An external media hub on which rolls with a larger diameter can be mounted is available as an accessory. – External media hub, for roll diameters of 150 mm to 400 mm:... -
Page 35: Maintenance And Troubleshooting
Remove dust and paper fluff in the printing area with a soft brush or vacuum cleaner. • It is important to clean the printhead regularly. This ensures consistently good printing and reduces wear on the printhead. • We recommend to clean the printer once a month. 35 / 52 108716_en_01 PHOENIX CONTACT... -
Page 36: Cleaning The Printhead
THERMOMARK ROLL 2.0 Cleaning the printhead Cleaning periods – Thermal direct printing: after each material roll change – Thermal transfer printing: after each ink ribbon change After a certain amount of material flow, a message on the display indicates that the print- head should be cleaned (see “Setting the cleaning interval”... -
Page 37: Cleaning And Replacing The Pressure Roller
Clean the pressure roller using a roller cleaner, or replace it. Do not use any sharp ob- jects to clean the pressure roller. • Push the pressure roller with bearings into the holders until it snaps into place. • Flip in the panel. 37 / 52 108716_en_01 PHOENIX CONTACT... -
Page 38: Troubleshooting
THERMOMARK ROLL 2.0 Troubleshooting Table 5-1 Troubleshooting Problem Cause Remedy Page Ink ribbon wrinkles Feed path of the ink ribbon Check the ink ribbon path Check the horizontal position of the ink ribbon on the take-up hub and supply hub... -
Page 39: Error Messages
No cutter function Switch printer off and on again. If – this problem occurs again, contact Phoenix Contact. “Out of paper” Label roll or shrink sleeve has been Insert material used up Error in material flow Check material flow, adapt margin stops, if necessary “Voltage error”... -
Page 40: Repairs
THERMOMARK ROLL 2.0 Repairs WARNING: Hazard to operational safety Incorrect operation or modifications to the device can endanger your safety or damage the device. Do not repair the device yourself. If the device is defective, please contact Phoenix Contact. Storage and disposal Transporting the device •... -
Page 41: A Appendix
Appendix A Appendix Ordering data Thermal transfer printer Description Type Order No. Pcs./Pkt. Thermal transfer printer for labels and shrink sleeves, in- THERMOMARK ROLL 2.0 1085260 cluding connecting cables, 300 dpi Accessories Description Type Order No. Pcs./Pkt. Cutter THERMOMARK ROLL-... - Page 42 THERMOMARK ROLL 2.0 Ink ribbon Description Type Order No. Pcs./Pkt. Ink ribbon, specifically for WMS... shrink sleeves, length: THERMOMARK-RIBBON 0801358 300 m, width: 110 mm, color: black 110-WMSU Ink ribbon, specifically for WMS... shrink sleeves, length: THERMOMARK-RIBBON 0801359 300 m, width: 110 mm, color: white 110-WMSU WH Ink ribbon, specifically for WMS...
- Page 43 Mandatory sign, attachment method: adhesive PML-M.. (..X..)R Prohibition sign, attachment method: adhesive PML-P.. (..X..)R Warning label, attachment method: adhesive PML-W.. (..X..)R Pipeline marker, attachment method: adhesive PML-T.. (..X..)R Magnetic sign, attachment method: magnetic adhesion PMM (..X..)R 43 / 52 108716_en_01 PHOENIX CONTACT...
-
Page 44: A 2 Technical Data
THERMOMARK ROLL 2.0 Technical data Printhead Printing method Thermal transfer, thermal direct Print resolution 300 dpi x 300 dpi (12 dots/mm x 12 dots/mm) Material sensor Position Centered Type Transmissive sensor Detection Inter-label clearance, black mark and hole mark Print speed 30 mm/s ... - Page 45 0°C ... +60°C Transport -25°C ... +60°C Humidity Operation 10% … 85%, non-condensing Storage 20% … 80%, non-condensing Transport 20% … 80%, non-condensing Approvals Approvals CE, FCC class A, UL, CB, CCC, KC, ICES3 45 / 52 108716_en_01 PHOENIX CONTACT...
-
Page 46: A 3 Approvals And Declarations
Whereas such specific license terms entitle you to the source code of such software, PHOENIX CONTACT will provide upon written request via email and/or traditional paper mail the applicable GPL source code files via CD-ROM for a nominal cost to cover shipping and media charges as allowed under the GPL and LGPL. -
Page 47: A 4 Declaration Of Conformity
Declaration of conformity Declaration of conformity The THERMOMARK ROLL 2.0 complies with the key requirements of the following direc- tives: – 2011/65/EU Restriction of the use for certain hazardous substances – 2014/30/EU EMC Directive (electromagnetic compatibility) – 2014/35/EU Low Voltage Directive The standards consulted for evaluating conformity can be found at: phoenixcontact.net/product/1085260... - Page 48 THERMOMARK ROLL 2.0 48 / 52 PHOENIX CONTACT 108716_en_01...
-
Page 49: Index
Inserting Leporello labels ..........14 Inserting marker sleeve ..........13 Inserting material............13 Inserting shrink sleeve..........13 Installation location............8 Ordering data .............. 41 Pressure roller Exchanging ............37 Printhead Cleaning ..............36 Notes............... 7 49 / 52 108716_en_01 PHOENIX CONTACT... - Page 50 THERMOMARK ROLL 2.0 50 / 52 PHOENIX CONTACT 108716_en_01...
- Page 51 The receipt of technical documentation (in particular user documentation) does not constitute any further duty on the part of Phoenix Contact to furnish information on modifications to products and/or technical documentation. You are responsible to verify the suitability and intended use of the products in your specific application, in particular with regard to observing the applicable standards and regulations.
-
Page 52: How To Contact Us
Should you have any suggestions or recommendations for improvement of the contents and layout of our manuals, please send your comments to: tecdoc@phoenixcontact.com 52 / 52 PHOENIX CONTACT GmbH & Co. KG • Flachsmarktstraße 8 • 32825 Blomberg • Germany phoenixcontact.com... - Page 54 PHOENIX CONTACT GmbH & Co. KG Flachsmarktstraße 8 32825 Blomberg, Germany Phone: +49 5235 3-00 Fax: +49 5235 3-41200 E-mail: info@phoenixcontact.com phoenixcontact.com...
Need help?
Do you have a question about the THERMOMARK ROLL 2.0 and is the answer not in the manual?
Questions and answers