Table of Contents
Advertisement
Quick Links
Download this manual
See also:
Installation Manual
Advertisement
Table of Contents

Related Manuals for Avaya Scopia


Summary of Contents for Avaya Scopia
- Page 1 ® Installation Guide for Avaya Scopia Application Server Version 2 For Solution 8.x March 2014...
- Page 2 If you trademarks of their registered owners. are unable to locate a copy, please contact Avaya Inc and a copy will be provided to you. This publication is AVAYA Confidential & Proprietary.
-
Page 3: Table Of Contents
Mounting the Outer Rails on to the Rack ................... 11 Mounting the Device on to the Outer Rails ..................15 Connecting Cables to the Device ........................19 ® Configuring the IP Address for the Avaya Scopia Application server ............20 Verifying the Server Installation ........................20 ®... -
Page 4: Chapter 1: About The Avaya Scopia ® Application Server
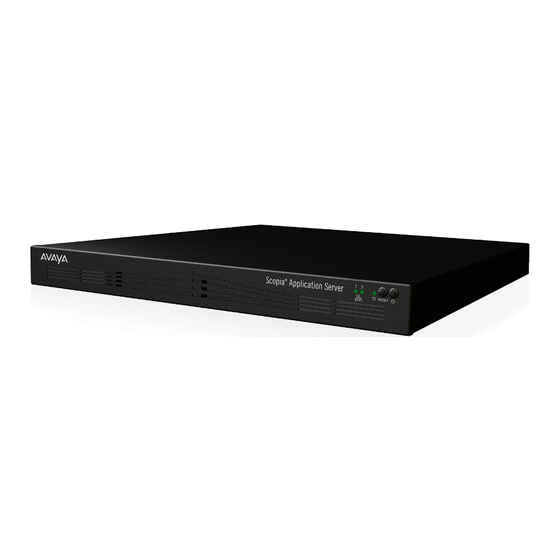
® Chapter 1 | About the Avaya Scopia Application server ® ® Avaya Scopia Application server is a state of the art modern server optimized to run the Scopia Solution software ® ® ® ® products: Scopia Management, Scopia Desktop server, Content Center for Scopia Desktop and Avaya Scopia ECS Gatekeeper. -
Page 5: Supported Capacity
® This software installation applies to both Scopia Management enterprise or service provider ® (multi-tenant) editions, in configurations with or without the internal Avaya Scopia Gatekeeper. The supported capacity on this device is as follows: – Up to 40,000 users listed in the user directory –... -
Page 6: Chapter 2: Preparing The Avaya Scopia ® Application Server Setup
® Chapter 2 | Preparing the Avaya Scopia Application server Setup Perform procedures in this section to prepare the site and device for installation. Navigation • Checking Site Suitability on page 6 • Unpacking the Device on page 6 •... -
Page 7: Inspecting For Damage
If you observe any physical defects in the items you ordered, contact Technical Support for Return Material Authorization (RMA) form. ® ® Installation Guide for Avaya Scopia Application Server Version 2 Preparing the Avaya Scopia Application server Setup | 7... - Page 8 Keep a record of the parts and serial numbers. If any parts are missing or damaged, contact your sales representative. ® ® Installation Guide for Avaya Scopia Application Server Version 2 Preparing the Avaya Scopia Application server Setup | 8...
-
Page 9: Chapter 3: Setting Up The Device
9 • Connecting Cables to the Device on page 19 ® • Configuring the IP Address for the Avaya Scopia Application server on page 20 • Verifying the Server Installation on page 20 Mounting the Device on to the Rack... - Page 10 • Two long outer rails and two short outer rails, to be attached to the rack itself (as described in Mounting the Outer Rails on to the Rack on page 11) ® Installation Guide for Avaya Scopia Application Server Version 2 Setting up the Device | 10...
-
Page 11: Mounting The Outer Rails On To The Rack
After fastening the outer rails to the rack itself, you attach the inner rails to the device. You can then slide the inner rails along the outer rails to mount the device on to the rack. ® Installation Guide for Avaya Scopia Application Server Version 2 Setting up the Device | 11... -
Page 12: Before You Begin
1. Connect the long and short outer rails to each other by sliding the knob on the short rail through the rounded end of the slot on the long rail (Figure 5: Connecting the two outer rails on page 13). ® Installation Guide for Avaya Scopia Application Server Version 2 Setting up the Device | 12... - Page 13 Slide the long rail towards the front of the rack, adjusting the length according to the depth of the rack. Attach it to the front of the rack as you did to the rear of the rack. ® Installation Guide for Avaya Scopia Application Server Version 2 Setting up the Device | 13...
- Page 14 The outer rail is now attached to the rack, as shown in Figure 9: Side view of rack with the outer rail attached on page 15. ® Installation Guide for Avaya Scopia Application Server Version 2 Setting up the Device | 14...
-
Page 15: Mounting The Device On To The Outer Rails
(Figure 10: Preparing the parts required to mount the device onto the rails on page 16): – Two inner rail extensions – Two flat-head short screws (Phillips cross recessed flat-head machine screws 6-32 UNCx3/16") ® Installation Guide for Avaya Scopia Application Server Version 2 Setting up the Device | 15... - Page 16 Secure the rear inner rail extension through one of the two holes on the rail extension, using one flat-headed short screw (Figure 12: Securing rail extensions to the device page 17). ® Installation Guide for Avaya Scopia Application Server Version 2 Setting up the Device | 16...
- Page 17 As you slide, you should hear two clicks; one mid-way and one near the end. These are the safety latches to stop the device from accidentally sliding out. ® Installation Guide for Avaya Scopia Application Server Version 2 Setting up the Device | 17...
- Page 18 Figure 14: Removing the device from the rails 3. Secure the device to each front post using a long screw. Insert a washer between the screw and the device panel. ® Installation Guide for Avaya Scopia Application Server Version 2 Setting up the Device | 18...
-
Page 19: Connecting Cables To The Device
1. On the rear panel, connect the power cable to the AC power connector (Figure 16: Rear panel of the device on page 20). ® Installation Guide for Avaya Scopia Application Server Version 2 Setting up the Device | 19... -
Page 20: Configuring The Ip Address For The Avaya Scopia ® Application Server
Use both Ethernet connectors for dual-NIC deployments. A dual-NIC deployment raises security by using different subnets for media versus management. Use NIC1 Ethernet connector for management and the NIC2 connector for media. ® Configuring the IP Address for the Avaya Scopia Application server ® The Avaya Scopia Application server comes preconfigured with an automatic IP (DHCP) address. - Page 21 1. On the front panel, verify that the power LED is lit green. Figure 17: Locating the front panel LEDs 2. Check the network connection by verifying that the Ethernet activity LED is lit green. ® Installation Guide for Avaya Scopia Application Server Version 2 Setting up the Device | 21...
- Page 22 ® Installation Guide for Avaya Scopia Application Server Version 2 | 22...
Need help?
Do you have a question about the Scopia and is the answer not in the manual?
Questions and answers