
Related Manuals for Zibro S1234


Summary of Contents for Zibro S1234
- Page 1 S1226 - S1234 - S1246 - S1266 GEBRAUCHSANWEISUNG BRUGSANVISNING INSTRUCCIONES DE USO MANUEL D'UTILISATION KÄYTTÖOHJE OPERATING MANUAL...
- Page 2 Estimada señora, estimado señor: Le felicitamos por la compra de su aparato de aire acondicionado de Zibro. Usted acaba de comprar un producto de calidad absoluta, que le dará plena satisfacción durante muchos años, a condición de que lo utilice debidamente.
-
Page 3: Table Of Contents
ÍNDICE INSTRUCCIONES DE SEGURIDAD COMPONENTES TEMPERATURA DE UTILIZACIÓN FUNCIONAMIENTO MANUAL FUNCIONAMIENTO DEL MANDO A DISTANCIA FUNCIONAMIENTO ÓPTIMO AJUSTE DE LA DIRECCIÓN DEL CAUDAL DE AIRE FUNCIONAMIENTO DEL AIRE ACONDICIONADO MANTENIMIENTO INFORMACIÓN SOBRE EL FUNCIONAMIENTO LOCALIZACIÓN DE AVERÍAS CONDICIONES DE GARANTÍA ESPECIFICACIONES TÉCNICAS LEA ESTE MANUAL Este manual contiene consejos muy útiles sobre la utilización y el mantenimiento... -
Page 4: Instrucciones De Seguridad
Las reparaciones y/o trabajos de mantenimiento deben ser siempre llevados a cabo por un técnico de servicio cualificado o por su distribuidor Zibro. Observe las instrucciones de uso y mantenimiento indi- cadas en el manual de usuario del aire acondicionado. -
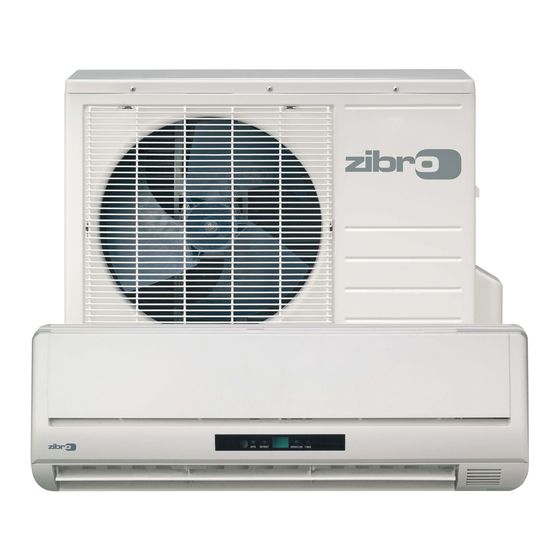
Page 5: Componentes
• No manipular los botones ni tocar el aire acondicionado con las manos mojadas. • La unidad exterior produce un sonido cuando está en funcionamiento, esto puede que no sea de con- formidad con la legislación local. Es responsabilidad del usuario comprobar que el aparato cumple con la legislación local. -
Page 6: Temperatura De Utilización
PANEL DE INDICADORES LUMINOSOS EN LA UNIDAD INTERIOR Receptor de señales Indicador “AUTO” Este indicador se enciende cuando el aire acondicionado está configurado para el modo de funciona- miento automático “AUTO”. Descongelar, indicador “DEFROST” (sólo para modelos con las funciones Refrigerar y Calentar) Este indicador se enciende cuando el aire acondicionado descongela automáticamente o cuando se acti- va la regulación del aire caliente, durante el calentamiento. -
Page 7: Funcionamiento Manual
FUNCIONAMIENTO MANUAL El aire acondicionado puede ser controlado manualmente con los botones en el aparato mismo o con el mando a distancia incluido. Para la operación con el mando a distancia, consulte el capítulo E “Funcionamiento del mando a distancia”. Cuando el aparato es operado sin el mando a distancia, funcio- nará... -
Page 8: Funcionamiento Del Mando A Distancia
FUNCIONAMIENTO DEL MANDO A DISTANCIA ¡ATENCIÓN! • Oriente siempre el mando a distancia hacia el receptor en la unidad interior y compruebe que no se encuentran obstáculos entre el mando a distancia y el receptor de la unidad interior. De lo contrario, la señal del mando a distancia no llegará... - Page 9 camente la dirección de giro. Al apretar este botón, en la pantalla no aparecerá ningún símbolo. Botón Timer on: Pulse este botón para iniciar la secuencia de tiempo de encendido automático. Cada vez que pulse este botón, la hora del encendido automático avanzará en incrementos de 30 minutos. Cuando la pantalla muestra 10Hr, con cada pulsación la hora incrementaré...
- Page 10 Funcionamiento del mando a distancia Colocación / Cambio de las pilas El mando a distancia utiliza dos pilas alcalinas secas (AAA/LR03). No utilice pilas recargables. Deslice la cubierta del compartimento de las pilas en el mando a distancia en el sentido de la flecha situ- ada en la cubierta.
- Page 11 ¡ATENCIÓN! El modo FAN ONLY no puede utilizarse para controlar la temperatura. En este modo, sólo se puede efectuar los pasos 1, 3 y 4. Funcionamiento en MODO DRY Pulse el botón Mode para seleccionar el modo DRY. Pulse el botón ) para ajustar la temperatura deseada entre los 21 °C y 28 °C.
-
Page 12: Funcionamiento Óptimo
¡ATENCIÓN! • Si se ha programado la misma hora para el INICIO y para la PARADA, la hora de parada incrementará en 0,5hr (si la hora programada mostrada es inferior a 10 horas) o en 1 hora (si la hora programada es 10 horas o más). •... -
Page 13: Ajuste De La Dirección Del Caudal De Aire
AJUSTE DE LA DIRECCIÓN DEL CAUDAL DE AIRE • Ajuste la dirección del caudal de aire correctamente, de lo contrario puede sentirse incómodo y tener una temperatura no homogénea. • Ajuste la aleta horizontal con el botón en el mando a distancia. •... -
Page 14: Funcionamiento Del Aire Acondicionado
ATENCIÓN • Los botones AIR DIRECTION y SWING quedan desactivados cuando el aire acondicionado no está funcionando (también si el TIMER ON está programado). • No dejar el aire acondicionado durante largos períodos de tiempo con el caudal dirigido hacia abajo en los modos de refrigeración o deshumidificación, ya que de esta forma se puede formar condensación en la superficie de la aleta horizontal (goteo). -
Page 15: Mantenimiento
ATENCIÓN Cuando el aire acondicionado está en modo de deshumidificación, la temperatura ambiente bajará. En estas circunstancias, un higrostato medirá una humedad relativa superior. La humedad absoluta en la habitación bajará en cualquier caso, en función de la cantidad de humedad producida en la habitación (cocinando, personas presentes, etc.). - Page 16 Limpie el filtro de plasma electrostático con agua, y si fuese necesario, con un detergente suave. Antes de volver a colocar el filtro, compruebe que está perfectamente seco y que no tiene defectos. Vuelva a colocar el filtro de aire. Introduzca la parte superior del filtro en la unidad, procurando que los bor- des izquierdo y derecho queden perfectamente alineados y coloque el filtro en posición.
-
Page 17: Información Sobre El Funcionamiento
INFORMACIÓN SOBRE EL FUNCIONAMIENTO Durante el funcionamiento normal del aparato pueden presentarse las siguientes situaciones: 1. Protección del aire acondicionado. Protección del compresor • Una vez se ha parado el compresor, tardará 3 minutos para volver a encenderse. Aire anti-frío •... -
Page 18: Localización De Averías
5. La unidad interior emana un olor peculiar. • La unidad interior emana los olores procedentes del material de construcción, de los muebles o del humo. 6. El aire acondicionado pasa de los modos de sólo VENTILACIÓN al modo de REFRIGERACIÓN o de CALEFACCIÓN •... - Page 19 Problema Causa Solución Esperar que se restablezca la alimentación Corte de alimentación eléctrica de corriente. Comprobar que la clavija está Unidad puede estar desenchufada. correctamente enchufada en la toma de corriente. Cambiar el fusible / reiniciar el relé / El fusible está fundido. reiniciar el interruptor automático La unidad no arranca Las pilas del mando están descargadas.
-
Page 20: Condiciones De Garantía
Los gastos de envío y el riesgo que conlleva el envío del aire acondicionado o partes del mismo, corre- rán siempre por cuenta del comprador. Los daños, provocados por no usar los filtros adecuados de Zibro, no están cubiertos por la garantía. La garantía no cubre la pérdida y/o fuga de refrigerante causada por la (des)conexión incompetente de la unidad. -
Page 21: Especificaciones Técnicas
ESPECIFICACIONES TÉCNICAS Modelo S 1226 S 1234 S 1246 S 1266 Tipo de aire acondicionado Aire acondicionado mural Aire acondicionado mural Aire acondicionado mural Aire acondicionado mural Capacidad de refrigeración (máx) * 2600 3400 4600 6600 Clase EE* EER* 3,02 3,02 2,88 3,08... - Page 22 Madame, Monsieur, Toutes nos félicitations pour l’achat de votre climatiseur Zibro. Vous venez d’acquérir un produit de qualité dont vous pourrez profiter pendant de longues années, à condition de l’utiliser de façon adéquate. Pour assurer une durée de vie optimale à votre climatiseur, nous vous invitons à lire d’abord ce manuel d’installation.
- Page 23 SOMMAIRE CONSIGNES DE SÉCURITÉ DÉSIGNATION DES PIÈCES TEMPÉRATURE DE FONCTIONNEMENT MANUEL D’UTILISATION UTILISATION AVEC TÉLÉCOMMANDE UTILISATION OPTIMALE RÉGLER L’ORIENTATION DU FLUX D’AIR FONCTIONNEMENT DU CLIMATISEUR ENTRETIEN CONSEILS D’UTILISATION RÉSOUDRE LES PANNES CONDITIONS DE GARANTIE SPECIFICATIONS TECHNIQUES LISEZ CE MANUEL Ce manuel vous propose de nombreux conseils pour utiliser et entretenir correcte- ment votre climatiseur.
-
Page 24: Consignes De Sécurité
• Toute réparation et/ou maintenance doit être exclusivement effectuée par un technicien agréé ou votre distributeur Zibro. Pour l’utilisation et l’entretien de l’appareil, prière de suivre les instructions indi- quées dans le manuel. • Débranchez toujours l’appareil lorsque vous ne l’utilisez pas. -
Page 25: Désignation Des Pièces
• Si vous avez les mains mouillées, n’appuyez pas sur les boutons de l’appareil et ne le manipulez pas. • Notez que l’unité extérieure émet un bruit de fonctionnement. L’utilisateur a la responsabilité de véri- fier si l’appareil est en parfaite conformité avec la législation locale. •... -
Page 26: Température De Fonctionnement
INDICATEURS DE FONCTIONS SUR L’ÉCRAN DE L’UNITÉ INTÉRIEURE Récepteur de signal AUTO Cet indicateur s’allume lorsque le climatiseur est en mode automatique DÉGEL (uniquement sur modèles Climatiseur & Chauffage) Cet indicateur s’allume lorsque le climatiseur commence à dégeler automatiquement ou lorsque le con- trôleur d’air chaud est activé... -
Page 27: Manuel D'utilisation
MANUEL D’UTILISATION Le climatiseur peut s’utiliser grâce aux boutons de commande placés sur l’appareil ou avec la télécomman- de fournie. Pour l’utilisation de la télécommande, voir le chapitre E “Utilisation avec télécommande”. Si vous l’utilisez sans télécommande, le climatiseur fonctionnera uniquement en mode AUTO. Pour une utili- sation de l’appareil sans télécommande, suivez les instructions suivantes: Panneau Bouton de com-... -
Page 28: Utilisation Avec Télécommande
UTILISATION AVEC TELECOMMANDE NOTE! • Orientez toujours la télécommande vers le récepteur de signal de l’unité intérieure. Aucun obstacle ne doit se trouver entre la télécommande et le récepteur, sinon le signal émis par la télécommande ne sera pas reçu par le récepteur et l’appareil ne fonctionnera pas correctement. - Page 29 dans une position qui affecte le fonctionnement du mode climatisation ou chauffage, l’appareil chan- ge automatiquement sa position. Lorsque vous appuyez sur ce bouton, aucun symbole n’apparaît sur l’écran de l’appareil. Bouton Timer on (Mise en marche minuterie): Appuyez sur ce bouton pour régler l’heure de mise en route automatique de l’appareil.
- Page 30 NOTE! La figure 2 montre toutes les fonctions qui peuvent s’afficher. Dans la pratique, seules les fonctions concernées s’affichent sur l’écran. Utiliser la télécommande Installer / Changer les piles Utilisez deux piles alcalines sèches (AAA/LR03). N’utilisez pas de piles rechargeables. Au dos de la télécommande, ouvrez le couvercle en le faisant coulisser dans le sens de la flèche.
- Page 31 Pour régler la température souhaitée dans la pièce, appuyez sur les boutons ). En mode COOL (Climatisation) la température la plus confortable est 21ºC ou plus. En mode (Chauffage) la tem- pérature la plus confortable est 28ºC ou moins. Appuyez sur le bouton pour sélectionner le mode FAN (Circulation d’air) ou le mode AUTO, HIGH, MED ou LOW.
-
Page 32: Utilisation Optimale
Réglage de l’horaire de mise en route et d’arrêt 3.1 Appuyez sur le bouton Timer on, l’écran de la télécommande affiche ON TIMER, le dernier horaire de mise en route programmé et le signal "Hr". Vous pouvez maintenant programmer le nouvel horai- re de mise en route. -
Page 33: Régler L'orientation Du Flux D'air
REGLER L’ORIENTATION DU FLUX D’AIR • Pour une température confortable et régulière il est important d’orienter correctement le flux d’air. • Réglez la position de la lamelle horizontale à l’aide du bouton de la télé- commande. • La lamelle verticale se règle manuellement. Régler le flux d’air horizontalement (haut –... -
Page 34: Fonctionnement Du Climatiseur
ATTENTION • Les boutons sont désactivés lorsque le climatiseur est arrêté (même lorsque la minuterie est enclenchée TIMER ON). • Lorsque l’appareil est en mode climatisation ou déshumidification, ne le faites pas fonctionner trop longtemps avec la lamelle horizontale en position baissée. De la condensation pourrait se former sur la lamelle horizontale et couler. -
Page 35: Entretien
ENTRETIEN AVERTISSEMENT Éteignez puis débranchez toujours le climatiseur avant de le nettoyer. Nettoyant tuyaux Nettoyer l’unité intérieure et la télécommande ATTENTION Diluant • Pour essuyer l’unité intérieure et la télécommande utilisez un chiffon propre. • Si l’unité intérieure est très sale, utilisez un chiffon légèrement humide. - Page 36 ENTRETIEN Si vous n’utilisez pas le climatiseur pendant une longue période, effectuez les opérations suivantes avant de le ranger: • Mettez la ventilation en route pendant 6 heures pour sécher l’intérieur de l’unité. • Éteignez ensuite le climatiseur puis débranchez-le. Retirez les piles de la télécommande. •...
-
Page 37: Conseils D'utilisation
CONSEILS D’UTILISATION Les fonctions suivantes peuvent s’activer automatiquement lorsque le climatiseur est en marche. 1. Protection du climatiseur. Protection du compresseur • Une fois arrêté, le compresseur de l’appareil ne se remet en marche qu’au bout de 3 minutes. Anti air froid •... -
Page 38: Résoudre Les Pannes
6. Le climatiseur passe uniquement en mode FAN (Circulation d’air) depuis le mode COOL (Climatisation) ou HEAT (Chauffage). • Lorsque la température intérieure atteint la température programmée, le compresseur s’arrête auto- matiquement et le climatiseur passe en mode FAN (Circulation d’air). Le compresseur se remet en route lorsque la température intérieure augmente en mode COOL (Climatisation) ou descend en mode HEAT (Chauffage). - Page 39 Problème Cause Solution Coupure de courant Attendez le rétablissement de l'électricité. Vérifiez si la fiche électrique est bien L'unité est peut-être débranchée enfoncée dans la prise murale. Changez le fusible / rétablissez le Le fusible peut avoir sauté. disjoncteur / coupe-circuit L'appareil ne se met La pile de la télécommande peut être Changez la pile.
-
Page 40: Conditions De Garantie
Les frais d’expédition et les risques liés à l’envoi du climatiseur ou de ses pièces sont toujours à la char- ge de l’acheteur. La garantie ne couvre pas les dégâts causés par l’utilisation de filtres d’une autre marque que Zibro. La garantie ne couvre pas les pertes et/ou fuites de gaz réfrigérant causées par une installation effec- tuée par un personnel non qualifié. -
Page 41: Specifications Techniques
SPECIFICATIONS TECHNIQUES Modèle S 1226 S 1234 S 1246 S 1266 Type climatiseur Climatiseur monté sur mur Climatiseur monté sur mur Climatiseur monté sur mur Climatiseur monté sur mur 2600 3400 4600 6600 Capacité de refroidissement (max) * Classe EE* EER* 3,02 3,02... - Page 42 Hyvä asiakas Onnittelemme Zibro-ilmastointilaitteen hankinnasta. Olet hankkinut laadukkaan tuotteen, josta on oikein käytettynä iloa monen vuoden ajaksi. Lue nämä ohjeet ennen ilmastointilaitteen käytön aloittamista sen pitkän käyttöiän varmistamiseksi. Tuotteen valmistajana myönnämme sille 24 kuukauden takuun kaikkien materiaali- ja tuotevikojen varalta. Toivotamme sinulle nautinnollisia hetkiä uuden ilmastointilaitteesi parissa.
- Page 43 SISÄLTÖ TURVAOHJEET OSIEN NIMET KÄYTTÖLÄMPÖTILA MANUAALINEN KÄYTTÖ KÄYTTÖ KAUKOSÄÄTIMELLÄ OPTIMAALINEN KÄYTTÖ ILMANVIRTAUKSEN SUUNNAN SÄÄTÄMINEN ILMASTOINTILAITTEEN TOIMINTA KUNNOSSAPITO KÄYTTÖVIHJEITÄ VIANMÄÄRITYSVIHJEITÄ TAKUUEHDOT TEKNISET TIEDOT LUE TÄMÄ OHJEKIRJA Tämä ohjekirja sisältää paljon hyödyllisiä ohjeita ilmastointilaitteen oikeaa käyttöä ja kunnossapitoa varten. Luvussa ”Vianmääritysvihjeitä” on useita ratkaisuja ylei- siin ongelmiin.
-
Page 44: Turvaohjeet
• Huolehdi lasten turvallisuudesta laitteen lähellä, kuten muitakin sähkölaitteita käytettäessä. • Laitetta saa korjata ja/tai huoltaa vain valtuutettu huoltoedustaja tai Zibro-toimittaja. Noudata laitteen käyttöohjeessa mainittuja käyttö- ja huolto-ohjeita. • Irrota aina pistoke pistorasiasta, kun laite ei ole käytössä. -
Page 45: Osien Nimet
• On suositeltavaa välttää oleskelua suoraan ilmavirrassa. • Älä koskaan juo ilmastointilaitteen poistovettä. HUOMIO! • Älä koskaan käytä laitetta, jos virtajohto, pistoke, kotelo tai ohjauspaneeli on vaurioitunut. • Ohjeiden noudattamatta jättäminen saattaa johtaa takuun raukeamiseen. OSIEN NIMET SISÄYKSIKKÖ Sisäyksikkö Etupaneeli Ilman tuloaukko Ilmansuodatin (etupaneelin takana) Ilman poistoaukko... -
Page 46: Käyttölämpötila
TOIMINNAN ILMAISIMET SISÄYKSIKÖN NÄYTTÖPANEELISSA Signaalin vastaanotin AUTO-ilmaisin Tämä ilmaisin syttyy, kun ilmastointilaitteen automaattitoiminto on käytössä (AUTO). DEFROST-huurteenpoiston ilmaisin (vain jäähdytys ja lämmitys -malleissa) Tämä ilmaisin syttyy, kun ilmastointilaite aloittaa automaattisen huurteenpoiston tai kun lämpimän ilman säätötoiminto aktivoidaan lämmitystoiminnon aikana. Lämpötilan ilmaisin Näyttää... -
Page 47: Manuaalinen Käyttö
KÄYTTÖ MANUAALISESTI Ilmastointilaitetta voidaan käyttää manuaalisesti laitteen säätimillä tai laitteen mukana toimitetulla kauko- säätimellä. Katso ohjeet kaukosäätimen käyttöä varten luvusta E ”Käyttö kaukosäätimellä”. Kun ilmastoin- tilaitetta käytetään ilman kaukosäädintä, se toimii ainoastaan automaattisessa tilassa (AUTO). Noudata seu- raavia ohjeita laitteen käyttämiseksi ilman kaukosäädintä: Paneeli AUTOMAATTI- Manuaalinen... -
Page 48: Käyttö Kaukosäätimellä
KÄYTTÖ KAUKOSÄÄTIMELLÄ HUOMAUTUS! • Osoita kaukosäädin aina sisäyksikön vastaanotinta kohti ja varmista, ettei kaukosäätimen ja vastaanottimen välillä ole mitään esteitä. Muuten vastaanotin ei tunnista kaukosäätimen signaalia, eikä ilmastointilaite toimi oikein. • Kaukosäätimen suurin toimintaetäisyys on noin 6 - 7 metriä. Kaukosäätimen toimintopainikkeet Kuva 1 Virtapainike: Paina tätä... - Page 49 kulmaa. Säleikön suuntauskulma muuttuu 6º jokaisella painalluksella. Kun säleikkö kääntyy tiettyyn kulmaan, joka vaikuttaa ilmastointilaitteen jäähdytys- ja lämmitystehoon, suuntausta muutetaan auto- maattisesti. Näytöllä ei näy mitään tunnusta, kun tätä painiketta painetaan. Ajastimen aloitusajan painike (Timer on): Paina tätä painiketta laitteen ajastetun päälläoloajan asettamiseksi.
- Page 50 HUOMAUTUS!NOTE! Kuvassa 2 on näkyvissä kaikki kohteet esittelytarkoituksessa. Laitteen todellisen käytön aikana näyttöpaneelissa näkyvät vain käytettävien toimintojen kohteet. Kaukosäätimen käyttäminen Paristojen asennus/vaihto Käytä kahta alkaliparistoa (AAA/LR03). Älä käytä ladattavia paristoja. Avaa kaukosäätimen takapuolella olevan paristokotelon kansi vetämällä sitä siinä olevan nuolen suuntaan.
- Page 51 miellyttävimmät asetukset ovat 28 ºC ja sitä alhaisemmat lämpötilat. Paina puhallinpainiketta valitaksesi puhaltimen nopeudeksi AUTO (automaattinen), HIGH (nopea), MED (keskinopea) tai LOW (hidas). Paina virtapainiketta . Toiminnan ilmaisin syttyy ja ilmastointilaite käynnistyy tekemilläsi asetuksilla. Paina virtapainiketta uudelleen laitteen sammuttamiseksi. HUOMAUTUS! Tuuletustilassa (FAN ONLY) lämpötilaa ei voida säätää.
-
Page 52: Optimaalinen Käyttö
3.2 Paina ajastimen aloitusajan painiketta (Timer on) uudelleen asettaaksesi halutun aloitusajan. 3.3 Paina Ajastimen lopetusajan painiketta (Timer off) , jolloin kaukosäätimen näytössä lukee OFF TIMER. Ajastimen näytössä näkyy viimeksi asetettu lopetusaika sekä tunnus ”Hr”. Voit nyt asettaa uudelleen laitteen toiminnan lopetusajan. 3.4 Paina ajastimen lopetusajan painiketta (Timer off) uudelleen asettaaksesi halutun lopetusajan. -
Page 53: Ilmanvirtauksen Suunnan Säätäminen
ILMAN VIRTAUSSUUNNAN SÄÄTÄMINEN • Säädä ilman virtaussuunta oikein, sillä väärin säädettynä se heikentää muka- vuutta ja saattaa tehdä huoneen lämpötilasta epätasaisen. • Säädä vaakasuuntaista säleikköä kaukosäätimen painikkeella • Säädä pystysuuntainen säleikkö käsin. Ilman virtaussuunnan säätö vaakasuunnassa (ylös-/alaspäin) Ilmastointilaite säätää ilmanvirtauksen suunnan vaakasuunnassa automaattisesti toimintatilan mukaan. -
Page 54: Ilmastointilaitteen Toiminta
VAROITUS! • Ilmavirran suuntaus- ja kääntöpainikkeet eivät ole käytettävissä, kun ilmastointilaite ei ole toiminnassa (vaikka ajastin on asetettu toimintaan). • Älä käytä ilmastointilaitetta pitkiä aikoja jäähdytys- tai kuivaustilassa ilmanvirtauksen ollessa suunnattuna alaspäin. Muuten vaakasuuntaisen säleikön pinnalle saattaa tiivistyä vettä, joka alkaa valua. -
Page 55: Kunnossapito
KUNNOSSAPITO VAROITUS! Sammuta ilmastointilaite ja irrota sen virtapistoke pistorasiasta ennen Viemärin- puhdistu- laitteen puhdistusta. saine Sisäyksikön ja kaukosäätimen puhdistus Ohennin VAROITUS! • Pyyhi sisäyksikkö ja kaukosäädin pehmeällä, kuivalla kankaalla. • Jos sisäyksikkö on erittäin likainen, se voidaan puhdistaa kylmään veteen kostutetulla kankaalla. •... - Page 56 Kunnossapito Jos laitetta ei käytetä pitkään aikaan, suorita seuraavat toimenpiteet: Käytä puhallinta noin kuuden tunnin ajan laitteen sisäosien kuivaamiseksi. Sammuta ilmastointilaite ja irrota sen virtajohto pistorasiasta. Poista paristot kaukosäätimestä. Ulkoyksikkö vaatii säännöllistä hoitoa ja puhdistusta. Ulkoyksikön kunnossapito on annettava valtuu- tetun ilmastointilaitehuollon tehtäväksi.
-
Page 57: Käyttövihjeitä
KÄYTTÖVIHJEITÄ Seuraavat tilanteet saattavat ilmetä normaalin käytön aikana. 1. Ilmastointilaitteen suojaus. Kompressorin suojaus • Kompressori voidaan käynnistää uudelleen vasta kolmen minuutin kuluttua sen sammutuksen jälkeen. Kylmän ilman esto • Laite on suunniteltu siten, että se ei puhalla kylmää ilmaa lämmitystoiminnan aikana, kun sisätilan lämmönvaihdin on jossakin seuraavista kolmesta tilasta ja asetettua lämpötilaa ei ole saavutettu: A. -
Page 58: Vianmääritysvihjeitä
Sisäyksikön päälle voi tiivistyä vettä, kun laitetta käytetään kosteassa tilassa (ilman suhteellinen kosteusprosentti yli 80). Säädä vaakasuuntainen säleikkö suurimpaan ilman poistoasentoon ja aseta puhallin toimimaan suurimmalla teholla (HIGH). 8. Lämmitystoiminto • Lämmitystoiminnossa ilmastointilaite imee lämmintä ilmaa ulkoyksiköstä ja vapauttaa sen sisäyksikön kautta. - Page 59 Ongelma Ratkaisu Odota, että sähkökatkos saadaan Sähkökatkos korjattua. Laitteen sähköjohto on voinut irrota Tarkista, että laitteen sähköjohto on hyvin pistorasiasta. kiinni pistorasiassa. Vaihda sulake / nollaa rele / nollaa Sulake voi olla palanut. vikavirtakytkin Laite ei käynnisty Kaukosäätimen paristo voi olla tyhjä. Vaihda paristo.
-
Page 60: Takuuehdot
Kuljetuskustannukset ja ilmastointilaitteen tai sen osien kuljetukseen liittyvät riskit ovat aina ostajan vastuulla. Muiden kuin sopivien Zibro-suodatinten käytön aiheuttamat vahingot eivät kuulu takuun piiriin. Laitteen epäpätevästä asennuksesta tai irrotuksesta johtuvat kylmäaineen hävikit ja/tai vuodot eivät kuulu takuun piiriin. -
Page 61: Tekniset Tiedot
TEKNISET TIEDOT Malli S 1226 S 1234 S 1246 S 1266 Ilmastointilaite, seinään Ilmastointilaite, seinään Ilmastointilaite, seinään Ilmastointilaite, seinään Ilmastointilaitteen tyyppi asennettava asennettava asennettava asennettava Jäähdytyskapasiteetti (enintään) * 2600 3400 4600 6600 EE-luokka* EER* 3,02 3,02 2,88 3,08 Lämmityskapasiteetti (enintään) * 2800 3900 5400... - Page 62 Dear Sir, Madam, Congratulations on the purchase of your Zibro airconditioner. You have acquired a high quality product that, if used responsibly, will give you many years of pleasure. Please read these instructions for use first in order to ensure the maximum life span of your airconditioner.
- Page 63 CONTENTS SAFETY INSTRUCTIONS PARTS NAMES OPERATING TEMPERATURE MANUAL OPERATION OPERATION WITH REMOTE CONTROL OPTIMAL OPERATION ADJUSTING AIR FLOW DIRECTION HOW THE AIR CONDITIONER WORKS MAINTENANCE OPERATION TIPS TROUBLESHOOTING TIPS GUARANTEE CONDITIONS TECHNICAL DATA READ THIS MANUAL Inside you will find many helpful hints on how to use and maintain your air con- ditioner properly.
-
Page 64: Safety Instructions
• Have any repairs and/or maintenance only carried out by a recognised service engineer or your recognised Zibro supplier. Follow the instructions for use and maintenance as indicated in the user manual of this device. • Always remove the plug of the unit from the wall socket when it is not in use. -
Page 65: Part Names
• It is advised to stay out of the direct airstream. • Never drink the drain water from the airconditioner. ATTENTION! • Never use the device with a damaged power cord, plug, cabinet or control panel. • Failing to follow the instructions may lead to nullification of the guarantee on this device. -
Page 66: Operating Temperature
FUNCTION INDICATORS ON INDOOR UNIT DISPLAY PANEL Signal receptor AUTO indicator This indicator illuminates when the air conditioner is in AUTO operation. DEFROST indicator (For Cooling & Heating models only) This indicator illuminates when the air conditioner starts defrosting automatically or when the warm air control feature is activated in heating operation. -
Page 67: Manual Operation
MANUAL OPERATION The air conditioner can be operated manually on the air conditioner itself as well as with the remote con- trol included. For operation with the remote control please refer to chapter E “Operation with Remote Control”. When operating without the remote control the air conditioner will only work in the AUTO-mode. For operation without the remote control follow these instructions: Panel Manual control... -
Page 68: Operation With Remote Control
OPERATION WITH REMOTE CONTROL NOTE! • Always aim the remote controller towards the receiver on the indoor unit and make sure there are no obstacles in between the remote control and the receiver on the indoor unit. Otherwise the remote control signal will not be picked up by the receiver and the air conditioner will not work properly. - Page 69 Timer on Button: Press this button to initiate the auto-on time sequence. Each press will increase the auto-timed setting in 30 minutes increments. When the setting time displays 10Hr, each press will incre- ase the auto-timed setting 60 minutes increments. To cancel the auto-timed program, continue pressing the button until nothing displays.
-
Page 70: Automatic Operation
Operating the Remote Controller Install / Replace Batteries Use two dry alkaline batteries (AAA/LR03). Do not use rechargeable batteries. Remove the battery cover on the back of the Remote Control by pulling it according to the arrow direction shown on the cover. Insert new batteries making sure that the (+) and (-) of battery are installed correctly. -
Page 71: Dry Operation
NOTE! The FAN ONLY mode cannot be used to control the temperature. In this mode, only steps 1, 3 and 4 are applicable. DRY Operation 1. Push the Mode button to select DRY. 2. Push the button ( ) to set the desired temperature from 21 C to 28 C. 3. -
Page 72: Optimal Operation
3.4 Push the Timer off button again to set the time you want to stop the operation. 3.5 After setting the TIMER, there will be half a second delay before the remote controller transmits the signal to the Air Conditioner. NOTE! •... -
Page 73: Adjusting Air Flow Direction
ADJUSTING AIR FLOW DIRECTION • Adjust the air flow direction properly otherwise, it might cause discomfort or cause uneven room temperatures. • Adjust the horizontal louver using button on the remote controller. • Adjust the vertical louver manually. Adjusting the horizontal Air Flow Direction (up - down) The air conditioner automatically adjusts the horizontal air flow direction in accor- dance with the operating mode. -
Page 74: How The Air Conditioner Works
CAUTION • The AIR DIRECTION and SWING buttons will be disabled when the air conditioner is not in operation (including when the TIMER ON is set). • Do not operate the air conditioner for long periods with the air flow direction set downward in cooling or dry mode. - Page 75 MAINTENANCE WARNING It is necessary to stop the air conditioner and disconnect the power House- hold supply before cleaning. Drain Cleaner Cleaning the indoor unit and remote controller Thinner CAUTION • Use a dry cloth to wipe the indoor unit and remote controller. •...
- Page 76 Maintenance If you plan to idle the unit for a long time, perform the following: Operate the fan for about 6 hours to dry the inside of the unit. Stop the air conditioner and disconnect power. Remove the batteries from the remote controller. The outdoor unit requires periodic maintenance and cleaning.
-
Page 77: Operation Tips
OPERATION TIPS The following events may occur during normal operation. 1. Protection of the air conditioner. Compressor protection • The compressor cannot restart for 3 minutes after it stops. Anti-cold air • The unit is designed not to blow cold air on HEAT mode, when the indoor heat exchanger is in one of the following three situations and the set temperature has not been reached. -
Page 78: Trouble Shooting Tips
6. The air conditioner turns to FAN only mode from COOL or HEAT mode. • When indoor temperature reaches the temperature setting on air conditioner, the compressor will stop automatically, and the air conditioner turns to FAN only mode. The compressor will start again when the indoor temperature rises on COOL mode or falls on HEAT mode to the set point. - Page 79 Problem Cause Solution Power cut Wait for power to be restored. Check that plug is securely in wall Unit may have become unplugged. receptacle. Replace fuse / reset relay / reset Fuse may have blown. circuitbraker Battery in Remote controller may have Unit does not start Replace the battery.
-
Page 80: Guarantee Conditions
Damage caused by not using suitable Zibro filters is not covered by the guarantee. Refrigerant loss and/or leakage because of incompetent (dis)connecting the units is not covered by the guarantee conditions applicable to this product. -
Page 81: Technical Data
TECHNICAL DATA Model S 1226 S 1234 S 1246 S 1266 Type air-conditioner Wall mounted split Wall mounted split Wall mounted split Wall mounted split Cooling capacity (max) * 2600 3400 4600 6600 EE Class* EER* 3.02 3.02 2.88 3,08 Heating capacity (max) * 2800 3900... - Page 82 +44 1606 837787 tel: +43 7434 44867 fax: +44 1606 837757 fax: +43 7434 44868 email: sales@scottmail.co.uk email: pvgaustria@zibro.com > ITALIA e BELGIË PVG Italy SRL PVG Belgium NV/SA Via Niccolò Copernico 5 Industrielaan 55 50051 CASTELFIORENTINO (FI) 2900 SCHOTEN tel:...
Need help?
Do you have a question about the S1234 and is the answer not in the manual?
Questions and answers