Subscribe to Our Youtube Channel
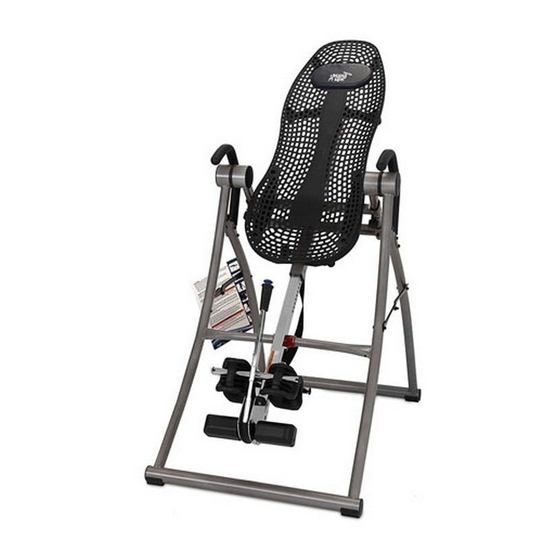
Summary of Contents for Teeter Hang Ups Contour Power
- Page 1 Contour Power ® Inversion Table Assembly Instructions Table d’inversion Manuel d’instructions Tabla de Inversión Instrucciones de Montaje www.Activeforever.com YEAR...
-
Page 2: Important Safety Instructions
IMPORTANT SAFETY INSTRUCTIONS When using an electrical appliance, basic precautions should always be followed, including the following: WARNING Read and understand all the instructions, view the instructional video, review all other • To disconnect, turn all controls to the off position, then remove plug from outlet. accompanying documents, and inspect the equipment before using the inversion table. -
Page 3: Instructions De Sécurité Importantes
INSTRUCTIONS DE SÉCURITÉ IMPORTANTES Lorsque vous utilisez un appareil électrique, vous devez toujours suivre les précautions de base, y compris les suivantes : AVERTISSEMENT • NE PAS laisser les enfants utiliser cet appareil. Lisez et comprenez toutes les instructions, visionnez la vidéo d’instructions, examinez tous les documents joints et inspectez l’équipement avant d’utiliser la table d’inversion Votre •... -
Page 4: Importantes Instrucciones De Seguridad
IMPORTANTES INSTRUCCIONES DE SEGURIDAD Cuando se utiliza un aparato eléctrico, siempre deben seguirse medidas de seguridad básicas, tales como: ADVERTENCIA Lea y comprenda todas las instrucciones, vea el video de instrucciones, revise todos • NO permita que los niños utilicen esta máquina. los documentos adjuntos e inspeccione el equipo antes de usar la tabla de inversión. -
Page 5: Entretien
(cont.) ENTRETIEN MANTENIMIENTO • Débranchez la table d’inversion avant tout entretien. • Desenchufe la tabla de inversión antes de realizar el mantenimiento. • Pour nettoyer le dossier, utilisez un chiffon humide. • Para limpiar el respaldo, utilice un paño húmedo. •... - Page 6 GROUNDING INSTRUCTIONS / INSTRUCTIONS DE MISE À LA TERRE / INSTRUCCIONES PARA LA CONEXIÓN A TIERRA • This product must be grounded. If it should malfunction or break down, grounding provides a path of least resistance for electric Figure 1/ Figura 1 current to reduce the risk of electric shock.
- Page 7 • Be sure to remove protective plastic from all items prior to assembly. TIPS: Unpack materials and prepare to set up your Contour Power Inversion Table in its permanent location. Keep in mind that you will require an electrical outlet to power your table.
- Page 8 Items for Assembly / Eléments de Montage / Piezas para el Montaje ITEM NUMBER PIEZAS A ENSAMBLAR ITEMS FOR ASSEMBLY You should have all of the items listed. LES ARTICLES POUR L’ASSEMBLÉE L’ARTICLE NUMÉROTE If you have any questions on assembly, NÚMERO DE PIEZA contact Customer Service at Estructura en A...
- Page 9 Avant de continuer la lecture de ce document, examinez le dessin ci-dessous afin de vous ® familiarisez avec les éléments importants de votre nouvelle table d’inversion Teeter Hang Ups Antes de continuar con la lectura, estudie el siguiente dibujo para familiarizarse con los ®...
- Page 10 Step / Étape / Paso Figure 4/ Figura 4 Open the A-Frame (CP-1100). • To stand the inversion table A-Frame upright, first move it onto its side (Figure 4), and then carefully lift it up onto its feet. • Open the A-frame wide enough so that it is stable and can stand upright on its own (Figure 5). •...
- Page 11 Step / Étape / Paso Install the Table Bed Assembly (CP-1300) to the A-Frame (CP-1100). Figure 6/ Figura 6 IMPORTANT: The Table Bed Assembly is heavy – be sure to complete this step with two people. • Lift the Table Bed Assembly (CP-1300) and hold in the inverted position. •...
- Page 12 Step / Étape / Paso Figure 9/ Figura 9 Attach the Upper Support Arms to the Table Bed (CP-1300). • Leave the Table Bed in the inverted position. • Push on the Support Beam on the back of the Table Bed Assembly so that the two holes align evenly with the holes at the base of the Upper Support Arms (Figure 9).
- Page 13 Step / Étape / Paso Insert the Main Shaft (NX-1620) into the Table Bed (CP-1300). Figure 11/ Figura 11 • Plug in the power supply. Be sure that the Hand Crank is not engaged in the motor and that the Safety Lock has been turned off (Figure 11).
- Page 14 Figure 13/ Figura 13 (cont.) • Tirez sur la goupille d’arrêt du réglage de la hauteur pour permettre à l’axe principal de glisser jusqu’au fond, puis relâchez la goupille pour l’enclencher dans un trou. (Consultez le manuel d’utilisation pour un réglage correct de la hauteur avant utilisation.) Remarque : Le bouton de serrage est un accessoire facultatif permettant d’empêcher l’axe principal de bouger lors de l’inversion de la table.
- Page 15 Step / Étape / Paso Attach the Hand Grips (P1-1015) to the Table Bed (CP-1300) Assembly. Figure 15/ Figura 15 • Insert a Hand Grip into the receiving end of the Table Bed Assembly, located near the Motor Housing (Figure 15). •...
- Page 16 Lisez le manuel d’utilisation entièrement avant d’utiliser votre table d’inversion Teeter Hang Ups. Des réglages inadaptés peuvent entraîner des blessures graves ou la mort ! Lea por completo el manual del usuario antes de utilizar su tabla de inversión Teeter Hang Ups. Una configuración incorrecta podría provocar lesiones graves o la muerte.
-
Page 17: Maintenance
Step / Étape / Paso Figure 19/ Figura 19 Figure 21/ Figura 21 MAINTENANCE • Unplug the inversion table before performing maintenance. • To clean the Table Bed, wipe down with a damp cloth. • Do not use abrasive cleaners. SAFETY LOCK and KEY •...


Need help?
Do you have a question about the Contour Power and is the answer not in the manual?
Questions and answers