
Related Manuals for LG LVC-S10


Summary of Contents for LG LVC-S10
-
Page 1: Operating Instructions
Operating Instructions LVC-S10/LVC-S101 LVC-S20/LVC-S201 Before installing and using the camera, please read these instructions throughly and retain them for later reference. - Page 2 Warning CAUTION RISK OF ELECTRIC SHOCK To prevent fire or shock hazard, do not expose the unit to rain or moisture. DO NOT OPEN To avoid electrical shock, do not open the cabinet Refer servicing to qualified personnel only. CAUTION TO REDUCE THE RISK OF ELECTRIC SHOCK, Regulatory Notices DO NOT REMOVE COVER (OR BACK).
-
Page 3: Table Of Contents
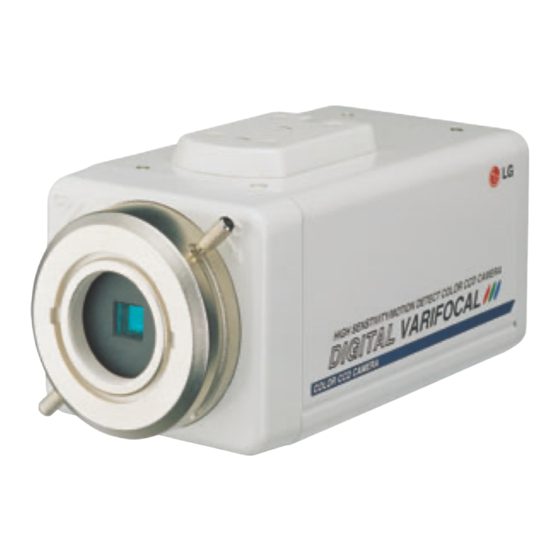
Contents Features ..........................3 Cautions for Safe Operation ......................4 Operating Controls and Their Functions ................5-6 Connections .........................7-8 Back Focus Adjustment ......................9 Installation of Camera......................10 Function Set up ........................11-18 Specifications ........................19-22 FEATURES This color video camera is designed for use Maintence of the unit •... -
Page 4: Cautions For Safe Operation
Cautions for Safe Operation Power Supply Handling of the unit S10, S20 : They must be operated with a AC Be careful not to spill water or other liquids on 24V class 2 power supply and DC12V the unit. Be cautions not to get combustible or alternatively. -
Page 5: Operating Controls And Their Functions
OPERATING CONTROLS AND THEIR FUNCTIONS Control names and Location 1. Tripod adaptor This adaptor can also be attached on the bottom of the camera 2. Flange-back Adjusting Lever This lever is used to adjust the back focal length or picture focus. Rotate this lever clockwise for a C-mount lens or counterclockwise for a CS-mount lens. - Page 6 OPERATING CONTROLS AND THEIR FUNCTIONS The Adjustment method of Line Lock Phase When using a camera switcher to connect 2 cameras or more to one monitor, there may be a vertical roll of the images when switched. In such a case, refer to the below.
-
Page 7: Connections
2. Connect the AC power cord to an electrical outlet of 100V - 240V 1 O l LVC-S10, LVC-S20 (DC12V/AC24V Compatible) DC 12V 1. DC 12V Power Supply Remove the insulation on the power cable as illustrated and connect the 12 V DC power cord to the AC/DC compatible terminals on rear panel of the camera. - Page 8 Mounting Auto Iris Lens Flange-Back Focus adjusting lever 1. Mount the lens by turning it clockwise on the lens mount of the camera. 2. Set the slide switch of rear panel to your lens type 3. Connect the lens cable to the auto iris lens connector on the side of the camera.
-
Page 9: Back Focus Adjustment
BACK FOCUS ADJUSTMENT 1. Loosen the screws on the flange -back adjusting lever. 2. Turn the flange-back adjusting lever to the proper focus position. 3. Tighten the screws with (-)driver on the flange-back adjusting lever Flange-Back adjusting lever Lever... -
Page 10: Installation Of Camera
INSTALLATION OF CAMERA This camera is mounted with tripod which makes it possible to install from both of the bottom and the top of the unit as illustrated. -
Page 11: Function Set Up
FUNCTION SET UP 1. CAMERA SETUP MENU MENU 1 Shutter Back Light WBC Mode Sync.Mode Sharpness Brightness ELC DC/Video On/Off On/Off Normal/ ATW/AWC INT/LL Soft/ Sharp Brightness Flickerless/ Auto Up/Down Shutter Up/Down Push Auto R / B INT/LL VD/VS Manual Automatic Selection Selection... - Page 12 MENU 2 Motion DET Camera ID Wide Burst Inital Set Sensitivity On/Off On/Off On/Off On/Off ID Set Level Set Area Set...
- Page 13 2. SETTING THE MENU Up Button Left Button Right Button Set Switch Down Button This camera has user setting menu that is displayed on the monitor. To set OSD function, use the following buttons on the side panel. Up/Down Button ( ) : This button is used to select function .
- Page 14 • Editing the Camera Setup Menu 1 MENU 1 1. BRIGHTNESS Adjustment - Use the button to move the cursor to “BRIGHTNESS” BRIGHTNESS SHUTTER 1/250 - Use the button to adjust the degree of brightness. 2. Shutter Speed Setting BACKLIGHT SHARPNESS NORMAL - Use the...
- Page 15 6 WBC(White Balance Control)Mode setting MENU 1 - Use the button to move the cursor to “WBC MODE” BRIGHTNESS - Use the button to set the mode (ATW, AWC) SHUTTER 1/250 - Use the to move to submenu in ATW menu. BACKLIGHT - Use the button to move the cursor to “R POINT”...
- Page 16 • Editing the Camera Setup Menu 2 1. MOTION DETECTION Setting MENU 2 - Use the button to move the cursor to “MOTION DET”. MOTION DET - Use the button to set the mode On or Off. CAMERA ID If the MOTION DET is set, “Motion Detected” appears on the WIDE BURST top of monitor.
- Page 17 *When the object is put in the place where the degree of light is not constant. *When the digital zoom is working, the Motion detection does not ABCDEFGHIJKLMNOP work . Please set the zoom switch to the end of wide mode. QRSTUVWXYZabcdef g h i j k l m n o p q r s t u v 2.
- Page 18 3. WIDE BURST Setting MENU 2 MENU 2 - Use the button to move the cursor to “WIDE BURST” - Use the button to set the On / Off mode. MOTION DET MOTION DET CAMERA ID CAMERA ID WIDE BURST Setting is useful to prevent attenuation of burst WIDE BURST WIDE BURST signal in case of long distance installation.
-
Page 19: Specifications
Specification Model LVC-S10HM LVC-S10NM LVC-S10HP LVC-S10NP Signal System NTSC Total/Effective Pixels 410K/380K 270K/250K 470K/440K 320K/290K Pick-Up Device 1/3 - Inch Interline Color CCD(Super HAD) Lens CS/C MOUNT Auto Iris Electronic /DC Iris / Video Iris , Selectable ( with Slide SW) Signal Process Digital Signal Process Digital Zoom... - Page 20 Model LVC-S101HM LVC-S101NM LVC-S101HP LVC-S101NP Signal System NTSC Total/Effective Pixels 410K/380K 270K/250K 470K/440K 320K/290K Pick-Up Device 1/3 - Inch Interline Color CCD (Super HAD) Lens CS/C MOUNT Auto Iris Electronic /DC Iris / Video Iris , Selectable (with Slide SW) Signal Process Digital Signal Process Digital Zoom...
- Page 21 Model LVC-S20HM LVC-S20HP Signal System NTSC Total/Effective Pixels 410K/380K 470K/440K Pick-Up Device 1/3 - Inch Interline Color CCD (Super HAD) Lens CS/C MOUNT Auto Iris Electronic /DC Iris / Video Iris , Selectable (with Slide SW) Signal Process Digital Signal Process Digital Zoom Scanning System 2:1 Interlace...
- Page 22 Model LVC-S201HM LVC-S201HP Signal System NTSC Total/Effective Pixels 410K/380K 470K/440K Pick-Up Device 1/3 - Inch Interline Color CCD (Super HAD) Lens CS/C MOUNT Auto Iris Electronic /DC Iris / Video Iris , Selectable (with Slide SW) Signal Process Digital Signal Process Digital Zoom Scanning System 2:1 Interlace...
- Page 23 P/NO.: 3834RC0019G...
Need help?
Do you have a question about the LVC-S10 and is the answer not in the manual?
Questions and answers