
Subscribe to Our Youtube Channel
Related Manuals for ENHANCED VISION Flipper Series


Summary of Contents for ENHANCED VISION Flipper Series
- Page 1 Flipper ™ The Ultimate in Flexibility ‑ Just Point and See! FlipperPanel ™ Flipper Stand Flipper ™ ™ Users Manual...
- Page 2 Fcc coMpliance notice Congratulations on your purchase of one of the Flipper family of products. Enhanced Vision products are designed to give you the highest quality This device complies with Part 15 of the FCC Rules. Operation is subject and convenience available.
-
Page 3: Table Of Contents
Flipper products should never be placed near a radiator or heat register. Warranty Statement ............Do not smoke while using Flipper products. Cigarette, cigar and pipe other enhanced Vision products ........36-38 smoke release abrasive particles which are potentially damaging to the Flipper optics. -
Page 4: Important Safety Precautions
Flipper Always place the excess cord in an area where it will not be damaged ™ by persons walking on it. To avoid the risk of electrical shock, do not disassemble this product. Return it to the place of purchase if service or repair work is required. Any attempt to disassemble your Flipper product will void the warranty. -
Page 5: Flipper Package Contents & Controls
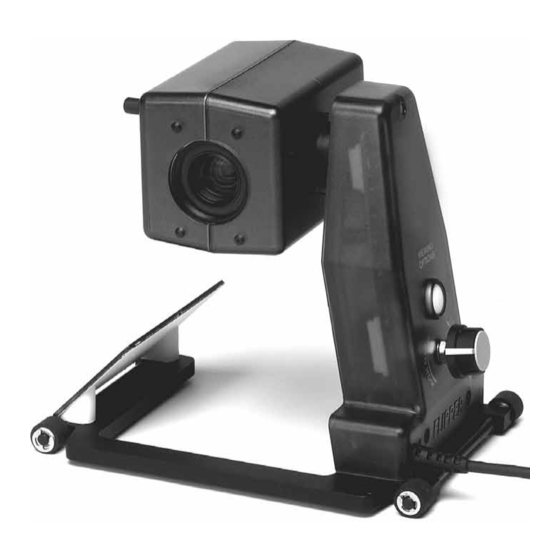
FlippeR packaGe contentS & contRolS Your Flipper is packaged in a convenient box for storage and transport. All required accessories for operation are included. Flipper is comprised of: 1. Camera: Captures and enlarges the image. 2. Control Box: Connects the camera to the television set and turns Flipper ON/OFF. -
Page 6: Flipper Installation
FlippeR inStallation tV connection Using Video cable and "Video input" Jack (Refer to Figure 1) 1. Remove the Flipper and the Control Unit from the package. 2. Remove the Video Cable from the package. (This is the thin cable that is not attached to any other component and has the same plug at both ends.) Plug one end of the Video Cable into the Control Box Jack labeled "VIDEO."... -
Page 7: Using Flipper
USinG FlippeR 3. Reading with Flipper There are at least three ways that you can magnify and read using Flipper. Now that you have successfully installed your Flipper you can enjoy the ease of use and operation. A. Reading with an Upright Book Stand (highly recommended) Flipper can be used to view objects at a distance, up close, and at any range in between. - Page 8 You can repeat the above action and SelectinG a VieWinG option read more than half of the page by just You can choose a viewing option by presing rotating the camera head. Once you the round white button on the Flipper labeled have read half of the page, move the “Viewing Option.”...
-
Page 9: Flipperpanel
Flipperpanel The magnification control for Flipper is very easy to use. The magnification ™ control is a round dial that has ten preset magnification levels for you to select from. changing the Magnification To increase the magnification, slowly turn the round knob clockwise until you feel a click. -
Page 10: Flipperpanel Package Contents & Controls
FlippeRpanel packaGe contentS & contRolS Your FlipperPanel is packaged in a soft case that is convenient for storage and transportation. All required accessories for operation are included. Flipperpanel is comprised of: 1. 12” LCD Screen. 2. LCD Screen mounting bracket. 3. -
Page 11: Using Flipperpanel
USinG FlippeRpanel 3) adjusting the lcD Screen 1) connecting acrobat to the lcD It is important to orient the LCD screen to provide power pack the best viewing angle. To lift the screen put one hand on the back of the base and the other hand If you have purchased your Flipper one the LCD and pull forward (see Figures 3 &... -
Page 12: Using Lcd Power Pack
USinG lcD poWeR pack Using the lcD power pack with Wall power You should always leave a battery in the LCD Power Pack. Once you are sure the battery is in the LCD power pack, then connect the desktop power connecting the Flipper to the lcD power pack supply and power cord together (See Figure 1). -
Page 13: Flipper Stand
Recharging the Battery Flipper Stand ™ The battery recharges in the LCD Power Pack. All you need to do is plug in the desktop power supply to the LCD Power Pack and the wall and the battery will automatically start charging. Refer to page 23. If the light is solid then the battery is fully charged. -
Page 14: Using Flipper Stand
USinG FlippeR StanD 3. Pick up the Flipper and slide it on the platform from left to right. Using Your Flipper Stand Make sure the base of the Flipper fits snug against the back and right side of the platform. 1. - Page 15 Using the X-Y table on the Flipper Stand 4. Use the X-Y table to move reading materials under the camera, rather than moving the material manually, except small items such as a check book or a business card. New users should use two hands when moving the X-Y 1.
-
Page 16: Common Questions
coMMon QUeStionS Flipperpanel: Flipper: Q. How long will the battery last? A. The battery will last approximately 3 - 4 hours per complete charge. Q. Reading with Flipper on top of the literature is difficult. is there other method i can use for reading? Q. -
Page 17: Flipper Stand
Flipperpanel (cont.): Flipper Stand: Q. can i connect the Flipperpanel to a television or monitor? Q. What is the advantage of using Flipper Stand? A. Yes. The FlipperPanel includes an RCA cable that will allow it to con- A. When used with any television monitor, the Flipper Stand allows the nect to a television. -
Page 18: Flipper
Then take the point of your pen/pencil and meet it up with your Enhanced Vision at its option, will at no charge either repair or replace the defective finger. Now you have found your starting point. -
Page 19: Other Enhanced Vision Products
ViSion pRoDUctS amigo – Your Portable Friend! Amigo is a truly portable desktop magnifier and is the lightest weight it its class. Optimal viewing Merlin lcD – Easy to use! is achieved with a tilting 6.5 inch viewing screen. -
Page 20: Contact Information
noteS ___________________________________________________________ Merlin lcD plus – Computer compatible! ___________________________________________________________ Merlin LCD Plus offers the same advanced features ___________________________________________________________ as the Merlin LCD but is also compatible with most ___________________________________________________________ computer workstations and offers a split screen ___________________________________________________________ mode. This mode lets the user view magnified images and computer files concurrently. - Page 21 (800) 440-9476 (US office, toll free) (714)465-3400 (US office) +44 (0) 9442317 (Uk office) +49 (0)6691 911588 (DE Office) Part # MAN-0200-00 May, 2010 Copyright © 2009 by Enhanced Vision. All rights reserved. Product specifications subject to change without prior notice.
Need help?
Do you have a question about the Flipper Series and is the answer not in the manual?
Questions and answers