Advertisement
Quick Links
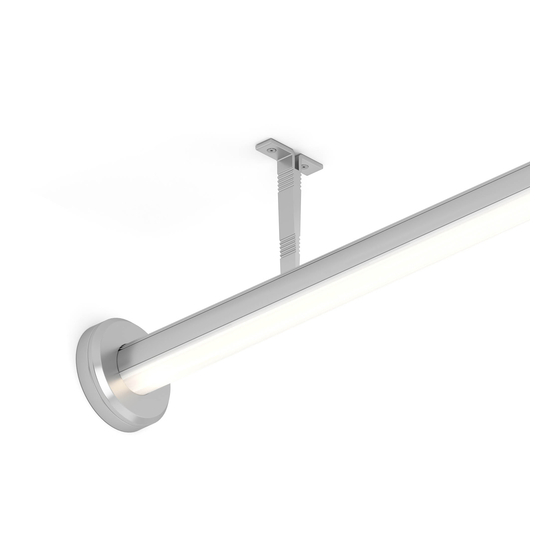
Kendo Closet Rod
Models KCR-
Please read all instructions prior to installation and keep for future reference!
1. Product to be installed by a qualified electrician.
2. Must be installed per NFPA 70, article 410.16.
3. Prior to installation ensure power is off at fuse box to prevent electrical shock.
4. Damp locations only.
5. Use only with Class 2 power unit.
6. Suitable for installation within the closet storage space.
7. Max 25 pounds per 6 inch with mounting supports.
1
support bracket
extrusion
1.1
support
bracket
1.2
2
2.1
lead wires
LED
mounting end cap
drywall
wood block
3a
Class II
power supply
3a
120 VAC
*LUMINII RESERVES THE RIGHTS TO CHANGE SPECIFICATION & INSTRUCTION WITHOUT NOTICE
-
Installation Instructions
every 20"
1.1
Slide the support brackets into the Kendo Closet Rod extrusion. Must be installed every 20" for
proper weight support distribution.
1.2
Carefully remove the protective film from the diffuser.
extrusion
1.3
Push the mounting end cap onto each Kendo Closet Rod extrusion end.
film
2.2
support
bracket
screw
mounting
end cap
24 VDC
2.1
Run the lead wires (or DC quick connect cable) through
opening in mounting surface to the remote power supply.
2.2
Mounting surface must to be flat and structurally sound.
Secure each support bracket into the mounting surface with
the appropriate hardware every 20". Diffuser lens must be
in the down position.
2.3
Remove the covers on each mounting endcap, orientate two
of the three mounting holes in the up position. Followed by
securing each endcap into the surface. Using the
2.3
appropriate hardware.
screw
Lead wire power feed
3a
Ensure power is off to power supply! Then proceed to
power to
connect Kendo Closet Rod LED lead wires to power supply.
24 VDC
For wiring instructions please refer to power supply wiring
Kendo Closet
Rod light fixture
instructions.
power feeding.
See page 2 - step 3b - for quick connect power feeding
7777 Merrimac Ave
Niles, IL 60714
T 224.333.6033
F 224.757.7557
info@luminii.com
Page 1 of 2
www.luminii.com
mounting
end cap
1.3
extrusion
See page 2 - step 4 - for quick connect
REV1.3 07052018
Advertisement

Related Manuals for luminii Kendo Closet Rod


Summary of Contents for luminii Kendo Closet Rod
-
Page 1: Installation Instructions
Slide the support brackets into the Kendo Closet Rod extrusion. Must be installed every 20" for bracket proper weight support distribution. Carefully remove the protective film from the diffuser. extrusion Push the mounting end cap onto each Kendo Closet Rod extrusion end. - Page 2 To connect two sections of the Kendo closet rod simply use the male and female quick connectors. If compatibility is an issue, the female/male adapter can be used as needed. Also, if the two sections of Kendo closet rod are located at a distance from each other, extension cables can be ordered up to 10’...
Need help?
Do you have a question about the Kendo Closet Rod and is the answer not in the manual?
Questions and answers