Table of Contents

Related Manuals for Satel KNX-BSA12H


Summary of Contents for Satel KNX-BSA12H
- Page 1 KNX-BSA12L (24 VDC) KNX-BSA12H (230 VAC) Blind/shutter Actuator Quick installation guide Full manual is available on www.satel.eu Firmware version 1.02 knx-bsa_sii_en 11/19 SATEL sp. z o.o. • ul. Budowlanych 66 • 80-298 Gdańsk • POLAND tel. +48 58 320 94 00 www.satel.eu...
- Page 2 Changes, modifications or repairs not authorized by the manufacturer shall void your rights under the warranty. SATEL aims to continually improve the quality of its products, which may result in changes in their technical specifications and software. Current information about the changes being introduced is available on our website.
- Page 3 They also enable control of the movement of electrically- operated windows. The KNX-BSA12L module is designed to control devices having the 24 VDC motor. The KNX-BSA12H module instead can control devices equipped with the 230 VAC motor.
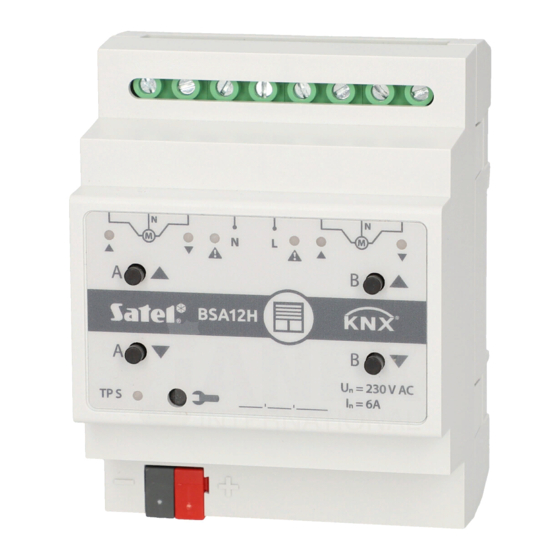
- Page 4 KNX-BSA12L • KNX-BSA12H SATEL – green, LEDs indicating state of blinds/shutters / channels and errors ( orange) – see Table 1. State of channel / blind/shutter no blind/shutter / channel not used blind/shutter not synchronized with module blind/shutter travel time detection (synchronization of...
- Page 5 KNX bus. Enclosure Electronics of the KNX-BSA12L and KNX-BSA12H modules is installed in enclosures of identical shape and dimensions. The enclosures only differ in their panels for manual control of channel state. The figure shows enclosure dimensions based on the KNX-BSA12L module.
- Page 6 4. Connect a computer running ETS program to the KNX bus and configure the module. To configure the module, you will require a computer running the ETS program version 5.5 or newer, provided with USB or Ethernet (TCP/IP) connector. The SATEL ETS application file, which can be downloaded from www.satel.eu/ets, must be imported...
- Page 7 KNX-BSA12L • KNX-BSA12H SATEL Wiring diagram 3. Restoring module factory default settings 1. Press simultaneously the four channel state control buttons located on the module enclosure (see “Description”). The LED indicators will come on. 2. Hold the buttons down until the LEDs go out (about 5 seconds). The module will be restarted and the factory settings will be restored.
- Page 8 Maximum tightening torque .................... 0.5 Nm KNX parameters Maximum time of reaction to telegram ................<20 ms Maximum number of communication objects KNX-BSA12L/KNX-BSA12H ......45 Maximum number of group addresses ................. 256 Maximum number of associations ..................256 Other parameters Operating temperature range ..................
Need help?
Do you have a question about the KNX-BSA12H and is the answer not in the manual?
Questions and answers