
Subscribe to Our Youtube Channel
Related Manuals for CDVI Digicode DGA


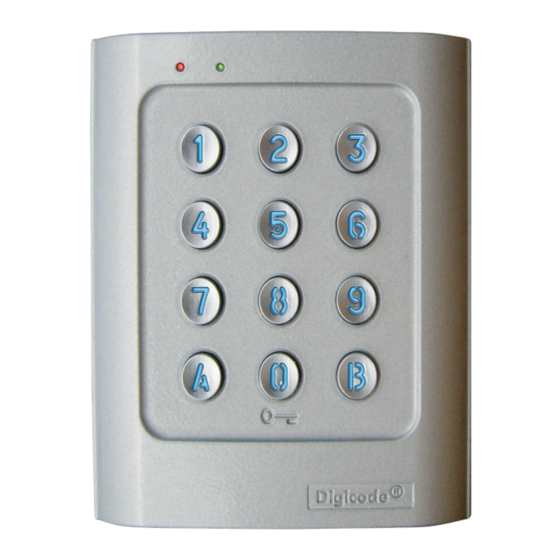
Summary of Contents for CDVI Digicode DGA
- Page 1 ESPAÑOL ENGLISH Teclado autónomo con electrónica interna Self Contained Digicode Keypad ® The installer’s choice cdvigroup.com...
-
Page 2: Programación Del Teclado
Su diseño y alta resistencia al vandalismo lo hacen idóneo para asegurar áreas residenciales e industriales. Su compatibilidad con todos los dispositivos de cierre de CDVI le da la versatilidad necesaria para personalizar su control de accesos sin renunciar a un alto nivel de seguridad. - Page 3 MANUAL DE INSTALACIÓN Teclado autónomo con electrónica interna CORRESPONDENCIA DE SEÑALES SONORAS - 1 pitido corto > Teclado alimentado. - 1 pitido largo > Introducción de datos en programación o acceso concedido. - 2 pitidos cortos > Entrada o salida del modo programación. - 4 pitidos cortos >...
- Page 4 MANUAL DE INSTALACIÓN Teclado autónomo con electrónica interna 3] El código maestro volverá a ser 12345 y se habrán borrado todos los códigos. PROGRAMACIÓN DEL NÚMERO DE DÍGITOS 1] Introduzca 2 veces el código maestro (por defecto, 12345). Se encenderá el LED rojo para confirmar la entrada en modo de programación.
- Page 5 MANUAL DE INSTALACIÓN Teclado autónomo con electrónica interna 1] Introduzca 2 veces el código maestro (por defecto, 12345). Se encenderá el LED rojo para confirmar la entrada en modo de programación. CÓD. MAESTRO CÓD. MAESTRO LED ROJO ENCENDIDO 2] Introduzca la posición de memoria del código a programar (00 a 99): - Si la posición está...
- Page 6 MANUAL DE INSTALACIÓN Teclado autónomo con electrónica interna PROGRAMACIÓN DE TEMPORIZACIONES 1] Introduzca 2 veces el código maestro (por defecto, 12345). Se encenderá el LED rojo para confirmar la entrada en modo de programación. 2] Teclee A0 para programar la temporización de la iluminación de la botonera: - El LED verde se iluminará...
- Page 7 MANUAL DE INSTALACIÓN Teclado autónomo con electrónica interna 2] Teclee el código de modificación (AB o 13 por defecto para relés 1 y 2, respectivamente), el LED rojo se encenderá para autorizar el cambio. 3] Introduzca el nuevo código de usuario. El LED verde se iluminará durante 1 segundo para confirmar la programación del nuevo código.
-
Page 8: Esquema De Cableado
MANUAL DE INSTALACIÓN Teclado autónomo con electrónica interna 3] ESQUEMA DE CABLEADO Negro ALIMENTACIÓN 230 V 12-24 Vca Rojo 12-48 Vcc Rosa [C1] VENTOSA ALIMENTACIÓN 230 V Marrón [NC1] Disp. de cierre Naranja [NA1] Amarillo Verde Verde claro Azul Violeta [C2] ELECTROCERRADURA Gris [NA2] Azul oscuro [NC2]... -
Page 9: Montaje
MANUAL DE INSTALACIÓN Teclado autónomo con electrónica interna 4] KIT DE MONTAJE ® Varistor Tacos de fijación Llave para tornillos Tornillo TORX Tornillo M4x30 ® 05D 680K TORX M4x10 5] MONTAJE Una vez se haya asegurado de que el kit de montaje está completo y de que ha preparado correctamente los hilos del DGA, puede proceder a montar el teclado. -
Page 10: Product Preview
Its design and its high resistance to vandalism make it suitable to secure residential as well as industrial sites. Its compatibility with all CDVI locking devices gives you the flexibility to set your own personalized system while keeping a high security level. -
Page 11: Audible Signal
INSTALLATION MANUAL Cast aluminium Digicode Self Contained ® AUDIBLE SIGNAL - 1 short beep > Keypad powered, - 1 long beep > data computing in programming or access granted, - 2 short beeps > Enter or Exit from programming, - 4 short beeps >... - Page 12 INSTALLATION MANUAL Cast aluminium Digicode Self Contained ® - wait a few seconds, one beep is emitted. The green LED lights off. Unshort the wires. 3] The keypad is reset to the factory default values. SETTING CODE LENGTH 1] Enter the master code twice (12345 default value master code) : - the red LED lights on to confirm entry in programming mode 2] Press A4 to program the code length: - the green LED lights on during 1 second,...
- Page 13 INSTALLATION MANUAL Cast aluminium Digicode Self Contained ® 1] Enter the master code twice (12345 default master code): - the red LED lights on to confirm entry in programming mode. MASTER CODE MASTER CODE RED LED LIGHTS ON 2] To add a user code, enter the user number (from 00 to 99): - If the user number is free, the green LED lights during 1 second enter the 4, 5 or 6-digit code, - If the user number is already programmed, the red LED flashes 4 times, - To modify the user code enter a 4, 5 or 6 digit code,...
-
Page 14: Reset Master Code
INSTALLATION MANUAL Cast aluminium Digicode Self Contained ® SETTING ILLUMINATION AND OUTPUT TIME 1] Enter the master code twice (12345 default value master code): - the red LED lights on to confirm entry in programming mode 2] Press A0 to program the key-in keypad time and the illumination time: - the green LED lights during 1 second. - Page 15 INSTALLATION MANUAL Cast aluminium Digicode Self Contained ® to disable this function). 1] Enter the old user code: - the relay is activated and the green LED lights on. 2] Enter the 2-digit sub master code (default sub master code A and B): - the red LED lights on to authorize the modification.
-
Page 16: Wiring Diagram
INSTALLATION MANUAL Cast aluminium Digicode Self Contained ® WIRING DIAGRAM Black INPUT VOLTAGE 230 V 12V à 24VAC 12V à 48VDC Pink [C1] ELECTROMAGNET INPUT VOLTAGE 230 V Brown [NC] Locking devices Orange [NO] Yellow Dark green Light green Blue Purple [C2] STRIKE Gray [NO]... -
Page 17: Mounting Kit
INSTALLATION MANUAL Cast aluminium Digicode Self Contained ® 4] MOUNTING KIT Spanner 05D 680K S5 plastic M4x10 M4x30 for Torx ® Varistor anchor Torx screw screws ® T20 screws 5] MOUNTING INSTRUCTION Once you have made sure that the mounting kit is complete and that you prepared the cables of the DGA keypad then you can proceed and mount the product. - Page 18 INSTALLATION MANUAL Cast aluminium Digicode Self Contained ® 6] NOTES cdvigroup.com...
- Page 19 INSTALLATION MANUAL Cast aluminium Digicode Self Contained ® cdvigroup.com...
- Page 20 Referencia : Extranet : CDVI Group FRANCE (Headquarter/Siège social) Phone: +33 (0)1 48 91 01 02 Fax: +33 (0)1 48 91 21 21 CDVI CDVI FRANCE + EXPORT IBÉRICA Phone: +33 (0)1 48 91 01 02 [SPAIN - PORTUGAL] Fax: +33 (0)1 48 91 21 21...
Need help?
Do you have a question about the Digicode DGA and is the answer not in the manual?
Questions and answers