Table of Contents
Advertisement
Advertisement
Table of Contents

Subscribe to Our Youtube Channel
Related Manuals for Sumitomo Beier Variator Series


Summary of Contents for Sumitomo Beier Variator Series
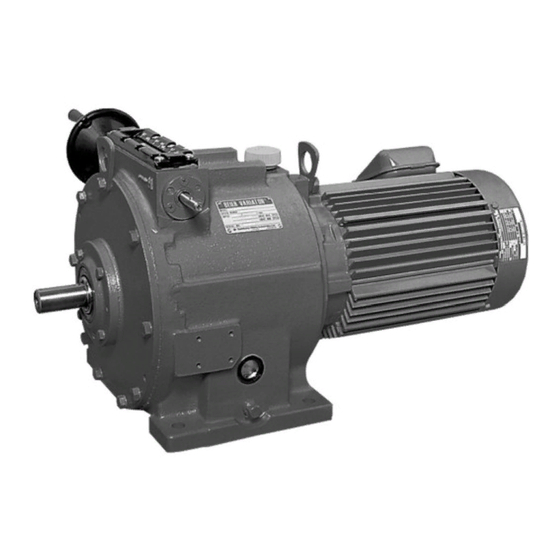
- Page 1 BM2001E...
- Page 2 Safety and Other Precautions G Carefully read this maintenance manual and all accompanying documents before use (installation, operation, maintenance, inspection, etc.). Thoroughly understand the machine, information about safety, and all precautions for correct operation. Retain this manual for future reference. G Pay close attention to the "DANGER"...
-
Page 3: Table Of Contents
How to Refer to the Maintenance Manual G This maintenance manual is common for both Cyclo gearmotor and reducer. The symbols shown below appear in the upper right corner of each page to indicate the classification. Read the applicable pages. On COMMON pages, these symbols identify distinctions between gearmotors and reducers. -
Page 4: Inspection Upon Delivery
COMMON 1. Inspection Upon Delivery CAUTION G Unpack the unit after verifying that it is positioned right side up; otherwise, injury may result. G Verify that the unit received is in fact the one you ordered. Installing the wrong unit may result in personal injury or equipment damage. - Page 5 COMMON Beier Cyclo Variator COMMON (1) Beier Cyclo 1Model name (Refer to page 5) M O D E L 2Cyclo Reducer Ratio 3Speed Rang R A T I O B E I E R S P E E D R A N G E ·...
- Page 6 COMMON 1-3) Type of Variator Respective codes and motor nomenclature are shown below. Please verify that the type you received conforms to whatyou ordered. G Nomenclature BASIC REDUCTION TYPE FRAME SIZE SUFFIX RATIO BEIER VARIATOR N05D BEIER Method of Method of Input BEIER Suffix Shaft Direction...
- Page 7 COMMON 1-4) Type of Motor Respective codes and motor nomenclature are shown below. Please verify that the type you received conforms to what you ordered. Mounting method Standards Regulations • With Foot Premium Efficiency Standards Blank Flange type IEC Efficiency Standards Blank Other types of motors Type of casing...
-
Page 8: Storage
COMMON 2. Storage When storing Beier variators for any extended period of time, consider the following important points : 2-1) Storage Location Store the unit in a clean, dry place indoors. • Avoid storage outdoors or in places with humidity, dust, sudden temperature changes or corrosive gas. 2-2) Storage Period (1) Storage period should be less than the "Rust-Proofing period"... -
Page 9: Installation
COMMON 4. Installation DANGER G Do not use a standard unit in an explosive atmosphere (which is likely to be filled with explosive gas or steam). Under such conditions, an explosion-proof motor should be used; otherwise, electric shock, personal injury, explosion fire, or damage to the equipment may result. -
Page 10: Coupling With Other Machines
COMMON 5. Coupling with Other Machines CAUTION G Confirm the rotation direction before coupling the unit with the driven machine. Incorrect rotation direction may cause personal injury or damage to the equipment. G When operating the variator alone (uncoupled), remove the key that is temporarily attached to the output shaft; otherwise, injury may result. - Page 11 COMMON 5-2) Coupling Installation • When installing a coupling, do not impact or apply excessive thrust load to the shaft ; otherwise, the bearing may be damaged or collar may be left. • Thermal shrinking is the recommended installation method. •...
-
Page 12: Wiring
6. Wiring • Wiring for SUMITOMO standard 3-phase motor is shown below. Refer to the respective instruction manual for brakemotors motors made by other companies when they are used. DANGER G Do not handle the unit when cables are live. Be sure to turn off the power; otherwise, electric shock may result. - Page 13 6-2) Connection with Power Source Cable Connecting method is shown below. Power Source Cable Insulating Tape Motor Lead wire 6-3) Measuring Insulation Resistance • When measuring the insulation resistance, disconnect the motor from the control panel. Check the motor separately. Measure the insulation resistance before wiring.
- Page 14 6-5) Motor Connection Fig.9 shows the motor connection and the standard specifications for terminal codes. Fig. 9 Motor Connection and Terminal Code Star connection Δ for starting Delta connection Δ after start U1 V1 W1 V2 W2 U2 Motor Motor Three outlet cables Star-delta connection For slow...
- Page 15 COMMON 6-6) Trochoid Pump Connection CAUTION G Conduct priming shown in the maintenance manual, before the start up of the main motor, in case of forced oil lubrication by the trochoid pump; otherwise damage to the equipment may result. For forced oil lubrication by trochoid pump, prime the pump, as shown in the maintenance manual, before starting the main motor;...
-
Page 16: Operation
COMMON 7. Operation DANGER G Do not approach or touch rotating parts (output shaft, etc.) during operation; loose clothing may became caught in these rotating parts and cause serious injury or death. G When the power supply is interrupted, be sure to turn off the power switch. Unexpected resumption of power may cause electric shock, personal injury, or damage to the equipment. -
Page 17: Daily Inspection And Maintenance
COMMON 8. Daily Inspection and Maintenance DANGER G Do not handle the unit when cables are live. Be sure to turn off the power; otherwise, electric shock may result. G Do not approach or touch any rotating parts (output shaft, etc.) during maintenance or inspection of the unit; loose clothing may become caught in these rotating parts and cause serious injury or death. - Page 18 COMMON 8-2) Confirmation of Lubrication Method • Refer to the applicable items regarding maintenance. Improper maintenance may decrcase unit life. (1) Refer to Table 10–12 to confirm the gear lubrication method for your unit. (2) Table 14 lists maintenance manual pages that can be referenced regarding lublication maintenance. Table 10 Standard Lubrication System, BEIER part BEIER size N02A N05A N1A N8A N10A 15A...
- Page 19 COMMON Table 13 Standard input speed A Type BType D Type (ND Series) Standard input speed Standard input speed Standard input speed Beier size Beier size Beier size (r/min) (r/min) (r/min) N02A–15A 1450/1750 N02B–10B 1450/1750 20A–40A 980/1165 15B–30B 980/1165 N05D–N10D 1450/1750 50A–200A 720/870...
- Page 20 COMMON (2) Recommended Lubricants Be sure to use a lubricant recommended by our company. Table 17 Recommended Lubricating Oil for A Type and B type Ambient Shell Oil Exxson Mobil Tempperature Shell Tellus Mobil DTE 25, 26 -10°C – 5°C Nuto H 68 S2 M 46, 68 (ISO VG46, 68)
- Page 21 COMMON (4) Oil Supply • Be sure to fill with oil when the unit is not operating. • When the viscosity of oil is high, it may take some time for the oil to settle. Be careful not to over-fill. (If oil is filled above the upper line, the temperature will rise due to the churning heat of the oil.) •...
- Page 22 COMMON 8-4) Oil Supply and Change for Oil-lubricated CYCLO (1) Oil Change Interval Table 23 Interval Task Conditions interval Conditions of use Supply of oil At purchase common First change 500 hrs operation or 6 months, whichever comes first. common Oil change 5000 hrs operation or 1 year, whichever comes first.
- Page 23 COMMON (4) Oil Supply • Be sure to fill with oil when the unit is not operating. • When the viscosity of oil is high, it may take some time for the oil to settle. Be careful not to over-fill. (If oil is filled above the upper line, the temperature wil lrise due to the churning heat of the oil.) •...
- Page 24 (6) Long-term Stoppage Table 27 Long-Term Stoppage Approx. 1 month Change the oil and operate the unit for several minutes before stopping the unit. Stoppage Period Flush the unit, fill with rust-preventive oil, and operate the unit without a load for several More than 1 month minutes before stopping the unit.
- Page 25 COMMON (3) Quantity of Grease Table 32 shows the quantity of grease required when grease needs to be changed. Approximately 1/3~1/2 of the volume for the 1st stage reduction portion is appropriate when grease needs to be replenished. Table 32 Qty of Grease Frame size Reduction Qty of grease (g)
- Page 26 COMMON 8-6) Maintenance of Variator Bearing • Maintenance of bearing is needed for BEILER vertical A Type and B Type • Replenish grease from grease nipple (Fig 30 on page 35.) (1) Interval Table 33 Interval Hours of Replenishment Remarks operation interval Reduce the supply inter-...
- Page 27 8-7) Maintenance of Motor Bearing The maintenance for Sumitomo standard 3-phase motor is shown below. (Refer to the respective instruction manuals for the brakemotor other companies' motor , etc.) Bearing No. and maintenance methods also differ according to motor size. Before maintenance, check the bearing type on the rating plate and Table 36.
- Page 28 (2) Recommended Grease Table 38 Recommended Grease Open bearing Ambient temperature Thermal Class B Thermal Class F °C Exxon Mobil Shell Oil -10~40 UNIREX N2 Shell stamina Grease RL2 • Do not use any grease other than those shown in Table 38. (3) Grease Supply and Discharge (Refer to Fig.20) 1 Remove the discharge plug, discharge old grease and add new grease while unit is operating.
-
Page 29: Lubricating Oil Cooling Device
COMMON 9. Lubricating Oil Cooling Device Lubrication oil cooling device is standard attachment to Beier frame size 50A – 200A, 50B – 150B 9-1) Installation • Install the horizontal-type Beier Variator horizontally, install the vertical-type Beier Variator vertically, and install the lubricating oil cooling device horizontally. - Page 30 COMMON 9-4) Daily Inspection and Maintenance of Oil Cooling Device (1) Daily Inspection Check the items below to evaluate whether cooling device is operating normally. 1. Is cooling water flowing normally? 2. Is oil clirculating? 3. Is the temperature of BEIER case at 60°C or lower most of the time? Table 40 Amount of Cooling Water Supply Amount of water Beier frame size...
-
Page 31: Troubleshooting
COMMON 10.Troubleshooting If a problem occurs with the Beier variator, refer to Table 40 below and take the appropriate corrective action as soon as possible. Table 40 Troubleshooting Problem Possible cause Correction Power failure Contact the electric power company. Defective electric circuit Check the circuit. -
Page 32: Remote Control Equipment
11. Remote Control Equipment (OPTION) 11-1) Speed Control Device (1) Checking Wiring and Speed Control Operation · An example of control circuit for pilot motor and push button is shown in Fig. 23 . To check the connection, start the main motor first. - Page 33 PM Mounting Bolt PM Flange Bushing for PM Part A PM Output Shaft Spring Pin Operating shaft for PM Fig. 24 · Setting torque of slip clutch for Cyclo Drive type Torque of slip clutch has been set at the time of delivery by taking into consideration required moment of control shaft of Beier Variator, strength of inserted bush (mounting screws), etc.
- Page 34 11-2) Speed indicators Electromagnetic tachometer (for non explosion proof type). (1) Connect the lead wire of the Beier Variator electromagnetic sensor to the two tachometer terminals. When shield wire is used with digital tachometer, shield can be connected to the (–) side of sensor input. For analog tachometer, connection of shield is not necessary.
- Page 35 11-3) Operating instructions (1) Starting • Change speed only after starting Variator. Never attempt to perform speed change operation when the unit is at a standstill. To prevent such erroneous operation, it is recommended that power to pilot motor (PM) be obtained from secondary side of main motor power supply.
-
Page 36: Construction Drawing
COMMON 13. Construction 13-1) Basic A and B Type BEIER VARIATOR (Horizontal) Fig. 29 13-2) Basic A and B Type BEIER VARIATOR (Vertical) Fig. 30 AFrame sizes equiped with grease nipple are shown on page 25. - Page 37 COMMON 13-3) BEIER-CYCLO VARIATOR C-6 C-3 C-10 C-12 C-11 Fig. 31 Main Parts Part No. Description Part No. Description Part No. Description Part No. Description Casing Face cam I D–1 Flange disc C–5 Ring gear housing pin Cover Face cam II D–3 Cone disc C–6...
- Page 38 COMMON 13-4) D Type BEIER VARIATOR (Horizontal) Fig. 32 Main Parts Part No. Description Part No. Description Part No. Description Part No. Description Casing Oil gauge Face cam I Hand wheel Base Drain plug Face cam II Shifting screw Cover Input shaft Swing shaft D–1...
- Page 39 13-6) Motor Fig 34 Example of Construction of 80–112M Frame Main Parts Part Name Part Name Part Name Bearing cover Rotor core Motor shaft bearing A Motor shaft bearing B Stationary core Oil seal Stator trame Motor shaft Fan cover Stator windings Conduit box End bracket...
-
Page 40: Oil Seal List
COMMON 14. Oil Seal list Table 43 Oil Seal List Gear Recuction Common Basic Type BEIER-CYCLO VARIATOR Type For slow speed For high speed For low speed Type For input shaft For shifting screw For output shaft CYCLO shaft shaft shaft Nominal No. -
Page 41: Bearing List
COMMON 15. Bearing list Table 44 Bearing list Common Basic Type Gear Reduction Type For spline shaft For swing shaft For output shaf For output shaft For driven shaft For intermediate For low speed Type For input shaft gear (input side) shaft shaft Nominal No. - Page 42 COMMON Table 45 Bearing List Notes 1. Bearings used on each unit of variator include bearing shown in BEIER-CYCLO VARIATOR "Common" column and those shown in each type column (Basic, For high speed End of high Slow speed Slow speed Gear reduction, and BEIER-CYCLO columns).
-
Page 43: Disk, Spline List
COMMON 16. Disc and Spline Shaft List Table 49 Flange disc Frame size Cone disc Spline shaft N02A N02B – N05A N05B N10A 100A 150A 100B 200A 150B N05D – – – – – – N10D – Note: For D Type (N05D–N10D), left side shows quantity of discs on 1st stage and right side quantity of discs on 2nd stage. - Page 44 Sumitomo Machinery Corporation of America (SMA) Sumitomo (SHI) Cyclo Drive Germany GmbH (SCG) Sumitomo (SHI) Cyclo Drive China, Ltd. (SCT) Sumitomo (SHI) Cyclo Drive Asia Pacific Pte. Ltd. (SCA) 4200 Holland Blvd. Chesapeake,VA 23323,U.S.A. Cyclostraße 92, 85229 Markt Indersdorf, Germany 11F,SMEG Plaza, No.1386 Hongqiao Road,...
Need help?
Do you have a question about the Beier Variator Series and is the answer not in the manual?
Questions and answers