Table of Contents
Advertisement
Available languages
Available languages
Models: B070-008-19-IP, B070-016-19-IP, B072-008-1-IP, B072-016-1-IP
PROTECT YOUR INVESTMENT!
Register your product for quicker service and ultimate peace of mind.
You could also win an ISOBAR6ULTRA surge protector-a $100 value!
1111 W. 35th Street, Chicago, IL 60609 USA • www.tripplite.com/support
Copyright © 2018 Tripp Lite. All rights reserved. All trademarks are the property of their respective owners.
Quick Start Guide
NetCommander
Cat5 KVM Switch
(Series Number: AG-00C3)
www.tripplite.com/warranty
IP
®
1
2
2
15
20
21
22
23
45
67
Advertisement
Chapters
Table of Contents

Related Manuals for Tripp Lite NetCommander AG-00C3 Series


Summary of Contents for Tripp Lite NetCommander AG-00C3 Series
-
Page 1: Table Of Contents
Quick Start Guide NetCommander ® Cat5 KVM Switch Models: B070-008-19-IP, B070-016-19-IP, B072-008-1-IP, B072-016-1-IP (Series Number: AG-00C3) Legal Notice 1. Product Overview 2. Web Configuration Interface 3. Conducting a Remote Session 4. Local Console 5. Warranty and Product Registration Español Français Русский... -
Page 2: Legal Notice
Legal Notice This guide and the software described in it are furnished under license, and may be used or copied only in accordance with the terms of such license. The content of this guide is provided for informational use only, and is subject to change without notice. It should not in and of itself be construed as a commitment by Tripp Lite, which assumes no responsibility of liability for any errors or inaccuracies that may appear in this guide. -
Page 3: Target Server Compatibility
1. Product Overview 1.2 Terminology The following table describes terms used in this guide. Term Definition Target Server The computer/server that is connected directly to the KVM, and which is accessed via the local console or by a Client Computer running a remote session. Client Computer A computer running a remote session, which is used to access computer/servers or devices connected to the KVM. -
Page 4: System Components
1. Product Overview • If an extension cord is used with this device, make sure that the total ampere rating of all products used on the cord does not exceed the extension cord ampere rating. Make sure that the total of all products plugged into the wall outlet does not exceed 15 amperes. •... -
Page 5: The Netcommander Ip Unit
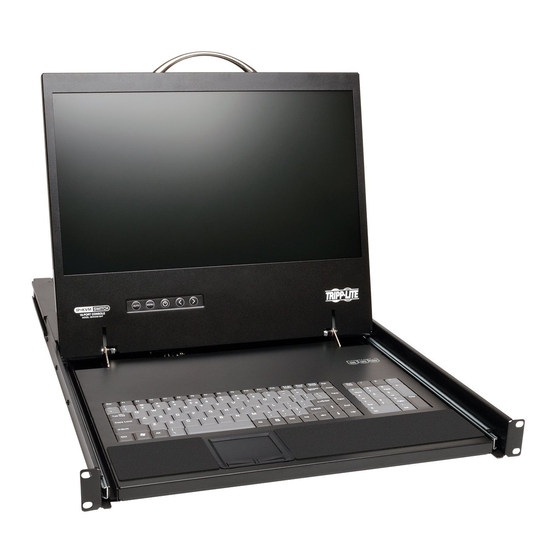
1. Product Overview 1.7 The NetCommander IP Unit Console KVM Switch Front View Upper Handle – Pull to slide the console out; push to slide the console in. 19” LCD Screen – After sliding the console out, flip up the cover to access the LCD screen, keyboard and touchpad. LCD Controls –... - Page 6 1. Product Overview Console KVM Switch Rear View Power Outlet – The power cord included with the console connects to the unit here. Reset Button – Pressing this button for 10 seconds restores the system to its factory default settings. Serial Ports 1 and 2 –...
-
Page 7: Rackmounting The Netcommander Ip
1. Product Overview Rackmount KVM Switch Rear View The NetCommander IP back panel is illustrated in the figure below. Note: The figure below shows the back panel for a B072-016-IP , but the back panel will be functionally the same for all models, with the only difference being the number of server ports. Power Outlet –... -
Page 8: Connecting The System
1. Product Overview 1.9 Connecting the System The figure below illustrates the NetCommander IP system overview. Note: The figure below shows a B072-016-1-IP . The only difference in set up between models is the number of ports, and the lack of an external console on the B070-Series console KVMs. Make sure that power to all the devices you will be connecting has been turned off. - Page 9 1. Product Overview To configure an IP address for the KVM, you can use the local console OSD or the Web Configuration Interface. Both methods are described in the following sections. To set the IPv4 address via the local console OSD: From the local console, press the left [Shift] key twice to open the OSD.
- Page 10 1. Product Overview To set the IP address via the Web Configuration Interface: Notes: • Before logging on the first time, verify the latest Java version (1.8 or 1.9) is installed on your computer. If the Java Runtime Environment is not installed on the client PC, a popup window similar to the one below will likely appear.
- Page 11 1. Product Overview Resolving this issue will require performing the following steps for each KVM: 1. Open the Java Control Panel to the client. 2. Select the Security tab. 3. Click the Edit Site List…button. In the panel that opens, click the Add button, then enter the URL of the relevant KVM device. 4.
- Page 12 1. Product Overview When logging in to the KVM from your web browser, a Security Alert message will appear stating the device’s certificate is not trusted. A prompt will ask if you want to proceed. • If working on a computer other than your own, accept this certificate for only this session by clicking the Continue to this website (not recommended) link.
- Page 13 1. Product Overview After the Java application is launched, the login page will appear. To launch the KVM Web Configuration Interface, select the Connect button in the home HTML page. An additional step may be required, depending on the web browser being used: •...
-
Page 14: Troubleshooting
1. Product Overview Enter in your username and password, and press Enter. If this is the first time you are accessing the KVM, enter in the default username (admin) and password (access). The My Targets page of the Web Configuration Interface opens, showing the state of your unit, and displaying all your available Target Servers. -
Page 15: Web Configuration Interface
2. Web Configuration Interface The NetCommander IP can be accessed in two ways: locally via the local console OSD, or remotely via the Web Configuration Interface. This section details the Web Configuration Interface, which can be used to access the computer/servers and other devices connected to the KVM, as well as to configure the KVM’s settings and accounts. - Page 16 2. Web Configuration Interface Resolving this issue will require performing the following steps for each KVM: 1. Open the Java Control Panel to the client. 2. Select the Security tab. 3. Click the Edit Site List…button. In the panel that opens, click the Add button, then enter the URL of the relevant KVM device. 4.
- Page 17 2. Web Configuration Interface When logging in to the KVM from your web browser, a Security Alert message will appear stating the device’s certificate is not trusted. A prompt will ask if you want to proceed. • If working on a computer other than your own, accept this certificate for only this session by clicking the Continue to this website (not recommended) link.
- Page 18 2. Web Configuration Interface After the Java application is launched, the login page will appear. To launch the KVM Web Configuration Interface, select the Connect button in the home HTML page. An additional step may be required, depending on the web browser being used: •...
- Page 19 2. Web Configuration Interface 5. Enter in your username and password, and press Enter. If this is the first time you are accessing the KVM, enter in the default username (admin) and password (access). The My Targets page of the Web Configuration Interface opens, showing the state of your unit, and displaying all your available Target Servers.
-
Page 20: Conducting A Remote Session
3. Conducting a Remote Session A remote session allows accounts IP access to computer/servers and serial devices connected to the KVM. In a remote session, accounts can access computers/servers, power cycle or turn power to a Target Server Off/On, virtually mount an .iso file, and configure the remote session settings. -
Page 21: Local Console
4. Local Console This section explains how to operate the NetCommander IP via the local console. The local console allows you to access connected computer/servers, configure the KVM’s network settings, and to configure some more basic settings specific to local access. To display the OSD: From the local keyboard, press the left Shift key twice. -
Page 22: Warranty And Product Registration
5. Warranty and Product Registration Limited Warranty TRIPP LITE warrants its products to be free from defects in materials and workmanship for a period of two (2) years (B072-008-1-IP and B072-016-1-IP) or one (1) year (B070-008-19-IP and B070-016-19-IP) from the date of initial purchase. TRIPP LITE’s obligation under this warranty is limited to repairing or replacing (at its sole option) any such defective products. -
Page 23: Español
Guía de Inicio Rápido KVM NetCommander ® IP Cat5 Modelos: B070-008-19-IP B070-016-19-IP B072-008-1-IP B072-016-1-IP (Número de Serie: AG-00C3) Aviso Legal 1. Vista General del Producto 2. Interfaz de Configuración Web 3. Conducción de una Sesión Remota 4. Consola Local 5. Garantía English Français Русский... -
Page 24: Aviso Legal
Aviso Legal Esta guía y el software que se describe en ella son suministrados con licencia y pueden ser utilizados o copiados solo de acuerdo con los términos de dicha licencia. El contenido de esta guía se proporciona únicamente para uso informativo y está sujeto a cambios sin previo aviso. No deben interpretarse como un compromiso por Tripp Lite, quien no asume responsabilidad por cualquier error o inexactitud que pueda aparecer en esta guía. - Page 25 1. Vista General del Producto 1.2 Terminología La siguiente tabla describe los términos utilizados en esta guía. Término Definición Servidor de La computadora o servidor se conecta directamente al KVM y que se accede a través de la consola local o por una Computadora Cliente ejecutando una sesión remota.
-
Page 26: Componentes Del Sistema
1. Vista General del Producto • Coloque cuidadosamente los cables de alimentación y cables del sistema para asegurarse de que nada se apoye o presione ningún cable. Conduzca el cable de alimentación y otros cables de modo que no puedan ser pisados o causen tropezones. •... - Page 27 1. Vista General del Producto 1.7 Unidad NetCommander IP Vista Frontal del KVM de Consola Manija Superior – Jale para deslizar la consola hacia afuera; empuje para deslizar la consola hacia adentro. Pantalla LCD de 19" – Después de deslizar la consola hacia afuera, levante la cubierta para acceder a la pantalla LCD, teclado y touchpad.
- Page 28 1. Vista General del Producto Vista Posterior del KVM de Consola Tomacorriente - El cable de alimentación incluido con la consola se conecta aquí a la unidad. Botón de Restaurar - Presionando este botón durante 10 segundos se restablece el sistema a su configuración de fábrica. Puertos Seriales 1 y 2 - El KVM cuenta con dos puertos seriales RJ45 para conexión de dispositivos seriales administrables, como PDUs, cortafuegos y ruteadores (consulte la sección de Pinout Serial en el Manual del Propietario para información sobre los pines).
- Page 29 1. Vista General del Producto Vista Posterior del KVM para Instalación en Rack El panel trasero del NetCommander IP se muestra en la siguiente figura. Nota: La figura a continuación muestra el panel posterior para un B072-016-IP , pero el panel posterior será funcionalmente el mismo para todos los modelos, con la única diferencia del número de puertos de servidor. Tomacorriente –...
- Page 30 1. Vista General del Producto 1.9 Conexión del Sistema La figura siguiente muestra la descripción general del sistema NetCommander IP . Nota: La siguiente figura presenta un B072-016-1-IP . La única diferencia en la configuración entre los modelos es el número de puertos y la falta de una consola externa en los KVMs de Consola de la Serie B070.
- Page 31 1. Vista General del Producto Para configurar una dirección IP para el KVM, puede usar el OSD de la consola local o la interfaz de configuración de la web. Ambos métodos se describen en las siguientes secciones. Para configurar la dirección IPv4 a través del OSD de la consola local: Desde la consola local, presione la tecla Shift [Mayúsculas] izquierda dos veces para abrir el OSD.
- Page 32 1. Vista General del Producto Para configurar la dirección IP mediante la interfaz de configuración Web: Notas: • Antes de iniciar sesión por primera vez, verifique que está instalada en su computadora la última versión de Java (1.8 o 1.9). Si el Java Runtime Environment [JRE] no está...
- Page 33 1. Vista General del Producto Resolver este problema requerirá realizar los siguientes pasos para cada KVM: 1. Abra el panel de control de Java para el cliente. 2. Seleccione la pestaña de Seguridad. 3. Haga click en el botón Editar Lista del Sitio. En el panel que se abre, haga click en el botón Add [Añadir] y a continuación, introduzca la URL del dispositivo KVM relevante.
- Page 34 1. Vista General del Producto Al iniciar sesión en el KVM desde su navegador web, aparecerá un mensaje de alerta de seguridad indicando que el certificado del dispositivo no es de confianza. Un mensaje le preguntará si desea continuar. • Si trabaja en una computadora que no sea la suya, acepte este certificado solo para esta sesión haciendo click en el enlace Continuar a este sitio web (no recomendado).
- Page 35 1. Vista General del Producto Después de que se inicie la aplicación Java aparecerá la página de inicio de sesión. Para iniciar la interfaz de configuración de Web del KVM, seleccione el botón Connect en la página HTML de inicio. Puede ser necesario un paso adicional, dependiendo del navegador web utilizado: •...
- Page 36 1. Vista General del Producto Introduzca su nombre de usuario y contraseña y presione Enter. Si esta es la primera vez que están accediendo al KVM, ingrese el nombre de usuario (admin) y la contraseña (access) predeterminados. La página Mis Destinos de la interfaz de configuración web se abre, mostrando el estado de su unidad y desplegando todos sus servidores de destino disponibles.
-
Page 37: Interfaz De Configuración Web
2. Interfaz de Configuración Web Se puede acceder al NetCommander IP de dos formas: local a través del OSD de la consola local, o en forma remota mediante la interfaz de Configuración Web. Esta sección detalla la interfaz de Configuración Web, que se puede utilizar para acceder a la computadora y servidores y otros dispositivos conectados al KVM, así... - Page 38 2. Interfaz de Configuración Web Resolver este problema requerirá realizar los siguientes pasos para cada KVM: 1. Abra el panel de control de Java para el cliente. 2. Seleccione la pestaña de Seguridad. 3. Haga click en el botón Editar Lista del Sitio. En el panel que se abre, haga click en el botón Add [Añadir] y a continuación, introduzca la URL del dispositivo KVM relevante.
- Page 39 2. Interfaz de Configuración Web Al iniciar sesión en el KVM desde su navegador web, aparecerá un mensaje de alerta de seguridad indicando que el certificado del dispositivo no es de confianza. Un mensaje le preguntará si desea continuar. • Si trabaja en una computadora que no sea la suya, acepte este certificado solo para esta sesión haciendo click en el enlace Continuar a este sitio web (no recomendado).
- Page 40 2. Interfaz de Configuración Web Después de que se inicie la aplicación Java aparecerá la página de inicio de sesión. Para iniciar la interfaz de configuración de Web del KVM, seleccione el botón Connect en la página HTML de inicio. Puede ser necesario un paso adicional, dependiendo del navegador web utilizado: •...
- Page 41 2. Interfaz de Configuración Web 5. Introduzca su nombre de usuario y contraseña y presione Enter. Si esta es la primera vez que están accediendo al KVM, ingrese el nombre de usuario (admin) y la contraseña (access) predeterminados. La página Mis Destinos de la interfaz de configuración web se abre, mostrando el estado de su unidad y desplegando todos sus servidores de destino disponibles.
-
Page 42: Conducción De Una Sesión Remota
3. Conducción de una Sesión Remota Una sesión remota permite acceso de cuentas IP a las computadoras y servidores y dispositivos seriales conectados al KVM. En una sesión remota, las cuentas pueden acceder a las computadoras y servidores, encender y apagar la alimentación o encender y apagar a un Servidor de Destino, montar virtualmente un archivo .iso y configurar los parámetros de la sesión remota. -
Page 43: Consola Local
4. Consola Local Esta sección explica cómo operar el NetCommander IP a través de la consola local. La consola local le permite acceder a las computadoras y servidores conectados, configurar los parámetros de red del KVM y configurar algunos parámetros básicos más específicos para el acceso local. -
Page 44: Garantía
5. Garantía Garantía limitada TRIPP LITE garantiza que este producto no tiene defectos de materiales ni de mano de obra por un período de dos (2) años (B072-008-1-IP y B072-016-1 IP) o de un (1) año (B070-008-19-IP y B070-016-19-IP) a partir de la fecha de compra inicial. La obligación TRIPP LITE bajo esta garantía está limitada a la reparación o reemplazo (A su entera discreción) de cualquier producto defectuoso. -
Page 45: Français
Guide de démarrage rapide Commutateur écran-clavier-souris NetCommander IP Cat5 ® Modèles : B070-008-19-IP, B070-016-19-IP, B072-008-1-IP, B072-016-1-IP (numéro de série : AG-00C3) Avis juridique 1. Aperçu du produit 2. Interface de configuration Web 3. Effectuer une session à distance 4. Console locale 5. -
Page 46: Avis Juridique
Avis juridique Ce guide et le logiciel qui y est décrit sont fournis sous licence et peuvent être utilisés ou copiés selon les conditions de cette licence. Le contenu de ce guide est fourni uniquement à titre d'information et peut être modifié sans préavis. Il ne doit pas, en soi, être considéré comme un engagement de la part de Tripp Lite, qui n'assume aucune responsabilité... - Page 47 1. Aperçu du produit 1.2 Terminologie Le tableau suivant décrit les termes utilisés dans ce guide. Terme Définition Serveur cible L'ordinateur/le serveur qui est connecté directement au commutateur écran-clavier-souris et auquel il est possible d'accéder via la console locale ou via l'ordinateur client exécutant une session à distance. Ordinateur client Un ordinateur exécutant une session à...
- Page 48 1. Aperçu du produit • L'appareil est équipé d'une fiche de type à 3 fils mise à la masse. Il s'agit d'un dispositif de sécurité. S'il est impossible d'insérer la fiche dans la sortie de courant, contacter un électricien pour remplacer la sortie de courant désuète. Ne pas tenter de modifier les dispositifs de sécurité...
- Page 49 1. Aperçu du produit 1.7 L'unité NetCommander IP Vue de face du commutateur écran-clavier-souris de la console Poignée supérieure – Tirer pour faire sortir la console en glissant; pousser pour faire entrer la console en glissant. Écran ACL de 19 po – Après avoir sorti la console en la glissant, ouvrir le couvercle pour accéder à l'écran ACL, au clavier et au pavé tactile.
- Page 50 1. Aperçu du produit Vue arrière du commutateur écran-clavier-souris de la console Prise de courant – Le cordon d'alimentation inclus avec la console est raccordé à l'appareil ici. Bouton de réinitialisation – Le fait d'appuyer sur ce bouton pendant 10 secondes permet de rétablir les paramètres d'usine par défaut du système.
- Page 51 1. Aperçu du produit Vue arrière du commutateur écran-clavier-souris pour montage en bâti Le panneau arrière du NetCommander IP est illustré sur la figure ci-dessous. Remarque : La figure ci-dessous montre le panneau arrière pour un B072-016-1-IP , mais le panneau arrière sera, sur le plan fonctionnel, identique pour tous les modèles, avec la seule différence étant le nombre de ports du serveur.
- Page 52 1. Aperçu du produit 1.9 Raccorder le système La figure ci-dessous donne un aperçu du système NetCommander IP . Remarque : La figure ci-dessus montre un B072-016-1-IP . La seule différence quant à la configuration entre les modèles est le nombre de ports et l'absence d'une console externe sur les commutateurs écran- clavier-souris de la série B070.
- Page 53 1. Aperçu du produit Pour configurer une adresse IP pour le commutateur écran- clavier-souris, il est possible d'utiliser l'affichage à l'écran (OSD) de la console locale ou l'interface de configuration Web. Les deux méthodes sont décrites dans les sections suivantes. Pour configurer l'adresse IPv4 via l'affichage à...
- Page 54 1. Aperçu du produit Pour configurer l'adresse IP via l'interface de communication Web : Remarques : • Avant de se connecter pour la première fois, vérifier que la version la plus récente de Java (1.8 ou 1.9) est installée sur l'ordinateur. Si Java Runtime Environment n'est pas installé...
- Page 55 1. Aperçu du produit Pour résoudre ce problème, il s'avérera nécessaire d'effectuer les étapes suivantes pour chaque commutateur écran-clavier-souris : 1. Ouvrir le panneau de commande Java au client. 2. Sélectionner l'onglet Security (sécurité). 3. Cliquer sur le bouton Edit Site List (modifier la liste de sites). Dans le panneau qui s'ouvre, cliquer sur le bouton Add (ajouter), puis saisir l'URL du dispositif écran-clavier-souris pertinent.
- Page 56 1. Aperçu du produit Au moment de se connecter au commutateur écran-clavier-souris depuis le navigateur Web, un message d'alerte de sécurité s'affichera en indiquant que le certificat du dispositif n'est pas sécurisé. Un message-guide demandera si l'utilisateur souhaite procéder. • Si l'ordinateur utilisé n'appartient pas à l'utilisateur, accepter ce certificat uniquement pour cette session en cliquant sur le lien Continue to this website (not recommended) (continuer vers ce site Web (non recommandé).
- Page 57 1. Aperçu du produit Une fois que l'application Java a été lancée, la page de connexion s'affichera. Pour lancer l'interface de configuration Web du commutateur écran-clavier-souris, sélectionner le bouton Connect (se connecter) sur la page d'accueil HTML. Une étape supplémentaire peut s'avérer nécessaire selon le navigateur Web utilisé...
- Page 58 1. Aperçu du produit Saisir le nom d'utilisateur et le mot de passe, puis appuyer sur Enter (enregistrer). Si c'est la première fois que l'utilisateur accède au commutateur écran-clavier-souris, saisir le nom d'utilisateur par défaut (admin) et le mot de passe par défaut (access). La page My Targets de l'interface de configuration Web s'ouvre, indiquant l'état de l'appareil et affichant tous les serveurs cibles disponibles.
-
Page 59: Interface De Configuration Web
2. Interface de configuration Web Il y a deux façons d'accéder à NetCommander IP : localement via l'affichage à l'écran de la console locale ou à distance via l'interface de configuration Web. Cette section décrit l'interface de configuration Web qui peut être utilisée pour accéder à l'ordinateur/aux serveurs et autres dispositifs connectés au commutateur écran-clavier-souris, de même que pour configurer les paramètres du commutateur écran- clavier-souris et les comptes. - Page 60 2. Interface de configuration Web Pour résoudre ce problème, il s'avérera nécessaire d'effectuer les étapes suivantes pour chaque commutateur écran-clavier-souris : 1. Ouvrir le panneau de commande Java au client. 2. Sélectionner l'onglet Security (sécurité). 3. Cliquer sur le bouton Edit Site List (modifier la liste de sites). Dans le panneau qui s'ouvre, cliquer sur le bouton Add (ajouter), puis saisir l'URL du dispositif écran-clavier-souris pertinent.
- Page 61 2. Interface de configuration Web Au moment de se connecter au commutateur écran-clavier-souris depuis le navigateur Web, un message d'alerte de sécurité s'affichera en indiquant que le certificat du dispositif n'est pas sécurisé. Un message-guide demandera si l'utilisateur souhaite procéder. •...
- Page 62 2. Interface de configuration Web Une fois que l'application Java a été lancée, la page de connexion s'affichera. Pour lancer l'interface de configuration Web du commutateur écran-clavier-souris, sélectionner le bouton Connect (se connecter) sur la page d'accueil HTML. Une étape supplémentaire peut s'avérer nécessaire selon le navigateur Web utilisé...
- Page 63 2. Interface de configuration Web 5. Saisir le nom d'utilisateur et le mot de passe, puis appuyer sur Enter (enregistrer). Si c'est la première fois que l'utilisateur accède au commutateur écran-clavier-souris, saisir le nom d'utilisateur par défaut (admin) et le mot de passe par défaut (access). La page My Targets de l'interface de configuration Web s'ouvre, indiquant l'état de l'appareil et affichant tous les serveurs cibles disponibles.
-
Page 64: Effectuer Une Session À Distance
3. Effectuer une session à distance Une session à distance permet à l'IP des comptes d'accéder à l'ordinateur/aux serveurs et aux dispositifs de série connectés au commutateur écran-clavier-souris. Dans une session à distance, les comptes peuvent accéder aux ordinateurs/serveurs, mettre sous tension/hors tension un serveur cible, monter virtuellement un fichier .iso et configurer les paramètres de la session à... -
Page 65: Console Locale
4. Console locale Cette section explique comment utiliser le NetCommander IP via la console locale. La console locale permet d'accéder à l'ordinateur/ aux serveurs connecté/connectés, de configurer les paramètres du réseau du commutateur écran-clavier-souris et de configurer certains paramètres de base supplémentaires particuliers à l'accès local. Pour afficher l'affichage à... -
Page 66: Garantie
5. Garantie Garantie limitée TRIPP LITE garantit que ses produits sont exempts de vices de matériaux et de fabrication pendant une période de deux (2) ans (B072-008-1-IP et B072-016-1-IP) ou d'un (1) an (B070-008-19-IP et B070-016-19-IP) à partir de la date d'achat initiale. La responsabilité de TRIPP LITE, en vertu de la présente garantie, se limite à la réparation ou au remplacement (à... -
Page 67: Русский
Краткое руководство пользователя КВМ-переключатель NetCommander ® Cat5 Модели: B070-008-19-IP, B070-016-19-IP, B072-008-1-IP, B072-016-1-IP (номер серии: AG-00C3) Правовая оговорка 1. Краткое описание изделия 2. Web Configuration Interface 3. Ведение удаленного сеанса 4. Локальная консоль 5. Гарантийные обязательства English Español Français 1111 W. 35th Street, Chicago, IL 60609 USA • www.tripplite.com/support Охраняется... - Page 68 Правовая оговорка Настоящее руководство и описанное в нем программное обеспечение (ПО) предоставляются по лицензии и могут использоваться или копироваться только в соответствии с ее условиями. Содержимое настоящего руководства предоставляется только в информационных целях и может меняться без уведомления. Как таковое и само по себе оно не может толковаться...
- Page 69 1. Краткое описание изделия 1.2 Терминология Термины, используемые в настоящем руководстве, описываются в приведенной ниже таблице. Термин Определение Целевой сервер Компьютер/сервер, подключенный напрямую к КВМ-переключателю и доступный через локальную консоль или с клиентского компьютера, работающего в удаленном сеансе. Клиентский компьютер Компьютер, работающий...
- Page 70 1. Краткое описание изделия • Системные кабели и кабели питания следует располагать осмотрительно и таким образом, чтобы ни один из них не оказался придавленным какими-либо предметами. Шнур питания и кабели следует располагать таким образом, чтобы на них нельзя было случайно наступить или споткнуться о них. •...
- Page 71 1. Краткое описание изделия 1.7 Модуль NetCommander IP Консольный КВМ-переключатель (вид спереди) Верхняя ручка: на себя — выдвинуть консоль; от себя — задвинуть консоль. 19-дюймовый ЖК-экран: после выдвижения консоли откиньте вверх крышку для получения доступа к ЖК-экрану, клавиатуре и сенсорной панели. Элементы...
- Page 72 1. Краткое описание изделия Консольный КВМ-переключатель (вид сзади) Выходной разъем питания: место подключения к устройству шнура питания, поставляемого в комплекте с консолью. Кнопка перезапуска: при нажатии этой кнопки с удержанием в течение 10 секунд происходит восстановление заводских настроек системы, установленных по умолчанию. Последовательные...
- Page 73 1. Краткое описание изделия Стоечный КВМ-переключатель (вид сзади) На приведенном ниже рисунке представлена задняя панель КВМ-переключателя NetCommander IP. Примечание. На рисунке ниже показана задняя панель мод. B072-016-IP, но функционально задние панели одинаковы для всех моделей и различаются только количеством серверных портов. Выходной...
- Page 74 1. Краткое описание изделия 1.9 Подключение системы На рисунке ниже изображен общий вид системы с использованием КВМ-переключателя NetCommander IP. Примечание. На приведенном ниже рисунке представлена модель B072- 016-1-IP. В плане расположения элементов модели различаются между собой только количеством портов, а также отсутствием внешней консоли у консольных КВМ-переключателей серии...
- Page 75 1. Краткое описание изделия Для настройки IP-адреса КВМ-переключателя можно использовать экранное меню локальной консоли или веб-интерфейс настройки конфигурации. Оба эти способа описаны в последующих разделах. Для установки IPv4-адреса через экранное меню локальной консоли: Откройте экранное меню двойным нажатием левой клавиши [Shift] на локальной консоли.
- Page 76 1. Краткое описание изделия Для установки IP-адреса через веб-интерфейс настройки конфигурации: Примечания: • Перед первым входом в систему убедитесь в том, что на компьютере установлена последняя версия Java (1.8 или 1.9). Если на клиентском ПК не установлена среда Java Runtime Environment, то на экране, скорее...
- Page 77 1. Краткое описание изделия Для устранения данной проблемы потребуется выполнение следующих действий для каждого КВМ-переключателя: 1. Откройте окно "Java Control Panel" ("Панель управления Java") для клиента. 2. Выберите вкладку "Security" ("Безопасность"). 3. Нажмите на кнопку "Edit Site List…" ("Редактировать список сайтов..."). На открывшейся панели нажмите на кнопку "Add" ("Добавить"), а затем введите URL-адрес соответствующего КВМ-устройства. 4.
- Page 78 1. Краткое описание изделия При входе в КВМ-переключатель из веб-браузера появляется предупреждение безопасности, сообщающее о том, что сертификат безопасности устройства не является доверенным. В диалоговом окне задается вопрос о том, хотите ли вы продолжить. • При работе на чужом компьютере примите данный сертификат только на один сеанс, нажав на ссылку Continue to this website (not recommended) / Продолжить работу с этим веб-сайтом...
- Page 79 1. Краткое описание изделия После запуска приложения Java появляется страница входа в систему. Для запуска KVM Web Configuration Interface нажмите на кнопку Connect (Подключиться) на главной HTML- странице. В зависимости от используемого веб-браузера может потребоваться дополнительное действие: • Microsoft Internet Explorer: Interface обычно запускается сразу, и каких-либо дополнительных действий не требуется. •...
- Page 80 1. Краткое описание изделия Введите свое имя пользователя и пароль. Нажмите Enter. Если подключение к КВМ-устройству производится впервые, введите установленные по умолчанию имя пользователя (admin) и пароль (access). После этого открывается страница My Targets (Мои цели) приложения Web Configuration Interface, показывающая состояние устройства и отображающая все...
- Page 81 2. Web Configuration Interface Доступ к устройству NetCommander IP может быть получен двумя способами: локально (через экранное меню локальной консоли) или дистанционно (через Web Configuration Interface). В данном разделе подробно рассматривается приложение Web Configuration Interface, которое может быть использовано для получения доступа к компьютерам/серверам и другим устройствам, подключенным...
- Page 82 2. Web Configuration Interface Для устранения данной проблемы потребуется выполнение следующих действий для каждого КВМ-переключателя: 1. Откройте окно "Java Control Panel" ("Панель управления Java") для клиента. 2. Выберите вкладку "Security" ("Безопасность"). 3. Нажмите на кнопку "Edit Site List…" ("Редактировать список сайтов..."). На открывшейся панели нажмите на кнопку "Add" ("Добавить"), а затем введите URL-адрес соответствующего КВМ-устройства. 4.
- Page 83 2. Web Configuration Interface При входе в КВМ-переключатель из веб-браузера появляется предупреждение безопасности, сообщающее о том, что сертификат безопасности устройства не является доверенным. В диалоговом окне задается вопрос о том, хотите ли вы продолжить. • При работе на чужом компьютере примите данный сертификат только на один сеанс, нажав на ссылку Continue to this website (not recommended) / Продолжить работу с этим веб-сайтом...
- Page 84 2. Web Configuration Interface После запуска приложения Java появляется страница входа в систему. Для запуска KVM Web Configuration Interface нажмите на кнопку Connect (Подключиться) на главной HTML- странице. В зависимости от используемого веб-браузера может потребоваться дополнительное действие: • Microsoft Internet Explorer: Interface обычно запускается сразу, и каких-либо дополнительных действий не требуется. •...
- Page 85 2. Web Configuration Interface 5. Введите свое имя пользователя и пароль. Нажмите Enter. Если подключение к КВМ-устройству производится впервые, введите установленные по умолчанию имя пользователя (admin) и пароль (access). После этого открывается страница My Targets (Мои цели) приложения Web Configuration Interface, показывающая состояние устройства и отображающая все...
- Page 86 3. Ведение удаленного сеанса Удаленный сеанс обеспечивает клиентам возможность IP-доступа к компьютерам/серверам и устройствам, последовательно подключенным к КВМ-переключателю. Во время удаленного сеанса клиенты могут подключаться к компьютерам/серверам, перезагружать целевой сервер или включать/выключать его питание, виртуально формировать файл типа .iso и настраивать параметры удаленного сеанса. В последующих разделах описываются возможности удаленных сеансов и порядок их использования. 3.1 Запуск...
- Page 87 4. Локальная консоль В данном разделе описывается принцип работы устройства NetCommander IP через локальную консоль. Локальная консоль обеспечивает возможность доступа к подключенным компьютерам/серверам, настройки сетевых параметров КВМ-переключателя, а также настройки некоторых основных параметров, относящихся к локальному доступу. Для отображения экранного меню: Дважды...
- Page 88 5. Гарантийные обязательства Ограниченная гарантия Компания TRIPP LITE гарантирует отсутствие дефектов материалов и изготовления в течение двух (2) лет (для мод. B072-008-1-IP и B072-016-1-IP) или одного (1) года (для мод. B070-008-19-IP и B070-016-19-IP) с момента первоначальной покупки изделия. Обязательства компании TRIPP LITE по настоящей гарантии ограничиваются ремонтом или заменой (по ее единоличному усмотрению) любых таких...