Tripp Lite NetCommander B072-016-1-IP Owner's Manual
Ip cat5 kvm switch
Hide thumbs
Also See for NetCommander B072-016-1-IP:
- User manual (84 pages) ,
- Quick start manual (88 pages) ,
- Owner's manual (58 pages)
Table of Contents
Advertisement
NetCommander
Table of Contents
201204111 93-2769.indd 1
Owner's Manual
B072-016-1-IP
Page 2
1111 W. 35th Street, Chicago, IL 60609 USA • www.tripplite.com/support
Copyright © 2012 Tripp Lite. All trademarks are the property of their respective owners.
IP Cat5 KVM Switch
™
Model:
2
3
3
4
5
5
6
6
7
7
9
9
10
10
11
12
13
1
Page 14
15
15
15
15
15
16
17
18
22
23
24
27
29
30
30
31
8/2/2012 10:15:53 AM
Advertisement
Table of Contents

Related Manuals for Tripp Lite NetCommander B072-016-1-IP


Summary of Contents for Tripp Lite NetCommander B072-016-1-IP
-
Page 1: Table Of Contents
35 – Warranty & Warranty Registration 18 – Device Upgrade 1111 W. 35th Street, Chicago, IL 60609 USA • www.tripplite.com/support Copyright © 2012 Tripp Lite. All trademarks are the property of their respective owners. 201204111 93-2769.indd 1 8/2/2012 10:15:53 AM... -
Page 2: Introduction
1. Introduction Tripp Lite’s NetCommander IP Cat5 KVM Switch is ideal for controlling multiple servers over inexpensive Cat5e cable from a single console (keyboard, ™ mouse and display). It includes the following premium features: • Access and control multiple computers from a single console (local or remote). -
Page 3: System Components
• Owner’s Manual CD Accessories, available separately from Tripp Lite, include: • Server interface units (SIU)–PS/2 (model # B078-101-PS2) or USB (model # B078-101-USB) • Cat5/6 cables (Tripp Lite model # series: N001-, N002-, N201-, N202- or N105-) 4. Compatibility Connected Computers •... -
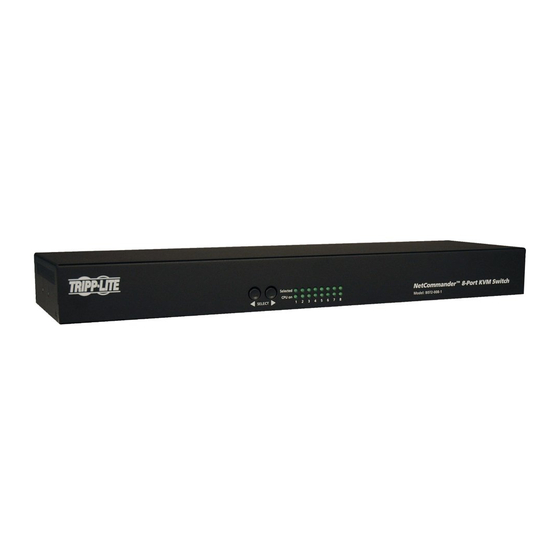
Page 4: Features
Back View 1. C14 Power Inlet – Connect the included power cord to the unit here, and then plug it into a Tripp Lite Surge Suppressor, Power Distribution Unit (PDU), or Uninterruptible Power Supply (UPS). 2. On/Off Switch – Turn the power to the KVM switch on/off using this switch. -
Page 5: Rackmount Installation
KVM switch using the included hardware, and then mount the KVM into your rack using user-supplied screws. 7. Connection (Single KVM Switch) Connecting Computers to the KVM Switch Connect each computer to the KVM switch using a Tripp Lite To LAN port B078-101-PS2* or B078-101-USB* Server Interface Unit (SIU), and a Cat5e Patch Cable. -
Page 6: Connection (Cascading Multiple Kvm Switches)
8. Connection (Cascading Multiple KVM Switches) The number of connected computers/servers can be increased to up to 256 by cascading an additional level of KVM switches from the B072- 016-1-IP . You can cascade any combination of B072-008-1 and B072- 016-1 KVM switches. -
Page 7: Web Configuration Interface
10. Web Configuration Interface The Web Configuration Interface is a Java-based utility that allows administrators to configure KVM network and security settings, create and manage user accounts, and upgrade the IP portion of the KVM firmware. The sections that follow tell you how to log into the Web Configuration Interface, and use the different settings available to the KVM administrators. -
Page 8: Window Menu
11. Logging into the Web Configuration Interface (Continued) Window Menu Help Menu The Window Menu includes two items; Cascade and Maximize. The Help Menu includes only one item; About. About – When selected, the About screen appears, which provides you with information pertaining to the KVM’s IP firmware. Cascade –... -
Page 9: Device
12. Device The Device screen is where the administrator can set the KVM network settings. The fields located in this screen are described below. Device Name: By default, the KVM device name starts with the letter D, and is followed by a 6-digit number that can be found on the sticker on the underside of the KVM. -
Page 10: Switch Configuration
14. Switch Configuration Server Name The Switch Configuration page allows users to give each port a unique name, making it easier to differentiate between them. By default, ports are named as Server 1, Server 2, Server 3, etc. To edit port names, simply highlight the name of the desired port on the Switch Configuration page and type in whatever name you want. -
Page 11: Security
16. Security The Security Settings Screen allows the Administrator to modify settings such as Account Blocking, Password Policy and Idle Timeout. Account Blocking: This allows the administrator to adjust the settings that cause a user to be blocked from access after entering an incorrect username and/or password. -
Page 12: Snmp
17. SNMP From this page you can activate or deactivate SNMP logging. Enable traps: Check to enable SNMP traps of KVM Access events and operation. Community: Type the SNMP community SNMP Manager IP: Enter the SNMP Server IP address The following table lists the events that are recorded and sent via SNMP traps. Event Text Code Description “System Boot”... -
Page 13: Device Upgrade
18. Device Upgrade The B072-016-1-IP has two sets of firmware; one to control IP access and another to control the KVM’s Mainboard and OSD. This section of the Web Configuration Interface allows you to update the KVM switches IP firmware. The non-IP firmware is updated using the KVM OSD. (See Local Firmware Upgrade section for details on updating the non-IP firmware) 1. -
Page 14: Safe Mode
19. Safe Mode Restore Factory Settings If you are in a situation where you can’t access the Web Configuration Interface via the normal method, you can access the KVM in Safe Mode If you forget your username and password, and are unable to log into to restore the factory settings and/or restore the firmware. -
Page 15: Factory Restore
20. Factory Restore The Factory Restore function will reset all of the settings and accounts added by administrators to the Web Configuration Interface. There is a check box that allows you to leave the network settings unchanged, while resetting everything else. If this box is not checked, performing a restore will clear the network settings information. -
Page 16: Logging In
25. Logging In 4. When the installation is complete, the username and password Note: Windows operating systems can use any browser to remotely screen appears. access connected computers. Linux-based computers can only use Firefox when remotely accessing connected computers. 1. Open your web browser and enter the IP address assigned to the KVM. Note: • Only SSL connections are allowed, so you must start the IP address with HTTPS, and not HTTP .) -
Page 17: Starting A Remote Session
26. Starting a Remote Session Remote Session Screen When in a shared session, the control of the mouse and keyboard is When you initiate a remote session for the first time, the screen of the transferred from user to user. As soon as one user stops using the first computer in the installation that you have access to is displayed. -
Page 18: Remote Toolbar
27. Remote Toolbar The NetCommander KVM provides a toolbar that allows the remote About session to be manipulated. The features on the toolbar allow you to Select this option to pull up a screen that displays firmware versions of toggle between accessible ports, adjust the video settings of the remote the KVM switch. - Page 19 27. Remote Toolbar (Continued) Advanced Performance If an Auto Video Adjust does not result in acceptable video settings, Selecting the Performance option pulls up a screen that allows you to selecting this option will bring up a screen that allows you to manually determine the amount of color that is displayed in the remote video.
- Page 20 27. Remote Toolbar (Continued) Adding a Predetermined Command Deleting a Command 1. Click the Add Predefined button to pull up a pre-defined list of 1. Select the desired command from the list and click the Delete button. keyboard key sequences to choose from. A prompt appears asking you to confirm the deletion.
-
Page 21: Mouse Settings
• If you are using non-shielded Cat5/6 cable, try using Tripp Lite N105- Series Cat5e shielded patch cable. Any noise that exists in the cabling can affect local and remote mouse alignment, and switching to shielded cabling eliminates that noise. -
Page 22: Local Console
27. Remote Toolbar (Continued) Server List – Clicking this icon will display a list of the accessible ports on the installation. If you are not given access to a port, it will not display in the list. Simply select the desired port to switch to it. Full Screen –... -
Page 23: On-Screen Display (Osd) Functions
29. On-Screen Display (OSD) Functions When in the OSD main menu, there are various functions that can be performed using the keyboard keys. These functions are described in the following sections. F1 – HELP Press the [F1] key to pull up the HELP screen. The HELP screen displays the functions that are available, and what keys are used to activate them. F2 –... -
Page 24: On-Screen Display (Osd) F2 Settings
30. On-Screen Display (OSD) F2 SETTINGS Press the [F2] key to pull up the OSD SETTINGS screen. From this screen you can configure the KVM and add/edit user accounts. The pages that follow describe the sections of the F2 SETTINGS page, and the settings included in them. Note: When local security is turned on, the KVM administrator is the only one that can access the F2 SETTINGS page. - Page 25 30. On-Screen Display (OSD) F2 SETTINGS (Continued) Ports Highlight the Ports option and press the [Enter] key to open the Port Settings page. This page allows you to edit port names, set the remote computer keyboard type, and set the hotkey for ports that have second level KVM switches connected to them. The table below describes each of these settings. Column Description NAME...
- Page 26 30. On-Screen Display (OSD) F2 SETTINGS (Continued) Security The Security option can only be accessed when Security is enabled in the General Settings page. (See General under On-Screen Display OSD F2 Settings section for details) Highlight the Security option and press the [Enter] key to open the Security Settings page. The Security Settings page displays all of the available accounts for the KVM;...
-
Page 27: Local Firmware Upgrade
31. Local Firmware Upgrade The NetCommander IP KVM switch uses two types of firmware, one for the IP Current Firmware Verification portion of the KVM, and the other for the local portion. This section describes After the physical connection is made, you need to install the Firmware how to perform a firmware upgrade on the local portion of the KVM. -
Page 28: Firmware Upgrade
2. Open the File drop-down menu at the top of the screen and select the Open option. Navigate to and select the firmware upgrade file you downloaded from the Tripp Lite website. 3. Check the checkbox at the top of the screen next to the text NetCommander IP Switch. -
Page 29: Troubleshooting
32. Troubleshooting Note: Disconnect device from AC mains before service operation! When using Firmware Update software you may at times get a Communication Error message. If a Communication Error message does appear during the update procedure, do the following: 1. Ensure that the RS232 Serial cable’s RS232 connector is connected to the Switch’s Communication port. 2. -
Page 30: Specifications
Service Your Tripp Lite product is covered by the warranty described in this manual. A variety of Extended Warranty and On-Site Service Programs are also available from Tripp Lite. For more information on service, visit www.tripplite.com/support. Before returning your product for service, follow these steps: 1. -
Page 31: Warranty & Warranty Registration
1-Year Limited Warranty TRIPP LITE warrants its products to be free from defects in materials and workmanship for a period of one (1) year from the date of initial purchase. TRIPP LITE’s obligation under this warranty is limited to repairing or replacing (at its sole option) any such defective products. To obtain service under this warranty, you must obtain a Returned Material Authorization (RMA) number from TRIPP LITE or an authorized TRIPP LITE service center. - Page 32 1111 W. 35th Street, Chicago, IL 60609 USA www.tripplite.com/support 201204111 – 93-2769 – Rev D 201204111 93-2769.indd 32 8/2/2012 10:16:07 AM...
Need help?
Do you have a question about the NetCommander B072-016-1-IP and is the answer not in the manual?
Questions and answers