Table of Contents
Advertisement
Quick Links
WIDOS
Wilhelm Dommer Söhne
GmbH
Working Instructions
Heating element butt welding machine
Headquarters: D-71254 Ditzingen Country court Stuttgart HRB 200973 Managing directors: Jürgen Dommer, Dr. Kai Dombrowski
Einsteinstr. 5
D-71254 Ditzingen
info @ widos.de
Translation
WIDOS 4002 S WI CNC
Keep for further use!
Phone
+49 71 52 99 39 0
Fax
+49 71 52 99 39 40
Internet: www.widos.de
®
Advertisement
Table of Contents

Related Manuals for widos 4002 S WI CNC


Summary of Contents for widos 4002 S WI CNC
- Page 1 +49 71 52 99 39 40 GmbH info @ widos.de Internet: www.widos.de Working Instructions Translation Heating element butt welding machine ® WIDOS 4002 S WI CNC Keep for further use! Headquarters: D-71254 Ditzingen Country court Stuttgart HRB 200973 Managing directors: Jürgen Dommer, Dr. Kai Dombrowski...
- Page 2 WIDOS Wilhelm Dommer Söhne GmbH Einsteinstr. 5 D -71254 Ditzingen Phone: +49 (0) 71 52 99 39 0 Fax: +49 (0) 71 52 99 39 40 E-Mail: info@widos.de 14.11.2016 Working instructions WIDOS 4002 S WI CNC Page 2 of 103...
- Page 3 11/14/2016 WIDOS Wilhelm Dommer Söhne GmbH Einsteinstraße 5 D-71254 Ditzingen All rights reserved. Reprinting only allowed with permission of the corporation. Any changes are subject to technical innovations. 14.11.2016 Working instructions WIDOS 4002 S WI CNC Page 3 of 103...
-
Page 4: Table Of Contents
Marking of the product ......................8 Technical data ........................8 1.4.1. 1.4.1.1. WIDOS 4002 S WI-CNC General data ................8 1.4.1.2. Basic machine ........................8 1.4.1.3. Heating element ....................... 9 1.4.1.4. Planer ..........................9 ... - Page 5 6.8. Disposal ..........................56 TRANSPORT ....................57 ® 7.1. 1.1 / 1.3 ........................57 WI-CNC 7.2. 4002 S CNC ..........................57 14.11.2016 Working instructions WIDOS 4002 S WI CNC Page 5 of 103...
- Page 6 3-zone heating element (variant) ....................93 9.6. Heating element holder ......................94 9.7. Beam for one-sided planing ..................... 95 DECLARATION OF CONFORMITY .............. 103 14.11.2016 Working instructions WIDOS 4002 S WI CNC Page 6 of 103...
-
Page 7: Description Of Product
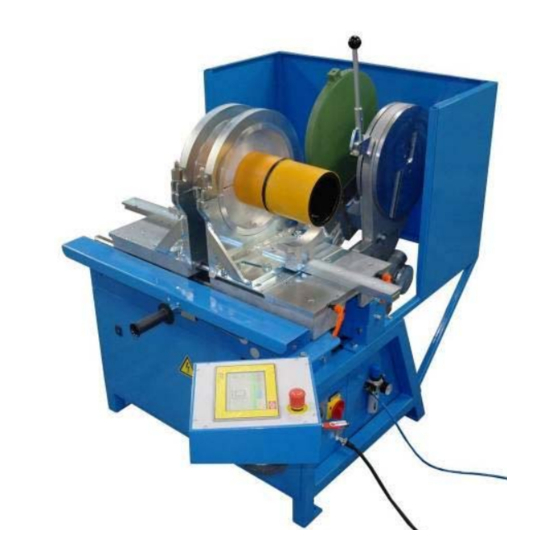
Usage and purpose-oriented use The WIDOS 4002 S WI-CNC is a workshop machine and especially designed for the heating element butt welding of plastic pipes and fittings from Ø = 90 up to 315 mm (Standard-: 90 / 110 / 125 / 140 / 160 / 180 / 200 / 225 / 250 / 280 / 315 mm). -
Page 8: Marking Of The Product
230 V ( 10 %) Amperage: 6,3 A Frequency: 50 Hz / 60 Hz Type of protection: IP 55 Engine revolution: 4000 (U/min) Driving torque: max. 8,2 Nm 14.11.2016 Working instructions WIDOS 4002 S WI CNC Page 8 of 103... -
Page 9: Heating Element
1 Allen key bent size 3; 6; 7; 8 Order numbers and singular components on request at the WIDOS company. The following optional accessories are available on request: - Program WICON for reading out the data (possibility of displaying included in USB stick) 14.11.2016... -
Page 10: Safety Rules
T h e a c c i d e n t p r e v e n t i o n m e a s u r e s a r e v a l i d ( U V V ) . 14.11.2016 Working instructions WIDOS 4002 S WI CNC Page 10 of 103... -
Page 11: Obligations Of The Owner
Only skilled and trained persons are allowed to work at the machine. A person who is being trained may only work at the machine under supervision of an experienced person. 14.11.2016 Working instructions WIDOS 4002 S WI CNC Page 11 of 103... -
Page 12: Maintenance And Inspection, Repair
2.8. Dangers while handling the machine The machine WIDOS 4002 S WI-CNC is constructed according to the latest technical standard and the acknowledged technical safety rules. However, dangers for the operator or other persons standing nearby may occur. Also material damages are possible. -
Page 13: Special Dangers
Lay the cables in such a manner that the danger is minimized. 2.11.5. Risk of injury by noise Noise exceeding 80 dB (A) may occur; during planing it is obligatory to wear ear protection! 14.11.2016 Working instructions WIDOS 4002 S WI CNC Page 13 of 103... -
Page 14: Warranty And Liability
Unsatisfactory inspection of machine parts which are subject to wearing. Unsatisfactory performed repairs. In case of catastrophes through action of an external body or actions of God. 14.11.2016 Working instructions WIDOS 4002 S WI CNC Page 14 of 103... -
Page 15: Description Of Process
The pipes are joined under prescribed welding pressure and then cool down under pressure (cooling time). The welded joint can be unclamped, the welding process is finished. Heating element heats the pipes up to welding temperature. welded pipe with internal and external bead 14.11.2016 Working instructions WIDOS 4002 S WI CNC Page 15 of 103... -
Page 16: Operating And Indicating Elements
Clamping tools WI CNC with emergency-stop and USB connection Heating element handle, here placed at the safety switch Swinging WI-CNC with emergency-stop and USB connection (NEW replacing no. 7) 14.11.2016 Working instructions WIDOS 4002 S WI CNC Page 16 of 103... -
Page 17: Elements On The Right Side
1 bar higher than the output pressure. Press the pressure setting button downwards (towards the housing) to secure it against unintentional turning. 14.11.16 Working instructions WIDOS 4002 S WI CNC Page 17 of 103... -
Page 18: Pneumatic Components On The Machine
Pneumatic valve for: heating element move out of machine QM21 Safety switch inactive Safety switch active (by heating element handle) Benennung Safety switch „release handle heating element“ BG21 14.11.16 Working instructions WIDOS 4002 S WI CNC Page 18 of 103... -
Page 19: Socket At The Machine (At The Front)
blinking: the temperature of the heating element is maintained by a pulse-position ratio. off: the desired temperature has been exceeded, the heating element is cooled automatically onto desired temperature, or the heating element is switched off. 14.11.16 Working instructions WIDOS 4002 S WI CNC Page 19 of 103... -
Page 20: Starting And Operating
5.2. Separating claws Separating claw (basic machine) Take care that the separating bracket of the heating element is swinging between both separating claws. Separating bracket (heating element) 14.11.2016 Working instructions WIDOS 4002 S WI CNC Page 20 of 103... -
Page 21: Description Of The Display
If the Emergency-Stop push button is pressed when the heating element is moved in, there is the danger of being burnt. The heating element cools down very slowly. 14.11.16 Working instructions WIDOS 4002 S WI CNC Page 21 of 103... -
Page 22: Buttons On The Touch Screen
Yes (green) Verifying on (black) Identify carriage automatically, Copy (option, with digital way measuring system) blank backwards Minus Manual driving together Next construction stage Check oil level Next 14.11.16 Working instructions WIDOS 4002 S WI CNC Page 22 of 103... -
Page 23: Large Symbol Buttons
Ramp, pressure built-up Check (black) Start Insert heating element Change-over Check heating temperature Check mismatch Pressure build-up – please check if Turn planer pipes are slipping through Insert planer 14.11.16 Working instructions WIDOS 4002 S WI CNC Page 23 of 103... -
Page 24: Accessories For Reading Data In And Out (Option)
The card can be read out with a WICON program. The card may not be bent, opened, overheated and become wet! Please only use SD cards purchased from WIDOS. We will not be liable for any cards from other manufacturers! 14.11.16... -
Page 25: Read Out Wicon With Usb Flash Drive
PC. As soon as the USB flash drive has been plugged, it appears as removable medium in the drive list. Open the WIDOS folder, there you will find: - WICON2000 viewer for considering and printing the welding data, - working instructions for WICON2000 viewer as PDF file. -
Page 26: Switching The Wi - Cnc
Press: < > and enter the 4-digit identifying information with the keypad. Press < > afterwards. Enter bar code with the keypad. Confirm bar code with: < >. 14.11.16 Working instructions WIDOS 4002 S WI CNC Page 26 of 103... -
Page 27: Select Machine Type With Digital Way-Measuring Device
>. 5.6.1. Select machine type with digital way-measuring device Indication: current software version, Indication: serial number Indication: validity until next maintenance Press < >, the machine identifies automatically. 14.11.16 Working instructions WIDOS 4002 S WI CNC Page 27 of 103... - Page 28 Confirm the selected machine type with: < >. Indication: currently connected machine type Indication: free memory space in RAM / on USB device Indication: user name 14.11.16 Working instructions WIDOS 4002 S WI CNC Page 28 of 103...
-
Page 29: Define Dimension
Image only appears if you press < >: Scroll the text with <>, it is explained on the screen. Press < > in order to exit the help menu 14.11.16 Working instructions WIDOS 4002 S WI CNC Page 29 of 103... - Page 30 Confirm welding standard with < >. No = < >; Yes = < >; Either: Confirm selected welding standard with < >. Press and select another welding standard. < > 14.11.16 Working instructions WIDOS 4002 S WI CNC Page 30 of 103...
-
Page 31: Specialties For Welding Standard >Lab
>, the current SDR value appears automatically. Select temperature with < >. Select welding method with < >: DVS / NEN / LAB you want to weld with. Confirm settings with < >. 14.11.16 Working instructions WIDOS 4002 S WI CNC Page 31 of 103... - Page 32 You may change the material name by adapting the entry via keypad. You may confirm it with < > afterwards. Indication: change parameters By tapping on each parameter you may change each one especially as you wish. 14.11.16 Working instructions WIDOS 4002 S WI CNC Page 32 of 103...
- Page 33 Select heat-up time with < >. Select heat-up pressure with < >. Confirm settings with < >. Indication: change parameters (change-over) Select change-over time with < >. Confirm settings with < >. 14.11.16 Working instructions WIDOS 4002 S WI CNC Page 33 of 103...
- Page 34 Confirm settings with < >. Indication: change parameters (cooling 2) Select cooling time 2 with < >. Select cooling pressure 2 with < >. Confirm settings with < >. 14.11.16 Working instructions WIDOS 4002 S WI CNC Page 34 of 103...
-
Page 35: How To Enter Further Settings Like Traceability, ½ Cooling Time Or Ram > Usb
> in order to copy all existing weldings from RAM to the connected device at the USB interface. Either: Exit further settings with < >. Enter diagnosis menu with < >. Press < > for further settings: time, date and buzzer. 14.11.16 Working instructions WIDOS 4002 S WI CNC Page 35 of 103... -
Page 36: How To Set Date, Time, Buzzer And Language
> in order to set time and date. Indication: date and time Set day, month and year as well as hour and minute with < >. Confirm it with < >. 14.11.16 Working instructions WIDOS 4002 S WI CNC Page 36 of 103... - Page 37 Indication: different languages, by selecting the language it is highlighted Confirm it with < >. Basic menu: Indication: current machine type Indication: current date and time Indication: user name 14.11.16 Working instructions WIDOS 4002 S WI CNC Page 37 of 103...
-
Page 38: Welding With The Wi-Cnc 1.1 - 1.3
>. In case you have not driven the basic machine into initial position while activating it, the following error message appears: Confirm the error message with < >. 14.11.16 Working instructions WIDOS 4002 S WI CNC Page 38 of 103... - Page 39 Indication: current dimensions Check dimensions if they match the pipes. Confirm settings with < >. Indication: current dimensions Check dimensions if they match the pipes. Confirm settings with < >. 14.11.16 Working instructions WIDOS 4002 S WI CNC Page 39 of 103...
- Page 40 You may change the weld number with the keypad, the next welding is counted forward automatically. Confirm weld number with < >. 14.11.16 Working instructions WIDOS 4002 S WI CNC Page 40 of 103...
- Page 41 Indication: pipe dimension, time + outside temperature (optional) Indication: nominal temperature (orange) and current temperature (red) You may drive the carriage apart and together with < >. Press < > (flashing). 14.11.16 Working instructions WIDOS 4002 S WI CNC Page 41 of 103...
- Page 42 Indication: pipe dimension, time + outside temperature (optional) Indication: nominal pressure: ps, drag pressure: p0, current pressure: pi and current temperature Press < > in order to start drag pressure measuring. 14.11.16 Working instructions WIDOS 4002 S WI CNC Page 42 of 103...
- Page 43 Indication: pipe dimension, time + outside temperature (optional) Indication: nominal pressure: ps, drag pressure: p0, current pressure: pi and current temperature Press < > in order to start drag pressure measuring. 14.11.16 Working instructions WIDOS 4002 S WI CNC Page 43 of 103...
- Page 44 Indication: nominal pressure: ps, drag pressure: p0, current pressure: pi and current temperature Cut pipes ends until a circular chip has formed running around the pipes and < > is flashing. Then release < >. 14.11.16 Working instructions WIDOS 4002 S WI CNC Page 44 of 103...
- Page 45 In case mismatch is not correct, you can compensate it by changing the clamping of the pipes; afterwards necessarily repeat planing with: < >. In case mismatch is correct, you may: Either: Continue welding with < >, 14.11.16 Working instructions WIDOS 4002 S WI CNC Page 45 of 103...
- Page 46 Indication: pipe dimension, time + outside temperature (optional) Indication: nominal pressure: ps, drag pressure: p0, current pressure: pi and current temperature Insert the heating element into the machine and confirm it with < >. 14.11.16 Working instructions WIDOS 4002 S WI CNC Page 46 of 103...
- Page 47 Indication: elapsed change-over [s] The machine drives apart. Either: You remove the heating element from the machine during change-over putting it back into the reception box. 14.11.16 Working instructions WIDOS 4002 S WI CNC Page 47 of 103...
- Page 48 Indication: elapsed cooling [s] Indication: pipe dimension, time + outside temperature (optional) Indication: nominal pressure: ps, drag pressure: p0, current pressure: pi and current temperature Indication: elapsed cooling 2 [min] 14.11.16 Working instructions WIDOS 4002 S WI CNC Page 48 of 103...
- Page 49 Indication: welding parameters ok Release the clamping rings and remove the welded pipe from the basic machine. Confirm removal of the welded pipe with < >. 14.11.16 Working instructions WIDOS 4002 S WI CNC Page 49 of 103...
-
Page 50: Copy Internal Data Onto Sd Card And Delete Internal Data (Ram)
Indication: current dimensions Press < > for further settings. Press < > in order to copy all existing weldings from the RAM onto the connected device at the USB interface. 14.11.16 Working instructions WIDOS 4002 S WI CNC Page 50 of 103... - Page 51 >. No = < >; Yes = < > Either: Press < > and delete the RAM memory. Press < > and do not delete the RAM memory. 14.11.16 Working instructions WIDOS 4002 S WI CNC Page 51 of 103...
-
Page 52: Setting The Welding Angle
The optional available T-piece clamping tools are screwed on with the corresponding adapter plates just as the clamping tools that belong to the standard equipment. Heating element Planer T–piece tools 14.11.16 Working instructions WIDOS 4002 S WI CNC Page 52 of 103... -
Page 53: Drillings At The Table
Pivot for clamping tool displaced Pivot for clamping tool Fixing hole Fixing hole for clamping tool displaced Moving direction Inner edge left table Angle marking Angle marking for clamping tool displaced 14.11.16 Working instructions WIDOS 4002 S WI CNC Page 53 of 103... -
Page 54: Equipment Care / Maintenance / Repair
Validity of the current maintenance will be indicated on the screen after activation: The work should be performed at the WIDOS GmbH company or by an authorized partner. The operating staff has to be informed before the starting of the maintenance work. -
Page 55: Fuses In The Switch Cabinet
1 safty switch: release handle heating element (BG21) 1 end switch: reference point table (BG111) Check end switch and safety switch regularly for correct functioning (and optionally for being soiled). 14.11.2016 Working instructions WIDOS 4002 S WI CNC Page 55 of 103... -
Page 56: Clamping Elements
At the end of their life time, the apparatus and the wear parts have to be disposed of properly and non-polluting, and in accordance with the national laws of waste disposal. 14.11.2016 Working instructions WIDOS 4002 S WI CNC Page 56 of 103... -
Page 57: Transport
The transport of the WI-CNC 1.1 / 1.3 is carried out: Either: in a transport box together with a WIDOS welding machine. in a separate transport box. The transport box is more suitable for longer transports thanks to their compact design. -
Page 58: Electric And Pneumatic Diagrams
+49 71 52 99 39 0 Wilhelm Dommer Söhne D-71254 Ditzingen +49 71 52 99 39 40 GmbH E-Mail: info @ widos.de Internet: www.widos.de Electric and pneumatic diagrams 8.1. Pneumatic diagram 14.11.2016 Working instructions WIDOS 4002 S WI CNC Page 58 of 103... -
Page 59: Electric Diagrams For 4002 S Wi-Cnc
Spare parts list Chapter 9 ® 8.2. Electric diagrams for 4002 S WI-CNC 14.11.2016 Working instructions WIDOS 4002 S WI CNC Page 59 of 103... - Page 60 Spare parts list Chapter 9 14.11.2016 Working instructions WIDOS 4002 S WI CNC Page 60 of 103...
- Page 61 Spare parts list Chapter 9 14.11.2016 Working instructions WIDOS 4002 S WI CNC Page 61 of 103...
- Page 62 Spare parts list Chapter 9 14.11.2016 Working instructions WIDOS 4002 S WI CNC Page 62 of 103...
- Page 63 Spare parts list Chapter 9 14.11.2016 Working instructions WIDOS 4002 S WI CNC Page 63 of 103...
- Page 64 Spare parts list Chapter 9 14.11.2016 Working instructions WIDOS 4002 S WI CNC Page 64 of 103...
- Page 65 Spare parts list Chapter 9 14.11.2016 Working instructions WIDOS 4002 S WI CNC Page 65 of 103...
- Page 66 Spare parts list Chapter 9 14.11.2016 Working instructions WIDOS 4002 S WI CNC Page 66 of 103...
- Page 67 Spare parts list Chapter 9 14.11.2016 Working instructions WIDOS 4002 S WI CNC Page 67 of 103...
- Page 68 Spare parts list Chapter 9 14.11.2016 Working instructions WIDOS 4002 S WI CNC Page 68 of 103...
- Page 69 Spare parts list Chapter 9 14.11.2016 Working instructions WIDOS 4002 S WI CNC Page 69 of 103...
- Page 70 Spare parts list Chapter 9 14.11.2016 Working instructions WIDOS 4002 S WI CNC Page 70 of 103...
- Page 71 Spare parts list Chapter 9 14.11.2016 Working instructions WIDOS 4002 S WI CNC Page 71 of 103...
- Page 72 Spare parts list Chapter 9 14.11.2016 Working instructions WIDOS 4002 S WI CNC Page 72 of 103...
- Page 73 Spare parts list Chapter 9 14.11.2016 Working instructions WIDOS 4002 S WI CNC Page 73 of 103...
- Page 74 Spare parts list Chapter 9 14.11.2016 Working instructions WIDOS 4002 S WI CNC Page 74 of 103...
- Page 75 Spare parts list Chapter 9 14.11.2016 Working instructions WIDOS 4002 S WI CNC Page 75 of 103...
- Page 76 Spare parts list Chapter 9 14.11.2016 Working instructions WIDOS 4002 S WI CNC Page 76 of 103...
- Page 77 Spare parts list Chapter 9 14.11.2016 Working instructions WIDOS 4002 S WI CNC Page 77 of 103...
- Page 78 Spare parts list Chapter 9 14.11.2016 Working instructions WIDOS 4002 S WI CNC Page 78 of 103...
- Page 79 Spare parts list Chapter 9 14.11.2016 Working instructions WIDOS 4002 S WI CNC Page 79 of 103...
- Page 80 Spare parts list Chapter 9 14.11.2016 Working instructions WIDOS 4002 S WI CNC Page 80 of 103...
- Page 81 Spare parts list Chapter 9 14.11.2016 Working instructions WIDOS 4002 S WI CNC Page 81 of 103...
- Page 82 Spare parts list Chapter 9 14.11.2016 Working instructions WIDOS 4002 S WI CNC Page 82 of 103...
- Page 83 Spare parts list Chapter 9 14.11.2016 Working instructions WIDOS 4002 S WI CNC Page 83 of 103...
- Page 84 Spare parts list Chapter 9 14.11.2016 Working instructions WIDOS 4002 S WI CNC Page 84 of 103...
-
Page 85: Spare Parts List
26 - 27 28 - 30 48 - 50 32 - 37 51 - 53 38 - 39 54 - 56 57 - 58 41 - 44 60 - 62 14.11.2016 Working instructions WIDOS 4002 S WI CNC Page 85 of 103... - Page 86 (Bottom side right carriage) 79 - 80 75 - 78 (Bottom side right carriage, side view) 85 - 87 83 - 84 89 - 91 92 - 93 14.11.2016 Working instructions WIDOS 4002 S WI CNC Page 86 of 103...
- Page 87 Spare parts list Chapter 9 94 - 95 96 - 97 14.11.2016 Working instructions WIDOS 4002 S WI CNC Page 87 of 103...
- Page 88 Spare parts list Chapter 9 (Basic machine rear view) 101 - 102 14.11.2016 Working instructions WIDOS 4002 S WI CNC Page 88 of 103...
- Page 89 Spare parts list Chapter 9 WIDOS 4002 S WI CNC Basic unit Pos. Name Piece Order no. Frontal girder 023102 Rivet nut M 10 N1002 Rear girder 023104 Rivet nut M 10 N1002 Angle 023103 Pan-head screw M 10x25 DIN 912...
- Page 90 Spare parts list Chapter 9 WIDOS 4002 S WI CNC Basic unit Pos. Name Piece Order no. Pan-head screw M 5x16 DIN 912 0912E016 Parallel pin M 5x18 DIN 6325 6325E018 Chips skirtboard for ball screw 172123 Pan-head screw M6x12 DIN 912...
- Page 91 Spare parts list Chapter 9 WIDOS 4002 S WI CNC Basic unit Pos. Name Piece Order no. Gear wheel for motor 30 L 100-6F on request Sprocket belt 173L on request Hlder for servo motor 172125 Cylinder pin 10 M6 x 20 DIN 7...
-
Page 92: Clamping Tool
Spare parts list Chapter 9 9.2. Clamping tool 4 - 5 8 - 9 17 - 18 19 - 20 14.11.2016 Working instructions WIDOS 4002 S WI CNC Page 90 of 103... - Page 93 Spare parts list Chapter 9 WIDOS 4002 S WI CNC Clamping tools Pos. Name Piece Order no. Center pin 020117 Supporting angle (option) 023712 Pipe support 1 Set 0206...* Clamping lever M 12/30° BM1230 Insert nut 023713 Pipe support 020711...
-
Page 94: Planer
Spare parts list Chapter 9 9.3. Planer 1 - 3 19 - 21 4 - 7 8 - 16 25 - 30 31 - 32 14.11.2016 Working instructions WIDOS 4002 S WI CNC Page 92 of 103... - Page 95 Spare parts list Chapter 9 35 - 39 42 - 44 47 - 48 14.11.2016 Working instructions WIDOS 4002 S WI CNC Page 93 of 103...
- Page 96 Pan-head screw M6x20 DIN 912 0912F020 Mounting plate 024405 Washer M10 DIN 9021 9021J Bolt for retaining plate 024404 Cylinder-head screw M10x25 DIN 912 0912J025 Retaining plate whith hole 024402 14.11.2016 Working Instructions WIDOS 4002 S WI CNC Page 94 / 1 of 103...
- Page 97 Spare parts list Chapter 9 Retaining plate whith thread 024401 Pan-head screw M10x55 DIN 912 0912J055 Washer M10 DIN 125 0125J 14.11.2016 Working Instructions WIDOS 4002 S WI CNC Page 94 / 2 of 103...
-
Page 98: Heating Element
Spare parts list Chapter 9 9.4. Heating element 2 - 5 11 - 12 13 - 14 19 - 25 14.11.2016 Working instructions WIDOS 4002 S WI CNC Page 95 of 103... - Page 99 Spare parts list Chapter 9 WIDOS 4002 S WI CNC Heating element Pos. Name Piece Order no. Heating element H 4002, 230 V H4002E Heating plate new HP4002E Heating plate in exchange HPT4002E Pan-head screw M 5x25 DIN 912 0912E025...
-
Page 100: 3-Zone Heating Element (Variant)
3-zone heating element (variant) (Refitting requires reconstruction at the machine) 13 - 15 2 - 4 16 - 17 6 - 9 23 - 24 25 - 26 27 - 28 14.11.2016 Working instructions WIDOS 4002 S WI CNC Page 97 of 103... - Page 101 Spare parts list Chapter 9 WIDOS 4002 S WI CNC Three-zone-heating element (alternative) Pos. Stück Art.-Nr. Three-zone heating element H 4002, 230 V H4002Z3 Three-zone heating plate new HP4002Z3 Three-zone heating plate in exchange HPT4002Z3 Heating cartridge Ø 10x130 - 315W H1701 Heating cartridge Ø...
-
Page 102: Heating Element Holder
Spare parts list Chapter 9 9.6. Heating element holder 2 - 3 5 -6 16 - 17 7 - 8 18 - 19 20 - 22 25 - 26 14.11.2016 Working instructions WIDOS 4002 S WI CNC Page 99 of 103... - Page 103 Spare parts list Chapter 9 WIDOS 4002 S WI CNC Heating element holder Pos. Name Piece Order no. Tear off shackle 172504 Hexagon-head screw M8x20 DIN 934 0934 H020 Washer M8 DIN 125 Washer M8 DIN 125 0125H 0125H Retaining plate whith thread...
-
Page 104: Beam For One-Sided Planing
Spare parts list Chapter 9 9.7. Beam for one-sided planing 3 / 4 14.11.2016 Working instructions WIDOS 4002 S WI CNC Page 101 of 103... - Page 105 Spare parts list Chapter 9 WIDOS 4002 S WI CNC Planer girder for planing only at one side Pos. Name Piece Order no. Centering bolt 023418 Bearing L51103 Plane girder for planing only at one side 023427 Protective cap (25x25x3)
-
Page 106: Declaration Of Conformity
Safety of equipments of the information technology The technical documentation is completely available. The working instructions is available in the user’s language. Ditzingen, 14/11/2016 Martin Dommer (Technical director) 14.11.2016 Working instructions WIDOS 4002 S WI CNC Page 103 of 103...
Need help?
Do you have a question about the 4002 S WI CNC and is the answer not in the manual?
Questions and answers