Table of Contents
Advertisement
Advertisement
Table of Contents

Related Manuals for Össur i-limb hand Series


Summary of Contents for Össur i-limb hand Series
- Page 1 i-limb hand ® Clinician Manual...
- Page 2 i-limb hand clinician manual ® This document provides instruction for prosthetists in the fitting and servicing of the i-limb hand and ® should be read in full prior to fitting. It is highly recommended that the use of this manual is made in con- junction with instruction from a clinician experienced in upper limb and myoelectric prostheses.
-
Page 3: Table Of Contents
1.0 i-limb ® hand range overview 1.1 Features comparison 1.2 Control Options 2.0 Prosthesis fabrication 2.1 Socket materials 2.2 Electrodes 2.3 Batteries 2.4 Charge port 3.0 Prosthesis Assembly 3.1 Quick wrist disconnect assembly 3.2 Wrist disarticulation assembly 4.0 Battery Charging 4.1 Magnetic Charge Port 4.2 Switch block or DC charge port 4.3 External Battery... -
Page 4: I-Limb ® Hand Range Overview
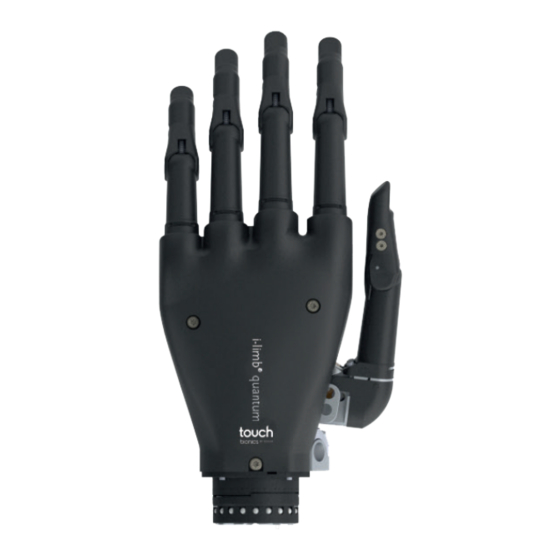
i-limb hand range overview ® Features comparison Touch Bionics i-limb ® hand range offers multi-articulat- ing technology with many benefits, including: • Individually motorized digits • Thumb rotation: powered/manual • Conformable grip • vari-grip ® feature to apply more force when desired •... -
Page 5: Control Options
There are 4 hands available in the i-limb range: ® Features comparison i-limb quantum i-limb revolution i-limb ultra i-limb access ® ® ® ® Control options - Gesture control - App control - Muscle control ... - Page 6 Gesture control Enables an automated grip to be accessed through a smooth motion of the prosthesis in one of four directions (forward, back, left or right). The grips programmed for each direction are customized to the users requirements using the biosim and my i-limb app.
-
Page 7: Prosthesis Fabrication
Prosthesis fabrication The i-limb hand is assembled in combination with a socket made to the requirements of the individual user. When fabricating the prosthesis for the i-limb hand ® consideration should be given to: a. Electrode positioning b. Battery placement, size and configuration c. -
Page 8: Electrodes
Electrodes When myotesting it is advisable to use the same elec- trode type as will be used in the users definitive pros- thesis. The electrode should be fitted into the socket in the op- timum position identified during myotesting. The elec- trode must remain in contact with the skin throughout the users range of motion, during use of the prosthesis. -
Page 9: Batteries
Batteries Touch Bionics batteries, magnetic charge port, DC port or switch block components should always be used with the i-limb ® hand. The battery should be changed every 12 months. Do not bend or shape the battery in any way. Only Touch Bionics batteries are ap- proved for use with the i-limb hand. -
Page 10: Charge Port
Magnetic charge port It is important to provide sufficient space for the charge port between the inner and outer sockets. When fabricating the outer socket the magnetic charger fabrication dummy should be used. The dummy is in 3 parts: Dummy 1: is the thickest dummy. It is used to ensure sufficient clearance within the outer socket/frame for the Dummy 1 Dummy 2... -
Page 11: Prosthesis Assembly
Prosthesis Assembly Quick wrist disconnect assembly Insert the coaxial plug into the coupling piece and secure in position using the small ‘O’ ring. Insert the coupling piece into the lamination ring and turn until seated. Insert the coupling piece ‘O’ ring and use the Quick wrist disconnect (QWD) release tool to secure in position. -
Page 12: Wrist Disarticulation Assembly
Wrist disarticulation assembly During fabrication consideration should be given to cre- ate sufficient space for the wiring and switch block and battery location. The lamination plate is fabricated directly into the outer socket. No rotation is possible at the wrist and therefore the fixed positioned should be set to be optimal for the user. - Page 13 Fig. 15: Switch block connector 13 of 27...
-
Page 14: Battery Charging
Battery Charging To charge the prosthesis it should be removed from the residual limb and turned off. The on/off switch is pic- tured. i-limb hand is off when switch is in left position. ® Note: A fully charged device can be employed for 16hours depending on its use. -
Page 15: Switch Block Or Dc Charge Port
Charging the battery Plug the mains charger into the mains socket. Attach the magnetic charger to the charger port on the prosthesis. When in standby, the charger unit will display a faint green light. When charging is in progress, a red light is displayed. When fully charged a green light is displayed. -
Page 16: External Battery
A car charger is also available. To remove the charger lead connector from the i-limb ® hand, grip the connector and pull directly away from the port. Consult Warnings and Precautions for additional information. If you intend to travel outside of your home country you will need to ensure that you have a Touch Bionics charger that will work in the country to which you are traveling. -
Page 17: Coverings
Coverings Covering options Coverings are an important part of the appearance and durability of the i-limb hand. The i-limb should not be ® ® used without an approved cover. Covering options for i-limb ® hands include: i-limb skin active ® Fig. -
Page 18: Covering Don/Doff
Covering don/doff To don/doff i-limb ® hand coverings the position shown in the image should be adopted and the hand switched off. The quick grip don/doff can also be used to achieve this position. Donning the i-limb skin active, i-limb skin contour ®... -
Page 19: Cleaning
8. Inspect the covering for bunching and ensure the covering tips are fully fitted against the digit tips. 9. Check the function of the i-limb hand and ensure ® full opening and closing is possible and the digit tips align. Doffing for all covering types 1. -
Page 20: Maintenance
Maintenance The following maintenance can be carried out by a cer- tified clinician. For annual service and repair the i-limb hand should be returned to touch bionics, for your local office see address at back of this manual. Digit installation i-limb ®... - Page 21 For small, medium and large hands: To replace the thumb on all other sized hands use a T10 screwdriver and follow these steps 1. Rotate the thumb to the lateral position 2. Remove palmar fairing 3. Access thumb screw from medial to lateral direction 4.
-
Page 22: Troubleshooting
Troubleshooting Issue Action Hand does not operate Ensure the hand is switched on Ensure the battery is charged and connected properly Ensure the hand is fully engaged at the wrist Check the electrodes have good contact with the skin Check the electrode cable is correctly fitted to the electrode One digit does not operate Run hand health check on biosim ®... -
Page 23: Appendix
Appendix Usage, safety, warnings and precautions The i-limb ® hand is intended to be used by individuals with upper limb loss or deficiency. The i-limb hand should be serviced annually by touch ® bionics. The hand serial number consists of a letter followed by four numbers. -
Page 24: I-Limb ® Hand Information
Use of this equipment adjacent to or stacked with other equipment should be avoided because it could result in improper operation. If such use is necessary, this equipment and the other equipment should be ob- served to verify that they are operating normally. Use of accessories, transducers and cables other than those specified or provided by the manufacturer of this equipment could result in increased electromagnetic... -
Page 25: Technical Information
Technical Information i-limb hand ® Voltage range 6 -8.4 V Max. Current Battery Capacity Rechargeable lithium polymer 7.4 V (nominal); 2,000 mAh capacity; 1,300 mAh capacity Max hand load limit (static limit) 40 kg/88 lbs (Extra Small) 90 kg/198 lbs (Small/Medium/Large) Finger Carry Load (static limit) 20 kg/44 lbs (Extra Small) 32 kg/71 Ibs (Small/Medium/Large) - Page 26 Consult instructions for use Class II equipment – provides double Isolation to protect against electric shock European Conformity Serial Number The unique serial number for i-limb quantum devices is a “M” ® with a 6 digit alpha / numeric number. The unique serial number for i-limb revolution devices is a “R”...
- Page 27 Össur Americas Össur Nordic Össur Europe BV – Italy 27051 Towne Centre Drive P.O. Box 67 Via Baroaldi, 29 Foothill Ranch, CA 92610, USA 751 03 Uppsala, Sweden 40054 Budrio, Italy Tel: +1 (949) 382 3883 Tel: +46 1818 2200 Tel: +39 05169 20852 Tel: +1 800 233 6263 Fax: +46 1818 2218...
Need help?
Do you have a question about the i-limb hand Series and is the answer not in the manual?
Questions and answers