Confer Plastics ROLLGUARD 7200 Assembly, Installation And Use Manual
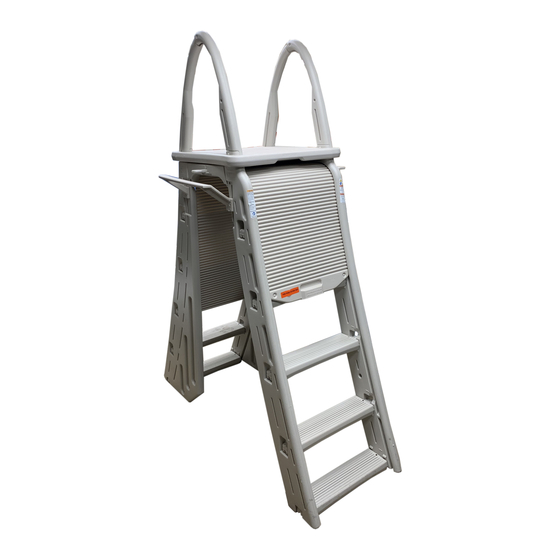
A-frame ladder
Hide thumbs
Also See for ROLLGUARD 7200:
- Assembly and installation manual (9 pages) ,
- Assembly and installation manual (8 pages) ,
- Assembly, installation and use manual (16 pages)
Advertisement
Quick Links
Dealer/Installer: Give manual to homeowner.
Installer: Read "Safe Installation" on page # 2 and all instructions before beginning. For proper assembly and
installation, instructions must be followed completely.
Homeowner: Read "Safe Use" on back cover before using. Save these instructions.
Installation must comply with local codes and may require permits.
"ROLLGUARD
Ladder must be attached to pool frame -
ASSEMBLY, INSTALLATION AND USE MANUAL
Assembly video available online: www.conferplastics.com
To reduce the risk of drowning, entrapment, falls, paralysis, electrocution, or
other serious injury or death:
MODEL #7200
" A-FRAME LADDER
®
Adjusts to fit pools 48" to 54"
do not use with inflatable pools.
WEIGHT LIMIT 300 LBS.
Proudly Made in U.S.A. by
US Patent Numbers
8,191,682
8,191,681
8,202,018
Advertisement

Related Manuals for Confer Plastics ROLLGUARD 7200


Summary of Contents for Confer Plastics ROLLGUARD 7200
- Page 1 To reduce the risk of drowning, entrapment, falls, paralysis, electrocution, or other serious injury or death: Dealer/Installer: Give manual to homeowner. Installer: Read "Safe Installation" on page # 2 and all instructions before beginning. For proper assembly and installation, instructions must be followed completely. Homeowner: Read "Safe Use"...
- Page 2 Model #7200 “ROLLGUARD ” A-FRAME LADDER ® Ladder must be attached to pool frame - DO NOT USE with inflatable pools If missing parts call - Toll free U.S./Canada - 800-635-3213 or www.conferladders.com Parts List 4 - Handrail 1 - ROLLGUARD ®...
- Page 3 STEP 1: Tools needed: rubber mallet Parts needed: 1- Inside left rail (marked “IL” at the top) 1- Inside right rail (marked “IR” at the top) INSIDE LADDER 4- Ladder treads #2: Correct, tap down #1: Lay “IL” rail on flat surface. Incorrect, do not until seated, note track is block track.
- Page 4 STEP 2: Tools needed: rubber mallet Parts needed: 1- Outside left rail (marked “OL” at the top) 1- Outside right rail (marked “OR” at the top) OUTSIDE LADDER 5- Ladder treads #2: Correct, tap down #1: Lay “OL” rail on flat surface. Incorrect, do not until seated, note track is block track.
- Page 5 Tools needed: rubber mallet, cordless drill w/Phillips driver STEP 3: Parts needed: 1- Deck 4- Handrails 1- Left bridge with lock assembly HANDRAILS/DECK 1- Right bridge 2- #10 x 1-1/4” self tapping screws 2- 1/4 - 20 x 1” machine screws 2- 1/4 - 20 Hex Nuts #1-3: Push handrails up through bottom of deck leaving about 3”...
- Page 6 STEP 4: Tools needed: rubber mallet Parts needed: 1- ROLLGUARD ® 1- Ladder tread INSTALLING ROLLGUARD ® #1: With the ladder laying on #2-6: Slide ROLLGUARD around to other side of ladder. ® its side, slide the ROLLGUARD ® into track, grab handle first. #7-8: Install bottom tread.
- Page 7 Tools needed: garden hose, cordless drill w/Phillips driver 5/16” drill bit, Phillips screwdriver, pliers STEP 5: Parts needed: 4- cap plugs 2- Stabilizer Rails PLACING LADDER IN POOL 2- 1/4-20 x 3-1/2” machine screw, washers and hex nuts 1- Padlock Fill rails with water using garden hose WARNING!
-
Page 8: Maintenance: Winterizing
To reinstall, see installation instructions Step 5: Placing ladder in pool. CONFER PLASTICS INC. FIVE YEAR WARRANTY Confer Plastics Inc. warrants their swimming pool ladders and steps to be free from defects in workmanship for five years from date of purchase.
Need help?
Do you have a question about the ROLLGUARD 7200 and is the answer not in the manual?
Questions and answers