Advertisement
TM-074 Digital Photocell Timer Instruction Sheet
Before initial use, please plug your time for at least 30 minutes to charge the internal battery. After the LCD
display appears, your unit will be ready for programming.
A. Reset:
Press the "RESET" button to reset your timer. This will clear all programmed setting.
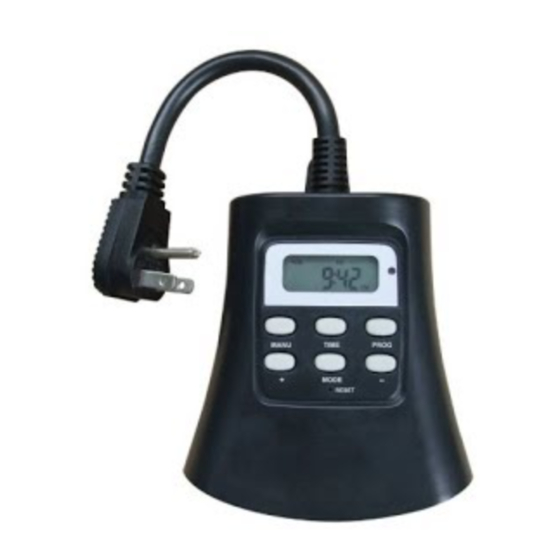
B. LCD Layout:
C. Button Layout:
Reset
1. MODE - Manual Override, Scroll between different modes options
2. Time - Press and hold for three seconds to set current time.
3. PROG - Press and hold for three seconds to begin setting function.
4.
- Setting confirms and clear setting.
5. < + > - To increase time and day setting.
6. < - > - To reduce time and day setting.
7. RESET - Reset all the functions.
D. Set Current Time:
1. Press and hold "TIME" button for 2 seconds to enter the current time settings, press "+" or "-" button
to set the correct day.
2. Press the "SET" button to enter the hour setting. Press "+" or "-" buttons to set the current hour. Be
sure that AM or PM appears correctly.
3. Press the "SET" button to enter the minute setting, Press the "+" or "-" buttons to set the current
minute.
4. Press the "SET" button to finish setting the current time and return to normal display.
5. While setting those processes above, press and hold "SET" button can clear the setting and back to the
original timer settings. While setting those processes above, press "TIME" button or wait for 15 seconds
to back the standby display.
Advertisement
Table of Contents

Related Manuals for Defiant TM-074


Summary of Contents for Defiant TM-074
- Page 1 TM-074 Digital Photocell Timer Instruction Sheet Before initial use, please plug your time for at least 30 minutes to charge the internal battery. After the LCD display appears, your unit will be ready for programming. A. Reset: Press the “RESET” button to reset your timer. This will clear all programmed setting.
- Page 2 E. MODE Setting: Press “MODE” button to choose the desired mode. ONOFFRDM TimerAUTO TimerAUTO CDSAUTO CDS + TIMER as following listed. Display Illustration Mode Explanation Remark Always on The outputs remain always on. Always off The outputs remain always off Security Up to 5 on/off events every feature.
- Page 3 Once complete the programs settings, press “TIME” button or wait for 15 seconds to restore your programs to back the standby display. G. Photocell Setting: Press “MODE” button to select the photocell function. Turn on the power at Dusk and turn off the power at Dawn automatically.
Need help?
Do you have a question about the TM-074 and is the answer not in the manual?
Questions and answers