
Related Manuals for Konica Minolta SRX-101A


Summary of Contents for Konica Minolta SRX-101A
- Page 1 SERVICE MANUAL MEDICAL FILM PROCESSOR MODEL SRX-101A SERVICE MANUAL (NEW CPU BOARD) 1051/1052/1069, #20001~ SERVICE MANUAL (OLD CPU BOARD) 1051/1052/1069, ~#20000...
- Page 2 MODEL SRX-101A SERVICE MANUAL CODE NO. 1051 CODE NO. 1052 CODE NO. 1069 4TH EDITION MAY 2004 No. 26-2, Nishishinjuku 1-chome, Shinjuku-ku, Tokyo 163-0512, Japan...
-
Page 4: Table Of Contents
15. Changing Processing Conditions ..................126 16. SRX-101A Customer Presentation Guide................ 127 17. SRX-101A Light Shield Installation Manual ..............133 18. Installation Procedure ....................... 135 This Service Manual is prepared for the service of SRX-101A classified as follows; Product Code Serial No. 1051... -
Page 6: Precautions
PRECAUTIONS PRECAUTIONS Before shipment from the factory, the procedure has already been inspected according to local safety regulations. However, the following precautions must be taken when servicing this equipment. (1) Before servicing, disconnect the automatic processor's power plug from is AC outlet. If it is absolutely necessary to repair the processor while the power is on, be sure to take precautions to avoid electrical shock and keep your fingers away from rollers, gears and other moving parts. -
Page 7: Caution Labels
CAUTION LABEL CAUTION LABELS 1. EXPLANATION OF CAUTION LABELS Caution labels imply the degree of the risk which may arise from incorrect use of this product. There are 3 degrees of caution labels, and each is used depending on the level of risk and damage caused by incorrect use and mishandling. - Page 8 SERVICE MANUAL...
-
Page 9: Specifications
Remarks for UL Version : Medical film processor SRX-101A is produced in factories that have been certified to be in compliance with the IS09001 : 2000, and IS013485 : 2001 quality control standards, as well as with the medical device directive FDA Premarket Notification 510(k) and GMP. -
Page 10: Dimensions
DIMENSIONS 2. Dimensions 2-1. Main Unit and Support Main Unit Support (Optional) 2-2. 25 Liter Replenisher Tank (Standard Equipment) SERVICE MANUAL... -
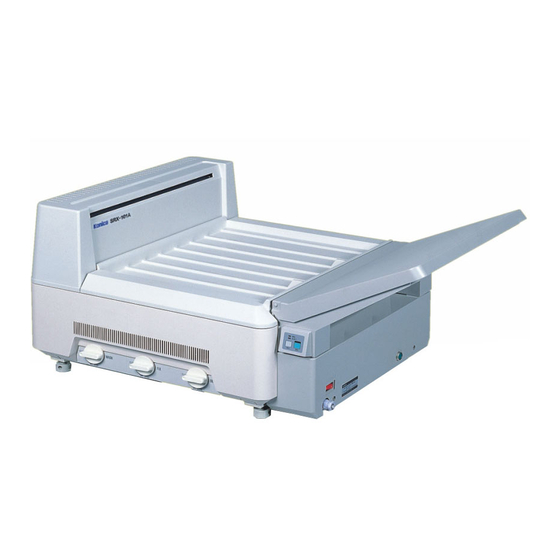
Page 11: Name Of Parts
NAME OF PARTS 3. Name of Parts 3-1. Main Unit (Front View) Film Exit Right Side Panel Power Breaker Electrical Components Housing Power Cord Overflow Drainage Hose Developer Drainage Hose (yellow) Wash Water Drainage Hose Developer Supply Hose (larger diameter than other hoses) Binding Tape (yellow) Fixer Drainage Hose... - Page 12 Lights up when the [RUN] SW is pressed. Will automatically go out if RUN SW Lamp no film has been inserted for 8 hours Indicates that the SRX-101A is after the "READY" LAMP lamp went electrically powered. on. Will light up again when the [RUN] SW is pressed.
- Page 13 NAME OF PARTS "RUN" and "READY" LAMP Lamps ON-OFF Patterns Different ON-OFF patterns shown by the "RUN" and "READY" lamps on the control panel indicate different operating conditions. The following is a listing of all the possibilities and the conditions they indicate. ON-OFF Pattern Operating Condition LED Pattern...
- Page 14 NAME OF PARTS 3-5. Main Unit (Top View) Drive Shaft Developer Tank Wash Water Tank Fixer Tank Rack Handles Rack Handles Developing Rack Starter Solution Inlet Fix/Wash Rack SERVICE MANUAL...
- Page 15 NAME OF PARTS 3-6. Drying Unit Dry Rack Drying Heater Unit Nozzle Duct Dry Sensor Unit Overheat Switch Recycle Duct Dry Fan Recycle Duct SERVICE MANUAL...
- Page 16 NAME OF PARTS 3-7. Film Transport 1) Rollers (1) Components Diagram SERVICE MANUAL...
- Page 17 "lower" rollers. (3) Capability The SRX-101A is capable of processing film ranging in size from 10x10 cm to 35x43 cm (14x17 inch). The feed tray has an insertion slot that will feed film up to 17" in width.
- Page 18 NAME OF PARTS 2) Drive Mechanism (1) Components Diagram Timing Belt Timing Belt Drive Motor Gear Type Symbol Parts No. Name Module No. of Teeth Note 13003A Worm Gear (Right) Worm Gear 13004A Worm Gear (Left) 13007B Worm Wheel (Right) Worm Gear 13008B Worm Wheel (Left)
- Page 19 NAME OF PARTS 3) Adjusting the Drive Timing Belt (1)Remove the Top Cover, the Right Side Panel and the Back Panel. (2)Test the tension in the timing belt with a push-pull gauge at a point half way between the main drive shaft pulley and the drive motor pulley.
- Page 20 NAME OF PARTS 3-8. Solution Supply and Drainage Unit Developer Supply Unit Fixer Circulation Pump Fixer Supply Unit Developer Circulation Pump Electromagnetic Valve Wash Water Temperature Drainage Valve Control Tank Fixer Drainage Valve Developer Drainage Valve SERVICE MANUAL...
- Page 21 NAME OF PARTS 2) Piping Diagram Body Drainage Tank Electromagnetic Valve Developer Supply Pump Fixer Supply Fixer circulation Pump Pump Developer Supply Tank Fixer Supply Tank Fixer Drainage Wash Water Valve Drainage Valve Temperature Control Tank Developer Circulation Drain Outlet Pump Developer Drainage Valve...
- Page 22 NAME OF PARTS 3) Solution Temperature Control Tank (1) Components Diagram Temperature Control Tank From the Fixer Circulation Tank To the DEV Tank Thermometer Heater FIX Tank From the Developer Circulation Pump (2) Capabilities 1) Developer temperature control is carried out by warming with a heater and by natural cooling.
- Page 23 NAME OF PARTS 3-9. Electrical Components Unit (CE) CPU Board(unified with Temperature Control) Motor Control Board Transformer (PT1) Terminal Block SSR(DRY) SSR(DEV) Circuit Protector Switching Power source (SUP1) Noise Filter (F1) CB 1 : 15A CB 3 : 15A Power Breaker (S1) SERVICE MANUAL...
- Page 24 NAME OF PARTS 3-9. Electrical Components Unit (UL) CPU Board(unified with Temperature Control) Switching Power Source (SUP1) Motor Control Board Transformer(PT1) Terminal Block SSR(DRY) Circuit Protector CB 1 : 15A SSR(DEV) Noise Filter (F1) Power Breaker (S1) SERVICE MANUAL...
- Page 25 NAME OF PARTS 3-10. Film Insertion Unit A rib has been added to the processing tanks so that the Guide has been unified. Insertion Guide Moving Insertion Detector Contact Insertion Detector Feed Tray Control Panel Board SERVICE MANUAL...
-
Page 26: Time Chart
NAME OF PARTS 4. Time Chart (In normal functioning) "RUN" Lamp 2min 15min "READY" Lamp READY Signal Drive Motor (Rapid Transfer) 30min DEV Circulation Pump 13.3s FIX Circulation 13.3s 3min Pump (11.1s) (11.1s) 53.3s DEV Supply Pump (44.4s) 23.3s 23.3s (19.4s) 46.7s (19.4s) - Page 27 5-1. Motor and Preset Temperature Errors In this SRX-101A, the motor error or the Temperature error will be indicated by the control panel lamps and an alarm buzzer. When such errors occur, use the following listing to correct these errors. The other errors will not displayed, so these errors have to be dealt with in the next sections.
- Page 28 Error Display Cause Response Reset or Set Direction The "RUN" lamp will begin The temperature levels (1) Check to see if the developer Tempera flashing, the READY lamp for the developer have is being circulated properly. (1) Although 45 minutes has passed after the [RUN] SW is on, the dev. temp. tures will remain lit, and the alarm dangerously risen above...
-
Page 29: Troubleshooting
TROUBLE SHOOTING 5-2. Errors described by the 7seg.LED on the CPU board. (for FSE use) Setting the DIP SW 1-1 to "ON" and the DIP SW2 to "0" will allow the FSE to view the error log. When several errors occur at the same time, a number calculated by summing up each error code will be shown by the 7seg.LED. - Page 30 TROUBLE SHOOTING 5-3. TROUBLESHOOTING : FLOW CHARTS Problem Page Processor will not start up ("RUN" lamp will not come on) Developer circulation pump not operating. Fixer circulation pump not operating. Drying fans not operating. Electromagnetic valve not operating. Developer supply pimp not operating. Fixer supply pump not operating.
- Page 31 TROUBLE SHOOTING 1. The processor will not start up. (RUN lamp will not come On.) Is the power supply voltage being Check to see if the facility's wiring, If all checks are OK, replace the supplied to the Noise Filter (NF1) the power cord plug and the power noise filter.
- Page 32 TROUBLE SHOOTING 2. The developer circulation pump (P1) is not operating. Change the Are the other electrical loads Is the pump operating Is the dev. temp. too temperature functioning properly? when a film is fed? high? setting. Replace the CPU board. When everything is proved to be Check the connection of JJ11 connector and the voltage at the...
- Page 33 TROUBLE SHOOTING 3. The fixer circulation pump (P2) is not operating. Change the Are the other electrical loads Is the pump operating Is the dev. temp. too temperature functioning properly? when a film is fed? high? setting. Replace the CPU board. When everything is proved to be Check the connection of JJ10 connector and the voltage at the...
- Page 34 TROUBLE SHOOTING 4. The drying fans (FM1,FM2) are not operating. Check the connection at Are the other electrical loads If all checks are OK, repair any connectors JJ30, JJ31 and check functioning properly? wiring breaks or replace the fans. the terminal voltage. Is AC 100V being supplied to If all checks are OK, repair any Check the wiring from the...
- Page 35 TROUBLE SHOOTING 5. The electromagnetic valve (MV) is not operating. If all checks are OK, repair any Are the other electrical loads Check the connection at connector wiring breaks and/or replace the functioning properly? JJ6 and the terminal voltage. valve. Is the CPU board fuse (F1) Replace the fuse (F1) on the blown?
- Page 36 TROUBLE SHOOTING 6. The developer supply pump (P3) is not operating. If all checks are OK, repair any Are the other electrical loads Check the connection to connector wiring breaks and/or replace the functioning properly? JJ8 and the terminal voltage. pump.
- Page 37 TROUBLE SHOOTING 7. The fixer supply pump (P4) is not operating. If all checks are OK, repair any Are the other electrical loads Check the connection to connector wiring breaks and/or replace the functioning properly? JJ7 and the terminal voltage. pump.
- Page 38 TROUBLE SHOOTING 8. The drive motor (M1) is not operating. Check the wiring connecting JP24 Is AC 24V being supplied between If all checks are are OK, replace to the transformer's secondary JP24 #1 and #2. the transformer. side. Is the CPU board fuse (F1) blown? Replace the fuse.
- Page 39 TROUBLE SHOOTING 9. The drive motor (M1) will not stop. NOTE : Refer to the procedure Did you wait for 2 minutes after Wait for the required time. for temperature control pressing the [RUN] SW OFF? board adjustments. Is at least 4.3V being supplied to Check to see if the output If all checks are OK, replace test pin JJ13 #5 and #6 on the...
- Page 40 TROUBLE SHOOTING NOTE : 10. Developer temperature After temperature setting adjustment, if improper temperature levels activates is too low. the temperature error function, all the electrical loads will be switched OFF. Adjust the temperature setting (See the circuit board check Is the temperature setting too low? using the temperature control procedures.)
- Page 41 TROUBLE SHOOTING NOTE : 11. Developer temperature After temperature setting adjustment, if improper temperature levels activates is too high. the temperature error function, all the electrical loads will be switched OFF. Adjust the temperature setting Is the temperature setting too (See the circuit board check using the temperature control high?
- Page 42 TROUBLE SHOOTING NOTE : 12. Drying temperature is After temperature setting adjustment, if improper temperature levels activates too low. the temperature error function, all the electrical loads will be switched OFF. Adjust the temperature setting (See the circuit board check Is the temperature setting too low? using the temperature control procedures.)
- Page 43 TROUBLE SHOOTING NOTE : 13. Drying temperature is After temperature setting adjustment, if improper temperature levels activates too high. the temperature error function, all the electrical loads will be switched OFF. Adjust the temperature setting Is the temperature setting too (See temperature control board using the temperature control high?
- Page 44 TROUBLE SHOOTING 14. Supply pumps (P3, P4) will not respond to frequency (DIPSW 1-2) setting change. Is DIP SW1-2 in the ON Set DIPSW1-2 to ON. position? REMINDER : In case of 50Hz, "in the OFF position." Replace the CPU board. NOTE: 15.
- Page 45 TROUBLE SHOOTING 17. The READY lamp will not come ON. Has 15 minutes passed since Wait the required time. the "RUN" lamp came ON? Has initial wash water Wait the required time. supply been completed (about 2 minutes) (LED5 OFF)? Is the film entry detector ON Check if there is any film If all of the checks are OK,...
- Page 46 TROUBLE SHOOTING 19. The film insertion alarm will not sound. If all of the checks are OK, Is the film entry detector ON Check if there is any film replace the film entry ("READY" lamp OFF)? jammed at the detector unit. detector unit.
- Page 47 TROUBLE SHOOTING 21. The dry heater will not switch off in the Standby Mode. Have you set the DIPSW Make the proper settings. properly? Replace the CPU board. REMINDER : 22. The processor will not Check to see if the drying heater is start out of the Standby functioningproperly.
- Page 48 TROUBLE SHOOTING 5-4. Trouble Caused by the Film Processor Trouble Cause Response Advice To Customer The processed film · The processing tank rollers · Clean the rollers. · Remind about checking surface is coming out are dirty. and maintenance tasks. grimy.
- Page 49 TROUBLE SHOOTING Problem Cause Response Advice To Customer (2)Bands across the film · Improper roller rotation. · Check the film transport · Remind about the periodical perpendicular to the mechanism. check and maintenance. direction of film transport. · Dirty rubber rollers. ·...
- Page 50 TROUBLE SHOOTING Trouble Cause Response Advice To Customer Discoloration · The fixer solution temperature · Show the proper method for is too low. maintaining optimum fixer temperature. · The wash water temperature · Install a water heating device. is too low. ·...
- Page 51 TROUBLE SHOOTING 5-5. Trouble Caused by Improper Film Handling Problem Symptom Cause Response Fogging · A certain portion of the film is · Improper light shielding of · Checking and repair. being blackened. stored film (due to torn (This is occurring in the same wrapping), a film cassette spot on a large number and the other facilities.
- Page 52 TROUBLE SHOOTING Problem Symptom Cause Response Dry Pressure · Unevenness due to reduction · Pressure has been on the film · Checking and repair. in film sensitivity. before exposure by rough · Handle the film more carefully. (white-outs) handling, such as bending, jamming, or dropping.
- Page 53 TROUBLE SHOOTING 5-6. Service and Maintenance Schedule Task 1 mo. 4 mos. 6 mos. 12 mos. 24 mos. Wash Top Cover Underside Scrub DEV and FIX/WASH racks Clean the area around processing tanks Wash DEV, FIX and WASH tanks Replace developer and fixer Wash processing tank and racks with system cleaner Replace FIX side FIX/WASH roller springs Replace DEV roller and WASH side FIX/WASH roller springs...
- Page 54 TROUBLE SHOOTING 5-6-2. Cleaning the Drier Nozzle and Rollers of the Drier Rack (1) Remove the top cover. (2) Remove the Drier Rack cover. (refer to "11-1. Removing the Drier Cover", p.98.) (3) Remove the drier nozzle to wash and clean in the water, and dry it afterward. (4) Wipe the drier rollers with a water-damped cloth.
- Page 55 TROUBLE SHOOTING 5-6-3. Replacing the Springs of Rack Rollers FIX/WASH rack springs There are two spring types depending on the length, and they should be attached to different places. Refer to the illustration in p.11 and to the left so that they are attached to correct 2nd pair 1st pair 4th pair...
- Page 56 TROUBLE SHOOTING 5-6-5. Replacing the Absorption Rollers, Rubber Rollers and Bearings (1) Remove the gear and stopper using the stop ring plier. Stop ring plier Stop ring plier Insert the tip of the plier into the slit of the stop ring, and pull out the ring with the plier edge kept open.
- Page 57 TROUBLE SHOOTING 5-6-6. Cleaning the Dev Rack and DEV Tank with a System Cleaner Scrubbing the rack rollers with cold or warm water will not completely remove the crystallized processing solutions or built-up gelatin and silver solving out from the film. It is necessary to wash both the DEV rack and tank with a system cleaner(option) every three months.
-
Page 58: Cpu Board Dip Switches
CPU BOARD DIP SWITCHES 6. CPU Board DIP Switches 6-1. CPU Board (silk-screen diagram) Always wear a wrist strap when touching the board. 7seg.LED (displays "Error Log", "Print Count", "Dev. & Dry Temp.", etc.) Fuse (F1) 1-2 : Backup battery is ON (default at shipment) 2-3 : Backup battery is OFF (for service board) Note : A service board for replacement is provided... - Page 59 CPU BOARD DIP SWITCHES 6-2. CPU Board DIP Switches Note : Make sure the Power Breaker is turned off before proceeding to the settings shown below. 6-2-1. Factory setting (Default) Setting Operation Normal operation mode Power source frequency (60Hz) Processing time (120 sec) Standby time (10 min) Replenisher correction (0%) Chemical Mixer...
- Page 60 CPU BOARD DIP SWITCHES 6-2-2. DIP Switch Settings 1. DS1 Function Mode Normal operation mode Maintenance Mode Power source frequency 50 Hz 60 Hz DS1-3 Selection of DS1-4 processing time Processing Time 90 sec. 120 sec. 180 sec. Use prohibited DS1-5 Selection of DS1-6...
- Page 61 CPU BOARD DIP SWITCHES 3. DIP Switch Settings for Maintenance Mode DS1-1 Function Page Error log display Total count of processed films (daily, monthly) Time setup and display Deletion of log data (RAM clear) Operation ON/OFF log Program version display –...
- Page 62 CPU BOARD DIP SWITCHES 6-3. Error Log Display Displays the error log that occurred on the SRX-101A. Total number of errors that can be stored in the SRX-101A is 1,024. Those exceeding the maximum records will overwrite the oldest record.
- Page 63 CPU BOARD DIP SWITCHES 3. Details of 7seg.LED display operation 7seg. display contents Push the [RUN] SW Error code (default) The last occurred error code ↓ Push the [RUN] SW Displays the year (YY). ↓ Push the [RUN] SW M.DD Displays the month (M) &...
- Page 64 Displays either per day or per month the total film count that has been processed by the SRX- 101A. Maximum number of processed film count, which the SRX-101A can record is 7,936 totaling both daily and monthly counts. Those exceeding the maximum records will overwrite the oldest record.
- Page 65 CPU BOARD DIP SWITCHES · Daily operation 7seg. display contents Push the [RUN] SW M.DD Displays the month (M) & date (DD). "A" for October, "B" for November, "C" for December. ↓ Push the [RUN] SW Displays the process count. "Month &...
- Page 66 CPU BOARD DIP SWITCHES 6-5. Time Setup & Display Sets time and display of the SRX-101A’s internal clock. The time set here will be used to specify time for each event in the log and displayed together with the events.
- Page 67 CPU BOARD DIP SWITCHES 3. Details of 7seg.LED display 1) Time Display Mode operation 7seg.LED display contents to (*2) ↑ Push the [RUN] SW (*1) Lower two digits represent "Year". [Example on the left : 2004] ↑ Push the [RUN] SW ↓...
- Page 68 CPU BOARD DIP SWITCHES 2) Time Setup Mode operation 7seg.LED display contents (*1) Lower two digits represent "Year". [Example on the left : 2004] Display is blinking. Pressing the [RUN] SW increase the value by "1". Setting Range : 0 ~ 40 ↓...
- Page 69 CPU BOARD DIP SWITCHES 6-6. Deleting the Log Data (RAM clear) Implementing “RAM clear” will delete all log data (errors, process count, operation ON/OFF log). 1. DIP Switch setting DS1-1 2. Operation Method 1) Set the DIP switches as shown above, and turn on the Power breaker. ·...
- Page 70 CPU BOARD DIP SWITCHES operation 7seg.LED display contents Remove your 7seg.LED changes from “F00”, fingers off the “F01”, …… “F49”, “F50”, …… [RUN] SW ”F89”, “F90, ….. “F98”, “F99”. and [Repl.] SW. Deletion completes at “F99”. “End” is displayed when deletion is completed.
- Page 71 CPU BOARD DIP SWITCHES 6-7. Operation ON/OFF Log Log data for date and time when the [RUN] SW of SRX-101A is turned off or on will be displayed. Total count of operation ON/OFF of the SRX-101A is 8,192. Those exceeding the maximum count for operation ON/OFF will overwrite the oldest log in order.
- Page 72 CPU BOARD DIP SWITCHES 6-8. Display of Program Version Displays the program version that is incorporated in the SRX-101A. 1. DIP Switch setting DS1-1 2. Operation Method 1) Set the DIP switches as shown above, and turn on the Power breaker.
- Page 73 CPU BOARD DIP SWITCHES 6-9. Dry/Dev Temperature Display Displays the Dry and Dev temperatures currently detected in the SRX-101A. 1. Operation Method 1) Turn on the [Power] breaker under the normal operation mode (DS1-1 : OFF). · Current dry temperature will be displayed by the 7seg.LED.
-
Page 74: Checking Circuit Boards, Sensors And Electrical Loads
CHECKING CIRCUIT BOARDS, SENSORS AND ELECTRICAL LOADS 7. Checking Circuit Boards, Sensors and Electrical Loads REMINDER : After performing each check and related adjustment, switch the power breaker OFF, then back ON again. 7-1. Circuit Boards Board Circuit Check Points Correct Voltage Adjustment Point TP1-TP3(GND) - Page 75 CHECKING CIRCUIT BOARDS, SENSORS AND ELECTRICAL LOADS 7-2. Sensor Check This board, using a MPU controls and corrects the inconsistency and in the circuit. Therefore, the voltage output at TP7 and TP8 corresponding to each temperature directly reflects the variation, thus resulting in different output values depending on the product. The table shown below indicates representative values, and is purely for reference.
- Page 76 CHECKING CIRCUIT BOARDS, SENSORS AND ELECTRICAL LOADS 7-3. Checking the output to various loads and the input to operation panel board. Check that the output from the SRX-101A’s CPU board to various loads and input from the operation panel to CPU board are normal.
- Page 77 CHECKING CIRCUIT BOARDS, SENSORS AND ELECTRICAL LOADS 3. Details and Method of Check Carry out a visual or sound check. operation 7seg.display check Item (while [RUN] SW is kept pressed) type of load (*1) [RUN] SW "RUN" lamp lights "RUN" lamp ↓...
- Page 78 CHECKING CIRCUIT BOARDS, SENSORS AND ELECTRICAL LOADS 4. Relation between Load and LED Relation between each load and LED No. on the CPU board is shown below. Caution Note that the LED No. corresponding to each load is different from that on the old CPU board (1050H1001) to the other on the new CPU board (1446H1002).
- Page 79 CHECKING CIRCUIT BOARDS, SENSORS AND ELECTRICAL LOADS 7-4. Checking the input signal at the entrance sensor Check that the signal from the SRX-101A’s entrance sensor is properly sent to the CPU board. Connect to the entrance sensor. Make sure the power breaker is OFF.
- Page 80 CHECKING CIRCUIT BOARDS, SENSORS AND ELECTRICAL LOADS 7-5. Dev. Temp. Correction When a difference is noted between the Dev. temperature indicated by the 7seg.LED and actually measured Dev. temperature, correct the difference according to the procedure detailed below. 7seg.LED VR for Dev. Temp. correction VR for Dev.
-
Page 81: Electrical Components Diagram
ELECTRICAL COMPONENTS DIAGRAM 8. Electrical Components Diagram 8-1. Electric Components Diagram (CE) CPU Board Serial EEPROM Interface FLASH EPROM SRAM MEMORY Buzzer Switch (Control Panel Board) Transistor Array Motor Control I/O Circuit Board Drive Motor Circulation Pumps (P1, P2) X2 Entrance Sensor Transistor Supply Pumps (P3, P4) X2... - Page 82 ELECTRICAL COMPONENTS DIAGRAM 8-2. Electric Components Diagram (UL) CPU Board Serial EEPROM Interface FLASH EPROM SRAM MEMORY Buzzer Switch (Control Panel Board) Transistor Array Motor I/O Circuit Control Board Drive Motor Circulation Pumps (P1, P2) X2 Entrance Sensor Transistor Supply Pumps (P3, P4) X2 Array Water Supply Pumps (P5) X1 Electromagnetic Valve (MV)
- Page 83 WIRING DIAGRAM OF MAIN UNIT 9. Wiring Diagram of Main Unit 9-1. Wiring Diagram of Main Unit (CE) AF Ready sig AF Connection sig Entrance Sensor 1 Entrance Sensor 2 Entrance Sensor 3 Entrance Sensor 4 RUN LED READY LED RUN SW Repl.
- Page 84 WIRING DIAGRAM OF MAIN UNIT 9-2. Wiring Diagram of Main Unit (UL) AF Ready sig AF Connection sig Entrance Sensor 1 Entrance Sensor 2 Entrance Sensor 3 Entrance Sensor 4 RUN LED READY LED RUN SW Repl. SW DEV Heater DRY Heater SERVICE MANUAL...
-
Page 85: Wiring Diagram Of Main Unit
WIRING DIAGRAM OF MAIN UNIT Main Body Electric Circuit Parts List (UL) Symbol Name Manufacturer Model Remarks Switch Matsushita AJ8201R S2~5 Reed switch Japan Automation Co. RS-9S Reed switch magnet Japan Automation Co. RS-9M Noise filter Nemic Ramda MAF-1220-33 Terminal block Osada OTB-525-14P-06-C Circuit protector... - Page 86 WIRING DIAGRAM OF MAIN UNIT Main Body Electric Circuit Parts List (CE) Symbol Name Manufacturer Model Remarks Switch Matsushita AJ8201R S2~5 Reed switch Japan Automation Co. RS-9S Reed switch magnet Japan Automation Co. RS-9M Noise filter Nemic Ramda MAF-1220-33 Terminal block Osada OTB-525-14P-06-C CB1, 3...
- Page 87 CIRCUIT BOARD DIAGRAM 10. Circuit Board Diagram 10-1. CPU Board (1/5) 4.7K 4.7K 4.7K 0.1U 0.1U 0.1U 0.1U HM628512C 0.1U D0/P40 RTC-62423A D1/P41 D2/P42 D3/P43 TP16 D4/P44 D5/P45 DQ10 D6/P46 STD.P 4/C2 DQ11 D7/P47 DQ12 VCC1 MBM29F400TC DQ13 VDD1 VDD2 DQ14 TP13 M27C4001...
- Page 88 CIRCUIT BOARD DIAGRAM CPU Board (2/5) 4.7K 4.7K (JJ3) IC11 Enterance Sensor 1 74HC165 Enterance Sensor 2 Enterance Sensor 3 0.1U CKINH Enterance Sensor 4 CN14 TP17 (JJ14) AF Ready AF Connection AF Connection XREF=1/B2 CN15 TLP181 CM_IN (JJ15) XREF=1/C1 CMVCC TP18 TP19...
- Page 89 CIRCUIT BOARD DIAGRAM CPU Board (3/5) 4.7K CN12 (JJ12) AC100V(N1) AC100V(N1) AC100V(L1) AC100V(L1) CN10 (JJ10) FIX Circulation Pump CN11 SSR6 IC15 (JJ11) TD62083F DEV Circulation Pump XREF=1/B2 DEV/FIX Circulation Pump XREF=1/B2 DEV Supply Pump XREF=1/B2 FIX Supply Pump SSR5 (JJ8) XREF=1/C2 Electromagnetic Valve XREF=1/C2...
- Page 90 CIRCUIT BOARD DIAGRAM CPU Board (4/5) 4.7K 2SA1162 XREF=1/D2 DIG_3 4.7K 2SA1162 XREF=1/C2 DIG_2 4.7K 2SA1162 XREF=1/C2 DIG_1 LED11 LED13 LED12 NAR131S NAR131S NAR131S IC17 TD62083F XREF=1/A2 XREF=1/A2 XREF=1/A2 XREF=1/A2 XREF=1/A2 XREF=1/A2 XREF=1/A2 XREF=1/A2 SERVICE MANUAL...
- Page 91 CIRCUIT BOARD DIAGRAM CPU Board (5/5) IC18 TA7805 R42 12 (JJ1) 470U 0.1U 470U 0.1U 0.1U 0.1U 0.1U 0.1U +12V CN18 (JJ18) VR-1 IC19 REF194GS VR-2 +5VA AVREF VR-3 SLEEP VR2 2 AGND 0.1UF 0.1UF 0.1UF R98 0 1.2K R99 0 IC20 AGND REF195GS...
-
Page 92: Circuit Board Diagram
CIRCUIT BOARD DIAGRAM CPU Board Parts Lists Symbol Name Manufacturer Model Remarks Hitachi Electronics HD6413007F Fujitsu MBM29F400TC-70PFTN FLASH ROM Fujitsu MBM29F400TC-90PFTN Hitachi Electronics HM628512CLFP-5 4M SRAM Hitachi HM628512CLFP-7 Hitachi Electronics HM628512CLFP-5SL Mitsubishi Electric M5M5408BFP-55H Mitsubishi M5M5408BFP-70H EPSON RTC-62423 EPSON RTC-62423A Rohm BR93LC46RFJ-W EEPROM... - Page 93 CIRCUIT BOARD DIAGRAM Symbol Name Manufacturer Model Remarks C52,54 Ceramic Condenser Murata Manufacturing GRM21B2C2D101JVD 100PF Kyocera CM21CH101J100AT Matsushita Electronic ECJ2VC1H101J Ceramic Condenser Murata Manufacturing GRM2191X1H223JA01D 0.022µ Kyocera CM21B223K50AT Matsushita Electronic ECJ2VB1H223K C41,C42,C45,C49,C51 Aluminum electrolytic condenser Nikkemi MKA16VC10MD55 10µF16V Aluminum electrolytic condenser Nikkemi MKA50VC1MD55 1µF50V...
- Page 94 CIRCUIT BOARD DIAGRAM Symbol Name Manufacturer Model Remarks R18,R26,R27,R28, Metal-film resistor Kamaya Electric RMC1/16 472JTP 4.7k R30,R32 RK73K1JTD4.7KΩJ Matsushita Electronic ERJ3GEYJ472V Rohm MCR03EZHJ472 R29,R31,R33 Metal-film resistor Kamaya Electric RMC1/16 202JTP 2.0k RK73K1JTD2KΩJ Matsushita Electronic ERJ3GEYJ202V Rohm MCR03EZHJ202 R21,R22,R23,R34, Metal-film resistor Kamaya Electric RMC1/16 331JTP 330Ω...
- Page 95 CIRCUIT BOARD DIAGRAM Symbol Name Manufacturer Model Remarks Metal-film resistor Kamaya Electric RMC1/4 100JTP 10Ω 1/4W RK73K2ETD10ΩJ Matsushita Electronic ERJ14YJ100U Rohm MCR25JZHJ100 Metal-film resistor Kamaya Electric RMC1/16 821JTP 820Ω RK73K1JTD820ΩJ Matsushita Electronic ERJ3GEYJ821V Rohm MCR03EZHJ821 R75,R76 Metal-film resistor Kamaya Electric RMC1/16 122JTP 1.2k RK73K1JTD1.2KΩJ...
- Page 96 CIRCUIT BOARD DIAGRAM Symbol Name Manufacturer Model Remarks Socket OMRON XJ8A-0211 Socket for JP M27C4001-10F1 Not implemented Print Board Meikousya 144671002B SERVICE MANUAL...
- Page 97 CIRCUIT BOARD DIAGRAM CPU Board Parts Layout SERVICE MANUAL...
- Page 98 CIRCUIT BOARD DIAGRAM 10-2. Control Panel Board JJ28 LED 1 LED 3 LED 2 Ready Lamp LED 2 RUN Lamp LED 3 SW 4 RUN Button Replenish SW 5 Button KEY Board Parts List Symbol Name Manufacturer Model Remarks S1, 2 Switch Fuji Electric AB12-EA137...
- Page 99 CIRCUIT BOARD DIAGRAM 10-3. Motor Control Board SERVICE MANUAL...
- Page 100 CIRCUIT BOARD DIAGRAM Motor Control Board Parts List (1) Symbol Name Manufacturer Model Remarks Toshiba TD62583AP µPC1246C Toshiba TC9192AP or Toshiba TC9192P Sharp IR3M02A µPC494C Toshiba TC4013BP or Motroller MC14013BCP Hitachi HD14052BP µPD4052BP Toshiba TC4052BP Hitachi HA17393 µPC393C µPC78M12AHF or NEC µPC78M12HF Transistor Array Sanken SMA6012 or Sanken SLA6012...
- Page 101 CIRCUIT BOARD DIAGRAM Motor Control Board Parts List (2) Symbol Name Manufacturer Model Remarks 2,200µF / 50V Condenser Matsushita ECES1HU222EG Nichicon LLK1H222MHSZ 10µF / 50V Condenser Nichicon UVZ1H100MAH Nichicon UPC-1H100MA1HS 10µF / 25V C18, 23, 29 Condenser Nichicon ULB1E100MAA Nichicon UVX1E100MAA Nippon Chemi-con SME25VB10...
- Page 102 CIRCUIT BOARD DIAGRAM Motor Control Board Parts List (3) Symbol Name Manufacturer Model Remarks Resistor Matsushita ERD-S2-TJ101 100Ω / 1/4W Matsushita ERD25VJ101 R35, 38 Resistor Matsushita ERD-S2-TJ223 22kΩ / 1/4W Matsushita ERD25VJ223 Resistor Matsushita ERD-S2-TJ684 680kΩ / 1/4W Matsushita ERD25VJ684 Resistor Matsushita ERD-S2-TJ680...
-
Page 103: Disassembly And Reassembly
DISASSEMBLY AND REASSEMBLY 11. Disassembly and Reassembly 11-1. Removing the Drier Cover Note : Make sure the power is turned off before replacing the parts. Note : Check operation after the replacement is completed. (1) Turn off the [Power] breaker, and unplug the power cable. - Page 104 DISASSEMBLY AND REASSEMBLY 11-2. Removing the Right & Left Side Covers (1) Turn off the [Power] breaker, and unplug the power cable. (2) Remove the top cover. (3) Remove the drier cover. (refer to "11-1. Removing the Drier Cover", p.98) (4) Remove the right &...
- Page 105 DISASSEMBLY AND REASSEMBLY 11-3. Removing the Electrical Unit Covers (1) Remove the outer cover for electrical unit. Remove truss screws (M4x12, 2pcs) and remove the outer cover. (2) Remove the inner cover for electrical unit. Remove truss screws (M4x8, 2pcs) and remove the outer cover.
- Page 106 DISASSEMBLY AND REASSEMBLY 11-5. Replacing Backup Battery (1) Turn off the [Power] breaker, and unplug the power cable. (2) Remove the covers for electrical unit. (refer to "11-3. Removing the Electrical Unit Covers", p.100) (3) Remove the backup battery following the procedure below.
- Page 107 DISASSEMBLY AND REASSEMBLY 11-6. Replacing the CPU Board Note Be sure to install the new CPU board on the machine, whose serial No. is #20001 or later. (1) Turn off the [Power] breaker, and disconnect the power cable. (2) Remove the cover for the electrical unit. (refer to "11-3.
- Page 108 DISASSEMBLY AND REASSEMBLY Note 2 Anti-noise measures When the CPU board of the device to which anti-noise measures are applied is replaced with 1446H1002, apply necessary changes to the device as instructed below. Current Board Measures to be taken Remarks DRY sensor when the CPU board is replaced...
-
Page 109: Upgradeing The Program Version
12. Upgrading the Program Version How to upgrade the program version for SRX-101A is detailed below. Note The version of current program running on your SRX-101A can be checked following "6-8. Displaying the Program Version", p67. 7seg.LED 1. Operation Method (1) Check that the [Power] breaker has been turned off. - Page 110 UPGRADING THE PROGRAM VERSION 3. Details of 7seg.LED display 1) When the switches are operated. operation 7seg.LED display Description of Display Press the [RUN] SW and [Repl.] SW simultaneously. Keep pressing till "F00" will be displayed after "F00" is displayed. blinking "FcP"...
- Page 111 UPGRADING THE PROGRAM VERSION 2) When the program is being transferred. operation 7seg.LED display Description of Display Remove your Deleting the Flash ROM. fingers off the After the deletion is completed, [RUN] SW program transfer will take place. and [Repl.] SW. No operation Program is being transferred.
- Page 112 UPGRADING THE PROGRAM VERSION SERVICE MANUAL...
- Page 113 UPGRADING THE PROGRAM VERSION Upon completion of program transfer, "End" and Check Sum value are alternately displayed. CHECK SUM value is displayed with alternating digits, one for a higher digit, the other for lower three digits. (example on the left : SUM value = 74dA) SERVICE MANUAL...
-
Page 114: Pre-Installation Instructions
PRE-INSTALLATION INSTRUCTIONS 13. Pre-Installation Instructions 13-1. Packaging Replenisher Tank Accessories Outer Crate Hoses Feed Tray Main Unit Packing Packing Seat Pallet External view (Total Weight : approx. 60kg.) Unit : mm 13-2. Contents Label Contents Remarks X-RAY FILM PROCESSING SRX–101A Main Unit SRX–101A Feed Tray 25R Replenisher Tank... - Page 115 PRE-INSTALLATION INSTRUCTIONS 13-3. Package Contents Verification Before installing the SRX-101A, make sure to check the main unit and accessory equipment for any missing parts or damage during transportation. (1) Check to see if the model name and numbers printed on the outside of the package correspond to what the customer ordered.
- Page 116 PRE-INSTALLATION INSTRUCTIONS 25R R Replenisher Tank ID. NO. Parts Name Remarks Hose band Tyton. SNP–12–HSO Replenisher pipe (DEV) Replenisher pipe (FIX) Replenisher filter Filter cap Name plate (DEV) Stirring rod (DEV) (yellow) Floating lid Clamp Kitagawa Industrial Co. LTD. CKS-16-H Name plate (FIX) Replenisher tank Stirring rod (FIX)
- Page 117 PRE-INSTALLATION INSTRUCTIONS 25R R Replenisher Tank SERVICE MANUAL...
- Page 118 PRE-INSTALLATION INSTRUCTIONS Set of Accessories ID.No. Parts Name Gear Idler gear Gear Idler gear Stopper Shaft support Coil spring Coil spring Rubber pad Bushing Packing Funnel Plastic beaker(Measuring cup) SERVICE MANUAL...
- Page 119 PRE-INSTALLATION INSTRUCTIONS Accessories SERVICE MANUAL...
-
Page 120: Installation Instructions And Precautions
Do not install the processor in high vibration areas or where it cannot be properly leveled. Place the SRX-101A at a height from the floor that fulfills both of the following conditions. a. The liquid surface inside the replenisher tank is below the full marks of the main unit processing tanks. - Page 121 INSTALLATION INSTRUCTIONS AND PRECAUTIONS 14-3. Connecting the Supply Hoses Connect the supply hoses to the 25 liter replenisher tank. Yellow ......DEV Supply Hose. Red........FIX Supply Hose. Use SNP-12-HSO to clamp the hoses to the tank. NOTE : Do not extend any of the hoses more than 5 meters in length. If these 12 mm diameter hoses are extended longer than 5 meters, they tend to bend and collapse.
- Page 122 (product liability standard) extension cords. Sub-standard extension cords may cause the processor to overheat or smoke. To prevent electrocution accidents, properly ground the SRX-101A. To avoid the possibility of explosions or electrocution, do not attempt to ground the processor to any of the following objects.
- Page 123 Temperatures between 15: and 30:(59<and 86<) Humidity levels between 30%RH and 75%RH In order to maintain the above room conditions, the facility where the SRX-101A is located should be equipped with a ceiling mounted ventilation fan and a ventilation opening in the wall below the height of the processor.
- Page 124 14-7. Water Lines Connect a reducer bushing with a packing to the facility's water utility outlet. Connect the processor's water supply hose to the reducer bushing. Packing Facility Water SRX-101A Water Supply Hose Utility Outlet PF3/4 PF1/2 Acceptable Wash Water Temperature 5:~30:(41<~86<)
- Page 125 INSTALLATION INSTRUCTIONS AND PRECAUTIONS 14-10.Leveling the Main Unit Use a carpenter's level. Turn the adjustable legs supporting the main unit to balance the processor vertically and horizontally. If the carpenter's level is not available, fill the tanks with a solution up to the indicator mark, and check the level of the solution at 6 different points on the leveling lines which are located at right and left inner side of the DEV, FIX and WASH tank and adjust if necessary.
- Page 126 INSTALLATION INSTRUCTIONS AND PRECAUTIONS 14-11.Setting the Racks Make sure that there is no excess water remaining in the racks before setting them into the main unit. The racks have been designed so that the DEV rack is set first, then the FIX- WASH rack can be inserted.
- Page 127 INSTALLATION INSTRUCTIONS AND PRECAUTIONS DEV Rack Rack Rib Groove FIX/WASH Rack Rack Rib Groove 14-12. Mixing the Processing Chemicals When Using the 25 Liter Replenisher Tank, follow the direction that come with each pack of developer and fixer. CAUTION 1. The chemistry and starter fluid are dangerous to eyes, can cause skin irritation and damage clothing.
- Page 128 INSTALLATION INSTRUCTIONS AND PRECAUTIONS 14-13. Filling the Tanks a. Normal Procedure Remove the top cover of the main unit. Close all the drainage valves Open the facility's water utility valve. Plug in the power cord. The [RUN] SW Lamp on the control panel will light up. NOTE : Do not press the [RUN] SW.
- Page 129 (refer to “6-5. Time Setup & Display”, p.61) (2) Remove the battery if log information (errors, process count, operation ON/OFF) and internal clock are not necessary. Other functions and performance of SRX-101A will not be affected even in operation without the battery.
- Page 130 INSTALLATION INSTRUCTIONS AND PRECAUTIONS 14-15. Operation Testing Press the [RUN] SW ON. The "RUN" lamp will light up. Wait until the "READY" lamp lights up. Remove the main unit's top cover. As soon as the processor is "READY", insert a few sheets of test film through the feed tray and check the following operations : a.
- Page 131 INSTALLATION INSTRUCTIONS AND PRECAUTIONS 14-17. Wash Basin Specifications Install a wash basin nearby the processor to keep it clean and to mix film processing solutions. The wash basin should be at least 700mm (2.3 ft) long, 500mm (1.64 ft) wide and 200mm (0.66ft) deep.
-
Page 132: Changing Processing Conditions
SRX-101A will automatically switch over the standby mode, during which the drying heater will be switched OFF and ON at 5 minutes intervals. As soon as a sheet of film enters the processor, the SRX-101A will automatically switch from standby into the normal operation mode. -
Page 133: Srx-101A Customer Presentation Guide
SRX-101A CUSTOMER PRESENTATION GUIDE 16. SRX-101A Customer Presentation Guide After the SRX-101A has been installed, explain the following points to the customer. 16-1. First, during your presentation check each of the points outlined in the following flow chart. Self introduction 1 Introduce yourself. - Page 134 2 If you cannot answer a certain question on the spot, make clear to the customer when you can answer. Warranty 1 Remind the customer that the SRX-101A is guaranteed for a certain period from the date of installation. Conclusion 1 Make sure to thank the customer for taking the time to listen to your presentation.
- Page 135 Then give your presentation so that the customer understand the similarities and differences between operating the previous processor and running the SRX-101A. (2) If the SRX-101A is a replacement processor, make sure that you are familiar with the features of the previously used model; for example, its processing speeds and solution temperature levels.
- Page 136 How to select the standby modes. c) How to supply replenisher and processing solution. d) Other procedures. Explain what film sizes and types are compatible with the SRX-101A. • After the processing solution temperatures have reached their operational levels, run a •...
- Page 137 If no option will be used, make your presentation as concise and brief as possible. • 16-7. Cleaning Explain all the points necessary in keeping the SRX-101A clean. Explain these points using the Operation Manual. • Explain the differences between the way of cleaning the bakelite rollers that are required to be done everyday, once a week, once a month, and once every three months.
- Page 138 After installation and check have been completed, refer the customer to the clause in the warranty that says," The SRX-101A has been handled over to you on this date,.., installed and checked properly with all its components and parts in optimum working condition."...
-
Page 139: Srx-101A Light Shield Installation Manual
SRX-101A LIGHT SHIELD INSTALLATION MANUAL 17. SRX-101A Light Shield Installation Manual 17-1. Light Shield Kit Contents Check the contents against this list upon delivery. Parts Name ID.No. Remarks Foam packing(thickness 10mm) L=1000mm, cut at adequate length of light shield plate and wall. - Page 140 SRX-101A LIGHT SHIELD INSTALLATION MANUAL SERVICE MANUAL...
-
Page 141: Installation Procedure
2. Assemble the processor main unit stand before assembling the light shield. 3. Before installing the SRX-101A, make sure to position the main unit stand so that the replenisher tanks are easily accessible. The main stand has crossbars on three of its four sides. The side without a crossbar is the side providing easy access to the replenisher tanks for mixing new processing solutions. - Page 142 INSTALLATION PROCEDURE 7) Cut a piece of Packing(D)[0thickness 10mm] into a strip of 530mm long. Attach it to the Lower Light Shield as shown in the diagram below. Attach 4 clip nuts at the top edge of the Lower light Shield, adjusting the position against the hole, fix the Lower Light Shield to the main unit stand with M6 x 20 pan-head screws, flat washers(φ6) and hexagonal nuts.
- Page 143 INSTALLATION PROCEDURE 9) Cut a piece of Packing(A)[thickness 3mm] into a strip of 165mm long, and attach it to the Upper Light shield, and fix it to the light shield panel(right and left) using the speed nuts 4 pieces of M4 x 6 pan screws from the light room side.
- Page 144 Make sure you have about 20cm of play in the wire. 14) Now bring the film insertion table up against the SRX-101A main unit, and string the connector end of the lead wire through the elongated hole in the main unit until the connector is hanging in front of the CPU board.
- Page 145 Cut a piece of Packing(D)[thickness 5mm] into a strip of 450mm long and attach it to the bottom of the electrical components housing. SRX-101A Electrical Components Unit Outer Cover Components Housing 450mm Strip of Packing(D) 20) Attach the square-shaped Packing(F) to the left and right sides of the light shield panel.
- Page 146 Darkroom Side Packing(D) 23) Lower the insertion table side legs so that the SRX-101A is leveled. Taking special care of the unit's left and right side position, move the processor up against the partition, and then level the unit once again.
- Page 147 27) Open(fold up) the film insertion table cover and make sure that the magnetic catch is strong enough to hold it open while operating the SRX-101A. 28) Put back the top cover and make sure that the light shield is functioning properly from the darkroom side.
- Page 148 (A dial, a volume, wires, and a connector are assembled.) ii) Screws for fixing ................3 Pcs. iii) Dial Plate (adhesive type, sticked backside.) ......... 1 Pce. 2) Remove the covers from the main body of SRX-101A. (Fig. A) Internal Cover Outer Cover Be sure to install or detach with care and in parallel.
- Page 149 INSTALLATION PROCEDURE 4) Fix the knob plate with the three screws after removing a round plate. (Fig. C) 5) Connect the connector JP18 to the JJ18 on the CPU board and the earth (ground) wire. (Fig. C) JJ18 CPU Board Motor control board Fig.
- Page 150 Check the Jp1 on the CPU board if its pins 2-3 are selected. JP1-1, 2 are in short circuited. Fig. B 2) Start of SRX-101A Turn on the power switch, set the DEV temp. control knob at 34:, and turn on the [RUN] SW. 3) Actual temperature checking (Fig. F) i) Wait 5 minutes after "READY"...
- Page 151 INSTALLATION PROCEDURE 4)When the actual temperature is not between 33: : and 35: : , proceed the Knob position adjustment (Fig. G). i) Loosen the set screw of the knob which locates just opposite of the pointer. Pay attention not to move the volume shaft. ii) Set the pointer at the measured temperature value.
- Page 152 1051-55030 C 0405TE...
Need help?
Do you have a question about the SRX-101A and is the answer not in the manual?
Questions and answers