
Related Manuals for Clarke PSP195


Summary of Contents for Clarke PSP195
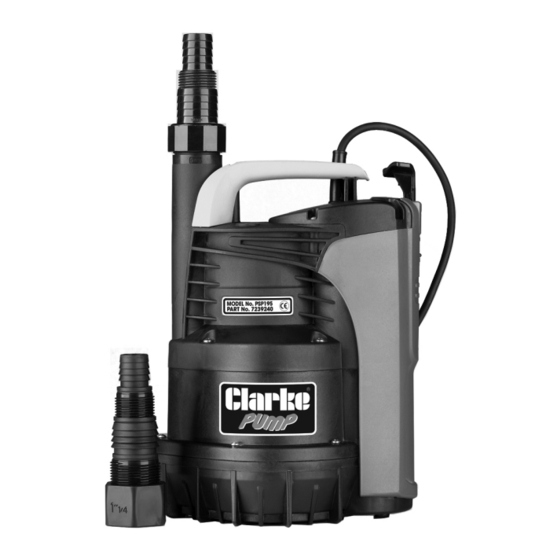
- Page 1 PUDDLE PUMP MODEL NO: PSP195 PART NO: 7239240 OPERATION & MAINTENANCE INSTRUCTIONS ORIGINAL INSTRUCTIONS GC0819 - ISS 1...
-
Page 2: Environmental Recycling Policy
INTRODUCTION Thank you for purchasing this CLARKE Puddle Pump. The pump is of the submersible type, designed for domestic use, with manual or automatic operation. It is suitable for drying out basements subject to flooding and for pumping drainage wells or rainwater collecting traps. -
Page 3: Safety Instructions
SAFETY INSTRUCTIONS GENERAL PUMP SPECIFIC 1. Read all instructions before use 1. Do not pump explosive / and save these instructions for flammable liquids or chemicals. future use. 2. Never allow the pump to run dry 2. An approved residual current or operate out of the water. -
Page 4: Electrical Connections
ELECTRICAL CONNECTIONS WARNING: READ THESE ELECTRICAL SAFETY INSTRUCTIONS THOROUGHLY BEFORE CONNECTING THE PRODUCT TO THE MAINS SUPPLY. These pumps MUST be fitted with a Residual Current Device (RCD), with a rated residual operating current of no greater than 30mA. This is essential when the pump is used for pumping swimming pools. -
Page 5: Installing The Pump
2. Connect a suitable hose (not supplied) to the adaptor. • Suitable hoses are available from your local Clarke dealer. 3. When push fitting the hose to the adaptor use a jubilee clip to secure it. 4. Stand the pump upright on a flat surface in the water that you want to drain. -
Page 6: Operation
OPERATION To operate the pump move the tab to the required position for either Auto or Manual mode. AUTOMATIC OPERATION (A) To set the pump running automatically: 1. Move the tab until the indicator is positioned on “A” (automatic). • When the float reaches the ON level the pump will start and will continue operating until the float drops to the OFF level. -
Page 7: Maintenance
ENSURE THE CIRCUIT BREAKER IS OPEN. This pump should require no maintenance other than regular cleaning. If the pump shows signs of wear or damage contact your CLARKE dealer for advice. CLEANING 1. Check the pump regularly to ensure the water inlet is clear of leaves or other debris. -
Page 8: Troubleshooting
6. Float switch may be jammed or prevented from moving. 7. Water level too low - float switch in OFF position - lift float to check switch. 8. If the pump still fails to start, consult your CLARKE dealer for advice. PUMP WILL 1. -
Page 9: Parts Diagram
PARTS DIAGRAM Capacitor holder / connector Impeller kit Seal kit Filter base Motor screws & o-rings Float switch cover Handle c/w screws Stepped adaptor / O-ring Cover unit with power cable Pump body kit Capacitor Control tab Motor assembly Float guide O-Ring kit Filter base screws Floatswitch... -
Page 10: Specifications
SPECIFICATIONS Dimensions (D x W x H) 225 x 185 x 335 mm (exc adaptor) Weight 5.3 kg Outlet Size 32 mm dia (male 1¼ “ BSP) Power supply 230v ~ 50 Hz Rated power 665 W Fuse Rating in BS plug 13 A Cable length 10 m... -
Page 11: Declaration Of Conformity
DECLARATION OF CONFORMITY Parts & Service: 020 8988 7400 / E-mail: Parts@clarkeinternational.com or Service@clarkeinternational.com...
Need help?
Do you have a question about the PSP195 and is the answer not in the manual?
Questions and answers