
Related Manuals for Clarke PSV3A


Summary of Contents for Clarke PSV3A
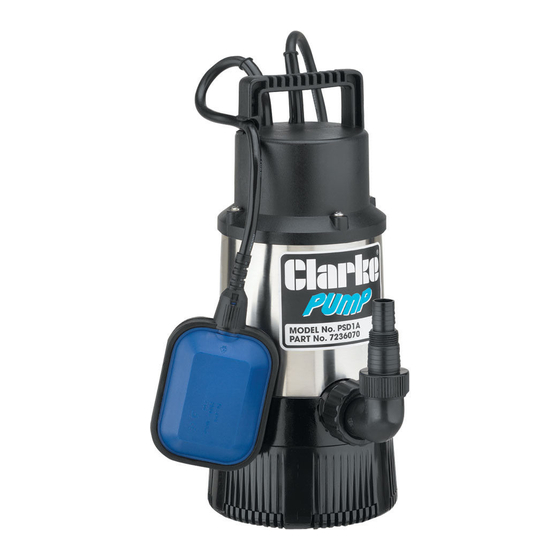
- Page 1 SUBMERSIBLE PUMPS MODEL NO: PSV3A, PSV4A, PSSV2A & PVP11A PART NO: 7236042, 7236044, 7236050 & 7236060 OPERATION & MAINTENANCE INSTRUCTIONS GC04/17...
-
Page 2: Environmental Recycling Policy
INTRODUCTION Thank you for purchasing this CLARKE Submersible Pump. This pump is designed for pumping clean water only. it is not designed for pumping slurry, sludge, mud or heavily polluted water, or any water containing chemicals or other acidic contaminants including salt water. -
Page 3: Safety Precautions
3. Never use this pump if any part is damaged. Have it inspected and repaired by your local Clarke dealer. 4. Always use an extension cable suitable for outdoor use when operating outdoors. -
Page 4: Servicing & Repairs
12. Never modify this pump in any way. Use it only for the purpose for which it is designed. SERVICING & REPAIRS 1. Always have the pump serviced by your local CLARKE dealer, using only identical replacement parts. This will ensure the safety of the pump is maintained. The use of non standard parts could be hazardous. -
Page 5: Electrical Connections
ELECTRICAL CONNECTIONS WARNING! READ THESE ELECTRICAL SAFETY INSTRUCTIONS THOROUGHLY BEFORE CONNECTING THE PRODUCT TO THE MAINS SUPPLY. Before switching the product on, make sure that the voltage of your electricity supply is the same as that indicated on the rating plate. This product is designed to operate on 230VAC 50Hz. - Page 6 OVERVIEW SUITABILITY The CLARKE range of submersible pumps are suitable for discharging pools, ponds, fountains, pits and any waste water drainage. They can handle foul water containing suspended material as listed in the specification. The pumps are not suitable for handling inflammable, corrosive, explosive or dangerous liquids.
-
Page 7: Connection And Positioning
• Suitable hoses are available from your local Clarke dealer. POSITIONING THE PUMP 1. ALWAYS raise and lower the pump using a rope attached to the lifting handle. -
Page 8: Using The Pump
Suitable hoses and valves are available from your Clarke dealer. USING THE PUMP 1. Plug in the pump and switch on the power supply. • Always use a high sensitivity residual current device (RCD) which has a tripping current of less then 30mA. -
Page 9: Automatic Thermal Overload
If the pump shows signs of wear or damage, contact your CLARKE dealer for advice. Do not attempt to repair the pump yourself, as you may damage the waterproof seals and invalidate your guarantee. -
Page 10: Troubleshooting
6. Float switch may be jammed against side wall, or prevented from moving. 7. If the pump still fails to start, consult your CLARKE dealer for advice. Parts & Service: 020 8988 7400 / E-mail: Parts@clarkeinternational.com or Service@clarkeinternational.com... -
Page 11: Specifications
1. Thermal overload has operated. Leave for 5-10 minutes running and try again. 2. Pump has run dry, or float switch has cut in. 3. A foreign object has jammed the impeller. SPECIFICATIONS Feature PSV3A PSV4A PSSV2A PVP11A Outlet Tread Dia 1½” BSP 1½” BSP 1½”... - Page 12 PARTS LIST PSV3A & PSV4A Description Description Power Cable Motor Front Cover Float Switch Washer 3-point Self Tapping Screw Cable Sheath Top Housing O-Ring Cable Entry Sheath Adjusting Shim Washer Cable Entry Gland Impeller Capacitor 8uF Cable Gland Main Pump Housing...
-
Page 13: Parts Diagram
PARTS DIAGRAM PSV3A & PSV4A Parts & Service: 020 8988 7400 / E-mail: Parts@clarkeinternational.com or Service@clarkeinternational.com... -
Page 14: Parts List Pssv2A
PARTS LIST PSSV2A Description Description Power Cable O-Ring Float Switch Motor Front Cover Dome headed Bolt Shim Washer Handle Impeller Bolt O-ring Main Pump Body Compression Ring O-ring Bolt Pump Rear Housing Ground Bracket Cable Entry Sheath Locating Ring Cable Sheath Sealing Washer Cable Gland Base Cover Ring... - Page 15 PARTS DIAGRAM PSSV2A Parts & Service: 020 8988 7400 / E-mail: Parts@clarkeinternational.com or Service@clarkeinternational.com...
-
Page 16: Parts List Pvp11A
PARTS LIST PVP11A Description Description Power Cable Air Vent Float Switch Motor Stator 3-point Self Tapping Screw Frame Seal Handle Front Motor Bush O-Ring S/t Screw Front Motor Cover Main Pump Body Mechanical Seal O-Ring Adjusting Shim Washer Pump Rear Housing Shim Washer Cable Entry Sheath Impeller... - Page 17 PARTS DIAGRAM PVP11A Parts & Service: 020 8988 7400 / E-mail: Parts@clarkeinternational.com or Service@clarkeinternational.com...
-
Page 18: Pump Performance Graphs
PUMP PERFORMANCE GRAPHS Parts & Service: 020 8988 7400 / E-mail: Parts@clarkeinternational.com or Service@clarkeinternational.com... -
Page 19: Declaration Of Conformity
DECLARATION OF CONFORMITY Parts & Service: 020 8988 7400 / E-mail: Parts@clarkeinternational.com or Service@clarkeinternational.com...
Need help?
Do you have a question about the PSV3A and is the answer not in the manual?
Questions and answers