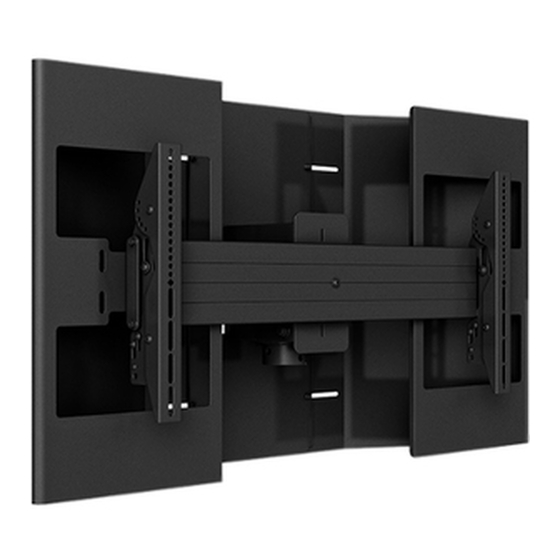
Summary of Contents for LEGRAND Chief OLCM1U
- Page 1 I N S T A L L A T I O N I N S T R U C T I O N S Large Outdoor Floor/Ceiling Mount Spanish Product Description German Product Description Portuguese Product Description Italian Product Description Dutch Product Description French Product Description OLCM1U...
-
Page 2: Important Safety Instructions
The information contained in this document is subject installer’s responsibility to make sure the mounting system to change without notice or obligation of any kind. Legrand does not exceed a moment of 2000 ft-lbs. See table below for makes no representation of warranty, expressed or implied, specific column specifications. - Page 3 Installation Instructions OLCM1U DIMENSIONS +5°AND -15° HOLE LOCKOUT 0° HOLE LOCKOUT +7.6° HOLE LOCKOUT -10° HOLE -5° AND -20° LOCKOUT HOLE LOCKOUT 2.48 63.0 - 10° 1.91 48.4 DIMENSIONS: INCHES [MILLIMETERS]...
- Page 4 OLCM1U Installation Instructions LEGEND Tighten Fastener Pencil Mark Apretar elemento de fijación Marcar con lápiz Befestigungsteil festziehen Stiftmarkierung Apertar fixador Marcar com lápis Serrare il fissaggio Segno a matita Bevestiging vastdraaien Potloodmerkteken Serrez les fixations Marquage au crayon Loosen Fastener Drill Hole Aflojar elemento de fijación Perforar...
-
Page 5: Tools Required For Installation
Installation Instructions OLCM1U TOOLS REQUIRED FOR INSTALLATION 5/32” (included) 1/2” 9/16” PARTS [Interface Bracket Hardware Kit] [Interface Lockout Bag] - (2) - (Qty per bag) C (4) D (4) A (4) B (4) M6x25mm M8x20mm M8x30mm M6x16mm F (4) G (4) E (4) M (1) P (1) -
Page 6: Installation
OLCM1U Installation Instructions INSTALLATION (To Floor) IMPORTANT ! : The following procedure assumes that: • a UL Listed ODAC Series Floor/Ceiling Column (not included) has been properly installed (U) x 2 following instructions provided with plate and pipe. Attaching Mount to ODAC Series Column CAUTION: WATCH FOR PINCH POINTS! Do not place fingers between movable parts. - Page 7 Installation Instructions OLCM1U Attach Wind Shield to Mount Loosely install two 1/4-20 x 5/8" button head cap screws (Z) and two 1/4" washers (CC) into two center holes on center wind shield (K). (See Figure 6) Use two 5/16 x 5/8" hex head bolts (Y) and two 5/16" washers (BB) to secure center wind shield (K) to back of mount assembly (H).
- Page 8 OLCM1U Installation Instructions Attaching Interface Brackets to Display Use four 1/4-20 x 5/8" button head cap screws (Z) and four 1/4" washers (CC) to secure two side wind shields (J) to Lower the latch mechanism on each interface bracket (L). center wind shield (K).
- Page 9 Installation Instructions OLCM1U Attaching Display to Ceiling Mount Repeat for other interface bracket. (wind shield hidden for clarity) WARNING: Exceeding the weight capacity can result in serious personal injury or damage to equipment! It is the (M) x 2 installer’s responsibility to make sure the combined weight of all components located within the mounting system of the OLCM1U mounts does not exceed 250 lbs (113.4 kg).
- Page 10 OLCM1U Installation Instructions Adjustments +5°AND -15° HOLE LOCKOUT CAUTION: Watch for pinch points! Do not place fingers between movable parts. 0° HOLE LOCKOUT +7.6° HOLE LOCKOUT The ceiling mounts allows yaw adjustment in 45° increments in -10° HOLE -5° AND -20° LOCKOUT HOLE LOCKOUT each direction.
- Page 11 Installation Instructions OLCM1U Roll Using Bolts/Nuts Adjust roll adjustment screw to change roll position.The roll NOTE: This will keep latch from opening but does not provide may be adjusted 3° in either direction. (See Figure 17) additional security for the displays. Use 5/16-18 x 2"...
-
Page 12: Installation Instructions
P +31 (0) 495 580 852 F +31 (0) 495 580 845 Asia Pacific A Office No. 918 on 9/F, Shatin Galleria 8800-003020 Rev02 18-24 Shan Mei Street 2019 Legrand Fotan, Shatin, Hong Kong www.legrandav.com P 852 2145 4099 03/19 F 852 2145 4477...


Need help?
Do you have a question about the Chief OLCM1U and is the answer not in the manual?
Questions and answers