Table of Contents
Advertisement
Quick Links
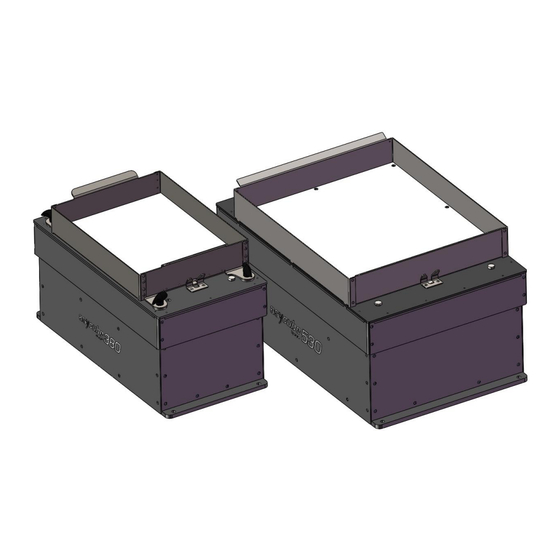
Asycube 380 & 530
Operating manual
Asyril_ ASYCUBE-
380_530_Operating_Manual_EN
Document
000.101.151
Version
B
Date
23.07.2019
Advertisement
Table of Contents

Subscribe to Our Youtube Channel
Related Manuals for Asyril Asycube 380


Summary of Contents for Asyril Asycube 380
- Page 1 Asycube 380 & 530 Operating manual Asyril_ ASYCUBE- 380_530_Operating_Manual_EN Document 000.101.151 Version Date 23.07.2019...
-
Page 2: Table Of Contents
ENERAL CHARACTERISTICS Technical features ........................ 9 Overall dimensions......................10 Visual signals ........................11 Maximum permissible external force on the platform ( Asycube 380 and 530) ..12 Permissible platform weight ....................12 Maximum plate displacement ................... 12 Work surface ........................13 ....................... - Page 3 Checking and cleaning the platform ................36 Replacing ball joints Asycube 380 and 530..............36 ..........................39 EPAIRS Replacing/installing the backlight for Asycube 380 and 530 ........40 Recover IP address using default IP address ..............44 ......................47 ECHNICAL SUPPORT For better service …...
-
Page 4: Introduction
IMPORTANT! Under no circumstances may Asyril be held liable for any loss or damage arising from a failure to observe the instructions contained in the “Safety precautions”. The customer is solely responsible for ensuring the necessary instructions are passed on to all persons concerned. -
Page 5: Safety Precautions
DANGER! Never unscrew the system's electrical boxes or protective covers. Serious physical injury could result from electric shock. Only authorised Asyril SA personnel are allowed to access these parts of the system for maintenance or for repair. DANGER! Do not plug or unplug cables of the system unless it is switched off. -
Page 6: Danger
Asycube 380 & 530 Operating Manual 000.101.151 Version: B Danger Safety equipment for operators For safety reasons, operators must wear protective eyewear when using the backlight NOTE: It is the customer's responsibility to install warning signs to inform anyone working around the Asycube that they must wear the appropriate safety equipment. -
Page 7: Warranty Information
Asycube 380 & 530 Operating Manual 000.101.151 Version: B Warranty information You will find all the Asyril warranty information (duration, scope of warranty) in the general conditions of sale. 7/50... -
Page 8: Description
The vibrations of the Asycube will be configured according to the type of components in order to guarantee an ideal process. The typical size of components that can be distributed in the platform ranges from 15 mm to 60 mm for Asycube 380 and from 30 mm to 150 mm for Asycube 530. It consists of:... -
Page 9: General Characteristics
Asycube 380 & 530 Operating Manual 000.101.151 Version: B General characteristics IMPORTANT! Do not use the device outside the specifications. Failure to follow this instruction will invalidate the warranty. Technical features Asycube 380 Asycube 530 Typical part size length of side: 15 mm to 60 mm... -
Page 10: Overall Dimensions
Asycube 380 & 530 Operating Manual 000.101.151 Version: B Overall dimensions Characteristic Asycube 380 Asycube 530 Footprint 257 mm 374 mm 498.5 mm 600 mm 147 mm 100 mm Size of vibration 254 mm 371 mm platform 325 mm 427 mm E ±... -
Page 11: Visual Signals
24 V on backlight (12) (13) (3) (5) (6) (7) synchronisation input 24 V on input 1 Figure 2-2: Asycube 380 operating indicator 24 V on input 2 LEDs 24 V on output 1 (10) (11) 24 V on output 2... -
Page 12: Maximum Permissible External Force On The Platform (Asycube 380 And 530)
Asycube 380 & 530 Operating Manual 000.101.151 Version: B Maximum permissible external force on the platform (Asycube 380 and 530) The maximum permissible external force on a point of the platform (for example, with the gripper) is: Fx = 10 N... -
Page 13: Work Surface
Asycube 380 & 530 Operating Manual 000.101.151 Version: B Work surface The maximum dimensions of the work surface correspond to the size of the illuminated Asycube platform: Asycube Asycube 304 mm 403 mm 233 mm 347 mm 380 mm 530 mm... -
Page 14: Electrical Interfaces
Digital and analogue output 1 for hopper Digital and analogue output 2 for hopper Power connection Fuse Figure 2-5: Asycube 380 electrical interfaces Ethernet connection (RJ45) Purge connector (Asycube 380 only) Programming connection (RJ12) Reset IP address NOTE: The cables are not part of the Asycube, but can be ordered separately. -
Page 15: Power Connection
16 A 14 A NOTE: Use a 20 A supply with a current reserve of 150% for 3 seconds The following two power supplies have been approved by Asyril: PULS QS20.244 SIEMENS 6EP1336-3BA10 NOTE: S-power is the safety power for the backlight and actuators. Switching off this safety power ensures that the backlight stays OFF (e.g. - Page 16 Asycube 380 & 530 Operating Manual 000.101.151 Version: B Switching off this safety power deactivates the digital hopper outputs and the digital purge output. In any case, both “Power” and “S-power” have to be supplied for using the backlight. Controller...
-
Page 17: Fuse
Operating Manual 000.101.151 Version: B Fuse DANGER! Switch off the system and disconnect the power supply before opening the fuse holder. Type of fuse: Time-delay fuse – 16 A Figure 2-11: Asycube 380 fuse Figure 2-12: Asycube 530 fuse 17/50... -
Page 18: Communication
Asycube 380 & 530 Operating Manual 000.101.151 Version: B Communication The communication with the Asycube is established by a standard Ethernet communication via the RJ45 port. Characteristic Value Default IP 192.168.127.254 address Default subnet 255.255.255.0 mask Port 4001 Can be read by... -
Page 19: Digital Inputs 1 And 2
Asycube 380 & 530 Operating Manual 000.101.151 Version: B Digital inputs 1 and 2 A standard M8 three-pin male cable is used to run a vibration sequence defined in the HMI. This cable must be connected as follows: Waveform +24 V DC OUT (sensor... -
Page 20: Purge Connector (Asycube 380 Only)
Asycube 380 & 530 Operating Manual 000.101.151 Version: B Purge connector (Asycube 380 only) A standard M8 four-pin male cable is used to transmit the signals with the purge system. Waveform 24 VDC Digital input 24 VDC 0 V GND... -
Page 21: Mechanical Interfaces
The total weight of the plate and frame, if they are not attached to the floor, should be at least 200 kg (Asycube 380) and 250 kg (Asycube 530) in order to dampen some of the vibrations. -
Page 22: Accessories And Optional Modules
In order to improve the availability of certain components on the surface of the feeder, it is possible to structure the platform surface. Asyril can provide various types of platform on request. Frequently used structures on Asycube 380 & 530 are as follows: Platform Example –... - Page 23 E.g.: Pin, axis NOTE: For more information on these bespoke platforms, please contact Asyril customer service. The customer can also make their own platforms, respecting the following dimensions: Figure 2-18: Dimension of platform 380 23/50...
-
Page 24: Backlight
Asycube 380 & 530 Operating Manual 000.101.151 Version: B Figure 2-19: Dimension of platform 530 Backlight The following backlights are available: Asycube 380 & 530 backlight Colour Wavelength Blue 465 nm Green 550 nm Infrared 850 nm 645 nm White 6500 K The backlight is supplied fitted when it is ordered at the same time as the Asycube. -
Page 25: Cables
The following cables are available: Product Power cable RJ45 Ethernet cable Synchro backlight cable Input cable Output cable NOTE: For more information on these cables, please contact Asyril customer service. IMPORTANT: There is NO suitable cable for the cable chains. 25/50... -
Page 26: Hopper
Asycube 380 & 530 Operating Manual 000.101.151 Version: B Hopper An optional hopper is available in the 10 or 15 litre versions. The stainless steel type 1.4301 hoppers withstand a maximum filling load of 20 kg. The following items are available:... - Page 27 Asycube 380 & 530 Operating Manual 000.101.151 Version: B Controller mechanical interface The intensity of the hopper's vibrations can be adjusted using the potentiometer. NOTE: Position the controller in a location providing access to the potentiometer 27/50...
- Page 28 Asycube 380 & 530 Operating Manual 000.101.151 Version: B 10 L hopper mechanical interface for Asycube 380 With hopper mounting kit (as an option depending on product list): Without hopper mounting kit: 28/50...
- Page 29 Asycube 380 & 530 Operating Manual 000.101.151 Version: B 15 L hopper mechanical interface for Asycube 530 29/50...
-
Page 30: Transportation, Handling And Installation
If the shipping box is to be left standing, it should be in a horizontal position. Do not climb on or place heavy objects on top of the shipping box. The Asycube 380 is shipped in a cardboard box. The Asycube 530 is shipped on a pallet. The dimensions are as follows:... -
Page 31: Installation And Storage Environment
Asycube 380 & 530 Operating Manual 000.101.151 Version: B Locate the identification label at the back of the product and check that the serial number corresponds to the delivery note You need this serial number for any correspondence with Asyril. -
Page 32: Maintenance And Repair
Maintenance and repair Safety instructions IMPORTANT! The product does not contain any parts which can be repaired by the user. Contact Asyril or your local supplier to carry out maintenance. Failure to follow this instruction will invalidate the warranty. DANGER! Do not operate the system when it is damaged. -
Page 33: Removing/Replacing The Platform
Risk of crushing. Be sure that the backlight is off before removing the platform module Step 1 Asycube 530: Unscrew the 8 M4 Allen screws completely (A) Asycube 380: Unscrew the 4 handle screws (B) Step 2 Remove the Asycube platform assembly. 33/50... - Page 34 Step 4 Assembly: Position the platform in the frame. Position the assembly on the Asycube: Figure 4-1: Remove the platform Asycube 530: Tighten the 8 bolts (2.2 Nm). Asycube 380: Tighten the 4 handle screws securely by hand 34/50...
-
Page 35: Platform In Purge Configuration
Step 2 Asycube 530: Fit the adapter piece (C) and secure it using 2 screws (0.6 Nm) Asycube 380: Fit the adapter piece (C) and secure it using 4 screws (0.6 Nm) The part (C) is available as an option. -
Page 36: Checking And Cleaning The Platform
Replace the surface if it is damaged to the extent that it obstructs the vision or behaviour of the parts. Figure 4-3: Platform Replacing ball joints Asycube 380 and 530 Step 1 Remove the platform and completely unscrew the 4... - Page 37 Asycube 380 & 530 Operating Manual 000.101.151 Version: B Step 3 Hold the axis (C) with a size 10 open-end wrench whilst you loosen the ball joint (D) Step 4 Apply a drop of adhesive (type: Loctite 243 or similar) to the outer thread of the new ball joint.
- Page 38 Asycube 380 & 530 Operating Manual 000.101.151 Version: B Step 5 Place the upper assembly (B) on the 4 ball joints and carefully align the holes opposite the threads Step 6 Apply a drop of adhesive (type: Loctite 243 or similar) to the nuts Tighten (4.4 Nm) the four nuts...
-
Page 39: Repairs
This section gives a list of the components, which can be replaced directly by the customer. For any other repair, the product must be returned to the manufacturer. IMPORTANT! For any kind of repair, always use Asyril products. Part name Backlight assembly (see 4.3.1) Platform and platform assembly (see 4.2.2) -
Page 40: Replacing/Installing The Backlight For Asycube 380 And 530
Asycube 380 & 530 Operating Manual 000.101.151 Version: B Replacing/installing the backlight for Asycube 380 and 530 DANGER! Make sure that all power sources and other cables to the unit are disconnected before changing the backlight. Material needed: New backlight assembly ordered from Asyril Flat wrench size 5.5... - Page 41 Asycube 380 & 530 Operating Manual 000.101.151 Version: B Step 3 Carefully disconnect the connectors from the electronics Remove the old backlight assembly (D) Replace the complete backlight assembly or only a backlight board by unscrewing the 8 screws (E) (it may be necessary...
- Page 42 Asycube 380 & 530 Operating Manual 000.101.151 Version: B Step 5 Replace the backlight boards respecting the position of the connector (F), and tighten the 8 screws (0.7 Nm) Take care to remove the protective film on the underside of the backlight board...
- Page 43 Asycube 380 & 530 Operating Manual 000.101.151 Version: B Step 6 Connect the connectors to the electronics Step 7 Refit the covers (J) on both sides and tighten (1.3 Nm) the screws on both sides Use a Torx key size 10 (0.8 Nm) Configure the Asycube with a new backlight colour You can set the colour of the backlight in the Asycube.
-
Page 44: Recover Ip Address Using Default Ip Address
Asycube 380 & 530 Operating Manual 000.101.151 Version: B Figure 4-4: Change backlight colour in HMI Ref. Designation Description " Asycube" button Press this button to display the Asycube screen. " Asycube Press this button to display the Asycube configuration tab. - Page 45 Asycube 380 & 530 Operating Manual 000.101.151 Version: B Asycube 530 Step 1 Disconnect the power cable (A) (or switch off the power supply to the Asycube) Press and hold the “Reset Step 2 IP” (B) button whilst you reconnect the power cable or you switch on the Asycube.
- Page 46 Asycube 380 & 530 Operating Manual 000.101.151 Version: B Asycube 380 Step 1 Disconnect the power cable (A) (or switch off the power supply to the Asycube) Insert a tip in the “Reset IP” Step 2 hole (B) and reconnect the power cable or switch on the Asycube.
-
Page 47: Technical Support
Asycube 380 & 530 Operating Manual 000.101.151 Version: B Technical support For better service … Have you read the relevant manuals and not found the answers to your questions? Before calling the support service, note the following information for your system:... -
Page 48: Annexes
Asycube 380 & 530 Operating Manual 000.101.151 Version: B Annexes CE certificate 48/50... - Page 49 Asycube 380 & 530 Operating Manual 000.101.151 Version: B 49/50...
- Page 50 23.07.2019 Addition of Asycube 380 The following document is the property of Asyril S.A. and may not be copied or circulated without permission. The information contained in this document is subject to change without notice for the purpose of product improvement.
Need help?
Do you have a question about the Asycube 380 and is the answer not in the manual?
Questions and answers