Table of Contents
Advertisement
Quick Links
Advertisement
Table of Contents

Subscribe to Our Youtube Channel
Related Manuals for Sonova Phonak Roger Pen iN


Summary of Contents for Sonova Phonak Roger Pen iN
- Page 1 Roger Pen User Guide...
-
Page 2: Table Of Contents
Contents Welcome Adding additional microphones Getting to know your Roger Pen iN 6.1 Connect In the box 6.2 Using additional microphones Troubleshooting How your Roger Pen iN works Compliance information Device descriptions Information and explanation of symbols Indicator lights (LED status) Getting started Important safety information Setting up the docking station... -
Page 3: Welcome
1. Welcome Congratulations on choosing the Roger Pen iN from Phonak. Please read this User Guide thoroughly to benefit from This universal, cutting-edge wireless microphone helps all the possibilities your Roger Pen iN offers. people with a hearing loss to understand more speech in loud noise and over distance. -
Page 4: Getting To Know Your Roger Pen In
2. Getting to know your Roger Pen iN 2.1 In the box 2.2 How your Roger Pen iN works Roger Pen iN transmits the speaker’s voice directly into your ears. Hearing Roger Pen iN Docking station Power supply with coun- aid with try adapter and charging Roger... -
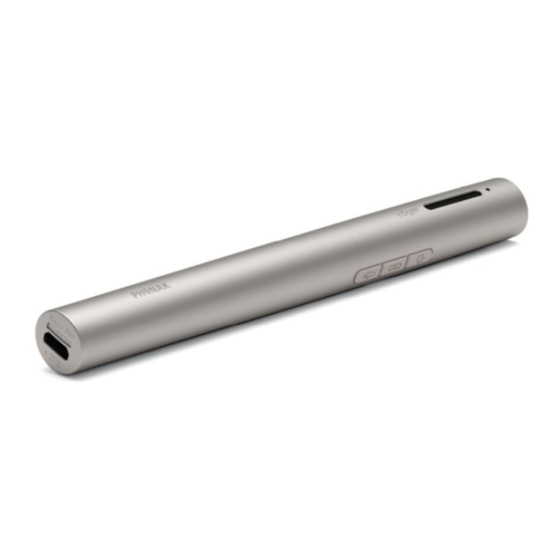
Page 5: Device Descriptions
2.4 Indicator lights (LED status) 2.3 Device descriptions Indicator light Meaning Roger Pen iN Switched on 1 Indicator light (LED) Switching off 2 Charging and audio input Switching off (micro-USB) Audio input detected 3 Microphones Microphone / audio input muted 4 On/Off/Mute 5 Connect Charging... -
Page 6: Getting Started
3. Getting started 3.1 Setting up the docking station Remove / Change: a. Pull back the tab on the universal The Roger Pen iN docking station is used to both recharge the power supply. microphone and transmit audio from a TV or other audio device b. - Page 7 Connecting the docking station to a TV / audio device 1. Plug the audio cable You can also connect via a into the audio input of SCART adaptor, which can be the docking station: bought from an electronics store or from your Phonak 2.
-
Page 8: Charging Your Roger Pen In
3.2 Charging your Roger Pen iN When the docking station is plugged into the headset so- cket of your TV, you can adjust the volume via your TV’s re- mote control. Roger Pen iN contains a built-in lithium polymer Some TVs will switch off their loudspeakers when you plug battery with fast-charge the jack into the headset socket –... - Page 9 Alternatively, you can also charge your Roger Pen iN without You can also charge your Roger Pen iN by using the char- the docking station. This may be useful when traveling. ging cable to connect your Roger Pen iN to one of your computer’s USB ports.
-
Page 10: Switching On And Off
3.3 Switching on and off 3.4 Using Roger receivers Using Roger MyLink To switch your Roger Pen iN on, press the on / off button for one second until the indicator light turns green. If your Roger receiver is a Roger MyLink, switch your Roger MyLink on and hang it around your neck. -
Page 11: Connecting A Receiver
3.5 Connecting a receiver The indicator light will turn green for two seconds to confirm a successful connection. Your hearing care professional may already have connected your Roger Pen iN to your hearing aids. If this is not the case, 4. -
Page 12: Using Roger Pen In
4. Using Roger Pen iN Interview style Roger Pen iN is a flexible, intelligent product. It detects which situation you are in and adapts its microphone settings Hold Roger Pen iN in your hand and point it towards the person automatically to provide you the best speech you want to hear. -
Page 13: Attaching The Lanyard
Around the neck 4.1 Attaching the lanyard Use the lanyard (neckloop) to hang Roger Pen iN around the neck of the speaker you want to hear. Slide the plastic part of the lanyard over the Roger Pen iN’s clip (1.) until it is fully inserted (2.). If you prefer to set the Roger Pen iN’s microphone mode manually, please refer to ‘Special use cases / Manual micro- phone modes’... -
Page 14: Connecting To Multimedia Devices
Hanging it around the neck 4.2 Connecting to multimedia devices 1. Open the lanyard by pulling the magnets apart. You can connect your Roger Pen iN to an audio source – such as your TV, tablet or HiFi - to hear its audio signal directly in 2. -
Page 15: Special Functions
5. Special functions Via micro-USB audio cable 5.1 Mute Alternatively, you can use the short micro-USB audio cable to connect your multimedia device directly to your Roger Firmly press the on / off button Pen iN. to mute Roger Pen iN’s microphone or audio input. -
Page 16: Manual Microphone Modes
5.2 Manual microphone modes The Roger Pen iN’s current manual microphone mode is indicated by the following indicator lights: If you wish to override the automatically selected microphone Indicator light Meaning mode, you can do this manually. Interview mode. Select this mode if Roger Pen iN features three manual microphone modes, which you want hear one particular speaker by can be accessed in turn by pressing the... -
Page 17: Disconnecting Roger Devices (Newnet)
5.3 Disconnecting Roger devices (NewNet) Indicator light (Verification mode) Indicator light Meaning To disconnect your Roger Pen iN from any connected receivers or other Roger Verification mode activated microphones, hold the Connect button Verification mode can only be activated during the for 7 seconds. -
Page 18: Adding Additional Microphones
6. Adding additional microphones Roger technology allows you to use multiple microphones in It’s possible to add up to 10 other Roger microphones to parallel by connecting additional Roger microphones. your Roger Pen iN. Note that the second Roger Pen iN will be locked in 6.1 Connect lanyard mode and will need to be within 20cm / 8 inches to the speaker‘s mouth. -
Page 19: Using Additional Microphones
Indicator light (Connection status) 6.2 Using additional microphones After pressing the Connect button, the following feedback may be given by the indicator light: Hand over the Roger microphones to your speakers. Make sure they are worn properly (pointing to the mouth and Indicator light Meaning within 20 cm / 8 inches). - Page 20 Indicator light (multiple microphone status) Only one speaker can be heard at a time. When two people speak at the same time, the person who talked first will be When using multiple Roger microphones, the following heard. When they stop talking, the other speaker will be feedback may be given by the indicator light: heard.
-
Page 21: Troubleshooting
7. Troubleshooting Problem Causes What to do I cannot switch Roger Pen iN on The battery is empty Charge Roger Pen iN for at least two hours I cannot understand the speaker The microphone is not positioned Move Roger Pen iN closer to the speaker’s mouth correctly Make sure Roger Pen iN is pointing towards the speaker’s mouth The microphone openings are... - Page 22 Problem Causes What to do I cannot hear my multimedia The audio source is muted Unmute the audio source device Roger Pen iN is using the micro- Swich on Roger Pen iN to listen to the audio source via the micro-USB USB audio cable but is not audio cable switched on...
-
Page 23: Compliance Information
8. Compliance information Europe: Notice 1: Declaration of Conformity This device complies with Part 15 of the FCC Rules and Hereby Phonak Communications AG declares that this with Industry Canada’s license exempt RSS standard(s). product is in compliance with the Radio Equipment Operation is subject to the following two conditions: Directive 2014/53/EU. - Page 24 Notice 4: the instructions, may cause harmful interference to radio communications. However, there is no guarantee that Japanese Radio Law Compliance. Business Law interference will not occur in a particular installation. If Compliance. This device is granted pursuant to the the device does cause harmful interference to radio or Japanese Radio Law .
-
Page 25: Information And Explanation Of Symbols
9. Information and explanation of symbols Operating The CE symbol is confirmation by The device is designed such that it conditions Phonak Communications AG that this functions without problems or product is in compliance with the Radio restrictions if used as intended, unless Equipment Directive 2014/53/EU. -
Page 26: Important Safety Information
10. Important safety information This symbol on the product or its packaging means that it should not be disposed of with your other household Please read the information on the following pages before waste. it is your responsibility to dispose using your device. - Page 27 Use only hearing aids that have been specially Do not use the device in explosive areas programmed for you by your hearing care (mines or industrial areas with danger of explosions, professional. oxygen rich environments or areas where flammable anesthetics are handled) or where electronic Dispose of electrical components in accordance with equipment is prohibited.
-
Page 28: Product Safety Information
10.2 Product safety information If the device has been dropped or damaged, if it overheats, has a damaged cord or plug, or has been Protect the device connectors, plugs, power supply dropped into liquid, stop using your device and contact from dirt and debris. -
Page 29: Service And Warranty
11. Service and warranty 11.1 Local warranty 11.3 Warranty limitation Please ask the hearing care professional, where you This warranty does not cover damage from improper purchased your devices, about the terms of the local handling or care, exposure to chemicals, immersion in warranty. - Page 30 Notes...
- Page 31 Phonak Communications AG Länggasse 17 CH-3280 Murten Switzerland www.phonak.com...
Need help?
Do you have a question about the Phonak Roger Pen iN and is the answer not in the manual?
Questions and answers