Table of Contents
Advertisement
Quick Links
INSTALLER: Leave this manual with the appliance
CONSUMER: Retain this manual for future reference
INSTALLATEUR : Laissez cette notice avec l'appareil.
CONSOMMATEUR : Conservez cette notice pour con-
sultation ultérieure.
FOR YOUR SAFETY
DO NOT STORE OR USE GASOLINE OR OTHER FLAMMABLE
VAPORS AND LIQUIDS IN THE VICINITY OF THIS OR ANY OTHER
APPLIANCE.
IHP electric fireplaces are designed for use as a decorative appli-
ance and/or as a supplemental heater. They are not intended
for continuous use as a primary heat source.
INSTALLATION AND
OPERATION INSTRUCTIONS
33" AND 36" ELECTRIC FIREPLACES
33" and 36" Electric Fireplaces
P/N 900974-00 Rev. NC 06/2019
MODELS
CAPELLA 33
CAPELLA 36
This manual will enable you to obtain a safe, efficient and dependable
installation and operation of your electric fireplace. Please read and
understand these instructions before beginning your installation.
Do not alter or modify this fireplace or its components under any circum-
stances. Any modification or alteration of the fireplace system, including
but not limited to the fireplace and accessories, may void the warranty,
listings and approvals of this system and could result in an unsafe and
potentially dangerous installation.
IMPORTANT! IF OPTIONAL GLASS DOORS ARE PURCHASED, TO
ASSURE PROPER ALIGNMENT, INSTALL THIS FIREPLACE IN A
SQUARE AND PLUMB CONDITION, USING SHIMS AS NECESSARY
AT SIDES. THIS APPLIANCE IS MOUNTED ON RUBBER FEET TO
ENSURE ADEQUATE AIR CIRCULATION BENEATH FIREPLACE.
DO NOT BLOCK AIRFLOW AT THE BOTTOM AIR INTAKES.
A French manual is available upon request. Order P/N 900974-01
Ce manuel d'installation est disponible en francais, simplement en
faire la demande. Numéro de la pièce 900974-01.
C
P900974-00
ERT3033
ERT3036
®
Report # C1482763
US
MPE-33-3
MPE-36-3
Advertisement
Table of Contents

Subscribe to Our Youtube Channel
Related Manuals for IHP CAPELLA 33


Summary of Contents for IHP CAPELLA 33
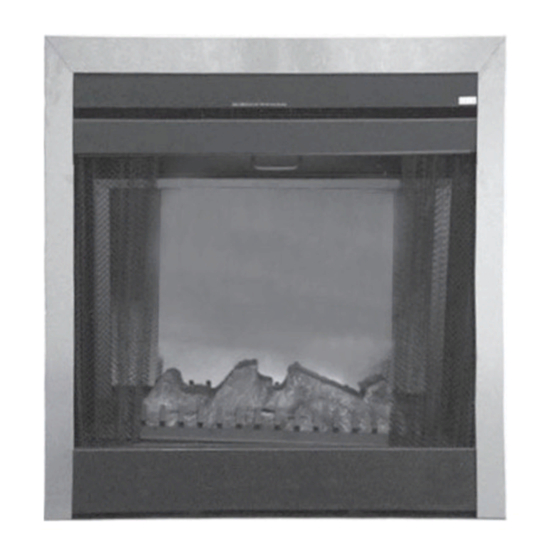
- Page 1 DO NOT STORE OR USE GASOLINE OR OTHER FLAMMABLE VAPORS AND LIQUIDS IN THE VICINITY OF THIS OR ANY OTHER APPLIANCE. IHP electric fireplaces are designed for use as a decorative appli- ® Report # C1482763 ance and/or as a supplemental heater. They are not intended for continuous use as a primary heat source.
-
Page 2: Important Safety Information
IMPORTANT SAFETY AND ANY REPAIRS TO THIS FIREPLACE WARNING SHOULD BE PERFORMED BY A QUALIFIED WARNING INFORMATION SERVICE TECHNICIAN. This product can expose you READ THIS MANUAL IN ITS ENTIRETY to chemicals including Carbon UNDER NO CIRCUMSTANCES SHOULD AND UNDERSTAND THESE RULES THIS FIREPLACE BE MODIFIED. -
Page 3: Table Of Contents
CONGRATULATIONS! Wall Thermostat Wire Gage Voltage Wire Gage In selecting this Innovative Hearth Products (IHP) electric fireplace, you have chosen the finest and most dependable fireplace found anywhere. A beautiful and prestigious 5 VOLTS 18 GAGE addition to the finest homes. -
Page 4: Framing Specifications
33" MODELS FRAMING SPECIFICATIONS 25-5/8 " (651 mm) 36-1/4 " (921 mm) 35-1/4 " (895 mm) 51-1/4 " (1302 mm) Electrical Junction Electrical 32 " Junction 35-1/4 " (812 mm) (895 mm) (left side) Corner View 4 " (102 mm) 15-1/8 "... - Page 5 36" MODELS FRAMING SPECIFICATIONS 26-1/2 " (668 mm) 37-1/2 " (945 mm) 38-5/8 " (981 mm) 52-3/4 " (1339 mm) Electrical Junction Electrical 32 " Junction 38-3/4 " (812 mm) (984 mm) (left side) Corner View 4 " (102 mm) 15-1/8 "...
-
Page 6: Clearances
(up to the edge of the appliance). Model: CAPELLA 33 - Disconnect and remove the 120 Volt power A drywall lip at the top of the fireplace and 4 cord from the fireplace wires. -
Page 7: Electrical Connections
ELECTRICAL CONNECTIONS MANUAL CONTROL PANEL OPERATION Press the “ ” key once, the heater is in High temperature mode, two groups of heater is ON (refer to Figure 4) at 1500W. The indication will display red color. Refer to the electrical diagrams on Pages 11-15. Once this appliance has been properly installed Press the “... -
Page 8: Remote Control Operation
REMOTE CONTROL OPERATION: 7. Heater ON/OFF key ( ): press first, the heater is ON the heater is working on ”HIGH” temperature status, two groups of heating Remote Control Function system turn ON at 1500W; press again,the (with LED display on firebox) heater is OFF;... -
Page 9: Maintenance
MAINTENANCE b. Turn the power and heater switches on 3. Open the screens (remove glass panel enclosure, if applicable). and check for proper operation. This appliance has been designed to provide c. Turn off power to the fireplace. many years of trouble-free service. The com- 4. -
Page 10: Warning
Locate flame cylinder drum (see Figure • Replacement LED strips are available 15). Locate the cotter pin on left through IHP (see Page 17). side of flame cylinder and remove it. 1. Turn off power to the fireplace. Remove outer plastic sleeve of drum 2. -
Page 11: Wiring Diagrams
WIRING DIAGRAM - 120 VOLT Wiring diagrams are provided here for reference purposes only. This information is also provided on schematics attached directly to the appliance on the left side. CAUTION: LABEL ALL WIRES PRIOR TO DISCONNECTION WHEN SERVICING CONTROLS. WIRING ERRORS CAN CAUSE IMPROPER AND DAN- GEROUS APPLIANCE OPERATION. -
Page 12: Warning
WIRING DIAGRAM - 240 VOLT Wiring diagrams are provided here for reference purposes only. This information is also provided on schematics attached directly to the appliance on the left side. CAUTION: LABEL ALL WIRES PRIOR TO DISCONNECTION WHEN SERVICING CONTROLS. WIRING ERRORS CAN CAUSE IMPROPER AND DAN- GEROUS APPLIANCE OPERATION. - Page 13 WALL THERMOSTAT WIRING DIAGRAM (optional kit, see Page 19) DC 5V WALL THERMOSTAT INSIDE OUTSIDE NOTE: Thermostat wire and wire nuts are field provided. Figure 21 900974-00NC 06/2019 NOTE: DIAGRAMS & ILLUSTRATIONS ARE NOT TO SCALE.
- Page 14 Installing Wall Thermostat (optional kit, see Page 19) Wire the wall thermostat prior to installing the fireplace. WALL THERMOSTAT WIRING (24 VAC): Install Wall Thermostat per instructions provided with kit and per the following information: NOTE: Thermostat only turns on or off fireplace heat. 1.
- Page 15 THERMOSTAT/SWITCH WIRE ACCESS COVER Follow instructions in Figure 23. 1) Locate access cover 3) Pull out Temp Sensor and cut black wires. Fireplace Left Side Thermostat Access Cover 2) Remove access cover. 4) Access wire and connect to Wall Thermostat (H8864) NOTE: Thermostat wire and wire nuts are field provided.
-
Page 16: Troubleshooting
TROUBLESHOOTING Who Performs Corrective Symptom Possible Causes Corrective Action Action 1. Fireplace turns off and will not Fireplace has overheated. Homeowner The appliance is protected with a safety turn on and an audible beeping noise device to prevent it from overheating. If can be heard. -
Page 17: Replacement Parts
REPLACEMENT PARTS - MODELS CAPELLA 33/36, MPE-33/36-3, AND ERT3033/36 33" Electric Fireplaces 36" Electric Fireplaces ITEM DESCRIPTION CAT. NO. CAT. NO. LED Light Strip, Embers H9106 H9106 Side Frames, 1 Left And 1 Right H1942 H1942 Circuit Board LED F4040... - Page 18 REPLACEMENT PARTS COMPONENT DIAGRAMS - MODELS CAPELLA 33/36, MPE-33/36-3, AND ERT3033/36 NOTE: DIAGRAMS & ILLUSTRATIONS ARE NOT TO SCALE. 900974-00NC 06/2019...
-
Page 19: Optional Accessories
ACCESSORY COMPONENTS - MODELS CAPELLA 33/36, MPE-33/36-3, AND ERT3033/36 Front Face Kits Wall Thermostat These decorative, screened front face panels are available in two attractive styles and are easy to install. The wall thermostat kit provides temperature control for optimum comfort. - Page 20 NOTES ______________________________________________________ ______________________________________________________ ______________________________________________________ ______________________________________________________ ______________________________________________________ ______________________________________________________ ______________________________________________________ ______________________________________________________ ______________________________________________________ ______________________________________________________ ______________________________________________________ ______________________________________________________ ______________________________________________________ ______________________________________________________ ______________________________________________________ ______________________________________________________ ______________________________________________________ ______________________________________________________ ______________________________________________________ ______________________________________________________ ______________________________________________________ ______________________________________________________ ______________________________________________________ ______________________________________________________ ______________________________________________________ ______________________________________________________ ______________________________________________________ ______________________________________________________ ______________________________________________________ ______________________________________________________ ______________________________________________________ ______________________________________________________ ______________________________________________________ ______________________________________________________ ______________________________________________________ ______________________________________________________ ______________________________________________________ 900974-00NC 06/2019...
-
Page 21: Warranty Certificate
In order for any claim under this warranty to be valid, you must contact the IHP dealer/distributor from which you purchased the product. If you cannot locate the dealer/ distributor, then you must notify IHP in writing. IHP must be notified of the claimed defect in writing within 90 days of the date of failure. Notices should be directed to the IHP Warranty Department at 1769 East Lawrence Street;... - Page 22 Date appliance was Installed Dealer name Innovative Hearth Products (IHP) reserves the right to make changes at any time, without notice, in design, materials, specifications, and prices, and also to discontinue colors, styles, and products. Consult your local distributor for fireplace code information.
Need help?
Do you have a question about the CAPELLA 33 and is the answer not in the manual?
Questions and answers