Table of Contents
Advertisement
Available languages
Available languages
Advertisement
Table of Contents

Related Manuals for Dimplex CAS500R


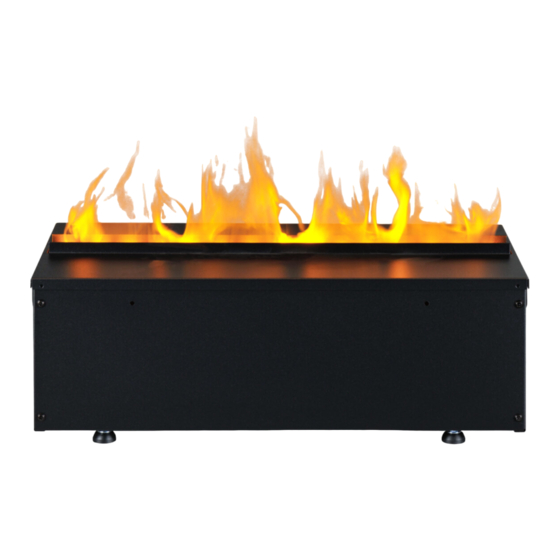
Summary of Contents for Dimplex CAS500R
- Page 1 CAS500R CAS1000R 08/53963/0 Issue 2 OCN 11034 The product complies with the European Safety Standards and the European Standard Electromagnetic Compatibility (EMC). These cover the essential requirements of EMC Directives and the LVD Directive.
- Page 2 MODEL DIM ‘A’ CAS500R 508mm CAS1000R 1017mm FUEL BED DIM ‘B’ METAL 304mm 354mm Min: 190mm Max: 260mm Dim A 300mm Dim B Fig.1 400mm 400mm 400mm Fig.2 Fig.3 >210cm >210cm Eg. 42cm x 5cm Eg. 14.5cm x 14.5cm...
- Page 3 Fig.4 >420cm Eg. 20.5cm x 20.5cm >420cm Eg. 84cm x 5cm >420cm >420cm Eg. 84cm x 5cm Eg. 84cm x 5cm Fig.6A Fig.6B Fig.6 Fig.5 Fig.7...
- Page 4 Fig.8 Fig.9 Fig.10 CAS500R CAS1000R Fig.11 Fig.12A...
- Page 5 Fig.12B Fig.13 Fig.14 Fig. 15 Fig. 17 Fig. 16...
- Page 6 Fig. 18 Fig. 19A Fig. 19B Fig. 19 Fig. 20...
- Page 7 Fig 21 CAS500 CAS1000 Fig 22 Fig 23 Fig 24 Fig 25 Fig 27 Fig 26...
- Page 8 GB ....................1 DE ....................9 NL ....................17 FR ....................25 IT ....................33 PL ....................41...
- Page 9 Dimplex CAS500R, CAS1000R Introduction Please read this information guide carefully to be able to safely install, use and maintain your product. When using electrical appliances, basic precautions should always be followed to reduce the risk of fire, electrical shock and injury to persons, including the following: If the appliance is damaged, check with the supplier before installation and operation.
-
Page 10: Electrical Connection
Please see Fig 3 & 4 for examples of the required ventilation. Please take note of the requirement for a ventilation opening on the shelf where the product sits, to allow a clear path for the air to get to the product. CAS500R Free Ventilation Area: Minimum 210cm CAS1000R Free Ventilation Area: Minimum 420cm ELECTRICAL CONNECTION Plug the fire into a 13amp/240 Volt outlet. - Page 11 (Fig.16). 5. Each log fuel bed is supplied with a loose non LED log. For single CAS500R installations, this can be placed on top of the fuel bed or stored away with the packaging. For CAS1000R or multiple product installations, the loose log can be placed on the centre join between two fuel beds (Fig 17).
-
Page 12: Operating The Product
MANUAL CONTROLS The manual controls are located beneath the fuel bed. (Fig 21) CAS500R Mains Switch - Controls the electricity supply to the appliance. (Fig 21A) Note: This switch must be in the ‘ON’ ( I ) position for the appliance to operate Button Panel - Controls the functioning of the appliance. -
Page 13: Receiver Controls
Pairing the Remote Control to Multiple Products If you are installing multiple CAS500R/CAS1000R products you can pair them to a single remote control. To do this, please install the products as described in the “Installation Instructions”. Ensure that all products are connected to mains power and have water supplied. -
Page 14: Maintenance
7. When all products are paired, test the remote control by pressing the button. If any of the products fail to receive a signal from the remote control you can bring that product back in line with the others via the Manual Controls or the receiver controls. -
Page 15: Additional Information
8. Put a small amount of washing up liquid into the sump, and using a soft brush, gently clean all surfaces in the sump and gently clean the transducer including the cone and metal discs located in the top grooved surface. 9. -
Page 16: Troubleshooting
Troubleshooting Symptom Cause Corrective Action Product will not oper- Electrical connection issue Ensure product has working electrical con- ate. nection. Low water reading Refill the water tank(s) of the product. See “Low Water / Refilling the Water Tanks” above. Product will not oper- Low water reading Refill the water tank(s) of the product. - Page 17 Dimplex CAS500, CAS1000 Einleitung Lesen Sie diese Informationen bitte sorgfältig, damit Sie das Gerät sicher installieren und warten können. Wichtiger Sicherheitshinweis Wenn elektronische Geräte verwenden, sollten stets grundlegende Sicherheitsvorkehrungen treffen, um die Gefahr von Feuer, einem elektrischen Schlag und Verletzungen zu vermeiden. Dazu zählen: Ist das Gerät beschädigt, sprechen Sie vor der Installation und Inbetriebnahme unverzüglich...
-
Page 18: Elektrische Anschlüsse
Komponenten dabei abzukühlen und sorgt dafür, dass der Nebel aus dem Gerät entweichen kann. Siehe Abb. 3 und 4 für die notwendige Belüftung. Beachten Sie, dass das Regal, auf dem das Produkt steht, eine Lüftungsöffnung erfordert, damit Luft problemlos zum Produkt gelangen kann. CAS500R Freier Belüftungsbereich: Minimum 210 cm CAS1000R Freier Belüftungsbereich: Minimum 420 cm ELEKTRISCHE ANSCHLÜSSE Stecken Sie den Kamin in eine Steckdose mit 13 Ampere/240 Volt. - Page 19 Jedes Gerät kann mit seiner eigenen Fernsteuerung betrieben werden. Es ist aber auch möglich, mehrere Geräte mit einer Fernsteuerung zu bedienen. Achten Sie bitte darauf, dass maximal sechs einzelne Geräte (entweder CAS500R oder CAS1000R) mit einer Bluetooth-Fernsteuerung betrieben werden können. Somit können alle Geräte gleichzeitig mit nur einer Fernsteuerung betrieben werden.
-
Page 20: Manuelle Steuerung
MANUELLE STEUERUNG Die manuellen Kontrollelemente befinden sich neben dem Brennstoffbett. (Abb. 21) CAS500R Hauptschalter – Steuert die Stromversorgung des Geräts. (Abb. 21A) Hinweis: Hinweis: Dieser Schalter muss sich auf der Position EIN ( I ) befinden, damit das Gerät betrieben werden kann. - Page 21 Die Bedienung der Fernsteuerung erfolgt in gleicher Weise wie im Kapitel „Empfänger-Steuerung“ beschrieben. Sie können die Fernsteuerung mit mehreren Produkten koppeln, indem Sie die Anweisungen mit anderen Geräten wie oben beschrieben wiederholen. Bitte beachten Sie, dass maximal sechs Geräte des Typs CAS500R oder CAS1000R mit einer Fernsteuerung gekoppelt werden können.
-
Page 22: Allgemeine Hinweise
Geräte an die Stromquelle sowie die Wasserversorgung angeschlossen sind. Wenn Sie CAS1000R- und CAS500R- Produkte miteinander koppeln, wählen Sie bitte die Fernsteuerung mit den sechs Tasten als Master-Fernsteuerung. 1. Koppeln Sie das erste Produkt wie in den Schritten 1-4 oben beschrieben. -
Page 23: Zusätzliche Informationen
2. Heben Sie das Brennstoffbett vorsichtig ab und legen Sie es beiseite. 3. Entfernen Sie den Wassertank von seiner Position oberhalb des Sammelbehälters. 4. Trennen Sie die elektrische Verbindung zu den Verneblern auf der rechten Seite des Sammelbehälters. (Abb. 23) 5. -
Page 24: Problembehebung
Problembehebung Symptom Ursache Problembehebung Gerät funktioniert Problem mit der elektrischen Stellen Sie sicher, dass das Produkt über eine nicht. Verbindung funktionierende elektrische Verbindung verfügt. Niedriger Wasserstand (Messwert) Füllen Sie den bzw. die Wassertanks des Produkts wieder auf. Siehe „Niedriger Wasserstand / Wiederauffüllen der Wassertanks“... - Page 25 Dimplex CAS500, CAS1000 Introductie Lees deze informatiehandleiding zorgvuldig door voor het veilig installeren, gebruiken en onderhouden van uw product. Belangrijk veiligheidsadvies Bij gebruik van elektrische apparaten dienen basisvoorzorgmaatregelen altijd in acht genomen te worden om het risico op brand, elektrische schokken en verwondingen bij personen te...
-
Page 26: Elektrische Aansluiting
4 voor voorbeelden van de vereiste ventilatie. Zorg ervoor dat u de vereiste van een ventilatieopening op de plank waarop het product staat in acht houdt. Zo blijft er genoeg ruimte over voor de luchtcirculatie rondom het apparaat. CAS500R Vrij ventilatiegebied: Minimaal 210 cm CAS1000R Vrij ventilatiegebied: Minimaal 420 cm ELEKTRISCHE AANSLUITING Sluit het apparaat aan op een stopcontact van 13 Amp/240 Volt. - Page 27 (fig. 16). 5. Elk brandstofbed met blokken wordt geleverd met een los blok zonder LED. Voor enkele CAS500R-installaties kan deze bovenop het brandstofbed worden geplaatst of met de verpakking worden opgeslagen. Voor CAS1000R of installaties met meerdere producten kan het losse blok op de tussenverbinding van twee brandstofbedden worden geplaatst (fig.
- Page 28 Dit gedeelte omschrijft hoe u uw kachel met de afstandsbediening of handmatig kunt bedienen. HANDMATIGE BEDIENINGSELEMENTEN De handbedieningselementen bevinden zich onder het brandstofbed. (fig. 21.) CAS500R Hoofdschakelaar: regelt de stroomtoevoer naar het apparaat. (Fig. 21A.) Opmerking: De schakelaar moet in de “AAN”-stand ( I) staan, voordat het apparaat kan functioneren.
- Page 29 Installeer de producten zoals beschreven in de “Installatie-instructies”. Zorg ervoor dat alle producten op de netvoeding zijn aangesloten en dat er water is toegevoerd. Als u CAS1000R- en CAS500R-producten koppelt, kies dan de afstandsbediening met 6 knoppen als de hoofdafstandsbediening.
-
Page 30: Algemene Tips
6. Herhaal de bovenstaande stappen om het volgende product te koppelen. 7. Wanneer alle producten zijn gekoppeld, test u de afstandsbediening door op de knop te drukken. Als een van de producten geen signaal van de afstandsbediening ontvangt, kunt u dat product weer in de groep opnemen via de handmatige bediening of via de bediening van de receiver. -
Page 31: Extra Informatie
mondstuk uit de clip. Herhaal dit voor de rechterkant (fig. 24). Het mondstuk kan nu worden opgetild en opzij worden geplaatst (fig. 25). 6. Til de opvangbak voorzichtig op (fig. 26) en zorg ervoor dat hij waterpas blijft, zodat u geen water morst. Plaats hem in de gootsteen. - Page 32 Probleemoplossing Symptoom Oorzaak Corrigerende actie Product werkt niet. Problemen met elektrische Zorg ervoor dat het product een werkende aansluiting elektrische verbinding heeft. Hervul het/de waterreservoir(s) van het product. Laag waterindicatie Zie het gedeelte “Laag water/Watertank bijvullen” hierboven. Product werkt niet. Laag waterindicatie Hervul het/de waterreservoir(s) van het product.
- Page 33 Dimplex CAS500R, CAS1000R Introduction Prière de lire attentivement ce mode d'emploi afin d'installer, d'utiliser et d'entretenir votre produit en toute sécurité. Toujours observer les précautions de base lors de l'utilisation d'appareils électriques, afin de réduire le risque d'incendie, de chocs électriques et de blessures personnelles, notamment : Si l’appaeil est endommagé, contacter le fournisseur avant de l’installer et de le mettre en...
-
Page 34: Branchement Électrique
CAS500R Zone d'aération libre : Minimum 210 cm CAS1000R Zone d'aération libre : Minimum 420 cm BRANCHEMENT ÉLECTRIQUE Brancher le foyer sur une prise de 13 ampères / 240 volts. - Page 35 5. Chaque couche de combustible à bûches est dotée d'une bûche sans LED détachable. Pour les installations CAS500R simples, elle peut être placée sur le dessus de la couche de combustible ou rangée dans l'emballage. Pour les installations CAS1000R ou à produit multiple, la bûche détachable peut être placée sur le joint central entre les deux couches de combustible (Fig 17).
-
Page 36: Fonctionnement Du Produit
Chaque produit peut être appairé à sa propre télécommande, ou de multiples produits peuvent être appairés à une seule télécommande. Noter qu'un maximum de six produits individuels (CAS500R/CAS1000R) peuvent être connectés à une seule télécommande Bluetooth. Cela permettra de contrôler tous les produits d'un coup avec une seule télécommande. - Page 37 Appairer la télécommande à plusieurs produits Si vous installez plusieurs produits CAS500R/CAS1000R, vous pouvez les appairer à une seule télécommande. Pour ce faire, installer les produits comme décrit dans les « Instructions d'installation ». Veiller à ce que tous les produits...
-
Page 38: Entretien
Si vous appairez les produits CAS1000R et CAS500R, choisir la télécommande à 6 boutons comme télécommande principale. 1. Appairer le premier produit comme décrit dans les étapes 1-4 ci-dessus. 2. Sur le second produit, appuyer sur l'interrupteur à bascule en position (I) d'allumage ; un unique bip retentit. -
Page 39: Informations Supplémentaires
1. Appuyer sur l'interrupteur « A » pour le mettre en position « OFF » (0) (Fig 21). 2. Ôter délicatement la couche de combustible et la mettre de côté. 3. Retirer le réservoir d'eau de son emplacement sur le bac. 4. -
Page 40: Dépannage
Dépannage Symptôme Cause Mesure corrective Le produit ne Problème de branchement électrique Vérifier que le raccordement électrique du fonctionne pas. produit fonctionne. Niveau d'eau faible Remplir le(s) réservoir(s) d'eau du produit. Voir « Niveau d'eau faible / remplissage des réservoirs d'eau » ci-dessus. Le produit ne Niveau d'eau faible Remplir le(s) réservoir(s) d'eau du produit. - Page 41 Dimplex CAS500R, CAS1000R Introduzione Leggere attentamente le informazioni riportate in questa guida al fine di installare, utilizzare e mantenere il prodotto in modo sicuro. Quando si utilizzano apparecchiature elettriche, è necessario attenersi sempre alle precauzioni fondamentali per ridurre i rischi di incendio, scossa elettrica e lesioni personali, compreso quanto segue: Se l'apparecchiatura è...
-
Page 42: Collegamento Elettrico
Fig. 3 e 4. Prendere nota della necessità di avere un'apertura di ventilazione sul ripiano in cui si trova il prodotto, in modo da avere un percorso libero tramite il quale l'aria possa arrivare al prodotto. CAS500R Area di ventilazione libera: Almeno 210 cm CAS1000R Area di ventilazione libera: Almeno 420 cm COLLEGAMENTO ELETTRICO Collegare il camino elettrico a una presa di rete da 13 amp/240 volt. - Page 43 5. Ogni braciere con ceppi è fornito con un ceppo estraibile sprovvisto di LED. Per le singole installazioni del prodotto CAS500R, questo ceppo può essere posizionato sopra il braciere o conservato insieme alla confezione. Per le installazioni multiple di prodotti o per quelle relative a CAS1000R, il ceppo estraibile può essere collocato nel raccordo centrale tra due bracieri (Fig.
-
Page 44: Funzionamento Del Prodotto
È possibile abbinare ogni prodotto al proprio telecomando o abbinare più prodotti a un unico telecomando. Si tenga presente che è possibile collegare un massimo di sei prodotti (CAS500R/CAS1000R) a un solo telecomando Bluetooth. Ciò consentirà il controllo di tutti i prodotti contemporaneamente da un unico telecomando. In aggiunta, il software del prodotto è... - Page 45 Associazione del telecomando a più prodotti Se si installano più prodotti CAS500R/CAS1000R, è possibile associarli a un unico telecomando. Per fare ciò, installare i prodotti come descritto nelle “Istruzioni per l'installazione”. Assicurarsi che tutti i prodotti siano collegati alla rete di alimentazione e alla rete idrica.
-
Page 46: Manutenzione
1. Associare il primo dispositivo come descritto nei passaggi 1-4 sopra riportati. 2. Sul secondo prodotto, premere l'interruttore a bilanciere nella posizione “ON” (I); l'apparecchiatura emetterà un “bip”. 3. Premere il tasto nella pulsantiera; il prodotto si accenderà. 4. Premere il tasto nella pulsantiera;... -
Page 47: Ulteriori Informazioni
3. Estrarre il serbatoio dell'acqua dalla sua posizione in cima alla vaschetta. 4. Scollegare il connettori elettrici ai trasduttori, situati sul lato destro della vaschetta (Fig. 23). 5. Ci sono due clip arancioni che fissano l'ugello sulla vaschetta; uno a sinistra e uno a destra dell'ugello. Sul lato sinistro, premere la clip con una mano e con l'altra sollevare l'ugello dalla clip. -
Page 48: Risoluzione Dei Problemi
Risoluzione dei problemi Sintomo Causa Soluzione Il prodotto non Problema del collegamento elettrico Assicurarsi che il prodotto abbia un funziona. collegamento elettrico funzionante. Basso livello dell'acqua Riempire il serbatoio (o i serbatoi) del prodotto. Consultare il paragrafo “Livello dell'acqua basso/Riempimento del serbatoio dell'acqua”. - Page 49 Dimplex CAS500R, CAS1000R Wprowadzenie Prosimy o uważne przeczytanie niniejszej Instrukcji, która ułatwi instalację, użytkowanie i konserwację produktu. Podczas użytkowania urządzeń elektrycznych należy zawsze stosować środki ostrożności celem zmniejszenia ryzyka pożaru, porażenia lub innych urazów, opisane niżej: Jeśli urządzenie jest uszkodzone, przed przystąpieniem do jego instalacji i eksploatacji należy skontaktować...
-
Page 50: Połączenie Elektryczne
3 i 4. Należy podkreślić, że konieczny jest otwór wentylacyjny w półce, na której produkt jest osadzony, aby umożliwić swobodny dopływ powietrza do produktu. CAS500R Obszar swobodnej wentylacji: Co najmniej 210 cm CAS1000R Obszar swobodnej wentylacji: Co najmniej 420cm POŁĄCZENIE ELEKTRYCZNE... - Page 51 INSTALACJA WIELU PRODUKTÓW JEDNOCZEŚNIE (PODŁĄCZENIE KASKADOWE) Połączenia elektryczne Zarówno produkt CAS500R, jak i CAS1000R mogą być instalowane jeden obok drugiego, aby wydłużyć efekt płomienia. Dostarczając energię elektryczną do wielu produktów, należy zwrócić uwagę, aby maksymalna łączna moc produktów nie przekraczała wartości znamionowej wyłącznika nadprądowego (MCB) w obwodzie elektrycznym.
- Page 52 Elementy sterowania ręcznego Elementy sterowania ręcznego znajdują się pod paleniskiem. (Rys. 21) CAS500R Przełącznik główny – steruje dopływem zasilania elektrycznego do urządzenia. (Rys. 21A) Uwaga: Przełącznik musi znajdować się w pozycji „ON” (włączanie) ( I ), aby urządzenie mogło działać.
-
Page 53: Pilot Zdalnego Sterowania
CAS500R/CAS1000R. Parowanie pilota zdalnego sterowania z wieloma produktami Jeśli instalujesz więcej niż jedno urządzenie CAS500R/CAS1000R, możesz sparować do sześciu z nich z jednym pilotem zdalnego sterowania. W tym celu zainstaluj produkty w sposób opisany w punkcie „Instrukcja instalacji”. Sprawdź, czy wszystkie produkty są... -
Page 54: Ogólne Wskazówki
7. Po sparowaniu wszystkich produktów przetestuj działanie pilota, naciskając przycisk. Jeśli któryś z produktów przestanie odbierać sygnał z pilota, możesz uzgodnić jego działanie z działaniem pozostałych za pomocą przycisków sterowania ręcznego lub przycisków znajdujących się na odbiorniku. UZYSKIWANIE POŻĄDANEGO EFEKTU PŁOMIENIA 1. -
Page 55: Dodatkowe Informacje
8. Wlej niewielką ilość płynu do mycia do zbiornika ociekowego i za pomocą miękkiej szczotki ostrożnie wymyj wszystkie jego powierzchnie oraz delikatnie wyczyść przetwornik, łącznie ze stożkiem i tarczami metalowymi zlokalizowanymi w rowku górnym. 9. Po oczyszczeniu starannie opłukaj zbiornik ociekowy czystą wodą, aby usunąć wszystkie ślady środka do czyszczenia. 10. -
Page 56: Rozwiązywanie Problemów
Rozwiązywanie problemów Objaw Przyczyna Działania naprawcze Produkt nie działa. Problem z połączeniem elektrycznym Sprawdź, czy produkt dysponuje prawidłowo działającym połączeniem elektrycznym. Niski odczyt poziomu wody Uzupełnij zbiornik(i) na wodę w produkcie. Zobacz punkt „Niski poziom wody / uzupełnianie zbiorników na wodę” powyżej. Produkt nie działa.
Need help?
Do you have a question about the CAS500R and is the answer not in the manual?
Questions and answers