Advertisement

Quick Links

OPERATING
INSTRUCTION MANUAL
Models:
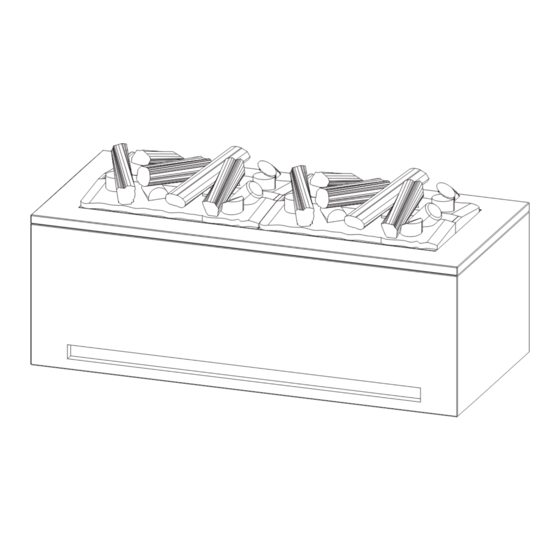
Cassette 500 Project Optimyst CAS500P-RGB-EU
Cassette 1000 Project Optimyst CAS1000P-RGB-EU
These instructions should be read carefully
and retained for future use. Note also the
information presented on the appliance.
EN: This product is only suitable for well insulated rooms or occasional use. DE: Dieses Produkt ist nur für gut isolierte Bereiche oder
gelegentliche Verwendung geeignet. FR: Ce produit convient uniquement à des endroits bien isolés ou pour un usage occasionnel.
IT: Questo prodotto è adatto solo per spazi ben isolati o per uso occasionale. ES: Este producto sólo es adecuado para espacios
bien aislados o un uso ocasional. NL: Dit product is uitsluitend geschikt voor goed geïsoleerde ruimten of voor sporadisch gebruik.
PL: Produkt ten jest odpowiedni wyłącznie do dobrze odizolowanych miejsc lub do okazjonalnego użytku. NO: Dette produktet
egner seg kun for godt isolerte rom eller sporadisk bruk. RO: Acest produs este adecvat exclusiv spaţiilor bine ventilate sau utilizării
ocazionale. CZ: Tento výrobek je vhodný pouze do dobře izolovaných prostor nebo k příležitostnému použití. DK: Dette produkt
er kun egnet til velisolerede rum eller lejlighedsvis brug. PT: Este produto somente é adequado para espaços bem isolados ou
uso ocasional. SE: Denna produkt är endast avsedd för välisolerade utrymmen eller tillfällig användning. FI: Tämä tuote soveltuu
ainoastaan hyvin eristettyihin tiloihin tai satunnaiseen käyttöön. SK: Tento výrobok je vhodný len pre dobre izolované priestory alebo
na občasné použitie. SI: Ta izdelek je primeren le za dobro izolirane prostore ali za občasno uporabo. HR: Ovaj proizvod je pogodan
samo za dobro izolirane prostore ili povremenu upotrebu. HU: Ez a termék csak jól szigetelt terekhez vagy eseti használatra alkalmas
This product complies with all the required Product Safety, Electromagnetic Compatibility and Environmental
Standards. This product is fully compliant with the LVD, EMC, RoHS and Eco Design Directives.
100001213 Issue A OCN -----

Advertisement

Table of Contents
loading

Summary of Contents for Dimplex Optimyst Cassette 500 Project

  • Page 1 OPERATING INSTRUCTION MANUAL Models: Cassette 500 Project Optimyst CAS500P-RGB-EU Cassette 1000 Project Optimyst CAS1000P-RGB-EU These instructions should be read carefully and retained for future use. Note also the information presented on the appliance. EN: This product is only suitable for well insulated rooms or occasional use. DE: Dieses Produkt ist nur für gut isolierte Bereiche oder gelegentliche Verwendung geeignet.
  • Page 2 GB ............................ 3 DE ..........................TBC NL ..........................TBC FR ..........................TBC IT............................. TBC PL...........................TBC ES........................... TBC DK..........................TBC PT........................... TBC TR........................... TBC NO..........................TBC...
  • Page 3 Dimplex CAS500P-RGB, CAS1000P-RGB IMPORTANT INSTRUCTIONS Please read this information guide carefully to be able to safely install, use and maintain your product. Failure to follow these instructions may cause injury and/or damage and may invalidate your guarantee. When using electrical appliances, basic precautions should always be followed to reduce the risk of fire, electrical shock and injury to persons, including the following: •...
  • Page 4: General Information

    CAUTION: No obvious symptoms Unfortunately, it is not obvious when a button or coin battery is stuck in a child’s oesophagus (food pipe). There are no specific symptoms associated with this. The child might: • cough, gag or drool a lot; •...
  • Page 5: Installation Instructions

    INSTALLATION INSTRUCTIONS This section describes how to install and set up your fire. Before you start: • Ensure that all packing items are removed (read any warning labels carefully) and retain all packing for possible future use. • Before connecting the appliance, check that the supply voltage is the same as that stated on the appliance. CONNECTIONS REQUIRED IN ADVANCE OF INSTALLATION ELECTRICAL CONNECTION Please ensure a 230/240V 16A power socket is located within 1m of the product.
  • Page 6: Electrical Connection

    Water Connection – Additional Information Water Pressure: the water pressure on the appliance should be between 8Bar (800Kilopascals) and 0.5Bar (50Kilopascals). Where required, use a pressure reducing valve. If the product is being supplied from a header tank, a head of at least 2 metres must be maintained above the product.
  • Page 7: Power Connections

    MULTIPLE PRODUCT INSTALLATION (DAISY CHAINING) POWER CONNECTIONS Both the CAS500P-RGB and CAS1000P-RGB products can be installed side by side to elongate the flame effect. When supplying power to multiple products, ensure the maximum wattage of the combined products does not exceed the rated capacity of the MCB (Minature Circuit Breaker) in the circuit.
  • Page 8: Operating The Product

    OPERATING THE PRODUCT This section describes how to activate your fire using either the manual controls or remote control. MAINS SWITCH The mains switch is located under the fuel bed on the module and controls the electricity to the appliance (Fig 23A). Note: This switch must be in the ‘ON’...
  • Page 9 MANUAL & REMOTE CONTROL OPTIONS Press to turn on the unit or to put it into standby mode. There is a brief delay after pressing this button before the unit turns on. Standby Note: When the unit is turned on there is a 45 second warm up sequence before the flame effect starts.
  • Page 10: Maintenance

    MAINTENANCE GENERAL TIPS Only use filtered/decalcified water in this appliance. Always ensure that the appliance is sitting on a level surface. If you intend not using the appliance for longer than a week, remove and empty the sump and water tank. Once installed, never move this appliance or lay on its back, without draining the water from sump.
  • Page 11: Additional Information

    flowing into the sump. The product should be carefully inspected for leaks after replacing the valve. Please note the product is not to be operated without the pad being fitted to the leak prevention valve. If leaking persists after replacing the valve, contact your dealer or service agent. ADDITIONAL INFORMATION AFTER SALES SERVICE Your product is guaranteed for two years from the date of purchase.
  • Page 12 Product will not operate. Low water reading on side that is blinking Ensure water tank is filling correctly. Check LEDs continuously blink water supply is working, that there are no twice on one side leaks/blockages and absorption valve has not been activated.
  • Page 13 MODEL DIM ‘A’ CAS500P-RGB 508mm CAS1000P-RGB 1017mm FUEL BED DIM ‘B’ METAL 304mm 354mm Min: 180mm Max: 210mm Dim A 300mm Dim B Fig.1 400mm 400mm 400mm Fig.2 Fig.3 >210cm >210cm Eg. 42cm x 5cm Eg. 14.5cm x 14.5cm...
  • Page 14 Fig.4 >420cm Eg. 20.5cm x 20.5cm >420cm Eg. 84cm x 5cm >420cm >420cm Eg. 84cm x 5cm Eg. 84cm x 5cm Fig.5 Fig.6...
  • Page 15 Fig.7 Fig.8 CAS500R-RGB CAS1000R-RGB Fig.9 Fig.10 Fig.12 Fig.11...
  • Page 16 Fig.13 Fig 12B Fig.12B Fig.14 Fig. 15 Fig. 16 Fig. 17...
  • Page 17 Fig. 18 Fig. 19 Fig. 20A Fig. 20B Fig. 20C CAS500R-RGB Fig. 20...
  • Page 18 Fig. 21A Fig. 21B Fig. 21C Fig. 21C CAS1000R-RGB Fig. 21 Fig. 22 Fig. 23 CAS500 CAS1000...
  • Page 19 Fig. 24 Fig. 25 Fig 26 Fig 27 Fig 28 Fig 29 Fig 31 Fig 30...
  • Page 20 Fig 32 Fig 33 Fig 34 Fig 35 Fig 36...

Table of Contents