Table of Contents
Advertisement
Available languages
Available languages
Please Read and Save this Use and Care Book
Por favor lea este instructivo antes de usar el producto
†
PARA INsTALAR DEBAJo DEL GABINETE
Register your product online at www.prodprotect.com/applica, for
Registre su producto por Internet en www.prodprotect.com/applica
y tendrá la oportunidad de GANAR $100,000!
solamente para residentes de EE.UU
USA/Canada
www.prodprotect.com/applica
Accessories/Parts
(USA/Canada)
Accesorios/Partes
(EE.UU/Canadá)
1-800-738-0245
UNDER-THE-CA BI NE T
ToAsTER ovEN
HoRNo TosTADoR
a chance to WIN $100,000!
For Us residents only
1-800-231-9786
™
Models
Modelos
❑ TRos1000
❑ TRos1000Q
Advertisement
Table of Contents

Related Manuals for Black & Decker SpaceMaker TROS1000


Summary of Contents for Black & Decker SpaceMaker TROS1000
- Page 1 WIN $100,000! For Us residents only Registre su producto por Internet en www.prodprotect.com/applica y tendrá la oportunidad de GANAR $100,000! solamente para residentes de EE.UU USA/Canada www.prodprotect.com/applica Accessories/Parts (USA/Canada) Accesorios/Partes (EE.UU/Canadá) 1-800-738-0245 1-800-231-9786 ™ Models Modelos ❑ TRos1000 ❑ TRos1000Q...
-
Page 2: Import Nt S Fegu Rds
❑ Do not use appliance for other than intended use. ❑ Oversized foods or metal utensils must not be inserted in a toaster-oven as they may create a fire or risk of electric shock. fire may occur if toaster-oven is covered or touching flammable ❑... -
Page 3: Grounded Plug
GROUNDED PLUG s a safety feature, this product is equipped with a grounded plug, which will only fit into a three-prong outlet. Do not attempt to defeat this safety feature. Improper connection of the grounding conductor may result in the risk of electric shock. Consult a qualified electrician if you are in doubt as to whether the outlet is properly grounded. -
Page 4: Control Panel
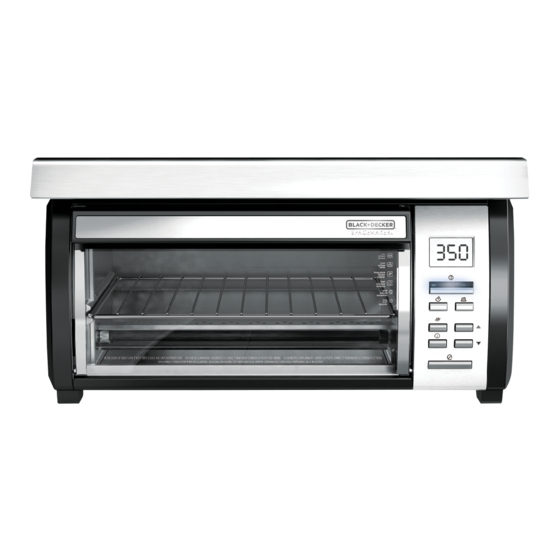
CONTROL P NEL START BAKE TOAST KEEP WARM TIMER CANCEL 1. Digital display 2. Power ON indicator light 3. ST RT button 4. B KE button 5. Time / Temp increase button 6. Time / Temp decrease button 7. -
Page 5: Choose A Location
†SpaceMaker™ appliances such as the mini food processor / grinder or can opener. Do not use this outlet for any other appliance! Caution: When selecting a location for your toaster oven, make sure you have adequate room to reach the Rear Receptacle. -
Page 6: Overhang Molding Installation
You must hook the tabs up and over the hooks to properly hold. 13. Once the back hooks are secure, hook your fingers around the feet on the front of the toaster oven (G). Pull forward and push up on the feet at the same time to engage the front hooks. - Page 7 4. fter measuring the overhang molding thickness as shown in Illustration J, look at the dashed lines on the mounting template; each line has a measurement next to it that indicates the thickness of the overhang molding used with that line.
-
Page 8: How To Use
16. fter the hood is secured, lift the toaster oven up to mount. Hook the mounting tabs on the back of the oven over the mounting hooks at the back of the hood (see Illustration F). 17. Once the back hooks are secure, hook your fingers around the feet on the front of the toaster oven (see Illustration G). - Page 9 14. End the cooking cycle at any time by pressing the C NCEL button. The blue light and the oven will turn off. 15. Keep oven unplugged when not in use. Important: Make sure toaster oven is off and has cooled completely before connecting or disconnecting any other †SpaceMaker™ appliance from the Save- -Plug™ outlet.
-
Page 10: Tosting
11. Unplug appliance when not in use. through baking period, check at minimum Important: Make sure toaster oven is off and has cooled completely before baking time. connecting or disconnecting any other †SpaceMaker™ appliance from the Save- - Plug™ outlet. -
Page 11: Cooking Cont Iners
HELPFUL TIP To refresh air inside oven, lay strips of orange or lemon peel on rack. Heat toaster oven to 350° F and bake for 30 minutes. Turn oven off and let stand until oven is completely cool. -
Page 12: Troubleshooting
The moisture that forms on the door is common and usually Preheat †SpaceMaker™ Toaster Oven to 400 ° F. Meanwhile, in medium bowl, disappears before the end of combine tomatoes, parsley, basil, chives, lemon peel, ¼ tsp. salt, lemon juice and the toasting cycle. -
Page 13: Instrucciones Import Ntes De Segurid D
INSTRUCCIONES IMPORT NTES DE SEGURID D Cuando se usan aparatos eléctricos, siempre se deben respetar las siguientes medidas básicas de seguridad: ❑ Por favor lea todas las instrucciones. ❑ No toque las superficies calientes. Use las asas o las perillas. fin de protegerse contra un choque eléctrico y lesiones a las personas, ❑... - Page 14 ENCHUFE DE TIERR Como medida de seguridad, este producto cuenta con un enchufe de tierra que tiene tres contactos. No trate de alterar esta medida de seguridad. La conexión inapropiada del conductor de tierra puede resultar en un riesgo de choque eléctrico. Si tiene alguna duda, consulte con un eléctricista calificado para asegurarse de que del tomacorriente sea una de tierra.
-
Page 15: P Nel De Control
P NEL DE CONTROL START BAKE TOAST KEEP WARM TIMER CANCEL 1. Indicador digital 2. Luz indicadora de encendido 3. Botón de INICIO 4. Botón de HORNE DO 5. Botón de aumento del tiempo/ temperatura 6. Botón de disminución del tiempo/ temperatura 7. -
Page 16: P Sos Prelimin Res
P SOS PRELIMIN RES • Retire todo el material de empaque, etiquetas y calcomanías. • Retire y conserve toda literatura. • Desempaque las partes de montaje, y apártelos en un lugar seguro para no perderlos. Importante: No trate de operar el aparato sin antes haberlo instalado debidamente. - Page 17 9. Sujete la cubierta en su lugar, alineando la parte delantera del aparato con el borde delantero del gabinete; los agujeros perforados en el gabinete deben coincidir con los agujeros de montaje de la cubierta. 10. Deje caer cada uno de los tornillos a través de cada una de las arandelas, cubriendo así...
- Page 18 4. Luego de medir el grosor del labio saliente, como se indica en la Ilustración J, observe las líneas discontinuas en la plantilla de montaje; cada línea tiene una medida al lado que indica el grosor del labio saliente que se usa para esa línea. Por ejemplo, si su gabinete tiene un saliente de ½”, usted debe usar la línea marcada ½”...
-
Page 19: Consejos Útiles Sobre Su Horno
16. Una vez que la cubierta esté bien afianzada, levante el horno tostador y encaje las piezas de montaje, ubicadas en la parte de atrás del horno, sobre los ganchos de montaje en la parte trasera de la cubierta (vea F). 17. - Page 20 • segúrese de que la parte superior del recipiente o de los alimentos que se estén horneando esté al menos a 1 pulg. (2,5 cm) de distancia de los elementos calefactores superiores (Q). • segúrese de que el horno esté apagado antes de enchufar o retirar el enchufe del tomacorriente.
- Page 21 Precaución: Este horno se calienta. l usarlo, siempre use manoplas o agarraderas cuando toque cualquier superficie interior o exterior del horno. Importante: El tiempo y la temperatura no pueden cambiarse una vez que la temperatura y el tiempo han sido seleccionados. 14.
- Page 22 Nota: Dé un toque al botón para cambiar el tiempo en incrementos de 1 minuto. Presione y mantenga presionado para que cambie más rápido. El tiempo mínimo es de 1 minuto. El tiempo máximo es de 30 minutos. 5. El horno comienza a precalentarse y la luz indicadora de encendido se enciende intermitentemente.
- Page 23 DETECCIÓN DE F LL S PROBLEM C US POSIBLE El aparato no El tomacorriente no calienta o deja funciona o el horno está de calentar. desconectado La segunda tanda El control del grado de de tostado resulta tostado está a un nivel muy oscura.
- Page 24 NOTES/NOT S NOTES/NOT S...
-
Page 25: Need Help
NOTES/NOT S NEED HELP? For service, repair or any questions regarding your appliance, call the appropriate 800 number on the cover of this book. DO NOT return the product to the place of purchase. lso, please DO NOT mail product back to the manufacturer, nor bring it to a service center. - Page 26 ¿NECESIT YUD ? Para servicio, reparaciones o preguntas relacionadas al producto, por favor llame gratis al número “800” que aparece en la cubierta de este manual. No devuelva el producto al establecimiento de compra. No envíe el producto por correo al fabricante ni lo lleve a un centro de servicio.
- Page 27 Save space and regain your counters in any kitchen with † SpaceMaker kitchen tasks while keeping your counters free of clutter! Visit www.bdspacemaker.com to learn more about † SpaceMaker Toaster Oven Can Opener Coffeemaker Mini Food Processor / Grinder Horno tostador Abrelatas Cafetera Mini procesador de alimentos / Molino Ahorre espacio y recupere sus mostradores en cualquier cocina con nuestra línea completa de ¡ † SpaceMaker tareas de la cocina sin ocupar mucho espacio! Visite www.bdspacemaker.com para obtener más información sobre los electrodomésticos † SpaceMaker y enterarse de nuestras promociones más recientes. † our full-line of space-saving appliances. appliances can help tackle all your ™ appliances and see our latest promotional offers. ™ Your countertops will thank you! electrodomésticos que ahorran espacio. puede ayudarlo con todas las ™ ¡Sus mostradores se lo agradecerán! ™...
Need help?
Do you have a question about the SpaceMaker TROS1000 and is the answer not in the manual?
Questions and answers