oticon TV Adapter 3.0 Instructions For Use Manual
Hide thumbs
Also See for TV Adapter 3.0:
- Instructions for use manual (34 pages) ,
- User manual (2 pages) ,
- Instructions for use manual (18 pages)
Table of Contents
Advertisement
Advertisement
Table of Contents

Related Manuals for oticon TV Adapter 3.0


Summary of Contents for oticon TV Adapter 3.0
- Page 1 Instructions for use TV Adapter 3.0...
- Page 2 This booklet gives you guidance on how to use and maintain your Intended use The TV Adapter 3.0 is intended as a wireless new TV Adapter. Please read the booklet carefully, including the transmitter of sound from a TV or from other Warning section.
-
Page 3: Table Of Contents
Volume control using your Remote Control Installation Mute using your Remote Control Placing the TV Adapter Using the TV Adapter with the Oticon ON App Connecting the TV Adapter to a power outlet More than one user Connecting the TV Adapter to the TV... -
Page 4: Package Content
Package content Box 1 Box 2 The TV Adapter packaging box consists of the following elements: Power supply RCA cable Mini jack Adapter Instructions for use TV Adapter 3.0 Connectline Box 3 TV Adapter This booklet (Instructions for use) TOSLINK About... -
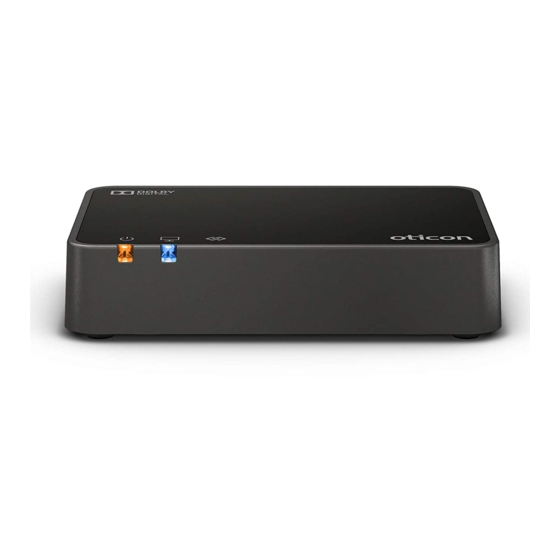
Page 5: Tv Adapter Overview
TOSLINK inserted and streaming (invalid signal)* Mode Fault condition ** RCA left and right TOSLINK in TOSLINK out No light Blinking Fading Steady * Try other input connection ** Contact your hearing care professional More information: www.oticon.global/connectivity About Installation Daily use Warnings More info... -
Page 6: Installation
Installation Place the TV Adapter Using the TV Adapter for the first time Place the TV adaptor close to the TV - horizontally, with free line of Before you can use your hearing aids with your TV, the TV sight to the hearing aids. Adapter must be connected to a power outlet, connected to the TV and paired with your hearing aids. -
Page 7: Connecting The Tv Adapter To A Power Outlet
Connect the TV Adapter to a power outlet Box 1 Use the power supply from box 1 1. Plug the power cord into the “power” connector on the TV Adapter (A). 2. Plug the power supply into the mains wall socket (B). 3. - Page 8 Mini jack (p. 20) SCART (p. 22) *Dolby is a registered trademark of Dolby Laboratories. We recommend using TOSLINK. Please see the following pages for a solution which fits your TV. More information: www.oticon.global/connectivity About Installation Daily use Warnings More info...
-
Page 9: Connecting Using Toslink
Connect using TOSLINK 1. Use the TOSLINK cable from box no. 3 (A). 2. Remove the plastic cap from the TOSLINK cable. (B) 3. Connect the TOSLINK cable to the TOSLINK output on your TV/home Box 3 theatre system (C). 4. - Page 10 Connect using RCA 1. Use the RCA cable from box no. 2 (A). 2. Connect the RCA cable to the RCA output on your TV (B) or home theatre system. (Typically marked “L – R AUDIO OUT” and found on the TV back or Box 2 bottom panel.) 3.
- Page 11 Connect using mini jack Adapter 1. Use the mini jack Adapter from box no. 2 (A). 2. Connect the RCA cable to the mini jack Adapter (B). 3. Connect the mini jack to the TV, this is typically the headphone output Box 2 (B).
-
Page 12: Connecting Using Scart
Connect using SCART 1. Use a SCART Adapter* (A). 2. Connect the RCA cable to the red and white terminals on the SCART Adapter (B). SCART Adapter 3. Connect the SCART Adapter to the SCART output on your TV (C). 4. - Page 13 Pair TV Adapter with hearing aids Before using the TV adapter, it must be paired with your hearing aids. Pairing is only required once, and takes around 20-60 seconds. Note This TV Adapter can be paired to as many hearing aids as you like. All users will be able to hear the same sound.
-
Page 14: Start Tv Sound Using Your Hearing Aids
Start TV sound using your hearing aids Turn off TV sound using your hearing aids Once a TV Adapter has been paired with your hearing aids, it will To stop the sound from the TV simply change to the desired be available as a programme in your hearing aids. -
Page 15: Volume Control Using Your Hearing Aids
Volume control using your hearing aids Use the volume button on your hearing aid to adjust the TV volume level in both hearing aids. Adjust the volume by pressing up or down briefly. Press briefly repeatedly for further adjustments. A short press on the RIGHT hearing aid increases the volume. -
Page 16: Start Tv Sound Using The Hearing Aid Remote Control
The programme cycle will depend on the programmes already Change programme available in your hearing aids. The TV programme indicator – which is different from programme indicators – will be heard once the TV programme is selected. More information: www.oticon.global/connectivity About Installation Daily use Warnings More info... -
Page 17: Mute Using Your Remote Control
Volume control using Remote Control Mute using Remote Control Use the volume buttons to adjust the TV volume level in both While watching TV you can switch off the microphones in your hearing aids. hearing aids, so that only the sound from the TV is heard. Press and hold the volume down button Adjust the volume by pressing up for approx 3 seconds until the surrounding... -
Page 18: More Than One User
An unlimited number of hearing aid users can listen to the sound Oticon ON App. from one TV Adapter. Please refer to the instructions for use “Oticon ON App for Android Pair the hearing aids to the TV Adapter as described on page 24. and iOS” for further information. -
Page 19: More Than One Tv Adapter
More than one TV Adapter Your hearing aids can be paired with up to 4 TV Adapters. When you 6) If another person wish to watch the TV that you turned OFF, it can be turned ON again after 5 minutes. If you do not wish to wait 5 minutes switch to ”TV Program”... -
Page 20: Removing A User/Clear Pairings
Remove a user/clear pairings Cleaning and maintenance To remove a user from your TV Adapter perform a system reset and Use a soft, dry cloth to clean the TV Adapter. re-pair the required hearing aids. 1. Reset system: Press and hold the setup button for more than 5 seconds 2. -
Page 21: Warnings
Warnings For your personal safety and to ensure Fire hazards Connection to external equipment Incompatible non-supplied correct usage, you should familiarise The power source in your TV The safety of the use TV Adapter when accessories yourself fully with the following general Adapter has insufficient energy to connected to external equipment with Only use accessories, transducers or... -
Page 22: International Warranty
Conditions of Use International warranty Your TV adapter is covered by an you might have under applicable international limited warranty national legislation governing sale of Operating conditions Temperature: +5°C to +40°C issued by the manufacturer for a consumer goods. Your hearing care Humidity: 15% to 93% relative humidity, period of 12 months from the date professional may have issued... - Page 23 TVA3 Additional information can be found in the The TV Adapter contains a radio transceiver using Bluetooth Low Energy (BLE) Technical data sheets (TD) on www.oticon.global. and a proprietary short range radio technology both working at ISM band 2.4 GHz.
- Page 24 This Class B digital apparatus complies by turning the equipment off and on, The manufacturer declares that this Declaration of Conformity is available with Canadian ICES-003. the user is encouraged to try to TV adapter is in compliance with the at the manufacturer.
- Page 25 The device contains Bluetooth Low Energy (BLE) 2.4 GHz radio technology, which next to the symbol. Indicates the medical device manufacturer, as defined in EU supports wireless streaming to Oticon hearing aids with a 2.4 GHz receiver. Directives 90/385/EEC, 93/42/EEC and 98/79/EC.
- Page 26 Description of additional symbols used on labels Keep dry Indicates a medical device that needs to be protected from moisture. Caution symbol Consult instructions for use for warnings and cautions. Serial number Indicates the manufacturer’s serial number so that a specific medical device can be identified.
- Page 27 0000191480000001...
Need help?
Do you have a question about the TV Adapter 3.0 and is the answer not in the manual?
Questions and answers