Table of Contents
Advertisement
Available languages
Available languages
Advertisement
Chapters
Table of Contents

Related Manuals for oticon TVA3


Summary of Contents for oticon TVA3
- Page 1 Instructions for use TV Adapter 3.0...
- Page 2 TV Adapter. Please read the booklet carefully, including the ter of sound from a TV or other electronic audio Warnings section. This will help you get the most out of the TV devices to Oticon hearing aids. Adapter. Indications for use No indications for use.
-
Page 3: Table Of Contents
Volume control using Remote Control Placing the TV Adapter Mute using Remote Control Connecting to a power outlet Use TV Adapter with Oticon On App Connect to the TV More than one user Connecting using TOSLINK More than one TV Adapter... -
Page 4: Package Content
Package content Box 1 Box 2 The TV Adapter box consists of the following elements: Power supply RCA cable Mini jack Adapter Instructions for use TV Adapter 3.0 Box 3 TV Adapter This booklet (Instructions for use) TOSLINK About Installation Handling Warnings More info... -
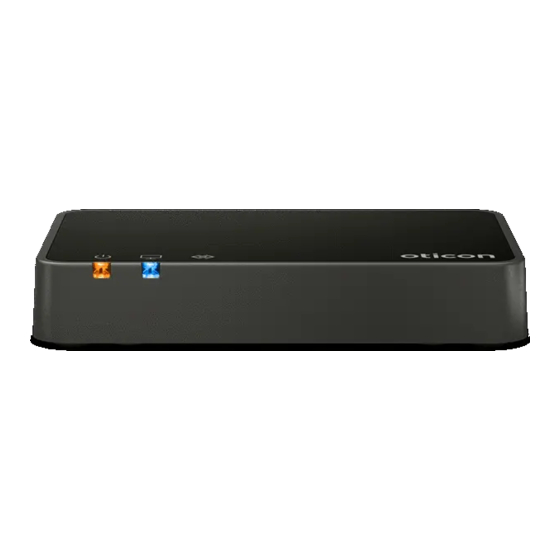
Page 5: Tv Adapter Overview
TV Adapter overview Front Power Mode Power indicator TV indicator Power on, not paired to any hearing aids Pairing complete (steady light 30 seconds) Power on, not streaming Back RCA inserted and streaming No RCA/Audio input Setup TOSLINK inserted and streaming (digital) Power supply TOSLINK inserted and streaming (invalid signal)* Mode... -
Page 6: Installation
Installation Placing the TV Adapter Using the TV Adapter for the first time Place the TV Adapter close to the TV — horizontally, with free line Before you can use your hearing aids with your TV, the TV Adapter of sight to the hearing aids. must be connected to a power outlet, connected to the TV and paired with your hearing aids. -
Page 7: Connecting To A Power Outlet
Connecting to a power outlet Box 1 Use the power supply from box 1 1. Plug the power cord into the “power” connector on the TV Adapter (A). 2. Plug the power supply into the wall socket (B). 3. Check that the power is turned on; after a few seconds both indicators will fade blue to indicate that pairing with your hearing aids is needed. -
Page 8: Connect To The Tv
Connect to the TV TOSLINK (p. 16) RCA (p. 18) You can connect the TV Adapter to the TV in four different ways. Connection Page TOSLINK. Either digital stereo (PCM) or Dolby® Digital * RCA audio output L+R Mini jack audio output (typically headphone output) SCART audio output (L+R) Mini jack (p. -
Page 9: Connecting Using Toslink
Connecting using TOSLINK 1. Use the TOSLINK cable from box no. 3 (A). 2. Remove the plastic cap from the TOSLINK cable (B). 3. Connect the TOSLINK cable to the TOSLINK output on your TV/home theatre system (C). Box 3 4. -
Page 10: Connecting Using Rca
Connecting using RCA 1. Use the RCA cable from box no. 2 (A). 2. Connect the RCA cable to the RCA output on your TV (B) or home theatre system. (Typically marked “L – R AUDIO OUT” and found on the TV back or Box 2 bottom panel.) 3. -
Page 11: Connecting Using Mini Jack Adapter
Connecting using mini jack adapter 1. Use the mini jack adapter from box no. 2 (A). 2. Connect the RCA cable to the mini jack adapter (B). 3. Connect the mini jack to the TV, this is typically the headphone Box 2 output (B). -
Page 12: Connecting Using Scart
Connecting using SCART 1. Use a SCART Adapter* (A). 2. Connect the RCA cable to the red and white terminals on the SCART Adapter (B). SCART Adapter 3. Connect the SCART Adapter to the SCART output on your TV (C). (accessory) 4. -
Page 13: Pairing The Tv Adapter With Your Hearing Aids
Pairing the TV Adapter with your hearing aids Before using the TV Adapter, it must be paired with your hearing aids. Pairing is only required once, and takes around 20-60 seconds. Note This TV Adapter can be paired with as many hearing aids as you like. All users will be able to hear the same sound. -
Page 14: Start Tv Sound Using Your Hearing Aids
Start TV sound using your hearing aids Turn off TV sound using your hearing aids Once a TV Adapter has been paired with your hearing aids, it To stop the sound from the TV simply change to the desired will be available as a program in your hearing aids. To listen to program in your hearing aids. -
Page 15: Volume Control Using Your Hearing Aids
Volume control using your hearing aids Use the push button on your hearing aid to adjust the TV volume level in both hearing aids. A short press on the RIGHT hearing aid increases the volume. A short press on the LEFT hearing aid decreases the volume. -
Page 16: Start Tv Sound Using The Hearing Aid Remote Control
Start TV sound using the hearing aid Turn off TV sound using Remote Control Remote Control To stop the sound from the TV simply change to the desired program in your hearing aids. The Remote Control is an optional accessory to your wireless hearing aids. -
Page 17: Volume Control Using Remote Control
Volume control using Remote Control Mute using Remote Control Use the volume buttons on your remote to adjust the TV volume While watching TV you can switch off the microphones in your level in both hearing aids. hearing aids, so that only the sound from the TV is heard. Press and hold the volume down button Adjust the volume by pressing for approx 3 seconds until the surrounding... -
Page 18: Use Tv Adapter With Oticon On App
An unlimited number of hearing aid users can listen to the sound Oticon ON App. from one TV Adapter. Please refer to the instructions for use “Oticon ON App” for further Pair the hearing aids to the TV Adapter as described on page 24. information. -
Page 19: More Than One Tv Adapter
More than one TV Adapter If another person wishes to watch the TV that you turned OFF, it Your hearing aids can be paired with up to 4 TV Adapters. When you switch to ”TV Program” mode, your hearing aids will automat- can be turned ON again after 5 minutes. -
Page 20: Remove A User/Clear Pairings
Remove a user/clear pairings Caring for TV Adapter To remove a user from your TV Adapter perform a system reset and Use a soft, dry cloth to clean the TV Adapter. re-pair the required hearing aids. 1. Reset system: Press and hold the setup button for more than 5 seconds 2. -
Page 21: Warnings
Warnings For your personal safety and to ensure Fire hazards Connection to external equipment Incompatible non-supplied correct usage, you should familiarise The power source in your TV The safety of the use TV Adapter when accessories yourself fully with the following general Adapter has insufficient energy to connected to external equipment with Only use accessories, transducers or... -
Page 22: Conditions Of Use
Conditions of Use International warranty Your device is covered by a an equivalent model. The above international limited warranty issued warranty does not affect any legal Operating conditions Temperature: +5°C to +40°C by the manufacturer for a period of rights that you might have under Humidity: 15% to 93% relative humidity, 12 months from the date of delivery applicable national legislation... -
Page 23: Technical Information
The TV Adapter compliance could void the user’s au- FCC ID: 2ACAHTVA3 complies with international standards thority to operate the equipment. IC: 11936A-TVA3 concerning radio transmitters, elec- tromagnetic compatibility and human The device complies with Part 15 exposure. - Page 24 Radiofrequency radiation exposure This Class B digital apparatus complies by turning the equipment off and on, with Canadian ICES-003. the user is encouraged to try to Information correct the interference by one or This equipment complies with FCC and This equipment has been tested and more of the following measures: IC radiation exposure limits set forth found to comply with the limits for...
- Page 25 The manufacturer declares that this Declaration of Conformity is available Description of symbols and abbreviation used in this booklet TV adapter is in compliance with the from the manufacturer. Warnings essential requirements and other Text marked with a warning symbol must be read before using the device. relevant provisions of Directive SBO Hearing A/S Manufacturer...
- Page 26 Caution symbol The device contains Bluetooth Low Energy (BLE) 2.4 GHz radio technology, which Consult instructions for use for warnings and cautions. supports wireless streaming to Oticon hearing aids with a 2.4 GHz receiver. Serial number Global Trade Item Number Indicates the manufacturer’s serial number so that a specific medical...
- Page 27 Imported and Distributed by: Audmet Canada Ltd 1600-4950 Yonge St Toronto, ON M2N 6K1 www.oticon.ca About Installation Handling Warnings More info...
- Page 28 Mode d’emploi Adaptateur TV 0000214172000001...
- Page 29 émetteur sans fil de son provenant d’un téléviseur mode d'emploi, y compris la section Avertissements. Il décrit comment ou d’autres appareils audio électroniques vers des utiliser au mieux l’adaptateur TV. aides auditives Oticon. Instructions Pas d’instructions d'utilisation Si vous avez des questions supplémentaires relatives à l'utilisation d’utilisation...
- Page 30 Contrôler le volume avec la télécommande des aides auditives Installation Couper le son avec la télécommande des aides auditives Installation Utiliser l'adaptateur TV avec l'application Oticon On Positionnement de l’Adaptateur TV Plus d'un utilisateur Connexion de l’Adaptateur TV à une prise électrique Plus d'un adaptateur TV Connexion de l’Adaptateur TV au téléviseur...
-
Page 31: Contenu De La Boîte
Contenu de la boîte Boîte 1 Boîte 2 La boîte de l’adaptateur TV contient les accessoires suivants : Alimentation électrique Câble RCA Adaptateur mini-jack Instructions for use TV Adapter 3.0 Boîte 3 Adaptateur TV Ce mode d’emploi TOSLINK À propos de Installation Manipulation Avertissements Plus d’infos... -
Page 32: Aperçu De L'adaptateur Tv
Aperçu de l’Adaptateur TV Face avant Alimentation électrique Voyant de Mode fonctionnement Voyant TV Téléviseur Sous tension, non appairé avec des aides auditives Appairage terminé (voyant constant 30 secondes) Face arrière Sous tension, pas de streaming RCA inséré et streaming Configuration Absence de signal Audio/RCA TOSLINK inséré... -
Page 33: Installation
Installation Positionnement de l’Adaptateur TV Première utilisation de l’Adaptateur TV Placez l’Adaptateur TV près du téléviseur, en position horizontale, Avant de pouvoir utiliser vos aides auditives avec votre téléviseur, avec un champ de vision dégagé jusqu’aux aides auditives. l’Adaptateur TV doit être connecté à une prise électrique, raccordé au téléviseur et appairé... -
Page 34: Connexion De L'adaptateur Tv À Une Prise Électrique
Connexion de l’Adaptateur TV à une prise électrique Boîte 1 Utilisez l’alimentation électrique de la boîte 1 1. Branchez le cordon d’alimentation dans le connecteur « Power » de l’Adaptateur TV (A). 2. Branchez l’alimentation électrique dans la prise murale secteur (B). 3. -
Page 35: Connexion De L'adaptateur Tv Au Téléviseur
Connexion de l’Adaptateur TV au téléviseur TOSLINK (p. 16) RCA (p. 18) Vous pouvez connecter l’Adaptateur TV au téléviseur de quatre façons différentes. Connexion Page TOSLINK. Stéréo numérique (PCM) ou Dolby® Digital * Sortie audio RCA (L+R) Sortie audio mini-jack (généralement sortie casque) Sortie audio PERITEL (L+R) Mini-jack (p. -
Page 36: Connexion Par Toslink
Connexion par TOSLINK 1. Utilisez le câble TOSLINK de la boîte n° 3 (A). 2. Retirez la protection en plastique du câble TOSLINK. (B) 3. Branchez le câble TOSLINK à la sortie TOSLINK de votre téléviseur/ Boîte 3 système de home cinéma (C). 4. -
Page 37: Connexion Par Rca
Connexion par RCA 1. Utilisez le câble RCA de la boîte n° 2 (A). 2. Branchez le câble RCA à la sortie RCA de votre téléviseur (B) ou de votre système de home cinéma. (Elle est généralement marquée « L – R AUDIO Boîte 2 OUT »... -
Page 38: Connexion Par Adaptateur Mini-Jack
Connexion par adaptateur mini-jack 1. Utilisez l’adaptateur mini-jack de la boîte n° 3 (A). 2. Branchez le câble RCA à l’adaptateur mini-jack (B). 3. Branchez le mini-jack au téléviseur, il s’agit généralement de la sortie Boîte 2 casque (B). 4. Branchez les connecteurs RCA à l’entrée RCA de l’Adaptateur TV (C). 5. -
Page 39: Connexion Par Peritel
Connexion par PERITEL 1. Utilisez un adaptateur PERITEL* (A). 2. Branchez le câble RCA aux bornes rouge et blanche de l’adaptateur PERITEL (B). Adaptateur PERITEL 3. Branchez l’adaptateur PERITEL à la sortie PERITEL de votre téléviseur (C). 4. Branchez les connecteurs RCA à l’entrée RCA de l’Adaptateur TV (D). (accessoire) 5. -
Page 40: Appairage De L'adaptateur Tv Avec Vos Aides Auditives
Appairage de l’Adaptateur TV avec vos aides auditives Avant d’utiliser l’Adaptateur TV, celui-ci doit être appairé avec vos aides auditives. L’appairage ne s’effectue qu’une seule fois, et prend environ de 20 à 60 secondes. Veillez à ce que l’adaptateur TV soit Placez les deux aides auditives près Remarque sous tension. -
Page 41: Allumer Le Son Du Téléviseur Avec Vos Aides Auditives
Allumer le son du téléviseur avec vos aides Éteindre le son du téléviseur avec vos aides auditives auditives Une fois qu’un Adaptateur TV a été appairé avec vos aides auditives, Pour arrêter le son du téléviseur, passez simplement au programme il devient disponible comme programme dans vos aides auditives. -
Page 42: Contrôler Le Volume Avec Vos Aides Auditives
Contrôler le volume avec vos aides auditives Utilisez le bouton volume de votre aide auditive pour régler le niveau de volume du téléviseur dans les deux aides auditives. Une pression brève sur l'aide auditive DROITE augmente le volume. Une pression brève sur l'aide auditive GAUCHE diminue le volume. -
Page 43: Allumer Le Son Du Téléviseur Avec La Télécommande Des Aides Auditives
Allumer le son du téléviseur avec la Éteindre le son du téléviseur avec votre télécommande des aides auditives télécommande La télécommande est un accessoire proposé en option pour vos aides Pour arrêter le son du téléviseur, passez simplement au programme auditives sans fil. - Page 44 Contrôler le volume avec la télécommande Couper le son avec la télécommande Utilisez les boutons volume pour régler le niveau de volume du Pendant que vous regardez la télévision, vous pouvez éteindre téléviseur dans les deux aides auditives. les microphones dans vos aides auditives afin que vous entendiez le son du téléviseur uniquement.
-
Page 45: Utiliser L'adaptateur Tv Avec L'application Oticon On
Oticon ON. Appairez les aides auditives avec l’adaptateur TV comme décrit à la page 24. Veuillez vous référer au Mode d'emploi de l’application Oticon ON pour Android et iOS* pour plus d’informations. Nettoyage et entretien Utilisez un chiffon doux et sec pour nettoyer l’Adaptateur TV. -
Page 46: Plus D'un Adaptateur Tv
Plus qu’un adaptateur TV Vos aides auditives peuvent être appairées avec un maximum de vos aides auditives seront désormais connectées à la télévision et à l’adaptateur TV adéquats. 4 adaptateurs TV : Lorsque vous passez en mode « Programme TV », vos aides auditives se connectent automatiquement au dernier Si une autre personne souhaite regarder la télévision que vous avez adaptateur TV connecté... -
Page 47: Supprimer Un Utilisateur/Effacer Des Appairages
Supprimer un utilisateur/effacer des appairages Pour supprimer un utilisateur de votre Adaptateur TV, effectuez une réinitialisation du système et réappairez les aides auditives requises. 1. Réinitialisation du système : Appuyez sur le bouton configuration et maintenez-le enfoncé pendant plus de 5 secondes 2. -
Page 48: Avertissements
Avertissements Pour votre sécurité personnelle et pour Risque d’incendie Connexion à un équipement externe Accessoires incompatibles non fournis garantir une utilisation correcte, vous La source d’alimentation de votre La sécurité d'utilisation de l’adaptateur N’utilisez que les accessoires, devez bien vous familiariser avec les aver- adaptateur TV n’a pas assez d’énergie TV lorsque connecté... -
Page 49: Conditions D'utilisation
Conditions d’utilisation Garantie internationale Votre appareil bénéficie d’une garantie n’affecte pas les droits juridiques dont limitée internationale, assurée par vous bénéficiez peut-être, de par les Conditions de fonction- Température : +5°C à +40 °C le fabricant. Cette garantie est de 12 législations nationales régissant la nement Humidité : 15 % à... -
Page 50: Informations Techniques
émetteurs radio, la compatibilité élec- FCC ID : 2ACAHTVA3 partie responsable de la conformité tromagnétique et l’exposition humaine. IC : 11936A-TVA3 pourraient annuler l'autorité de l'utilisateur à faire fonctionner l'appareil. À propos de Installation Manipulation Avertissements Plus d’infos... - Page 51 Ce dispositif numérique de Catégorie Si cet équipement provoque des Le fabricant certifie que cet Adaptateur La déclaration de conformité est B est conforme à la norme canadienne interférences nocives avec la réception TV est conforme aux exigences disponible auprès du fabricant. ICES-003.
- Page 52 Le produit est fabriqué par le fabricant dont le nom et l’adresse figurent à côté qui prend en charge le streaming sans fil vers des aides auditives Oticon intégrant du symbole. Indique le fabricant du dispositif médical, tel que défini dans les un récepteur de 2,4 GHz.
- Page 53 Description des symboles utilisés sur l’étiquette réglementaire de l’emballage Description des symboles utilisés sur l’étiquette réglementaire de l’emballage Prise d’alimentation électrique Tenir à l’abri de l’humidité Indique la vitesse à laquelle l’alimentation est envoyée à votre appareil électrique Indique un dispositif médical qui doit être protégé de l’humidité. 5.0V 200mA depuis la prise d’alimentation électrique.
- Page 54 Importé et Distribué par : Audmet Canada Ltd 1600-4950 Yonge St Toronto, ON M2N 6K1 www.oticon.qc.ca À propos de Installation Manipulation Avertissements Plus d’infos...
Need help?
Do you have a question about the TVA3 and is the answer not in the manual?
Questions and answers