
Related Manuals for Etac Crissy Series


Summary of Contents for Etac Crissy Series
- Page 1 Etac Crissy Manual English 75369D 19-05-16 Etac Crissy Swing-Away Etac Crissy Active...
-
Page 2: Table Of Contents
Angle setting of front fork attachment ......14 Head support ..............44 Rear seat height ..............15 12. Technical data Seat height adjustment using rear wheel Etac Crissy Swing-Away, Etac Crissy Active ......45 position/rear wheel ............. 15-16 Rear seat height table ............17 13. Service and maintenance Cleaning ................46 User manual Disinfection ...............46... -
Page 3: Intended Use
Etac / Crissy / www.etac.com 1. General Thank you for choosing a wheelchair from Etac. To avoid injury In the middle of this manual, you will find a during handling and use, you should read this manual and keep section containing user information. -
Page 4: Description
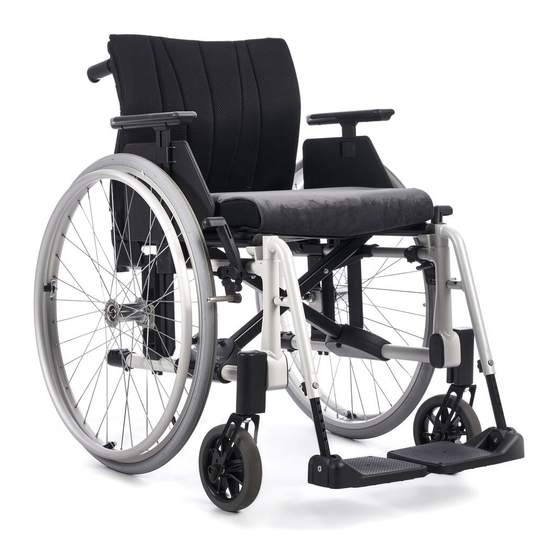
Etac / Crissy / www.etac.com 2. Description/Standard version Etac Crissy Swing-Away Etac Crissy Active Push handle Rear wheel Handrim Seat upholstery User brake Cross Detachable leg support (on Crissy Active, fixed Quick release hub and integrated i ramen) Side frame... -
Page 5: Chair Options
In the “Chair options” section you can see all the adjustments that can be made to the wheelchair. In addition, there are so-called “Non-standard combinations”, e.g. for rear wheels, castor wheels and back support mod- els. Contact customer service. For more information about chair options, see www.etac.com Front 40.5-55 cm... - Page 6 Etac / Crissy / www.etac.com 3. Chair options Seat depth 41/43/45 cm in frame (S, M, L) Seat depth Back support 2C 37-45 cm with upholstery Back support Adjustable upholstery upholstery Airmesh (Back support 2B) Back support cover Standard (Back support 2C)
- Page 7 Etac / Crissy / www.etac.com 3. Chair options Standard attachment tubes 15 cm deep Max. length: 51 cm. Folding, angle and Min. length: 33 cm. depth-settable. Attach- ment tubes adjustable Extended attachment in height tubes +10 cm Standard attachment tubes 13 cm deep.
-
Page 8: Accessories
4. Accessories Assembly instructions are provided with all accessories when they are supplied by Etac. You can find the instructions as well as more information about the accessories on our website www.etac.com. Settable= Adjusted using tools. Adjustable= Adjusted without tools. - Page 9 Etac / Crissy / www.etac.com 4. Accessories Transparent, width 35-50 cm. Can be fitted onto short or long Hemi tray arm supports. Anti-slip device for the Hemi tray Hemi tray/Communication Right/left tray half Seat extender With long seat depth Dark grey plush and black velour, 56 cm, cut according to seat...
- Page 10 Etac / Crissy / www.etac.com 4. Accessories Adjustable in height, depth and angle. Only with Back sup- Head support, traditional port 2C Fixed head support For fitting onto push brace Cross brace (for back sup- For Back support 2C. With snaplock port) Three different sizes, fixed with Velcro.
-
Page 11: Installation Upon Delivery
Etac / Crissy / www.etac.com 5. Installation upon delivery Leg supports Leg supports with foot plates are delivered unassem- bled and must be mounted upon delivery (see section ”Handling”). Arm supports Arm supports/side covers are delivered unassembled and must be mounted upon delivery. -
Page 12: Settings
Etac / Crissy / www.etac.com 6. Settings Front seat height Front seat height is adjustable using: - Front fork attachment, adjustable height and angle -Changing height in front fork. -Changing front fork -Changing castor wheels Bear in mind the risk of tipping. -
Page 13: Seat Height Adjustment By Replacing The Front Fork/Castor Wheel
Etac / Crissy / www.etac.com 6. Settings Seat height adjustment by replacing the front fork/castor wheel See the “Seat height adjustment using the castor wheel position in the fork” and “Front seat height table” sections. 5 mm 19 mm Bear in mind the risk of tipping. -
Page 14: Disassembly/Assembly Of Front Fork
Etac / Crissy / www.etac.com 6. Settings Disassembly/assembly of the front fork Disassembly/assembly of the front fork - Remove the cover plug (A) and loosen the retaining - Remove the cover plug (A) and loosen the retaining nut (B). Pull out the front fork and transfer the bev- nut (B). -
Page 15: Rear Seat Height
Etac / Crissy / www.etac.com 6. Settings Rear seat height Rear seat height The rear seat height can be adjusted using: Bear in mind the risk of tipping. - The rear wheel’s (camber washer’s) position in the Always check the positioning of the anti-tips. - Page 16 Etac / Crissy / www.etac.com 6. Settings When fitting, check that the hub axle of the rear wheel is set correctly. The button in the hub should pop out to the original position. Fitting 0° Camber...
-
Page 17: Rear Seat Height Table
Etac / Crissy / www.etac.com 6. Settings Rear seat height table Rear wheel position height Rear wheel Seat height Distance 22” 48.5 cm 7.0 cm 24” 51 cm 9.5 cm 22” 46.5 cm 9.0 cm 24” 49 cm 11.5 cm 22”... - Page 18 Etac / Crissy / www.etac.com 6. Settings Attendant brake D1 D2 D2 D1 C1 C2 C2 C1 B1 B2 B2 B1 A1 A2 A2 A1 Pos A-B Pos A-B Pos C-F Pos C-F The brake arm can be turned. When adjusting the brake loosen nut (A) and adjust the brake by screwing (B) up/down.
-
Page 19: User Manual
Etac / Crissy / www.etac.com User manual 75369D 19-05-16 This part of the manual (User Manual) can be removed and supplied with the wheel- chair as it contains important user informa- tion. Etac Crissy Swing-Away Etac Crissy Active... -
Page 20: Symbols And Warnings
Etac / Crissy / www.etac.com User manual Table of Contents User manual Symbols and warnings ............20 Driving technique, use ..........26-29 Transportation in vehicles ..........21 Care and maintenance..........30 How to use ..............22-23 Troubleshooting chart ...........30 Seating comfort settings Back support cover ............24 Seat cushion ..............24... -
Page 21: Transportation In Vehicles
Etac / Crissy / www.etac.com User manual Transportation in vehicles Etac recommends in the following order: • It is best to place the wheelchair in the car boot. • 1) The user transfers to one of the seats in the vehicle If the wheelchair is placed on the back seat, ensure that it cannot overturn or roll. -
Page 22: How To Use
Etac / Crissy / www.etac.com User manual How to use Unfolding • Push down on one side of the seat frame, using the whole of the flat of the hand. • Do not hold the seat frame tube while unfolding as there is a risk of pinching your fingers. - Page 23 Etac / Crissy / www.etac.com User manual Leg support (Etac Crissy Swing-Away) Check that the leg supports have locked before lifting. The leg supports can be lifted/swung to the side as needed. lockable leg supports by pressing the red button (A).
-
Page 24: Seating Comfort Settings
Etac / Crissy / www.etac.com User manual Seating comfort settings Seating comfort different pressure distribution qualities. Good seating comfort depends on the needs and possi- The back support setting is a combination of angles, bilities available to each individual. The following general height and shape. -
Page 25: Footplates
Etac / Crissy / www.etac.com User manual Seating comfort settings Footplates Tipping risk! Adjust the height so that you feel the feet are supported Never stand on the footplates and the thighs rest against the cushion. For outdoor use the footplates should be raised 4 to 5 cm above the ground. -
Page 26: Driving Technique, Use
Etac / Crissy / www.etac.com User manual Driving technique, use Parking Turn the castor wheels forwards and activate the brakes. Do not park the wheelchair on a hill when it has a user in it. Transferring to/from the wheelchair Turn the castor wheels forwards, activate the brakes, flip up the foot supports and twist the leg supports to one side. - Page 27 Etac / Crissy / www.etac.com User manual The following illustrations show principles of driving technique and obstacle clearance. User, up forwards This technique is recommended only for experienced wheelchair users. – Ensure that the anti-tips are disabled. Enable the anti-tips afterwards.
- Page 28 Etac / Crissy / www.etac.com User manual Carer, up forwards – Ensure that the anti-tips are disabled. Enable the anti-tips afterwards. Carer, up backwards – Ensure that the anti-tips are disabled. Enable the anti-tips afterwards. Carer, down forwards – Ensure that the anti-tips are disabled.
- Page 29 Etac / Crissy / www.etac.com User manual Stairs, up We recommend that there are always two carers for this transfer: one walking behind and holding – Ensure that the anti-tips are disabled. Never use the push handles, and one walking in front, hold- an escalator, even if a carer is available.
-
Page 30: Care And Maintenance
Etac / Crissy / www.etac.com User manual Care and maintenance Rear Wheels: Clean the quick release axles when nec- Upholstery: Wash, see label on upholstery. essary. For more severe problems, contact the Technical Aids Castor wheels: Clean the castor wheel axles when nec- Centre. -
Page 31: Settings (Continued)
Etac / Crissy / www.etac.com 6. Settings Seat angle The seat angle is achieved through the difference between the front and the rear seat heights. Bear in mind the risk of tipping. Always check the positioning of the anti-tips. When the seat angle is changed: - Adjust the angle of the front fork attachment. -
Page 32: Seating Comfort
Etac / Crissy / www.etac.com 6. Settings Seating comfort After setting seat height, seat angle, seat depth and back angle, the back support upholstery should be adjusted to give support and comfort. See section “Seating comfort settings “ in the User Manual. - Page 33 Etac / Crissy / www.etac.com 6. Settings Adjustment of the centre of balance The centre of balance can be adjusted by changing The centre of balance is also altered when the seat the position of the rear wheels. and/or back support angle are adjusted.
-
Page 34: Fitting Seat Extender
Etac / Crissy / www.etac.com 7. Fitting seat extender Fitting seat extender Bear in mind the risk of tipping. Always check the posi- tioning of the anti-tips. -
Page 35: Settings Back Support 2C
Etac / Crissy / www.etac.com 8. Settings Back support 2C Adjusting back support height The back support height is variably adjustable (See “Chair options”). Loosen the screws (A) 2-3 turns to set the height of the back support. Ensure that both sides are at the same height by checking against the ruler (B) on the back of the back tube. -
Page 36: Settings Back Support 2B
Etac / Crissy / www.etac.com 9. Settings Back support 2B Adjusting back support height The back support height is adjustable (See “Chair op- tions”). Loosen the screws to adjust the height of the back support. Tighten the screws. Bear in mind the risk of tipping. -
Page 37: Readjustments
Etac / Crissy / www.etac.com 10. Readjustments Brake, adjustment The brakes are variably adjustable. The braking effect is dependent on the air pres- 1. Loosen the screws about one turn. sure in the tyres. The brakes are parking brakes 2. Adjust the brake position. -
Page 38: Adjustment Of Brake Pin In Certain Rear Wheel Positions
Etac / Crissy / www.etac.com 10. Readjustments Adjustment of brake pin in certain rear wheel positions 5 mm Leg supports, variable angle adjustment Never stand on the footplates as there is a risk of tipping! When lifting a wheelchair, remove the leg supports and lift using the frame (lower or upper part). -
Page 39: Amputee Leg Support (Option)
Etac / Crissy / www.etac.com 10. Readjustments Amputee leg support Never sit on the amputee leg support. When lifting the wheelchair, remove the amputee leg support, swing away the other leg support (or remove it) and lift using the frame (lower or... -
Page 40: Changing The Camber Angle
Etac / Crissy / www.etac.com 10. Readjustments Changing camber angle You can change the camber angle by changing the Check that the hub axle of the rear wheel is set washers between the hub sleeve and the nut. (See correctly. The button in the hub should pop out also section “Seat height adjustment using the rear... -
Page 41: Handrims
Etac / Crissy / www.etac.com 10. Readjustments Handrims The way in which the user is able to grip the Be aware that when passing through narrow spaces handrims is influenced by the handrim’s material and there is a risk of getting your fingers caught. - Page 42 Etac / Crissy / www.etac.com 10. Readjustments Mounting/dismantling upholstery The seat upholstery is fastened lengthways to the The back support upholstery is removed by loose- seat frame, and can easily be removed from the ning the Velcro straps. frame by unscrewing the end caps.
-
Page 43: Accessories - Adjustment, Handling
Etac / Crissy / www.etac.com 11. Accessories - adjustment, handling Assembly instructions are always provided with accessories when they are delivered from Etac. Instructions are also available on our website www.etac.com Seat cushion and comfort wedge The cushion is cut to the required depth at the front or back edge. -
Page 44: Positioning Belt
Etac / Crissy / www.etac.com 11. Accessories - adjustment, handling Head support The head support is mounted onto the push brace (option, Back support 2C). The head support is adjustable in height, depth and angle, and is detach- able. Before the head support is adjusted, ensure that the user has a good, secure sitting posture. -
Page 45: Technical Data
Etac / Crissy / www.etac.com 12. Technical data Seat depth Total width Back support Max user Type of chair Art. no. Crissy from back Seat width Weight angle weight support, cm 37.5 cm 13230103 57.5 37-45 37.5 cm 5° 15,2 125 kg... -
Page 46: Service And Maintenance
Miscellaneous If there is a fault in your wheelchair you should contact Etac will not be held responsible for damage or injury your dealer or Technical Aids Centre. A defective wheel- caused by use of non-original parts. -
Page 47: Tests And Guarantees
10 years. If the product is intended for use after the service life period specified by Etac, it is the responsibility of the product owner to ensure product functionality in accordance with the manual and reconditioning instructions. - Page 48 West Midlands B62 8BH United Kingdom R82, Inc. Tel 800 336 7684 12801 E. Independence Boulevard Fax 704 882 0751 P.O. Box 1739 Information@snugseat.com Matthews, NC 28106, USA www.etac.com Etac Supply Center AB Långgatan 12 320451 413994 SE-334 24 Anderstorp...
Need help?
Do you have a question about the Crissy Series and is the answer not in the manual?
Questions and answers