
Subscribe to Our Youtube Channel
Related Manuals for Etac Convaid Trekker


Summary of Contents for Etac Convaid Trekker
- Page 1 ENGLISH User and Service Manual CANADA Convaid Trekker ® Lightweight Tilt-In-Space Wheelchair READ INSTRUCTION BEFORE USING SAVE THIS BOOK FOR FUTURE REFERENCE...
-
Page 2: Customer Service Support
Convaid. Indications for Use The Convaid Trekker models are manual wheelchairs; they are intended to provide mobility to person with disabilities who are partially or permanently non-ambulatory and limited to a sitting position. -
Page 3: Table Of Contents
Table of Contents Product Overview Definition of Symbols…………………………………………………..……..…..1 Warnings…………………………………………………………………..……..3 Product Overview…………………………………………………………..……..……...6 Specifications……………………………………………………………..……..14 Setting Up Contents in the box………………………………………..……………………..……..15 How To Remove Chair from box……………………………….…………..……..15 Preparing the Chair for Use………………………………….………………..……..15 Push Handle Adjustment………………...………………………………..……..……..16 Wheel Lock Operation………………...……………………………………..……..……..16 Unfolding the Chair …………………………………………………………..……..……..17 Folding the Chair………………………………………………………....……..……..18 Folding/Unfolding the Seating Module……………………………....……..……..21 Lifting/Carrying the Seating Module…………………………………...……..……..21 Lifting/Carrying the Chair Mobility Base…………………………………..……..……..22... - Page 4 Accessories & Options Medical Necessity Storage Basket ......... 41 Ventilator / Suction Hard Tray .
-
Page 5: Read Before Use
CONVAID USER’S GUIDE READ BEFORE USE Read the user’s guide completely before use and fully understand its content. Familiarize yourself with the handling and functions of the product before use and practice them. Any caregiver that is going to operate this chair should also read the user’s guide in full. You are responsible for the safety of the user. -
Page 6: Choose The Right Chair & Safety Options
CONVAID USER’S GUIDE This symbol indicates a wheelchair which cannot be used in motor vehicle as vehicle seat. This wheelchair does not comply with WC19 (RESNAWC-4:2012 for ISO7176-19:2008) and cannot be used as a vehicle seat to transport the user in a vehicle. The Symbol indicates a wheelchair which can be used in motor vehicle as vehicle seat. -
Page 7: Warnings
CONVAID USER’S GUIDE General Warnings WARNING: The operator/caregiver must read and understand this user’s guide prior to operating this equipment. If you are unable to understand any part of the user’s guide, contact your supplier for assistance. WARNING: Never exceed the maximum occupant weight capacity indicted on the serial number label on the seating module. - Page 8 CONVAID USER’S GUIDE WARNING: Do not go up or down stairs without the assistance of another person or with user in the chair. If devices such as ramps or elevators are available, please use them. If they are not available, then the chair should be carried over the obstacle by two people without the user in the chair.
- Page 9 CONVAID USER’S GUIDE WARNING: Motor vehicle safety – The seating module is not designed, tested or intended to be used as a car seat. Never use the seating module as a car seat. Transfer the user from the chair to an approved motor vehicle adaptive car seat.
-
Page 10: Product Overview
CONVAID USER’S GUIDE PRODUCT OVERVIEW Trekker Mobility Base (Front View) One Piece Height Adjustable Push Handle Docking Platform Frame Shroud Seat Release Lever Tilt Stopper Transit Anchors Transit Anchor (Front) Logo Sticker Option 7.5” x 2” Front Solid Wheels Mobility Base Serial Number Label Fig. - Page 11 CONVAID USER’S GUIDE Trekker Mobility Base (Back View) Never leave occupant unattended. Failure to read and follow user guide instructions could result in serious injury. To obtain a replacement user’s guide email sales@convaid.com or call 1-844-US Mobility (844-876-6245) Chair Warning Label Tilt Adjustment Lever Back View Closure Strap...
- Page 12 CONVAID USER’S GUIDE Trekker Seating Module Back Canes (Front View) Back Canes 90° Fixed Front Leg Rest Recline Plate Depth Adjustable Seat Pan 90° Fixed Footplate Fig. 3...
- Page 13 CONVAID USER’S GUIDE Trekker Seating Module Back Canes (Back View) Height Adjustable Crossbar Recline Strap Recline Lock Pins Recline Plate Docking Plate Seating Module Serial Number Label 80° - 110° Recline Degrees (Standard) Fig. 4...
- Page 14 CONVAID USER’S GUIDE Trekker Seating Module Solid Back (Front View) Curved Head Support Height Adjustable Solid Back Seating Module Trunk Positioning Slots Option 90° Fixed Front Rigging Depth Adjustable Seat Pan 90° Fixed Footplate Fig. 5...
- Page 15 CONVAID USER’S GUIDE Trekker Seating Module Solid Back (Back View) Curved Head Support Crossbar Recline Lock Pins Recline Plate Docking Plate Seating Module Serial Number Label 80° - 110° Recline Degrees (Standard) Fig. 6...
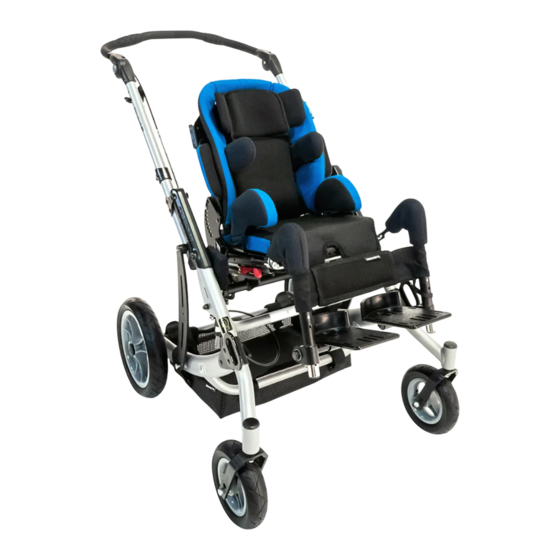
- Page 16 Please consult your dealer for more information WARNING: Always refer to the serial number label on the seating module for occupant maximum weight capacity. Stingray Seating Module weight capacity: 88 lbs. Fig. 7 R82 Stingray Seating Module with Convaid Trekker Base...
- Page 17 Trekker 12: 75 lbs. Trekker 14: 110 lbs. Fig. 8 Fig. 9 R82 High-Low Indoor Frame without R82 High-Low Indoor Frame with push brace (shown lowered) with push brace (shown extended) with Convaid Trekker Seating Module Convaid Trekker Seating Module...
-
Page 18: Specifications
CONVAID USER’S GUIDE Trekker Seating Module Specifications Seating Module Size TR12 TR14 Seat Width 11.75” 13.75” Seat Depth Range 7.5” - 13.5” 9.5” - 16.5” Seat Back Height 13 - 17” 17 - 25” Seat to Floor Height 19.8” 19.8” Seat hip width range between hip guides without armrest: 6”... -
Page 19: Contents In The Box
CONVAID USER’S GUIDE Chair Set Up & Adjustment Contents in the Box List of items included in the box: Tools needed: • 5/32” Allen wrench • Mobility Base and Seating Module • 7/16” Wrench • Rear wheels (pair) • 3/8” Wrench •... -
Page 20: Push Handle Height Adjustment
CONVAID USER’S GUIDE Push Handle Height Adjustment 1. To adjust the height of the one piece push handle, press the buttons on each side of handle. Fig. 10 2. While holding the buttons down, adjust handle up or down. Fig. 11 3. -
Page 21: Unfolding The Chair
CONVAID USER’S GUIDE Unfolding the Chair Unfolding instructions with seating module in place: 1. Unbuckle and release closure strap. Fig. 14 2. Install rear wheels if they have been removed, confirm that the wheels are all the way in and that you have heard the “click”... -
Page 22: Folding The Chair
CONVAID USER’S GUIDE Folding the Chair WARNING: Never attempt to fold the Trekker Chair with a user in it. This could result in serious injury. WARNING: Do not place user in the chair until you have verified that the folding action is properly locked. WARNING: Do not allow children near the chair while folding to avoid possible pinch points. - Page 23 CONVAID USER’S GUIDE Folding Instructions with seating module in place: 1. Adjust the push handle downward. Fig. 22 2. Fold the seat back forward by pulling on the recline strap and pushing the seat back forward. Fig. 23 3. Pull back on folding triggers (Fig. 24) until the mobility base unlocks. 4.
- Page 24 CONVAID USER’S GUIDE Folding Instructions with seating module removed: 1. Pull back on folding triggers (Fig. 28) until the mobility base unlocks. 2. Push forward and then down on push handle. Fig. 29 3. Secure closure strap on the side of the chair to keep mobility base closed while transferring or lifting.
-
Page 25: Folding/Unfolding The Seating Module
CONVAID USER’S GUIDE Folding/Unfolding the Seating Module Folding: Unfolding: 1. Remove user from the chair. 1. To unfold, pull the recline strap while holding 2. While holding the back of the push handle, on the center of the recline strap. pull on the recline strap. -
Page 26: Lifting/Carrying The Chair Mobility Base
CONVAID USER’S GUIDE Lifting/Carrying the Chair Mobility Base 1. To safely lift or carry the Trekker, hold the mobility base with two hands. Fig. 39 Fig. 40 Fig. 39 Fig. 41 WARNING: Always secure the Trekker mobility base by using the folding strap before carrying/lifting the chair. -
Page 27: Installing Seating Module In Forward Configuration
CONVAID USER’S GUIDE Installing Seating Module in Forward Configuration 1. On the seating module, adjust seat back angle to upright 90 degrees position by pulling on the recline strap and adjusting the seat upright. Fig. 42 2. On the mobility base, adjust tilt to neutral position so that the docking platform is parallel to the floor. -
Page 28: Installing Seating Module In Reverse Configuration
CONVAID USER’S GUIDE Installing Seating Module in Reverse Configuration 1. On the seating module, adjust seat back angle to upright 90 degrees position by pulling on the recline strap and adjusting the seat upright. Fig. 50 2. On the mobility base, adjust tilt to neutral position so that the seat pan is parallel to the floor. - Page 29 CONVAID USER’S GUIDE WARNING: During transit, chair must be forward facing with the seating module in the forward facing position on the mobility base with the storage basket removed. WARNING: Armrest combined with a contoured seat cushion can interfere with chair mobility base during installation and removal, therefore armrest must be adjusted to the lowest width;...
-
Page 30: Removing Seating Module From Mobility Base
CONVAID USER’S GUIDE Removing Seating Module from Mobility Base WARNING: Always remove the user from the chair prior to removal of the seating module from the mobility base. Removal of the seating module is only intended for facilitating lifting and transportation of the chair. The user should never be placed in the seating module if it is not properly attached to the mobility base. -
Page 31: Fitting Guide
CONVAID USER’S GUIDE Fitting Guide Please take the time to properly adjust the chair to fit the user. If the user is not correctly posi- tioned, check the accessories listed in this user’s guide to see if one or more of our accesso- ries would help to facilitate posture or consult a healthcare professional. -
Page 32: Seat Depth Adjustment
CONVAID USER’S GUIDE Seat Depth Adjustment Measure from the most posterior portion of the buttocks to the back of the knee. Subtract from that measurement 1-2” (25-51mm) to allow adequate clearance between the seat and the back of the knee. Fig. 66 1. -
Page 33: Seat Width Adjustment
CONVAID USER’S GUIDE WARNING: When using the Trekker 12 or Trekker 14 back canes seating module in reverse configuration and set to seat depth position 1, the recline adjustment of 80° combined with -10° anterior tilt may cause the chair to tip. To reduce the possibility of tipping, add anti-tips to the chair. - Page 34 CONVAID USER’S GUIDE Depth Adjustment: 1. Remove hip guide cover. Fig. 77 2. Use 7/16” wrench to loosen hardware. Fig.76 3. Using the provided slot, adjust to the desired depth and retighten. Fig. 79 Fig. 77 Fig. 78 Fig. 79 Height Adjustment: 1.
-
Page 35: Laterals
CONVAID USER’S GUIDE Laterals To Adjust: 1. Remove Back Cushion. Fig. 84 2. Using 5/32” Allen wrench and 7/16” wrench, loosen the hardware and adjust hardware as needed to provide user with adequate trunk support. Fig. 85 3. Retighten the hardware. Fig. -
Page 36: Tilt-In-Space Adjustment
CONVAID USER’S GUIDE Tilt-In-Space Adjustment The Trekker Chair is equipped with a tilt-in-space mechanism. The tilt-in-space range in the Trekker is -10º anterior to 45º posterior. Fig. 90 To Adjust the Tilt Angle: 1. With your right hand, hold onto the handle, on the back on the seat to support the weight of the user. -
Page 37: Recline Adjustment
CONVAID USER’S GUIDE Recline Adjustment The Trekker comes standard with Back Angle Adjustment of 80º - 110º in increments of 10º. Optional Feature: 1. The Trekker has an additional recline option to extend the back angle adjustment to full recline range of 80º to 130º of recline adjustment. 2. -
Page 38: Pelvic Positioning Belts
CONVAID USER’S GUIDE Pelvic Positioning Belts WARNING: Positioning belts should never be used as a safety restraint device in a motor vehicle when transporting chair with occupant. An additional WC-4-19 or ISO 7176-19 compliant automotive type seat belt is required when the chair is used in transport vehicles. Make sure the occupant does not slide down in the wheelchair seat. -
Page 39: H-Harness With Padded Covers
CONVAID USER’S GUIDE H-Harness with Padded Covers Optional Feature: Prior to adjusting the H-Harness, please make sure to adjust the back adjustment height, as shown in (Fig. 99), so that the top of the back panel is at the height of the user’s shoulder. 1. -
Page 40: Footplate Height Adjustment
CONVAID USER’S GUIDE Footplate Height Adjustment Trekker foot support is height adjustable. To determine the correct seat-to foot support Height, measure from the back of the knee to the bottom of the heel. To adjust the height: 1. Pull out safety detent pin as shown in Fig. 103 and remove. -
Page 41: Individual Footplates
CONVAID USER’S GUIDE Individual Footplates To adjust minimum seat to footplate height: 1. Flip and swap the individual footplate assemblies. Fig. 107 & 108 2. Use a 5/32” Allen wrench to loosen the nuts and bolts from each footplate. 3. Slide the footplate out and adjust the lock pin to the upper locking position. 4. -
Page 42: Footbox Cover
CONVAID USER’S GUIDE Footbox Cover To install footbox cover to one-piece footplate: 1. Attach the footbox cushion to the footbox base using Velcro. Fig. 110 Note: Make sure the front flap of the box cushion is facing forward when attaching the cushion. -
Page 43: Foot Positioners
CONVAID USER’S GUIDE Foot Positioners Adjustable foot positioners hold feet in position on the foot support. The foot positioners may be criss-crossed over the top of the foot to secure the entire foot. The foot positioners can also be converted to an ankle strap. To convert into an ankle strap, remove left buckle and secure the loose end of the strap. -
Page 44: Wheels Specifications
CONVAID USER’S GUIDE Wheels Specifications The Trekker comes standard with 7.5" x 2" front solid tires and 11.5" x 2.5" rear solid tires. You can upgrade, replace or re-order Trekker tires at any time. You have the option of upgrading to pneumatic tires or re-ordering replacement standard solid tires. -
Page 45: Medical Necessity Storage Basket
CONVAID USER’S GUIDE Accessories Medical Necessity Storage Basket Optional Feature: The Medical Necessity Storage Basket is made of texteline mesh and durable plastic and suspends from the chair frame by Velcro straps. The Medical Necessity Storage Basket can hold a weight capacity of up to 50lbs. Note: Convaid logo must be facing the right side of chair when installing. -
Page 46: Head Support
CONVAID USER’S GUIDE Head Support Attaching Headrest: 1. Remove headrest cover by unzipping the cover on the back side. Fig. 131 & 132 2. Using a 5/32” Allen wrench and 7/16” wrench, secure the two provided mounting Allen screws on the top center of the upper back plate. Fig. 133 3. -
Page 47: Universal Bracket
CONVAID USER’S GUIDE Universal Bracket 1. Insert screw into one of the four holes on the upper portion of the back pan of the universal plate. Fig. 136 2. Orient the universal plate to desired position. 3. Partially thread the screw onto the plate but do not tighten. 4. -
Page 48: Anatomic Headrest
CONVAID USER’S GUIDE R82 Anatomic Headrest Installing Anatomic Headrest to Turtle Bar System 1. Align the anatomic headrest bracket with turtle bar system. Fig. 141 2. Use 6mm Allen wrench to tighten the connecting hardware. Fig. 142 Headrest bracket Note: Do not remove the preinstalled head rest bracket. Fig. 140 Note: Universal bracket must be oriented to the position as shown in Fig. - Page 49 CONVAID USER’S GUIDE To Adjust the Turtle Bar System 1. Use 5mm Allen wrench to loosen the bolts and loosen the lever. Fig. 146 2. Adjust to desired depth and height then retighten the bolts and lever. To Remove Cover Detach the three Velcro strips and remove cover.
-
Page 50: Canopy Bracket Installation
CONVAID USER’S GUIDE Canopy Bracket Installation Aftermarket Kit Includes: Fig. 149 2 Canopy brackets with Hardware 1 5/32” Allen Wrench 1 7/16” & 3/8” Wrench Fig. 149 To Install the Canopy Bracket: 1. Install the canopy bracket at the location as shown. -
Page 51: Canopy Attachment
CONVAID USER’S GUIDE Canopy Attachment 1. Rotate push handle down. Fig. 156 & 157, 2. Insert canopy rod into brackets located on the sides of the back of the seating module. 3. Rotate handle to desired position. Fig. 158 Fig. 156 Fig. -
Page 52: I.v. Pole
CONVAID USER’S GUIDE I.V. Pole The folding I.V. pole offered on the Trekker accommodates the user when intravenous fluids, medication, or G-tube feeding are necessary. Fig. 163 1. The pole easily secures to the Trekker by clamping the pole mount on the side mobility base tubing. -
Page 53: Elevating Leg Rest (Option)
CONVAID USER’S GUIDE Elevating Leg Rest (Option) To Adjust Height: 1. Place your hand on the grey button located at the knee joint. Fig. 169 2. Press the grey button to adjust lower extremity to design angle and release button. Fig. 170 Fig. -
Page 54: Ltv Vent Holder
CONVAID USER’S GUIDE LTV Vent Holder 1. Align male dovetail bracket located on ventilator with female dovetail bracket located on frame. Fig. 174 2. Slide down and lock securely into bracket. Fig. 175 3. Attached Ventilator. Fig. 176 Fig. 174 Fig. -
Page 55: Curb Tipper
CONVAID USER’S GUIDE Curb Tipper 1. To install the curb tipper tube, align the tube angled upwards with the end of the round mobility base tubing located next to the rear wheel. Fig. 180 2. Push the spring button while positioning the curb tipper tube into the round mobility base tubing, and then push until the “release button”... -
Page 56: Caster Locks
CONVAID USER’S GUIDE Caster Locks Note: Casters must be in straight position before engaging. 1. Engage caster lock by pushing the caster lock down. Fig. 182 2. To disengage the caster lock, push the bottom portion of caster lock. Fig. 182 Fig. -
Page 57: Upper Extremity Support Tray
CONVAID USER’S GUIDE Upper Extremity Support Tray The trays are great for feeding and for trunk stabilization. 1. Insert tray into tray mounting bracket. Fig. 188 2. Push spring button into mounting tray to secure. Fig. 189 Fig. 188 Fig. 189 Note: Seat depth minimum range is reduced by 1"... -
Page 58: Transit Option
CONVAID USER’S GUIDE Transit Option The wheelchair transport model has been crash tested and complies with the requirements of RESNA WC4:2012 section 19 and ISO7176-19:2008. Dummy weights are: Trekker Seating Modules Weight Capacity: 14T......110lbs/50kg 12T ………………….. 75lbs/34 kg Transit Anchor Wheelchair user should transfer to the vehicle seat and use the vehicle- Transit Anchor... -
Page 59: Transportation Mode Instructions
CONVAID USER’S GUIDE Wheelchair Lateral Stability and Belt Restraint Accommodation Rating Wheelchair Model Mass (Weight) of Test Rating Lateral Stability ** Wheelchair (lb./kg) (A,B,C,D)* (in./mm) TR-12T 30/13.6 0.51/13 TR-14T 31/14 0.55/14 *A = Excellent; B = Good; C = Fair; D = Poor ** “Lateral stability”... - Page 60 CONVAID USER’S GUIDE WARNING: Trekker was dynamically crash tested in a forward- facing configuration using an appropriately sized crash-test dummy restrained by both upper-torso (shoulder) and lower-torso (lap) belts. To reduce the possibility of head and chest injuries resulting from contact with vehicle components, you must use both upper and lower torso belts.
-
Page 61: Recommended Clear Zones In Vehicle
CONVAID USER’S GUIDE WARNING: During transit, chair must be forward facing with the seating module in the forward facing position on the mobility base. All non-essential accessories should be removed. WARNING: Adequate clear zones are required for occupants restrained by both upper - and lower-torso belt restraints. -
Page 62: Proper Use Of Equipment
CONVAID USER’S GUIDE PROPER USE OF EQUIPMENT Securing the Wheelchair Attach tiedown straps to securement points (black brackets) located on the wheelchair’s legs in accordance with the WTORS manufacturer’s instructions. Securement points are identified by the symbol in Fig. 198. and their location on the wheelchair illustrated in Fig. 197 Hook-type end fitting Lap belt anchorage Transit anchor... - Page 63 CONVAID USER’S GUIDE PREFERRED ANGLES OF FRONT AND REAR TIEDOWN STRAPS (Fig. 199) AND PREFERRED LOCATIONS OF FLOOR ANCHOR POINTS (Fig. 200). Fig. 200 Fig. 199 Fig. 201 Fig. 202 Fig. 201: FRONT TIEDOWN STRAPS ANGLED AWAY FROM SIDES OF WHEELCHAIR. Fig.
- Page 64 CONVAID USER’S GUIDE STANDARD METAL CLIP (Fig. 203) AT LOWER END OF SHOULDER BELT AND AT END OF OPTIONAL WHEELCHAIR-ANCHORED LAP BELT USED TO CONNECT TO PIN/BUSHING (Fig. 204) ON LAP BELT OR ON WHEELCHAIR TRANSIT ANCHORS. Fig. 203 Fig. 204...
-
Page 65: Restraining The Wheelchair Occupant
CONVAID USER’S GUIDE Restraining the Wheelchair Occupant Your Convaid transit wheelchair was dynamically crash tested in a forward-facing configuration using an appropriately sized crash-test dummy restrained by both upper- torso (shoulder) and lower-torso (lap) belts. To reduce the possibility of head and chest injuries resulting from contact with vehicle components, you must use both upper and lower torso belts. -
Page 66: Using Postural Belts & Supports
CONVAID USER’S GUIDE Note: Steeper side view pelvic-belt angles are especially important if the pelvic belt is intended to be used for postural support in addition to occupant restraint in a frontal crash. Steeper angles will reduce the tendency for a vertical gap to develop between the user and the belt due to compliance of seat cushions and belt movement, thereby reducing the tendency for the user to slip under the belt for the belt to ride up on the soft abdomen during normal use. -
Page 67: Trays & Other Wheelchair Components
CONVAID USER’S GUIDE Trays & Other Wheelchair Components To reduce the risk of potential injury to the wheelchair user or other occupants in a motor vehicle crash, wheelchair-mounted accessories, such as trays and respiratory equipment, must be removed and secured separately during transit. Use tether straps or other strong attachment hardware to prevent items from breaking loose and causing injury during a crash. -
Page 68: Important Information
CONVAID USER’S GUIDE Important Information Maintenance, Operating & Safety Instructions • READ ALL INSTRUCTIONS BEFORE USING THE PRODUCT • ALWAYS FOLLOW THESE SAFETY INSTRUCTIONS • SAVE SAFETY INSTRUCTIONS FOR FUTURE REFERENCE • For user safety, the seat belt should be fasten at all times. WARNING •... - Page 69 CONVAID USER’S GUIDE Safety Instructions • Follow folding/unfolding instructions. • Never leave occupied chair unattended. • Do not attempt to take occupied chair up or down stairs, escalators,steep inclines, icy or slippery surfaces. • When transferring user to or from chair, apply wheel locks. Fig.
- Page 70 CONVAID USER’S GUIDE IMPORTANT INFORMATION • When going up a curb or step, face forward and tilt the chair back to lift the front wheels over the curb. Move forward and lift the rear wheels over the curb. The Trekker curb clearance is 7.5”...
- Page 71 CONVAID USER’S GUIDE IMPORTANT INFORMATION Check for functionality and/or damage Weekly Every 3 Every 6 of the following: months months necessary Rims and tires • Wheel lock and hand brakes • Accessories • Front and rear wheel axles • Cleaning & lubricating all moving parts* •...
- Page 72 CONVAID USER’S GUIDE IMPORTANT INFORMATION Cleaning of fabric cover Seat and back upholstery can be easily removed, washed, air dried and reattached to the chair. Use standard detergent to wash fabric. Cushioned parts can also be removed from chair, washed or wiped off with a moist cloth. Before reattaching them to the chair, make sure they are completely dry.
- Page 73 Seat fabric should not be wide-stretched or sagging. Positioning accessories should be correctly adjusted and secure. Convaid Service Dealer Please record the Convaid Dealer from which you purchased your chair: Company:___________________________________________________ Address:____________________________________________________ Phone:______________________________ Website:________________ Contact:_____________________________ Email:__________________ Serial #:_____________________________________________________ Or contact Convaid Customer Service at 844 US Mobility (844-876-6245) (+1-310-618-0111) or convaidsales.us@etac.com...
-
Page 74: Troubleshooting Guide
CONVAID USER’S GUIDE Troubleshooting Guide Trekker Mechlock Assembly WARNING: The Trekker Mecklock head/fork should be tightly torqued onto the Mecklock shaft. If not properly tightened, the head/fork assembly may become unscrewed. Fig. 209 WARNING: Do not adjust mecklock as this will affect intended functionality. Fig. -
Page 75: Tilt Adjustment Lever
CONVAID USER’S GUIDE Tilt Adjustment Lever Handle Fig. 211 Fig. 212 1. Plug the cable end into the adjustment barrel. Make sure the chrome cable end is fully seated inside adjustment barrel. WARNING: The cable on the tilt adjustment lever may be pulled loose or dislodged during transport and/or initial assembly. -
Page 76: Warranty
Warranty applicable in USA only, may vary in other countries. Convaid Products, LLC 2830 California Street, Torrance, CA 90503, USA Toll free in the US: 1-844-US-Mobility (844-876-6245) • Phone: (310) 618-0111 • Fax: (310) 618-8811 Email: convaidsales.us@etac.com • International Email: international.convaid.us@etac.com www.etac.us.com UG1802-ENG-Rev.00 2020-02-03 Printed in USA...
Need help?
Do you have a question about the Convaid Trekker and is the answer not in the manual?
Questions and answers