Pepperl+Fuchs LGS Series Manual

Pepperl+Fuchs LGS Series Manual

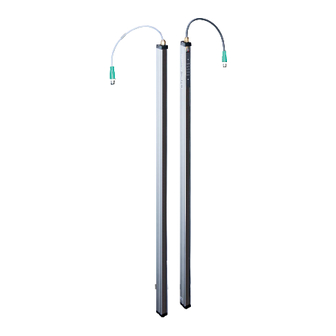
Switching automation light grid

Advertisement

Quick Links

FACTORY AUTOMATION
MANUAL
LGS Series
Switching Automation Light Grid

Advertisement

Table of Contents
loading

Summary of Contents for Pepperl+Fuchs LGS Series

  • Page 1 FACTORY AUTOMATION MANUAL LGS Series Switching Automation Light Grid...
  • Page 2 LGS Series With regard to the supply of products, the current issue of the following document is applicable: The General Terms of Delivery for Products and Services of the Electrical Industry, published by the Central Association of the Electrical Industry (Zentralverband Elektrotechnik und Elektroindustrie (ZVEI) e.V.) in its most recent version as well as the supplementary clause: "Expanded reservation...
  • Page 3: Table Of Contents

    LGS Series Contents 1 Introduction................. 5 2 Declaration of Conformity ..........6 Declaration of Conformity ................6 3 Safety................... 7 Symbols Relevant to Safety ................7 Intended Use ....................7 4 Product Description ............9 Use and Application ..................9 Indicators and Operating Elements ...............9 Interfaces and Connections ................11...
  • Page 4 LGS Series Contents 10 Appendix................35 10.1 Technical Data ................... 35 10.2 Type Code ....................37 10.3 Response Times and Number of Beams ............ 38 10.4 Profile Length and Weight ................41 10.5 Accessories ....................42 10.5.1 Installation Accessories ................. 42 10.5.2 Connecting Cables ................
  • Page 5: Introduction

    Introduction Introduction Congratulations You have chosen a device manufactured by Pepperl+Fuchs. Pepperl+Fuchs develops, produces and distributes electronic sensors and interface modules for the market of automation technology on a worldwide scale. Before you install this device and put it into operation, please read the operating instructions thoroughly.
  • Page 6: Declaration Of Conformity

    This product was developed and manufactured under observance of the applicable European standards and guidelines. Note A Declaration of Conformity can be requested from the manufacturer. The product manufacturer, Pepperl+Fuchs GmbH, D-68307 Mannheim, has a certified quality assurance system that conforms to ISO 9001. ISO9001...
  • Page 7: Declaration Of Conformity

    LGS Series Safety Safety Symbols Relevant to Safety Danger! This symbol indicates an imminent danger. Non-observance will result in personal injury or death. Warning! This symbol indicates a possible fault or danger. Non-observance may cause personal injury or serious property damage.
  • Page 8: Safety

    User modification and or repair are dangerous and will void the warranty and exclude the manufacturer from any liability. If serious faults occur, stop using the device. Secure the device against inadvertent operation. In the event of repairs, return the device to your local Pepperl+Fuchs representative or sales office.
  • Page 9: Use And Application

    IO-Link interface for service and process data, and for parameterization Description In addition to the usual standard functions, LGS series light grids feature a range of useful extra functions previously found only in much more expensive device classes. These functions include ultra-quick object detection even with beam crossover, the option of identifying objects, and remote communication via an IO- Link interface.
  • Page 10: Product Description

    LGS Series Product Description Indicators and Operating Elements Emitter strip Figure 4.1 Function indicator on the emitter strip Operating indicator: Indicates power on or power save mode Status indicator: Indicates transmission power, fault state, or active test input Receiver strip Figure 4.2...
  • Page 11 LGS Series Product Description H3 F 2 Figure 4.3 Touch field: Function indicators on the receiver strip Touch buttons Menu button Function selection OK button Function confirmation Function status indicators, level 1 Detection field status Teach in object or display object detection...
  • Page 12: Interfaces And Connections

    LGS Series Product Description H3 (F2) Reset factor y setting Object position (F2) Signal tracking active Signal tracking inactive Interfaces and connections The electrical connections are established using two M12 connectors. The transmitter strip has a cable with a 4-pin connector and the receiver strip a cable with an 8-pin connector.
  • Page 13: Accessories

    LGS Series Product Description C/Q (IO-Link / Out) H1 (Out) H2 (Out) H3 (Out) Teach-in (In) IO-Link communication is established via the C/Q connector (pin 4). Accessories An extensive range of accessories with detailed descriptions can be found in the appendix see chapter 10.5.
  • Page 14: Installation

    2. Check the package contents against your order and the shipping documents to ensure that all items are present and correct. Should you have any questions, direct them to Pepperl+Fuchs. 3. Retain the original packaging in case the device is to be stored or shipped again at a later date.
  • Page 15 LGS Series Installation Transmitter Detection field + 159 21.2 Detection field 137.8 Receiver Figure 5.1 Light Grid Dimension Drawing To mount the slim panels, use customized bore holes (d = 4.5 mm for M4 screws) or a rear, continuous groove (for flat M6 nuts in accordance with ISO 4035).
  • Page 16 LGS Series Installation Secure the light grid in its final position using the drilled holes. Figure 5.2 Position of the central point for the mounting holes Figure 5.3 Mounting holes Mounting 1. Align the emitter strip and receiver strip so they are parallel with one another and at the same height.
  • Page 17: Multiple Positions

    LGS Series Installation Characteristic response curve Offset Y [mm] Distance X [m] Figure 5.4 Maximum offset between emitter and receiver Multiple Positions Note If several light grids are operating close to each other, care must be taken to prevent cross-talk. This can be achieved by swapping the emitter and receiver, or by ensuring a sufficient distance between the two light grids.
  • Page 18: Connecting The Sensor Rails

    LGS Series Installation Connecting the Sensor Rails Caution! Electrical connection Wiring work that requires the opening and closing of electrical connections must always be performed with the power disconnected. Use a Class 2 power supply to supply the power (certified according to UL 1310).
  • Page 19 LGS Series Installation Function test: When the strip is activated for less than 1.2 s, the transmitter beams switch off and the outputs on the receiver strip switch on in the same way as when a beam is interrupted. The outputs for the height control can also be tested in this way, if the relevant height control parameters are available.
  • Page 20 LGS Series Installation Height Control Outputs (H1, H2, H3) These three independent signal outputs are active if objects in the detection field match the position of the taught-in height controls see chapter 7.1.2. The outputs then report the same statuses as the function status indicators 5 (H1), 6 (H2), and 7 (H3).
  • Page 21: Storage And Transportation

    LGS Series Installation 1. Make up a grounding cable (max. 1 mm ) using the supplied cable lug. 2. Remove one housing screw from the cover at the cable end, using a Torx T8 screwdriver. 3. Place the cable lug with the prepared cable under the cover and tighten the housing screw again.
  • Page 22: Commissioning

    LGS Series Commissioning Commissioning Final Assembly Checking the Mounting and Settings 1. Check the position of the light strips in relation to one another. The emitter strip and receiver strip must be aligned with one another with an accuracy of approximately ± 5°.
  • Page 23: Operation

    LGS Series Operation Operation Operating the Light Grid No objects or height controls are parameterized on delivery. The grid is operated using the touch field on the front of the receiver strip. The system can be parameterized as required using the two operating elements and the icons on the receiver strip.
  • Page 24 LGS Series Operation Factory Setting Parameter Status Height control 1 – 3 Inactive Beam crossover (3-way) Active Object position Floating Object tolerance Active Light-on/dark-on switching Dark on Beam suppression (blanking) Inactive Inverse operation (gap detection) Inactive (solid objects) Signal tracking Inactive Table 7.1...
  • Page 25 LGS Series Operation Touch Field Overview Figure 7.1 Touch field on the sensor for parameterization...
  • Page 26 LGS Series Operation Touch Field: Configurable Parameters, 1st Level Touch field Parameter icon Description Q object Explanation of function: Teach in object. The object currently located in the detection field is taught in. Output Q is activated when the object is detected during operation.
  • Page 27 LGS Series Operation Touch field Parameter icon Description 2nd parameter Enable function: Pressing the OK button enables ization level the 2nd parameterization level. Disable function: Pressing the OK button again quits the parameterization process. Table 7.2 Touch field: configurable parameters, 1st level...
  • Page 28: Object Detection (Overhang Control)

    LGS Series Operation Touch field Parameter icon Description Signal tracking Explanation of function: In non-stable ambient conditions, e.g., soiling and temperature changes, signal tracking ensures that the response threshold Object remains constant. Reflective objects that are position occasionally present along the detection field can distort signal tracking and cause switching faults.
  • Page 29: Monitoring The Object Height With Height Controls

    LGS Series Operation 7.1.2 Monitoring the object height with height controls The LGS switching light grid has been designed e.g. to monitor the load heights of pallets. An H switching output is therefore allocated for every load height. For example, the upper edge of the smallest object is taught in as height control 1 (H1), the upper edge of the middle object as height control 2 (H2) and the upper edge of the largest object as height control 3 (H3).
  • Page 30: Object Identification

    LGS Series Operation 7.1.3 Object identification The switching light grid can identify solid or perforated objects in the detection field from the interrupted light beams. Output Q is switched for the entire time that the object is in the detection field.
  • Page 31: Commissioning And Operating The Light Grid With Io-Link

    LGS Series Operation Commissioning and Operating the Light Grid with IO-Link Commissioning with IO-Link To activate the sensor via the IO-Link, proceed with the following steps: 1. Set the corresponding port on the IO-Link master to which the sensor is con- nected to IO-Link status.
  • Page 32 LGS Series Operation See the device description and software, e.g., the IODD, DTM, and the FDT master application within the product at www.pepperl-fuchs.com/io-link.
  • Page 33: Maintenance And Repair

    If it appears that safe operation of the sensor system is no longer possible, it must be taken out of operation and secured against inadvertent use. Always send both parts of the device (transmitter and receiver strip) to Pepperl+Fuchs together for repair.
  • Page 34: Troubleshooting

    LGS Series Troubleshooting Troubleshooting Troubleshooting Before requesting field service, check that the following actions have been taken: The plant has been tested according to the following checklists. Telephone assistance obtained from the Service Center to isolate the problem. Interference The sensor must be firmly mounted. It must not vibrate.
  • Page 35 LGS Series Troubleshooting 2. Press the Menu button repeatedly until the "F2" icon starts flashing. 3. Press the Menu button . This will take you to the 2nd parameterization level. 4. Press the Menu button repeatedly until the "H3" icon starts flashing.
  • Page 36: Appendix

    LGS Series Appendix Appendix 10.1 Technische Daten General specifications Effective detection Standard : 0.3 ... 6 m range Option /35: 0.5 ... 8 m LGS100: When beam crossover is activated, the detection range starts at 0.6 m Threshold detection Standard : 7.5 m...
  • Page 37 LGS Series Appendix Electrical specifications Operating voltage 18 ... 30 V DC Ripple 10 % No-load supply current Emitter : 50 mA Receiver:  150 mA (without outputs) Interface Interface type IO-Link Protocol IO-Link V1.0 Mode COM 2 (38.4 kBaud)
  • Page 38: Type Code

    Mass See chapter 10.4 10.2 Type Code Automation light grids from the LGS series are designated using a code as follows: LGSxx-yyyy-IO/Options Here, xxx indicates the resolution, yyyy indicates the height of the detection field, IO indicates the integrated IO interface, and Options indicates additional options.
  • Page 39: Response Times And Number Of Beams

    LGS Series Appendix Detection field Resolution [mm] [mm] IO-Link interface Options 300, 600, … 3000 /35/110/115b/146 300, 600, … 3000 /35/110/115b/146 Clarification of Options Increased detection range: 8 m instead of 6 m /110 Push-pull 0.1 A switching output, short-circuit proof, protected against...
  • Page 40 LGS Series Appendix Response time [ms] C/Q output with object Detection Number C/Q output without parameterization Variants field [mm] of beams object Height control parameterization outputs H1, H2, H3 Typical Maximum Typical Maximum LGS17- LGS17- LGS17- LGS17- LGS17- 1200 1200...
  • Page 41 LGS Series Appendix Response time [ms] C/Q output with object Detection Number C/Q output without parameterization Variants field [mm] of beams object Height control parameterization outputs H1, H2, H3 Typical Maximum Typical Maximum LGS25- 2100 2100 LGS25- 2400 2400 LGS25-...
  • Page 42: Profile Length And Weight

    LGS Series Appendix Response time [ms] C/Q output with object Detection Number C/Q output without parameterization Variants field [mm] of beams object Height control parameterization outputs H1, H2, H3 Typical Maximum Typical Maximum LGS100- 1200 1200 LGS100- 1500 1500 LGS100-...
  • Page 43: Accessories

    LGS Series Appendix Overall length of the transmitter / receiver strip Weight of transmitter / Detection field [mm] [mm] receiver strip [g] 1500 1660 1600 1760 1700 1860 1000 1800 1960 1050 1900 2060 1100 2000 2160 1150 2100 2260...
  • Page 44 LGS Series Appendix Compatible mounting accessories for the light grid Designation Illustration Description OMH-SLCT-01 Mounting bracket OMH-LGS-01 Mounting bracket Only in combination with OMH-SLCT-01 OMH-SLCT-03 Mounting bracket OMH-SLCT-04 Mounting bracket OMH-SLCT-05 Mounting bracket...
  • Page 45 LGS Series Appendix Designation Illustration Description AA SLCT-01 Profile alignment tool Table 10.3 Accessories list Mou nting Ai d OM H-SLCT -01 Model number: OMH-SLCT-01 The emitters/receivers can be secured using mounting aids that grip the dovetail guide. There are dovetail guides on three sides of the profile. When mounting and aligning the unit, avoid subjecting the profile to mechanical tension.
  • Page 46 LGS Series Appendix OMH-LGS-01 OMH-SLCT-01 ø 4.3 OMH-SLCT-01 OMH-LGS-01 42.8 Figure 10.1 Dimensional drawing and fitting mounting accessory OMH-LGS-01 Figure 10.2 Alignment aid Order code: AA-SLCT-01 The transmitter and receiver should always be aligned at the same height in parallel to one another. The AA-SLCT-01 alignment aid with bubble level assists the perpendicular alignment of the profile.
  • Page 47: Connecting Cables

    LGS Series Appendix ø 21 24.5 21.5 23.4 11.1 ø 5.5 Figure 10.3 Dimensional drawing and assembly of the alignment AA-SLCT-01 10.5.2 Connecting Cables Various 4-pin and 8-pin connecting cables are available in different cable lengths. Connecting cables for automation light grids...
  • Page 48: Parameterizing The Light Grid

    LGS Series Appendix Designation Description IO Device Description Device description on how to operate and control automation light grids via an IO-Link master (available as a download on the product page) IO Device Description IO Device Description interpreter and device type manager...
  • Page 49 LGS Series Appendix Press menu button Teach an object Place object Q Object pictogram flashes fast in beam path no settings Press menu button Press OK Button Object has been taught Teaching height of object Place object H1 pictogram flashes fast...
  • Page 50 LGS Series Appendix Selection floating = LED long light duration / short break change Object position pictogram floating flashes fast fixed = LED short light duration / long break fixed no settings Press menu button Press OK Button changed active = LED long light duration / short break...
  • Page 51 Twinsburg, Ohio 44087 · USA Tel. +1 330 4253555 E-mail: sales@us.pepperl-fuchs.com Asia Pacific Headquarters Pepperl+Fuchs Pte Ltd. Company Registration No. 199003130E Singapore 139942 Tel. +65 67799091 E-mail: sales@sg.pepperl-fuchs.com www.pepperl-fuchs.com Subject to modifications Copyright PEPPERL+FUCHS • Printed in Germany 239596 DOCT-2493F 09/2019...

This manual is also suitable for:

Lgs100Lgs8Lgs17Lgs25Lgs50

Table of Contents