Advertisement
Available languages
Available languages
Quick Links
Download this manual
See also:
User Manual
Advertisement

Related Manuals for Lionelo LIAM


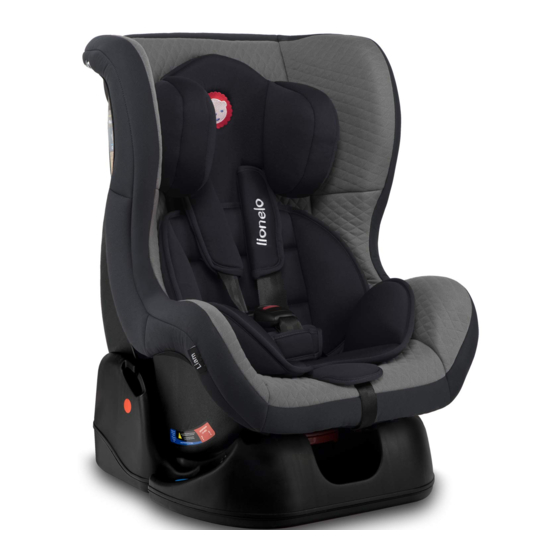
Summary of Contents for Lionelo LIAM
-
Page 2: Safety Notes
Do not mount the safety seat on a passenger seat equipped with an airbag. 2. Function LIAM has been classified as a "universal" car safety seat for children from Group 0+ and I, that is for those weighing less than 18 kg. - Page 3 • Any modifications to the safety seat without the consent of the competent authorities are not allowed. Failure to follow the manufacturer's installation instruction may result in danger to the child. • It is recommended not to expose the safety seat to direct sunlight. Otherwise it may become hot and cause harm to the child’s skin.
- Page 4 belt guides springs harness adjustment strap belts connector adjustable base 5. Usage Harness adjustment, straps tightening / loosing 5.1.1 Normally the straps are always secured, as shown in the picture 5.01. In this position, you tighten straps adjust their length height child.
- Page 5 5.1.2 In order to loosen the shoulder straps, use one hand to press the button (Picture 5.03 and 5.04) and the second one to pull the shoulder straps. Picture 5.03 Picture 5.04 Pull the shoulder straps down Press the adjustment button Shoulder straps connection 5.2.1 Hook the shoulder straps in the harness connector as shown in the Picture 5.05.
- Page 6 Adjustment strap connection 5.3.1 Attach the strap to the hook (Picture 5.07). 5.3.2 Thread the hook through the hole at the front of the seat (Picture 5.08). Then pull the shoulder straps up so as to lock the harness at the underside of the seat. 5.3.3 To remove the adjustment strap follow the above steps (up to point 5.3.2) in reverse order (Picture 5.09).
- Page 7 Picture 5.10, 5.11 Picture 5.12 Shoulder strap height adjustment 5.5.1 Loosen the shoulder straps. 5.5.2 Remove the shoulder straps from the harness connector. 5.5.3 Remove the shoulder straps from the slots. 5.5.4 Choose the most appropriate slots and run the shoulder straps through them. The slots position should be determined by the height of the child.
- Page 8 5.7.2 The arrows on both sides of the base indicate the seat angle (Picture 5.15). 5.7.3 Red arrows indicate position 1 and 2. These settings are reserved for the I age group and can only be used when the seat is installed in a forward-facing position (Picture 5.16). 5.7.4 Position 3 indicated by blue arrow is reserved for children from the 0+ age group.
- Page 9 indicated by the blue arrow. 6.1. Installation of the safety seat in a car 6.1.1. Adjust the back of the safety seat so that it is in the position number 3 indicated by the blue arrow. 6.1.2. The safety seat should be installed in a car equipped with 3-point seat belts. 6.1.3.
- Page 10 7.1.5. Ensure that the vehicle’s seat belt connector is properly locked in a buckle. 7.1.6. Ensure that the vehicle’s seat belts are not twisted. Picture 7.02 Picture 7.01 Securing a child with the 5-point safety harness 7.2. 7.2.1. Choose the most appropriate slots and run the shoulder straps through them. The slots position should be determined by the height of the child.
-
Page 11: Maintenance Instruction
7.2.2. Place your child in the safety seat. 7.2.3. Secure the child with the 5-point safety harness. 7.2.4. Ensure that the straps are not twisted. 8. Maintenance instruction Cover removal 8.1. Remove the 5-point safety harness. 8.1.1. After that all parts of the cover can be easily removed. 8.1.2. -
Page 12: Ważne Informacje
Nie należy umieszczać fotelika na siedzeniu pasażera wyposażonego w poduszkę powietrzną. 2. Zastosowanie Produkt LIAM jest sklasyfikowany jako „uniwersalny” fotelik samochodowy dla dzieci z grupy 0+ oraz I, czyli dla dzieci o masie ciała mniejszej niż 18 kg. - Grupa 0+: dzieci o masie ciała poniżej 13 kg - Grupa I: dzieci o masie ciała poniżej 18 kg... - Page 13 • Z zaleca się trzymać fotelik z dala od promieni słonecznych, w przeciwnym razie może ulec nadmiernemu nagrzaniu. • Nie należy umieszczać ciężkich przedmiotów na półce tylnej szyby pojazdu. Taki przedmiot może stać się niebezpieczny dla dziecka w przypadku ostrego hamowaniu lub podczas wypadku.
- Page 14 prowadnice pasów sprężyny Uprząż pasa regulującego złącze pasów regulowana podstawa Użycie zestawu Zastosowanie regulacji pasów, naciągnięcie i zwolnienie pasów 5.1.1 Standardowo pasek uprzęży jest zawsze zablokowany tak jak na Ilustracji 5.01. W tej pozycji można zawsze naciągnąć pasy żeby przystosować ich długość do wzrostu dziecka. ( Ilustracja 5.02 ) Ilustracja 5.01 Ilustracja 5.02...
- Page 15 5.1.2 Aby poluźnić pasy naramienne, należy najpierw jedną ręką wcisnąć przycisk ( Ilustracja 5.03, oraz Ilustracja 5.04 ) a drugą ręką pociągnąć za pasy naramienne. Ilustracja 5.03 Ilustracja 5.04 Pociągnij pasy naramienne w dół Przycisk zwalniający Połączenie szelek pasów 5.2.1 Zahacz szelki w łączniku szelek według poniższych ilustracji ( Ilustracja 5.05 ) 5.2.2 Umieść...
- Page 16 Wpięcie szelki regulującej do uprzęży 5.3.1 Umieść szelkę w uprzęży ( Ilustracja 5.07 ). 5.3.2 Przełóż obręcz przez otwór znajdujący się z przodu siedziska fotelika ( Ilustracja 5.08 ). Następnie pociągnij za szelki naramienne do góry tak aby uprząż zablokowała się od spodniej strony siedziska.
- Page 17 Ilustracja 5.10, 5.11 Ilustracja 5.12 Regulacja wysokości pasa naramiennego 5.5.1 Zwolnij pasy naramienne. 5.5.2 Rozłącz pasy z łącznika. 5.5.3 Wyjmij pasy naramienne z gniazd pasów. 5.5.4 Sprawdź, w których gniazdach powinny zostać umieszczone pasy naramienne. Jest to uwarunkowane wzrostem dziecka. 5.5.5 Złącz pasy naramienne łącznikiem pasów.
- Page 18 5.7.1 Zmienić kont nachylenia siedziska fotelika, włóż rękę pod siedzisko fotelika, naciśnij i przytrzymaj blokadę. Poruszając ręką w górę lub w dół, możesz zmienić kont nachylenia siedziska. Aby opuścić siedziska fotelika, dla ułatwienia można dodatkowo drugą ręką nacisnąć na górną krawędź siedziska ( Ilustracja 5.14 ). 5.7.2 Po obu stronach podstawy umieszczone są...
- Page 19 6. Zastosowanie fotelika dla grupy wiekowej 0+ Fotelik musi być zamontowany tyłem do kierunku jazdy. Oparcie musi być ustawione w pozycji 3 – na niebieskiej strzałce. 6.1. Mocowanie fotelika w pojeździe. 6.1.1. Fotelik musi być ustawiony w pozycji nr 3 – niebieska strzałka. 6.1.2.
- Page 20 7.1.3. Aby zamontować fotelik należy wyciągnąć pasy do maksimum. 7.1.4. Pas biodrowy i naramienny należy przeciągnąć przez fotelik ( Ilustracja 7.01, 7.02 ), Pas biodrowy należy przeciągnąć przez otwór „C” i wyciągnąć go z drugiej strony otworem „D”. W tym samym czasie pas naramienny należy przeciągnąć specjalną szczeliną za oparciem fotelika.
- Page 21 Zabezpieczenie dziecka w pięciopunktowych pasach 7.2. 7.2.1. Sprawdź, w których gniazdach powinny zostać umieszczone pasy naramienne. Jest to uwarunkowane wzrostem dziecka. 7.2.2. Umieść dziecko w foteliku. 7.2.3. Zabezpiecz dziecko 5 punktowym pasem fotelika. 7.2.4. Upewnij się że pasy nie są poskręcane. 8.
-
Page 22: Declaration Of Conformity
Declare the following apparatus: Products name: Baby car seat Brand and Model name: LO-Liam Below standards were tested and passed: R44-04 Release date: 21.09.2015 May be sold in: BE CZ DK DE EE IE EL ES FR HR IT LV LT HU...
Need help?
Do you have a question about the LIAM and is the answer not in the manual?
Questions and answers