Advertisement
Available languages
Available languages
Quick Links
Instrukcja obsługi
User manual
Sander
Grupa wagowa 0+ półuniwersalny 0 - 9kg
Grupa wagowa I uniwersalny 9 - 18kg
Grupa wagowa II półuniwersalny 15 - 25kg
Grupa wagowa III półuniwersalny 25 - 36kg Suitable for Group III / 25kg to 36kg
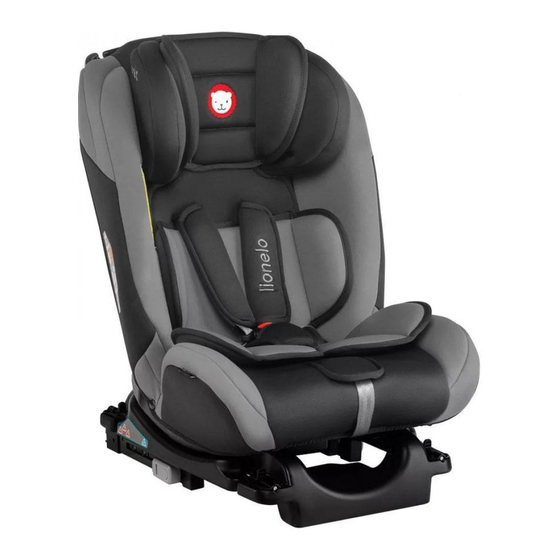
fotelik samochodowy
baby car seat
Suitable for Group 0+ / 0kg to 9kg
Suitable for Group I / 9kg to 15kg
Suitable for Group II / 15kg to 25kg
Advertisement

Related Manuals for Lionelo sander


Summary of Contents for Lionelo sander
- Page 1 Instrukcja obsługi User manual Sander fotelik samochodowy baby car seat Grupa wagowa 0+ półuniwersalny 0 - 9kg Suitable for Group 0+ / 0kg to 9kg Grupa wagowa I uniwersalny 9 - 18kg Suitable for Group I / 9kg to 15kg Grupa wagowa II półuniwersalny 15 - 25kg...
- Page 4 Informacja Urządzenie przytrzymujące dla dzieci należy do kategorii „uniwersalne” oraz „półuniwersalne”. Uzyskało homologację zgodnie z regulaminem nr 44, seria poprawek 04, do ogól- nego zastosowania w pojazdach i nadaje się do instalacji na większości miejsc siedzących w samochodzie. Prawidłowa instalacja jest możliwa, jeśli producent pojazdu oświadczył...
- Page 5 Wprowadzenie Drogi Kliencie! Dziękujemy za obdarzenie nas zaufaniem i wybranie fotelika samochodowego marki Lionelo. Nasze foteliki wykonywane są z największą starannością, by zapewnić Twojemu dziecku komfortową podróż, a przede wszystkim, by zadbać o jego bezpieczeństwo. Dzięki wykorzy- staniu wysokiej jakości materiałów i nowoczesnych rozwiązań...
- Page 6 LO-Sander musi zawsze być używany i zainstalowany w sposób opisany w niniejszej instrukcji. 1. Zastosowanie Niniejszy fotelik przeznaczony jest dla kategorii (grup) wagowych 0-III, co oznacza, że mogą z niego korzystać dzieci o wadze od 0 do 36 kg (w wieku od urodzenia do 12 lat).
- Page 7 Nie używaj fotelika w aucie wyposażonym w dwupunktowe pasy 2. Zastosowanie w aucie bezpieczeństwa. Fotelik przeznaczony jest do instalacji wyłącznie w pojazdach wyposażonych w 3-punktowe pasy bezpieczeństwa (statyczne lub bezwładnościowe), spełniające warunki Regulaminu nr 16 EKG/ ONZ lub inne równoważne normy. Nie wolno montować...
- Page 8 Prawidłowy i nieprawidłowy montaż fotelika: zła pozycja Może być stosowany z trzypunktowym systemem pasów nie może być zamontowany w pojeździe z akty- wną poduszką powietrzną Ostrzeżenia • Fotelik przeznaczony jest wyłącznie dla dzieci o wadze od 0 do 36 • Fotelik musi być stosowany w pojazdach posiadających 3-punk- towy pas bezpieczeństwa oraz złącze ISOFIX z górnym zapięciem TOP TETHER.
- Page 9 obsługi. • Fotelik może być zainstalowany tyłem lub przodem do kierunku jazdy. • Przed każdą podróżą należy upewnić się, że fotelik jest prawidłowo i pewnie zamocowany. • Tylko prawidłowe korzystanie z pasów bezpieczeństwa zapewni dziecku maksymalną ochronę podczas wypadku. • Nie należy używać innych punktów instalacji, oprócz tych, które zostały zdefi...
- Page 10 dować obrażenia ciała w przypadku kolizji pojazdu, były odpowied- nio zabezpieczone. • Podczas jazdy, fotelik powinien być pewnie przymocowany do siedzenia pojazdu za pomocą systemu ISOFIX oraz pasa samo- chodowego, nawet wówczas, gdy nie znajduje się w nim dziecko. • Fotelik samochodowy nie może być używany bez pokrowca. Pokrowiec nie może być...
- Page 11 Oparcie Klamra pasów Przycisk regulacji ISOFIX Pas górny Top tether Obudowa fotelika Uchwyt ISOFIX Obudowa ISOFIX Przycisk regulacji ISOFIX...
- Page 12 SYSTEM MOCOWANIA ISOFIX ISOFIX jest systemem mocowania fotelików dziecięcych na siedzeniach w samochodzie. System ISOFIX składa się z dwóch uchwytów, które znajdują się między siedzeniami a oparciem fotela. Uchwyty te są przymocowane bezpośred- nio do konstrukcji pojazdu. W stosunku do pasów ISOFIX zapewnia sztywniejsze zamocowanie, co przekłada się...
- Page 13 Dwa kliknięcia będą oznaczały poprawne zamocowanie fote- lika oraz znaczniki przy systemie ISOFIX zmienią kolor. z czerwonych na zielone.
- Page 14 UWAGA ! Jeśli wskaźniki na złączu ISOFIX będą czerwone, znaczy to że fotelik został źle zamocowany. Zainstaluj fotelik ponownie. Pociągnij mocno fotelik aby upewnić się, że został prawidłowo zamocowany SYSTEM MOCOWANIA PASA GÓRNEGO TOP TETHER Korzystanie z górnego paska znacznie zwiększa siłę mocu- jącą, ale nie nadaje się...
- Page 15 Upewnij się że złącza system mocowania Naciśnij przycisk regulacji na górnym ISOFIX zostały prawidłowo zainstalowane. zaczepie, wciągnij wystarczającą długość pasa TOP TETHER, tak by jego długość wystarczyła do zaczepienia z punktem mocowania w samochodzie. Upewnij się, że pas nie jest skręcony i jest Pociągnij końcówkę...
- Page 16 DEMONTAŻ ZACZEPÓW ISOFIX ORAZ PASA GÓRNEGO TOP TETHER Naciśnij przycisk regulacji górnego paska i poluzuj pasek. Naciśnij elastyczną końcówkę na haku paska górnego i odczep hak pasa górnego. Trzymając podstawę fotelika z obu stron, pchaj fote- lik w stronę siedzenia. Naciśnij przycisk regulacji uchwytu ISOFIX, aby odłączyć...
- Page 17 DOPASUJ FOTELIK DO DZIECKA REGULACJA POŁOŻENIA OPARCIA Fotelik posiada 4 stopniową regulację pochylenia oparcia. Użyj dźwigni zmiany położenia znajdującą się z przodu fote- lika, aby zmienić pozycje oparcia.
-
Page 18: Regulacja Wysokości Zagłówka
REGULACJA WYSOKOŚCI ZAGŁÓWKA Wciśnij przycisk umiejscowiony w tylnej części oparcia i podnieś lub opuść zagłówek do żądanej pozycji. Pamiętaj, aby głowa dziecka zawsze była na środku zagłówka. REGULACJA 5-PUNKTOWYCH PASÓW BEZPIECZEŃSTWA Końcówki prawidłowo ustawionych 5-punktowych pasów bezpieczeństwa powinny znajdować się tuż nad ramiona- mi dziecka. - Page 19 JAK NACIĄGNĄĆ I POLUZOWAĆ PASY FOTELIKA Im ciaśniej pasy będą przylegały do ciała dziecka, tym lepszą ochronę zapewnią. Pomiędzy pasami a dzieckiem powinna być przestrzeń na dwa palce osoby dorosłej. Przed zapięciem dziecka w foteliku, najlepiej zdjąć grube ubrania (typu kurtki). Pasy nie powinny być wyregulowane za cias- no lub za luźno.
- Page 20 INSTALACJA DLA GRUPY 0+ (0-13kg) Ustaw położenie oparcia w pozycji największego pochylenia (4ta pozycja regulacji). W tym ułożeniu fotelika oparcie musi być maksymalnie pochylone. Fotelik powinien być zamon- towany tyłem do kierunku jazdy. W tym celu przesuń prow- adnice ISOFIX na przód fotelika (instrukcja powyżej, rys. 1-3).
- Page 21 w foteliku. Złóż dwie metalowe klamry razem. Włóż dwie części metalowej klamry w uchwyt. Po usłyszeniu kliknię- cia, pas zostanie zablokowany. Upewnij się że pas został poprawnie zablokowany. Pociągnij regulację pasa, aby naciągnąć uprząż pasów bezpieczeństwa fotelika. Im ciaśniej pasy będą przylegały do ciała dziecka, tym lepszą ochronę...
- Page 22 Instalacja dla GRUPY I (9-18kg) za pomocą ISOFIX Fotelik powinien być zamontowany przodem do kierunku jazdy. W tym celu przesuń prowadnice ISOFIX na tył foteli- ka (instrukcja powyżej, rys.1-3). Fotelik powinien być usta- wiony w pozycji siedzącej (rys. 8). Zamontuj fotelik zgod- nie z instrukcją...
- Page 23 korzystając z oznaczonych prowadnic (pomiędzy stelażem a pokrowcem fotelika), wyciągnij pas z drugiej strony foteli- ka i zablokuj go wpinając w klamrę pasów samochodowych. Naciągnij pas oraz sprawdź, czy fotelik jest mocno zamon- towany. Jeśli jest luźno, naciągnij pas ponownie (rys. 9-13). Rozłóż...
- Page 24 KLIK Instalacja dla GRUPY II i III (15-36kg) za pomocą ISOFIX Usuń pasy bezpieczeństwa fotelika (instrukcję znaj- dziesz poniżej). W tej pozycji fotelik musi być ustawio- ny przodem do kierunku jazdy, ustaw odpowiednio uchwy- ty ISOFIX (zgodnie z opisem powyżej). Zamontuj fote- lik zgodnie z instrukcją...
- Page 25 gając jego piersiową część w kierunku zwijacza pasa. Upewnij się, że pas piersiowy przebiega przez środek obojczyka dziecka. Jeśli pas jest zbyt blisko szyi dziecka, należy dopasować ponownie wysokość zagłówka (rys. 15-15c). Instalacja dla GRUPY II i III (15-36kg) za pomocą pasów bezpieczeństwa Usuń...
- Page 26 DEMONTAŻ 5-PUNKTOWYCH PASÓW BEZPIECZEŃSTWA P o l u z u j m a k s y m a l n i e p a s y i o t w ó r z k l a m r ę s z e l e k . W y c i ą g n i j s p r z ą c z k ę z p a s ó w b e z p i e - czeństwa (z tyłu fotelika).
-
Page 27: Zdejmowanie Pokrowca
ZDEJMOWANIE POKROWCA Zdejmij 5-punktowe pasy bezpieczeństwa zgodnie z instruk- cją powyżej. Odepnij dodatkową poduszkę na zagłówku. Zdejmij pokrowiec zaczynając od doły fotelika, na zagłówku kończąc. Czyszczenie U ż y w a ć n a t u ra l n yc h d e t e rg e n tó w i c i e p ł e j w o d y (poniżej 30°C). - Page 28 Info This is a “universal” and “semi-universal” child restraint.It is approved to Regulation No. 44.04 series of amendments, for general use in vehicles, and can be installed on most car seats. Correct installation is possible if the vehicle manufacturer has declared in the vehicle’s manual that the vehicle is capa- ble of accepting a “universal”...
- Page 29 Failure to comply with the provisions in the manual can result in an accident. In order to protect your child, always install and use LO-Sander as described in this manual.
- Page 30 1. Application This safety seat is designed for 0-III weight groups (cate- gories), that is for children weighing: 0 - 36 kg (aged from 0 months to 12 years) 0+ weight group: 0kg - 9kg I weight group: 9kg - 18kg II weight group: 15kg-25kg III weight group: 22kg-36kg Children from 0+ and I weight group must use dedicat-...
- Page 31 Do not use the safety seat in a car equipped with 2-point seat belts. The seat can only be installed in vehicles equipped with 3-point safety-belts (static or inertia-reel ones) which satisfy Regulations no. 16 ECG/UN or other equivalent standards. Do not mount the safety seat in a front car seat with an airbag, unless it is inactive.
- Page 32 Proper and improper installation of the safety seat: Wrong position May be used with three point belt system Can not be mount- ed on an active airbag Warnings: • The safety seat is suitable for children weighing from 0 to 36 kg only. •...
- Page 33 • Only the correct use of the safety belts ensures maximum protection of the child during an accident • Do not use other installation points than specifi ed. • It is forbidden to combine the safety seat with other unsuit- able/unfi...
- Page 34 be replaced by a substitute recommended by the manufac- turer only. • Please inspect safety belts periodically and pay special attention to fi xing points, seams and adjustment elements. • The backrest of the safety seat must adhere to the back- rest of the vehicle seat well.
- Page 35 Headrest Backrest Belt pad Buckle Safety belt Adjustment strap Position changing ISOFIX adjustment lever button Top tether strap Safety seat casing Five-point safety belt Safety belt connector ISOFIX handle ISOFIX casing ISOFIX adjustment...
- Page 36 ISOFIX FIXING ISOFIX is the system of connectors enabling the installation of safety seats in a vehicle. It is composed of two handles located between the seats and the backrest. These handles are attached directly to the structure of the vehicle. In rela- tion to belts, ISOFIX guarantees more rigid fixing, which translates into increased safety.
- Page 37 WARNING ! If the indicators on the ISOFIX connector are red, it means that the seat has been badly attached. Mount the safety seat again. Pull the seat fi rmly to make sure that it is properly attached TOP TETHER UPPER STRAP ATTACHMENT The top strap adjustment can increase the fi...
- Page 38 Connecting the top strap to fi xing points Attaching to the fl oor of the trunk behind the rear seats. Attaching to the fl oor of the trunk behind the rear seats. Fixing just under the seat of the vehicle, you have to put the seat to fi...
- Page 39 If you cannot see a green marker on the up- per adjustment or the marker is coverd, this means that the safety seat has not been mounted properly. Make improvements.
- Page 40 DISASSEMBLING TOP TETHER UPPER STRAP AND ISOFIX CONNECTORS Press upper strap adjustment button and slacken the strap. Press a flexible end on the hook of the upper strap and unfasten the hook of the upper strap. Hold the base of the safety seat on both sides, press the safety seat against the car seat.
- Page 41 ADJUST THE SAFETY SEAT TO YOUR CHILD ADJUSTMENT OF BACKREST POSITION The backrest of the safety seat can be tilted in a 4-degree mode. Use a lever located in the front of the safety seat to change the backrest position.
- Page 42 ADJUSTMENT OF HEADREST HEIGHT Press a button located in the rear part of the backrest and lift or drop the headrest to a desired position. Remember that the child’s head must always be in the center of the headrest. ADJUSTMENT OF 5-POINT SAFETY BELTS Ends of properly positioned 5-point safety belts must be just above the child’s arms.
- Page 43 HOW TO TIGHTEN AND SLACKEN SAFETY SEAT BELTS If belts fi t tight the body of your child, it is highly protected. Between the belts and your child should be space (two adult fi ngers). Before you fasten your child in the safety seat, it is advisable to take off warm clothes (such as jackets).
- Page 44 INSTALLATION FOR GROUP 0+ (0-13kg) Position the backrest at maximum tilting (4-th position of adjustment). In this position the backrest must be titled as much as possible. The safety seat must be in a rear-fac- ing position. To do so, slide ISOFIX guides to the front of the safety seat (see instructions above, fi...
- Page 45 Combine two metal clamps. Insert two parts of the metal clamp in the handle. If you can hear a click, the belt is locked. Make sure the belt has been locked properly. Push belt adjustment to tighten harness of the safety belts. If belts fi t a child tight, the protection is fully guaranteed (fi...
-
Page 46: Safety Belts
INSTALLATION FOR GROUP I (9-18KG) WITH ISOFIX The safety seat must be in forward-facing position. To do so, slide ISOFIX guides to the back of the safety seat (see instructions above, fig. 1-3). The safety seat must be in sitting position (fi g. 8). Mount the safety seat in accordance with ISOFIX assembly instructions described above. - Page 47 if it is well mounted. If it is still slackened, tighten the belt again (fi g. 9-13). Spread safety belts of the safety seat, next position your child in the safety seat well. Combine two parts of the metal clamp. Insert two parts of the metal clamp in the handle.
- Page 48 KLIK The safety seat can be in position 1, 2 or 3 INSTALLATION FOR GROUP II AND III (15-36KG) WITH ISOFIX Remove the safety belts of the safety seat (see instruc- tions below). In this position the safety seat must be in forward-facing position, position ISOFIX handles proper- ly (in accordance with the description above).
- Page 49 through the center of the child’s collarbone. If the belt is too close to the child’s neck, adapt it to the headrest again (fi g. 15-15c). Installation for Group II and III (15-36kg) with safety belts Remove safety belts of the safety seat (see instruc- tions below).
-
Page 50: Removing A Cover
DISASSEMBLY OF 5-POINT SAFETY BELTS Slacken belts off and open the harness clamp. Pull out the buckle from the safety belts (in the back of the safety seat). Pull out arm belts from the safety seat. Pull out the crotch belt from the metal buckle under the base of the safety seat, and pull it by taking out the entire crotch belt along with the buckle from the hole (fi... - Page 51 CLEANING Use natural detergents and warm water (below 30°C). Do not wash in the washing machine. Do not swirl and squeeze. Note: Extensive scrubbing may damage the surface of the cover or sponge. Clean the frame with a wet cloth and natural detergents. The pictures are for reference only.
- Page 53 BrandLine Group Sp. z o. o. ul.Dziadoszańska 10 61-248 Poznań www.lionelo.com WARRANTY CARD KARTA GWARANCYJNA Model: ………………………….. SN: …………………………..May be sold in: BE CZ DK DE EE IE EL ES FR HR IT LV LT HU MT NL AT PL PT RO SI SK FI SE UK...
-
Page 54: Warunki Gwarancji
Warunki gwarancji: 1. Marka Lionelo z siedzibą w Poznaniu (61-248) przy ul. Dziado- szańskiej 10 gwarantuje sprawne działanie produktu zgodnie z warunk- ami techniczno-eksploatacyjnymi opisanymi w instrukcji obsługi. 2. Gwarancja jest udzielana na okres 60 miesięcy, licząc od daty sprzedaży. W przypadku zakupu produktu przez fi rmę (faktura VAT) gwarancja udzielana jest na okres 12 miesięcy. - Page 55 12. Gwarancja będzie respektowana jedynie w przypadku dołączenia do reklamowanego urządzenia opisu uszkodzenia, wszystkich akce- soriów, które klient otrzymał podczas kupna urządzenia oraz dowodu zakupu zawierającego datę sprzedaży. 13. Gwarancją nie są objęte: naturalne zużycie związane z eksploatac- ją, uszkodzenia powstałe w wyniku niewłaściwego i niezgodnego z in- strukcją...
-
Page 56: Warranty Conditions
Warranty conditions: 1. The Lionelo brand with its registered offi ce at Dziadoszańska 10, 61-248 Poznań, Poland guarantees that the equipment is operational in accordance with the technical-operating conditions described in the manual. 2. The warranty is granted for a 60 months period from the date of sale. - Page 57 12. The warranty does not cover: natural wear of the product relat- ed to its normal operation, damage resulted from improper usage or non-compliance of the instructions described in the manual, tears or cracks caused by the Customer, fading of fabric resulting from pro- longed exposure to sunlight or washing the product or its parts in the wrong temperature, mechanical, electrical, thermal and intentional damages and defects caused by them, as well as damage caused by...
- Page 58 Lionelo Service – Support List of Authorized Service Centers: Lista autoryzowanych centrów serwisowych: lionelo.com/en/service Dziękujemy za zakup urządzenia naszej marki!
- Page 60 WWW.LIONELO.COM...
Need help?
Do you have a question about the sander and is the answer not in the manual?
Questions and answers