
Related Manuals for Lionelo Liam


Summary of Contents for Lionelo Liam
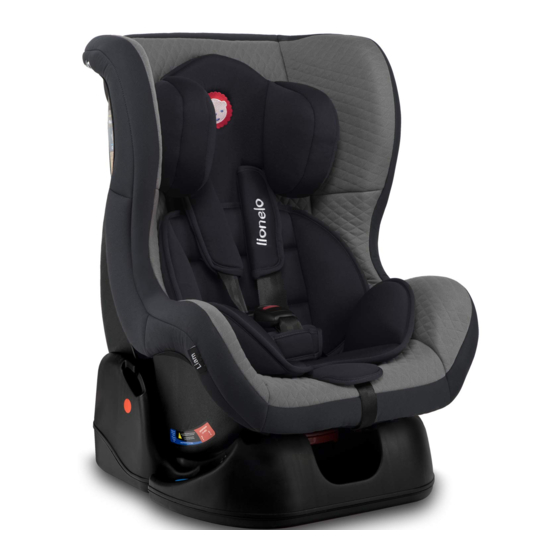
- Page 1 Instrukcja obsługi User manual Liam fotelik samochodowy child safety seat Grupa wagowa 0+ i I uniwersalny 0kg - 18kg Suitable for Group 0+ and I / 0kg to 18kg...
- Page 2 Informacja Urządzenie przytrzymujące dla dzieci należy do kate- gorii „uniwersalne”. Uzyskało homologację zgod - nie z regulaminem nr 44, seria poprawek 04, do ogól- nego zastosowania w pojazdach i nadaje się do insta- lacji na większości miejsc siedzących w samochodzie. Prawidłowa instalacja jest możliwa, jeśli producent pojaz- du oświadczył...
- Page 3 0+ i I 0 - 18kg. Fotelik samochodowy będzie maksymalnie chronić twoje dziecko tylko wtedy, gdy jest sto- sowany prawidłowo. Niestosowanie się do instrukcji może prowadzić do nieszczęśliwego wypadku. Aby chronić swoje dziecko prawidłowo, LO-Liam musi zawsze być używany i zainstalowany w sposób opisany w niniejszej instrukcji.
- Page 4 UWAGA: pasażera wyposażonego w poduszkę powietrzną. 2. Zastosowanie Produkt LIAM jest sklasyfikowany jako „uniwersalny” fote- lik samochodowy dla dzieci z grupy 0+ oraz I, czyli dla dzieci o masie ciała mniejszej niż 18 kg. - Grupa 0+: dzieci o masie ciała poniżej 13 kg - Grupa I: dzieci o masie ciała poniżej 18 kg...
- Page 5 Prawidłowy montaż fotelika Nieprawidłowy montaż fotelika Nie należy montować fotelika na siedzeniu pasażera wy- posażonego w poduszkę powietrzną Montaż fotelika może być możliwy w przypadku gdy środkowe siedzenie jest wyposażone w 5 punktowy pas bezpieczeństwa 3. Porady dotyczące bezpieczeństwa • Nigdy nie zostawiaj dziecka bez opieki w foteliku.
- Page 6 • Fotelik nie może być używany bez oryginalnej tapicerki. Materiał nie powinien być także zastępowany przez inny niż rekomendowany przez producenta, ponieważ stanowi inte- gralną część fotelika. • Fotelik może być montowany w pojazdach mających homologację zatwierdzoną przez ONZ/EKG według rozporządzenia nr 16 lub innymi odpowiednimi przepisami.
- Page 7 4. Zestaw oparcie zagłówek osłona pasa pasy bezpieczeństwa podkładka zamek pasów podkładk pod zamek siedzisko regulowana podstawa regulacja pasów bezpieczeństwa prowadnice pasów sprężyny uprząż pasa regulującego złącze pasów regulowana podstawa...
- Page 8 5. Użycie zestawu 5.1 Zastosowanie regulacji pasów, naciągnięcie i zwolnienie pasów 5.1.1 Standardowo pasek uprzęży jest zawsze zablokow- any tak jak na Ilustracji 5.01. W tej pozycji można zawsze naciągnąć pasy żeby przystosować ich długość do wzrostu dziecka. ( Ilustracja 5.02 ) Ilustracja 5.01 Ilustracja 5.02 5.1.2 Aby poluźnić...
- Page 9 Ilustracja 5.03 Poc gnij pasy Ilustracja 5.04 naramienne w dó Przycisk zwalniaj cy 5.2 Połączenie szelek pasów 5.2.1 Zahacz szelki w łączniku szelek według poniższych ilustracji ( Ilustracja 5.05 ) 5.2.2 Umieść pasek uprzęży w łączniku szelek ( Ilustrac- ja 5.06 ) Ilustracja 5.05 Ilustracja 5.06...
- Page 10 5.3 Wpięcie szelki regulującej do uprzęży 5.3.1 Umieść szelkę w uprzęży ( Ilustracja 5.07 ). 5.3.2 Przełóż obręcz przez otwór znajdujący się z przodu siedziska fotelika ( Ilustracja 5.08 ). Następnie pociągnij za szelki naramienne do góry tak aby uprząż zablokowała się od spodniej strony siedziska.
- Page 11 5.4 Zamek bezpieczeństwa 5.4.1 Aby wpiąć klamry w zamek bezpieczeństwa należy najpierw je ze sobą złączyć ( Ilustracja 5.11 ). Następnie złąc- zone klamry należy wprowadzić od góry do zamka bezpiec- zeństwa ( Ilustracja 5.11 ). Prawidłowe zatrzaśnięcie klamry w zamku powinno zakończyć...
- Page 12 5.6 Ustawienie odpowiedniej wysokości pasów naramiennych 5.6.1 Wysokość pasów naramiennych nie może być za wysoka i za niska ( Ilustracja 5.13 ) Za nisko Za wysoko 5.7 Regulacja kąta siedziska Fotelik posiada 3 regulacje kąta nachylenia siedziska. Zmienić kąt nachylenia siedziska fotelika, włóż 5.7.1 rękę...
- Page 13 zarezerwowana jest dla dzieci z grupy wiekowej 0+. Jest to pozycja półleżąca, fotelik w tej pozycji powinien być zainsta- lowany tyłem do kierunku jazdy ( Ilustracja 5.17 ). Kiedy siedzisko fotelika nie jest ustawione 5.7.5 względem żadnej ze strzałek, oznacza to że jest on niepraw- idłowo ustawiony i może być...
- Page 14 6. Zastosowanie fotelika dla grupy wiekowej 0+ Fotelik musi być zamontowany tyłem do kierunku jazdy. Opar- cie musi być ustawione w pozycji 3 – na niebieskiej strzałce. 6.1. Mocowanie fotelika w pojeździe. 6.1.1. Fotelik musi być ustawiony w pozycji nr 3 – niebieska strzałka. 6.1.2.
- Page 15 7. Zastosowanie fotelika dla grupy wiekowej I W przypadku stosowania fotelika dla dzieci z grupy wiekow- ej I, fotelik musi być zamontowany przodem do kierunku jazdy, oparcie fotelika powinno być ustawione w pozycjach 1 lub dwa – czerwone strzałki. 7.1. Mocowanie fotelika w pojeździe. Ilustracja 7.02 Ilustracja 7.01...
- Page 16 7.1.1. Ustaw oparcie fotelika w 1 lub 2 pozycji. 7.1.2. Umieść fotelik w samochodzie wyposażonym w 3 punktowe pasy bezpieczeństwa, przodem do kierunku jazdy. 7.1.3. Aby zamontować fotelik należy wyciągnąć pasy do maksimum. 7.1.4. Pas biodrowy i naramienny należy przeciągnąć przez fotelik ( Ilustracja 7.01, 7.02 ), Pas biodrowy należy przeciągnąć...
- Page 17 8. Instrukcja pielęgnacji fotelika 8.1. Zdejmowanie tkaniny z fotelika 8.1.1. Zdemontuj pięciopunktowe pasy bezpieczeństwa. 8.1.2. Dzięki temu wszystkie tkaniny będzie można bezpiec- znie zdjąć. 8.2. Czyszczenie tkaniny Do mycia używaj tylko neutralnych detergentów (poniżej 30°C ) i ciepłej wody. Materiał nie powinien być prany w pralce, suszony w suszarce i prasowany.
- Page 18 9.Jakie kroki należy podjąć po wypadku Po kolizji z prędkością większą niż 10 km / h, należy dokład- nie sprawdzić czy fotelik nie ma żadnych uszkodzeń mechanicznych. Jeżeli fotelik nie będzie działał prawidłowo, dla bezpieczeństwa dziecka, nie należy go dalej eksploat- ować.
- Page 19 WWW.LIONELO.COM...
- Page 20 Info This is a “universal” child restraint. It is approved to Regulation No. 44.04 series of amendments, for gener- al use in vehicles, and can be installed on most car seats. A c o r r e c t i n s t a l l a t i o n i s p o s s i b l e i f t h e v e h i - c l e m a n u f a c t u r e r h a s d e c l a r e d i n t h e v e h i - cle’s manual that the vehicle is capable of accept- ing a “universal”...
- Page 21 0 and 18kg of weight. Only when used correctly can the safety seat protect your child the most effectively. Failure to comply with the provisions in the manual can result in an accident. In order to protect your child, always install and use LO-Liam as described in this manual.
- Page 22 2. Function LIAM has been classified as a “universal” car safety seat for chil- dren from Group 0+ and I, that is - those weighing less than 18 - Group 0+: children weighing less than 13 kg - Group I: children weighing less than 18 kg •...
-
Page 23: Safety Notes
Correct installation of the safety seat Incorrect installation of the safety seat Do not mount the safety seat on a passenger seat equipped with an airbag. The installation of the safety seat is possible if a vehicle’ s middle seat is equipped with a 5-point safety belt. 3. - Page 24 Do not use the safety seat without the original pad. Do not replace the cover / pad with the one that is not recom- mended by the manufacturer. It is an integral part of the product and it contributes to the safety of the child. The seat can be installed in vehicles approved by the UN/ECE (Regulation No 16) or other relevant regulations.
- Page 25 4. Accessories: back headrest shoulder strap pad safety harness safety lock buckle pad seat adiustable base seatbelts adiustment strap belts guide springs harness adiustment strap belts connector adiustable base...
- Page 26 5. Usage 5.1 Harness adjustment, straps tightening / loosing 5.1.1 Normally the straps are always secured, as shown in the picture 5.01. In this position, you can tighten the straps to adjust their length to the height of the child. (Figure 5.02) Picture 5.01 Picture 5.02 5.1.2 In order to loosen the shoulder straps, use one hand to...
- Page 27 Picture 5.03 Poc gnij pasy Pull shoulder Picture 5.04 naramienne w dó straps down Press the adjustment button 5.2 Shoulder straps connection 5.2.1 Hook the shoulder straps in the harness connector as shown in the Picture 5.05. 5.2.2 Run the harness strap through the harness connector (Picture 5.06).
- Page 28 5.3 Adjustment strap connection 5.3.1 Attach the strap to the hook (Picture 5.07). 5.3.2 Thread the hook through the hole at the front of the seat (Picture 5.08). Then pull the shoulder straps up so as to lock the harness at the underside of the seat. 5.3.3 To remove the adjustment strap follow the above steps (up to point 5.3.2) in reverse order (Picture 5.09).
- Page 29 5.4 Safety lock 5.4.1 In order to fasten the buckles in the safety lock, first joint them (Picture 5.11) and insert the combined buckle into the safety lock (from the top) (Picture 5.11). The “click” sound indicates that the safety lock has been properly fastened. 5.4.2 To remove the buckles from the safety lock, press the red button on it (Picture 5.12).
- Page 30 5.6 Proper height of the shoulder straps 5.6.1 The shoulder straps should be neither too tight nor too loose (Picture 5.13). Za nisko Za wysoko To low (tight) To high (loose) Correct 5.7 Seat angle adjustment The seat can be adjusted to three different positions. 5.7.1In order to change the seat angle, put your hand under the seat, then press and hold the lock.
- Page 31 When the seat position is not aligned with any of 5.7.5 the arrow, it means that it has been adjusted improperly and can be dangerous for the baby. In that case it is necessary to correct the seat position immediately. Ilustracja 5.14 Picture Picture...
- Page 32 6. Installation and usage for the group 0+ The safety seat must be installed in a rear-facing position. The back must be tilted to the position number 3 indicated by the blue arrow. 6.1. Installation of the safety seat in a car 6.1.1.
- Page 33 7. Installation for the group I The safety seat must be installed in a forward-facing posi- tion. The back must be locked in the position number 1 or 2 indicated by the red arrows. 7.1. Installation of the safety seat in a car Ilustracja 7.02 Ilustracja 7.01 Picture...
- Page 34 7.1.1. Adjust the back of the safety seat so that it is in the position number 1 or 2. 7.1.2. Install the safety seat in a forward-facing position, in a car equipped with 3-point seat belts. 7.1.3. First, pull the vehicle’ s seat belts as much as possible. 7.1.4.
-
Page 35: Maintenance Instruction
8. Maintenance instruction 8.1. Cover removal 8.1.1. Remove the 5-point safety harness. 8.1.2. After that all parts of the cover can be easily removed. 8.2. Cleaning the cover Use only natural detergents and warm water (below 30°C). Do not machine wash, tumble dry or iron the cover. 8.3. - Page 36 9.What should be done after the accident? If the collision occurred at the speed greater than 10 km / h, ensure that the safety seat has no mechanical damage. If it doesn’t work properly, stop using it so as not to put your child at risk.
- Page 37 BrandLine Group Sp. z o. o. ul.Dziadoszańska 10 61-248 Poznań www.lionelo.com WARRANTY CARD KARTA GWARANCYJNA Model: ………………………….. SN: …………………………..May be sold in: BE CZ DK DE EE IE EL ES FR HR IT LV LT HU MT NL AT PL PT RO SI SK FI SE UK...
-
Page 38: Warranty Conditions
Warranty conditions: 1. The Lionelo brand with its registered office at Dziadoszańska 10, 61-248 Poznań, Poland guarantees that the equipment is operational in accordance with the technical-operating conditions described in the manual. 2. The warranty is granted for a 60 months period from the date of sale. - Page 39 12. The warranty does not cover: natural wear of the product relat- ed to its normal operation, damage resulted from improper usage or non-compliance of the instructions described in the manual, tears or cracks caused by the Customer, fading of fabric resulting from pro- longed exposure to sunlight or washing the product or its parts in the wrong temperature, mechanical, electrical, thermal and intentional damages and defects caused by them, as well as damage caused by...
-
Page 40: Warunki Gwarancji
Warunki gwarancji: 1. Marka Lionelo z siedzibą w Poznaniu (61-248) przy ul. Dziado- szańskiej 10 gwarantuje sprawne działanie produktu zgodnie z warunk- ami techniczno-eksploatacyjnymi opisanymi w instrukcji obsługi. 2. Gwarancja jest udzielana na okres 60 miesięcy, licząc od daty sprzedaży. W przypadku zakupu produktu przez firmę (faktura VAT) gwarancja udzielana jest na okres 12 miesięcy. - Page 41 12. Gwarancja będzie respektowana jedynie w przypadku dołączenia do reklamowanego urządzenia opisu uszkodzenia, wszystkich akce- soriów, które klient otrzymał podczas kupna urządzenia oraz dowodu zakupu zawierającego datę sprzedaży. 13. Gwarancją nie są objęte: naturalne zużycie związane z eksploatac- ją, uszkodzenia powstałe w wyniku niewłaściwego i niezgodnego z in- strukcją...
- Page 42 Lionelo Service – Support List of Authorized Service Centers: Lista autoryzowanych centrów serwisowych: lionelo.com/en/service Aktualizacja oprogramowania na www.overmax.eu w zakładce “Wsparcie techniczne”. Software updates are available on our website www.overmax.eu in “Technical support” tab. Dziękujemy za zakup urządzenia naszej marki!
- Page 44 WWW.LIONELO.COM...
Need help?
Do you have a question about the Liam and is the answer not in the manual?
Questions and answers